
springboot整合SSE技术开发经验总结及心得
一、开发背景
公司需要开发一个大屏界面,大屏页面的数据是实时更新的,由后端主动实时推送数据给大屏页面。此时会立刻联想到:websocket 技术。当然使用websocket,确实可以解决这个场景。但是今天本文的主角是 :SSE,他和websocket略有不同,SSE只能由服务端主动发消息,而websocket前后端都可以推送消息。
二、快速了解SSE
1、概念
SSE全称 Server Sent Event,顾名思义,就是服务器发送事件,所以也就注定了他 只能由服务端发送信息。
2、特性
- 主动从服务端推送消息的技术
- 本质是一个HTTP的长连接
- 发送的是一个stream流,格式为text/event-stream
三、开发思路
要实现后端的实时推送消息,前台实时更新数据,思路如下:
- 1、前后端需要建立连接
- 2、后端如何做到实时推送信息呢?可以采用定时调度
四、代码演示
1、引入依赖
原则上是不需要引入的,因为springboot底层已经整合了SSE
<dependency><groupId>org.springframework.boot</groupId><artifactId>spring-boot-starter-web</artifactId></dependency>
2、服务端代码
controller层
@RestController@CrossOrigin@RequestMapping("/sse")publicclassSseEmitterControllerextendsBaseController{@AutowiredprivateSseEmitterService sseEmitterService;/**
     * 创建SSE连接
     *
     * @return
     */@GetMapping("/connect/{type}")publicSseEmitterconnect(@PathVariable("type")String type){return sseEmitterService.connect(type);}}
service层
publicinterfaceSseEmitterService{SseEmitterconnect(String type);voidvolumeOverview();voidsysOperation();voidmonitor();........}
service实现层
@ServicepublicclassSseEmitterServiceImplimplementsSseEmitterService{privatefinalLogger logger =LoggerFactory.getLogger(this.getClass());privatestaticMap<String,SseEmitterUTF8> sseCache =newConcurrentHashMap<>();/**
     * 创建连接sse
     * @param type
     * @return
     */@OverridepublicSseEmitterconnect(String type){if(sseCache.containsKey(type)){return sseCache.get(type);}SseEmitterUTF8 sseEmitter =newSseEmitterUTF8(0L);try{
            sseEmitter.send(SseEmitter.event().comment("创建连接成功 !!!"));}catch(IOException e){
            logger.error("创建连接失败 , {} ", e.getMessage());}
        sseEmitter.onCompletion(()->{
            logger.info("connect onCompletion , {} 结束连接 ...", type);removeUser(type);});
        sseEmitter.onTimeout(()->{
            logger.info("connect onTimeout , {} 连接超时 ...", type);removeUser(type);});
        sseEmitter.onError((throwable)->{
            logger.error("connect onError , {} 连接异常 ...", type);removeUser(type);});
        sseCache.put(type, sseEmitter);//立即推送volumeOverview();dealResp();monitor();if(type.equals(SseEmitterConstant.OVER_VIEW)){sysOperation();mileStone();}
        logger.info("当前用户总连接数 : {} ", sseCache.size());return sseEmitter;}/**
     * 交易量概览
     */@OverridepublicvoidvolumeOverview(){Map<String,Object> map =newHashMap<>();
        map.put("latest_tps",440.3);
        map.put("total_cics_trans",341656001);
        map.put("total_zjcx_trans",391656001);
        map.put("zjcx_tps",23657);
        map.put("day10",48388352);
        map.put("history",105013985);SseEmitter.SseEventBuilder data =SseEmitter.event().name(SseEmitterConstant.VOLUME_OVERVIEW).data(map,MediaType.APPLICATION_JSON);for(Map.Entry<String,SseEmitterUTF8> entry : sseCache.entrySet()){SseEmitterUTF8 sseEmitter = entry.getValue();if(sseEmitter ==null){continue;}try{
                sseEmitter.send(data);}catch(IOException e){String body ="SseEmitterServiceImpl[volumeOverview  ]";
                logger.error(body +": 向客户端 {} 推送消息失败 , 尝试进行重推 : {}", entry.getKey(),e.getMessage());messageRepush(entry.getKey(),data,body);}}}privatevoidmessageRepush(String type,SseEmitter.SseEventBuilder data,String body){for(int i =0; i <3; i++){try{Thread.sleep(2000);SseEmitterUTF8 sseEmitter = sseCache.get(type);if(sseEmitter ==null){
                    logger.error(body +" :向客户端{} 第{}次消息重推失败,未创建长链接", type, i +1);continue;}
                sseEmitter.send(data);}catch(Exception ex){
                logger.error(body +" :向客户端{} 第{}次消息重推失败", type, i +1, ex);continue;}
            logger.info(body +" :向客户端{} 第{}次消息重推成功", type, i +1);return;}}
常量类
publicclassSseEmitterConstant{/**
     * 创建连接的客户端类型
     */publicstaticfinalStringOVER_VIEW="overview";/**
     * even 数据类型
     */publicstaticfinalStringVOLUME_OVERVIEW="vw";publicSseEmitterConstant(){}}
3、后端定时任务代码
采用注解的方式实现:@Scheduled,使用该注解时,需要增加这个注解@EnableScheduling,相当于来开启定时调度功能,如果不加@EnableScheduling注解,那么定时调度会不生效的。
启动类增加注解@EnableScheduling
packagecom.hidata;importorg.mybatis.spring.annotation.MapperScan;importorg.springframework.boot.SpringApplication;importorg.springframework.boot.autoconfigure.SpringBootApplication;importorg.springframework.boot.autoconfigure.jdbc.DataSourceAutoConfiguration;importorg.springframework.context.annotation.ComponentScan;importorg.springframework.scheduling.annotation.EnableScheduling;@SpringBootApplication(exclude ={DataSourceAutoConfiguration.class})@EnableSchedulingpublicclassHidataApplication{publicstaticvoidmain(String[] args){SpringApplication.run(HidataApplication.class, args);System.out.println("[HiUrlShorter platform startup!]");}}
创建 定时任务调度类,在该类上加上@Scheduled注解,
@ConfigurationpublicclassSendMessageTask{privatefinalLogger logger =LoggerFactory.getLogger(this.getClass());@AutowiredprivateSseEmitterService sseEmitterService;@Scheduled(cron ="0/40 * * * * ?}")publicvoidvolumeOverviewTask(){try{
            sseEmitterService.volumeOverview();}catch(Exception e){
            logger.error("SendMessageTask [volumeOverviewTask]: {} ",e.getMessage());}}.......}
4、解决乱码的实体类
如果发送中文数据的时候,会出现乱码的现象。此时需要做对应的处理
packagecom.hidata.devops.lagrescreen.domain;importorg.springframework.http.HttpHeaders;importorg.springframework.http.MediaType;importorg.springframework.http.server.ServerHttpResponse;importorg.springframework.web.servlet.mvc.method.annotation.SseEmitter;importjava.nio.charset.StandardCharsets;publicclassSseEmitterUTF8extendsSseEmitter{publicSseEmitterUTF8(Long timeout){super(timeout);}@OverrideprotectedvoidextendResponse(ServerHttpResponse outputMessage){super.extendResponse(outputMessage);HttpHeaders headers = outputMessage.getHeaders();
        headers.setContentType(newMediaType(MediaType.TEXT_EVENT_STREAM,StandardCharsets.UTF_8));}}
4、前端代码
    // 连接服务器
    var sseSource = new EventSource("http://localhost:8080/sse/connect");
    // 连接打开
    sseSource.onopen = function () {
        console.log("连接打开");
    }

    // 连接错误
    sseSource.onerror = function (err) {
        console.log("连接错误:", err);
    }

    //接收信息
    eventSource.addEventListener("vw", function (event) {
    console.log(event.data);
    .....
  });
五、核心代码分析
先看代码片段
SseEmitter.event().name("vw").data(map,MediaType.APPLICATION_JSON);
分析:
后端不会把所有数据一起发送给前端,而是会把页面分成多个模块,然后发给前端,此时前端需要区分哪一块数据对应哪一块页面。所以我们可以给各个模块的数据起个名字。也就是上述的代码
SseEmitter.event().name("vw")
这样,前端就知道怎么渲染页面了,类似于这样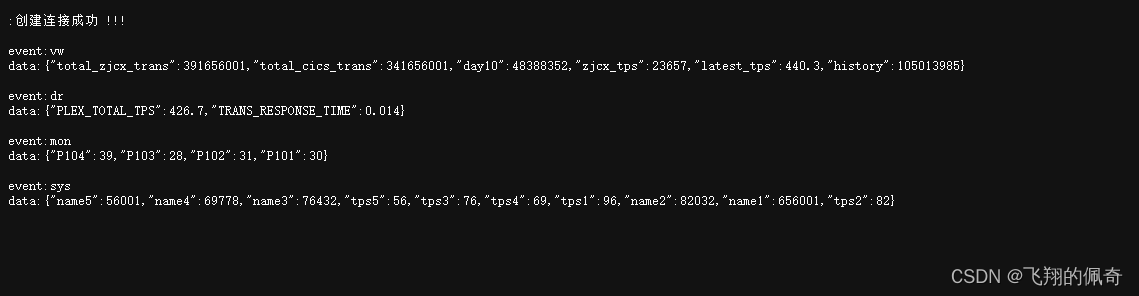
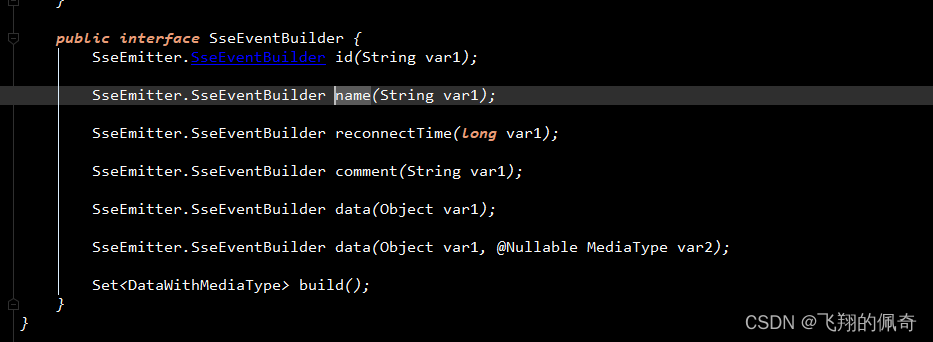
关于even()的属性,可以查看源码,
publicinterfaceSseEventBuilder{SseEmitter.SseEventBuilderid(String var1);SseEmitter.SseEventBuildername(String var1);SseEmitter.SseEventBuilderreconnectTime(long var1);SseEmitter.SseEventBuildercomment(String var1);SseEmitter.SseEventBuilderdata(Object var1);SseEmitter.SseEventBuilderdata(Object var1,@NullableMediaType var2);Set<DataWithMediaType>build();}
本文转载自: https://blog.csdn.net/weixin_43860634/article/details/134378074
版权归原作者 飞翔的佩奇 所有, 如有侵权,请联系我们删除。
版权归原作者 飞翔的佩奇 所有, 如有侵权,请联系我们删除。