
文章目录
通过五大类注解可以更便捷的将对象存储到 Spring 中,同样也可以使用注解将已经储存的对象取出来,直接赋值到注解所在类的一个属性中,这一个过程也叫做对象的装配或者叫对象的注入,即 DI。
一. 什么是对象装配
获取 Bean 对象也叫做对象装配,就是把对象取出来放到某个类中,有时候也叫对象注入。
对象装配(对象注入)的实现方法以下 3 种:
- 属性注入 ,就是将对象注入到某个类的一个属性当中。
- 构造方法注入 ,就是通过构造方法来将对象注入到类中。
- Setter 注入 ,通过 SetXXX 系列方法将对象注入到类中。
常见有关对象注入的注解有两个,一个是
@Autowired
,另外一个是
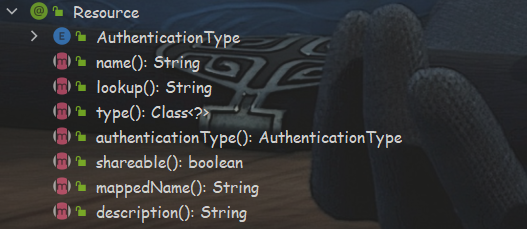
@Resource
🍂它们两者的区别如下:
- 出身不同:@Autowired 是由
Spring提供的,而 @Resource 是JDK提供的。 - 查找顺序不同:从容器中获取对象时 @Autowired 先根据类型再根据名称查询,而 @Resource 先根据名称再根据类型查询。
- 使⽤时设置的参数不同:@Resource 支持更多的参数设置(有 7 个),如
name、type等,而@Autowired只支持设置required一个参数,用来设置注入 Bean 的时候该 Bean 是否必须存在(true/false)。
- 依赖注入支持不同:@Autowired 支持属性注入,构造方法注入和 Setter 注入,而 @Resource 只支持属性注入和 Settter 注入,但是不支持构造方法注入。
- 对 IDEA 的兼容性支持不同:使用 @Autowired 在 IDEA 旗舰版下可能会有误报(设置
required即可);而 @Resource 不存在误报的问题。
二. 三种注入方式
1. 属性注入
属性注入只需要在需要注入对象的属性上加上 @Autowired 或者 @Resource 注解就可以了,这里以 @Autowired 为例。
首先来看第一种情况,待注入的同类对象只有一个,此时我们直接使用 @Autowired 注解就好,不必设置参数,例如我们在
UserController
类里面注入
UserService
对象。
下面
UserService
的结构,先使用 @Service 将 Bean 存放到 Spring 中:
package com.tr.demo.service;import org.springframework.stereotype.Service;@ServicepublicclassUserService{publicvoidsayHi(){
        System.out.println("Hello, UserService~");}}
属性注入:
package com.tr.demo.controller;import com.tr.demo.service.UserService;import org.springframework.beans.factory.annotation.Autowired;import org.springframework.stereotype.Controller;@ControllerpublicclassUserController{//属性注入@Autowiredprivate UserService userService;publicvoidsayHi(){
        userService.sayHi();}}
此时我们就可以在启动类中,使用上下文对象来获取到
UserController
对象,通过执行
UserController
对象的
sayHi
方法来进而调用到注入的
UserService
对象中的
sayHi
方法了,此时的
UserService
对象就不是我们自己
new
出来的了。
import com.tr.demo.controller.UserController;import org.springframework.context.ApplicationContext;import org.springframework.context.support.ClassPathXmlApplicationContext;publicclassApp{publicstaticvoidmain(String[] args){
        ApplicationContext context =newClassPathXmlApplicationContext("spring-config.xml");
        UserController usercontroller =  context.getBean("userController", UserController.class);

        usercontroller.sayHi();}}
运行结果:
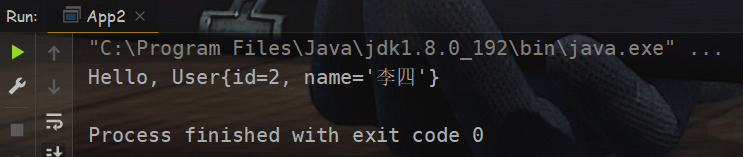
上面说的是同类对象只有一个的情况,而如果存在多个同类对象,我们就得通过参数来告知容器我们要注入哪一个对象,不告知就会报错。
比如我们将多个
User
对象添加到容器中,如下:
package com.tr.demo.model;// User 结构publicclassUser{privateint id;private String name;@Overridepublic String toString(){return"User{"+"id="+ id +", name='"+ name +'\''+'}';}publicintgetId(){return id;}publicvoidsetId(int id){this.id = id;}public String getName(){return name;}publicvoidsetName(String name){this.name = name;}}package com.tr.demo.model;import org.springframework.context.annotation.Bean;import org.springframework.stereotype.Component;@ComponentpublicclassUserBeans{// 使用方法注解添加多个 User 对象到容器中@Bean("user1")public User user1(){
        User user =newUser();
        user.setId(1);
        user.setName("张三");return user;}@Bean("user2")public User user2(){
        User user =newUser();
        user.setId(2);
        user.setName("李四");return user;}@Bean("user3")public User user3(){
        User user =newUser();
        user.setId(3);
        user.setName("王五");return user;}}
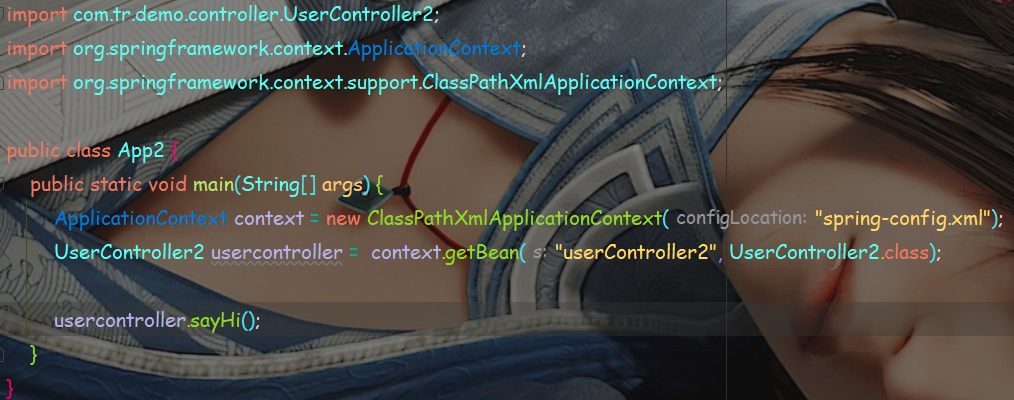
而在
UserController2
类中需要注入
User
对象,此时我们运行程序就会报错:
package com.tr.demo.controller;import com.tr.demo.model.User;import org.springframework.beans.factory.annotation.Autowired;import org.springframework.stereotype.Controller;@ControllerpublicclassUserController2{@Autowiredprivate User user;publicvoidsayHi(){
        System.out.println("Hello, "+ user);}}
我们试着以同样的方法来调用
sayHi
方法:
运行结果:
@Autowired 依赖注入流程首先是先根据类型从容器中获取对象,如果只能获取到一个,那么就直接将此对象注入到当前属性上;如果能获取到多个对象,此时会使用
BeanName
进行匹配,而我们添加到 Spring 中的对象是没有一个叫
user
的,所以程序就报错了。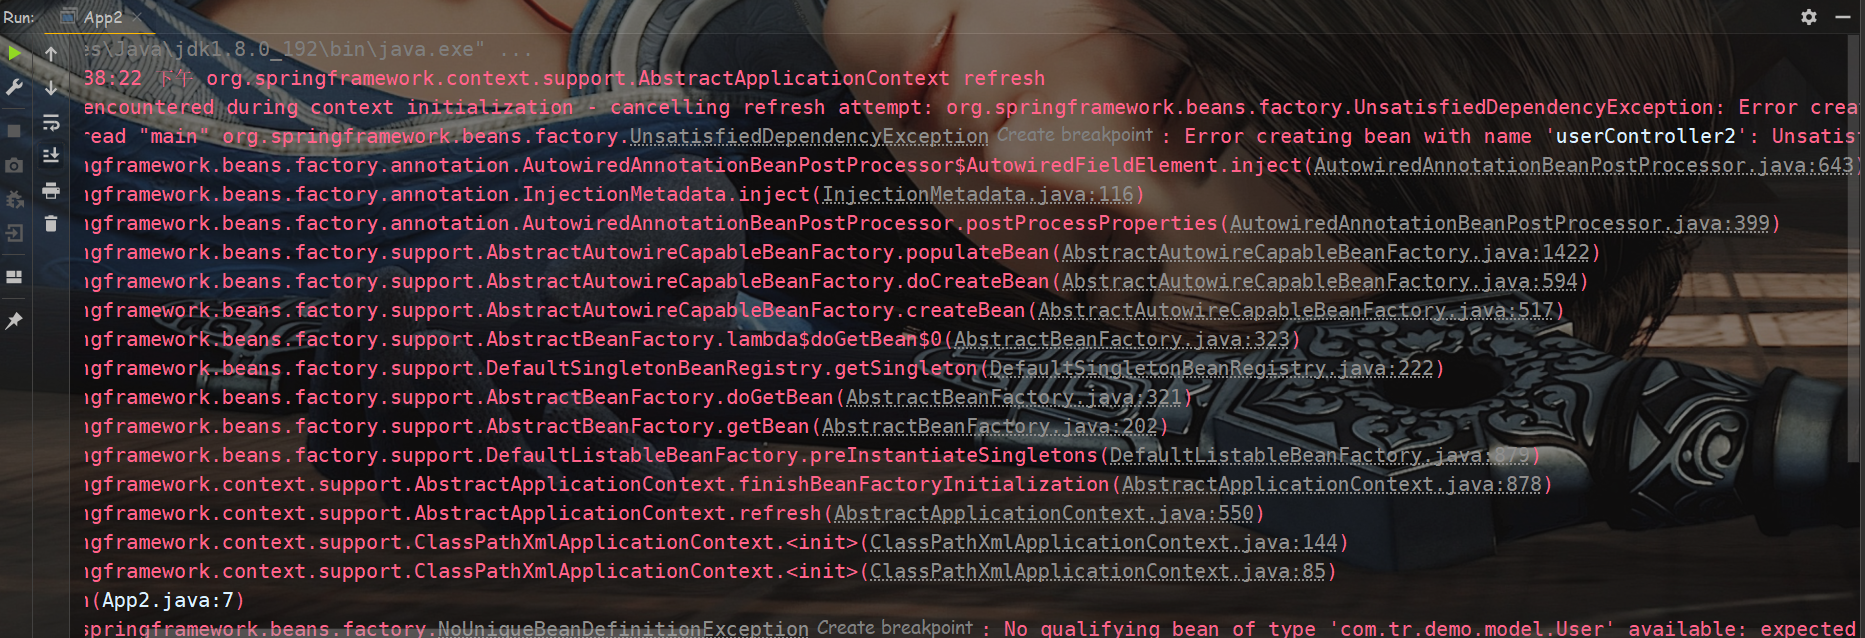
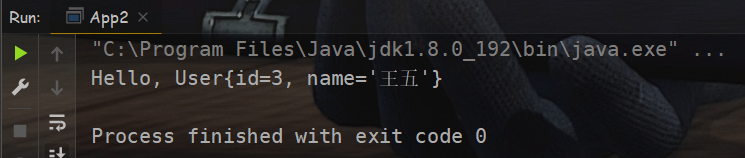
此时就需要我们来告知容器我们需要哪一个具体的 Bean,要获得目标对象主要有下面三种方法:
- 1️⃣方法1:将属性的变量名设置为你需要的那个
BeanName就可以了,后面的构造方法与 Setter 注入同理,将形参名设置成与BeanName相同即可。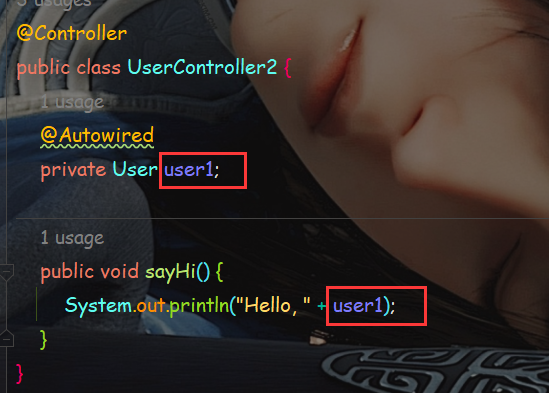

- 2️⃣方法2:@Autowired 注解与 @Qualifier 注解配合使用,设置 @Qualifier 的
value参数为BeanName即可,要注意 @Qualifier 注解不能修饰方法,只能修饰变量。
- 3️⃣方法3:将 @Autowired 注解替换成 @Resource 注解的,并将它
name参数值设置为BeanName即可。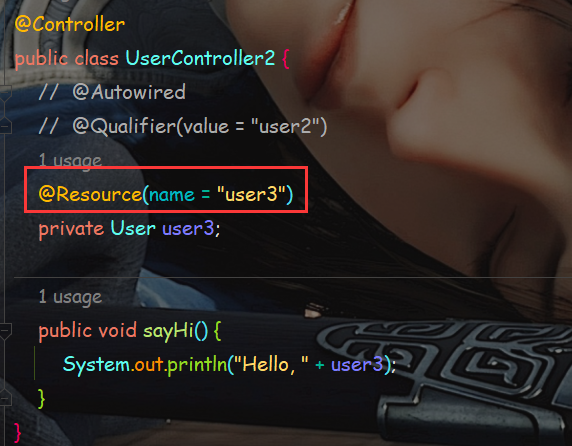
2. 构造方法注入
在构造方法加上 @Autowired 注解就可,要注意 @Resource 注解是不支持构造方法注入的,我们就直接演示如何获取取多个同类对象中的其中一个了,还是用上面添加到容器中的多个 User 对象。
方法1:将构造方法形参名设置为
user1
package com.tr.demo.controller;import com.tr.demo.model.User;import org.springframework.beans.factory.annotation.Autowired;import org.springframework.stereotype.Controller;@ControllerpublicclassUserController3{private User user;@AutowiredpublicUserController3(User user1){this.user = user1;}publicvoidsayHi(){
        System.out.println("Hello, "+ user);}}
启动类就不贴代码了,一样的,运行结果如下: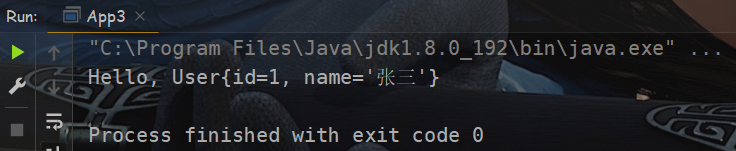
方法2:@Autowired 搭配 @Qualifier
package com.tr.demo.controller;import com.tr.demo.model.User;import org.springframework.beans.factory.annotation.Autowired;import org.springframework.beans.factory.annotation.Qualifier;import org.springframework.stereotype.Controller;@ControllerpublicclassUserController4{private User user;@AutowiredpublicUserController4(@Qualifier(value ="user2") User user){this.user = user;}publicvoidsayHi(){
        System.out.println("Hello, "+ user);}}
运行结果:
对了,如果一个类中只有一个构造方法,@Autowired 是可以省略的,演示一下:
package com.tr.demo.controller;import com.tr.demo.model.User;import org.springframework.stereotype.Controller;@ControllerpublicclassUserController5{private User user;publicUserController5(User user3){this.user = user3;}publicvoidsayHi(){
        System.out.println("Hello, "+ user);}}
此时仍然是可以成功注入对象。
如果有多个构造方法,要注意此时是不能省略 @Autowired 的,会导致会注入对象失败。
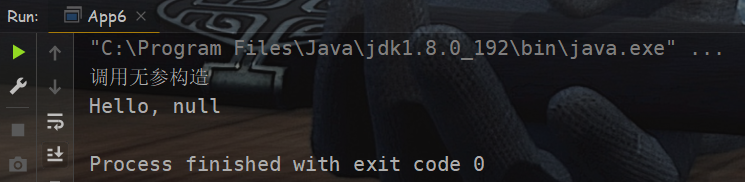
package com.tr.demo.controller;import com.tr.demo.model.User;import org.springframework.stereotype.Controller;@ControllerpublicclassUserController6{private User user;publicUserController6(User user1){this.user = user1;}publicUserController6(){
        System.out.println("调用无参构造");}publicvoidsayHi(){
        System.out.println("Hello, "+ user);}}
此时可以看到注入对象失败了,输出的结果是
null
。
当然此时加上 @Autowired 注解就能正常注入了,就不做展示了。
3. Setter注入
Setter 注入就是在 setXXX 系列方法上加上 @Resource 或者 @Autowired 进行注入,和构造方法注入大同小异,简单演示一下。
package com.tr.demo.controller;import com.tr.demo.model.User;import org.springframework.beans.factory.annotation.Autowired;import org.springframework.beans.factory.annotation.Qualifier;import org.springframework.stereotype.Controller;@ControllerpublicclassUserController7{private User user;@AutowiredpublicvoidsetUser(@Qualifier(value ="user2") User user){this.user = user;}publicvoidsayHi(){
        System.out.println("Hello, "+ user);}}
启动类和运行结果:
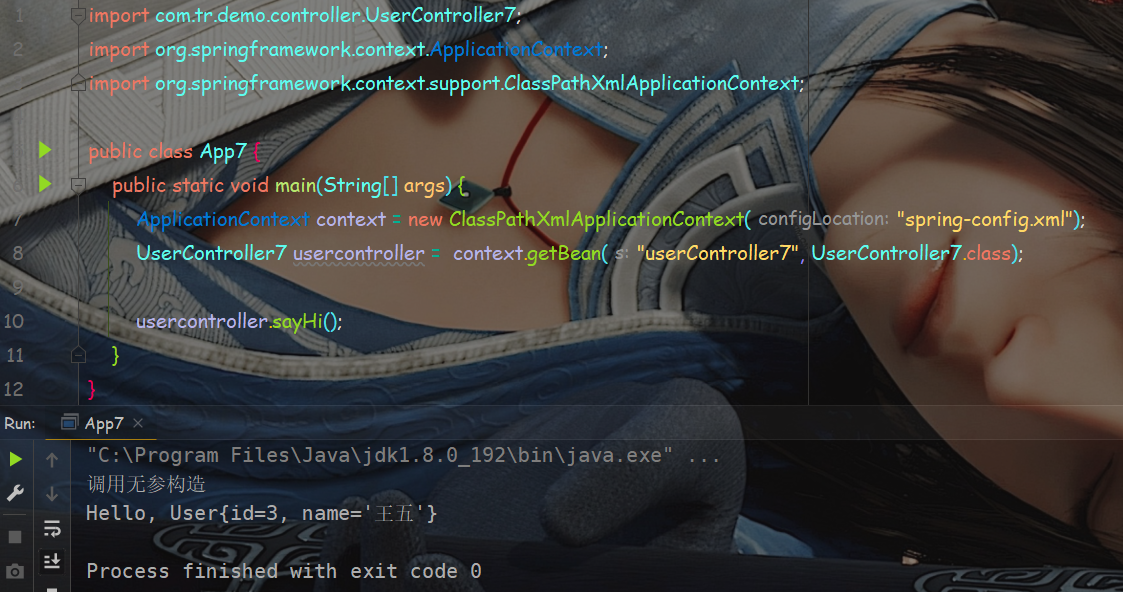
这里这里第一行输入的是因为启动程序会将上面写的
UserController6
也添加到容器中,
UserController6
的无参构造方法是我们自定义的。
三. 三种注入方式的优缺点
在早期的 Spring 版本中,官方推荐使用的 Setter 注入,最开始说的原因就是不符合单一设计原则吧,而现在比较新的 Spring 版本(Sring 4.x 之后)中,官方最使用推荐的又是构造方法注入了,说法是因为它的通用性最好。
🎯属性注入
优点:
- 使用起来简单方便
缺点:
- 无法注入到一个
final修饰的变量,因为 final 修饰的变量只有两种赋值方式,一是直接赋值,二是通过构造方法进行赋值,而属性注入这两种方式都不能满足。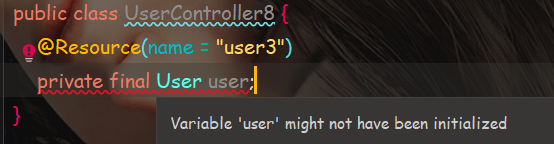
- 通用性问题,属性注入只能在 IoC 容器中使用,在非 IoC 容器中是不可⽤的。
- 更容易违背单一设计原则,简单理解就是注入方式越简单,滥用的概率越大,就比如在数据持久层有一个针对用户操作的类,本来这个类就只是注入用户相关操作的依赖就行了,但由于属性注入使用起来成本不高,程序猿就多注了一些依赖去完成了一些和用户操作无关的内容,这就违背了单一设计原则了。
🎯Setter 注入
优点:
- 通常情况下,setXXX 系列的方法中只会设置一个属性,就更符合单一设计原则。
缺点:
- 同样的,也不能注入到一个 final 修饰的变量中。

- 注入的对象是可能被修改的,因为 setXXX 系列的方法随时都有可能被调用导致注入的 Bean 就被修改了。
🎯构造方法注入
优点:
- 可以注入到一个被 final 修饰的变量。

- 注入对象不会被修改,因为构造方法只会在对象创建时执行一次,不存在注入对象被随时修改的情况。
- 可以保证注入对象的完全初始化,因为构造方法是在对象创建之前执行的。
- 通用性最好,因为不管你怎么写 Java 代码,创建实例对象时都要执行构造方法吧。
缺点:
- 相较于属性注入,写法更加复杂,如果有多个注⼊会显得⽐较臃肿,但出现这种情况你应该考虑⼀下当前类是否符合程序的单⼀职责的设计模式了。
- 使用构造注入,无法解决循环依赖的问题。
四. 综合练习
在 Spring 项⽬中,通过 main ⽅法获取到 Controller 类,调⽤ Controller ⾥⾯通过注⼊的⽅式调⽤ Service 类,Service 再通过注⼊的⽅式获取到 Repository 类,Repository 类⾥⾯有⼀个⽅法构建⼀ 个 User 对象,返回给 main ⽅法。Repository ⽆需连接数据库,使⽤伪代码即可。
首先要清楚的是在 main 方法中是不能使用依赖注入的,因为类的静态部分是在 Spring 注入之前的加载的,仔细想一下,在类加载时就要使用一个还没注入的对象这是不现实的。
所以我们要在 main 中执行的是将扫描路径中的类添加到 Spring 中,对象的注入要在 mian 方法所在类的外部去实现。
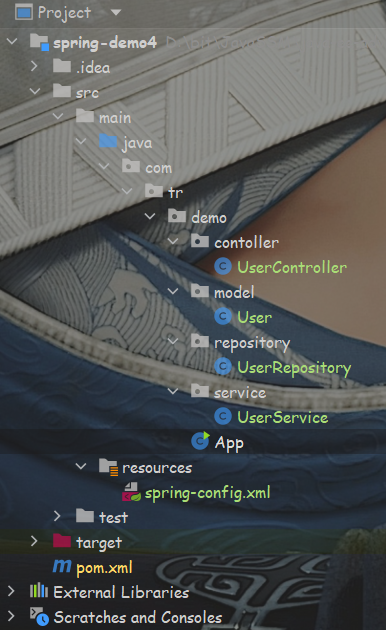
package com.tr.demo.model;publicclassUser{privateint id;private String name;@Overridepublic String toString(){return"User{"+"id="+ id +", name='"+ name +'\''+'}';}publicintgetId(){return id;}publicvoidsetId(int id){this.id = id;}public String getName(){return name;}publicvoidsetName(String name){this.name = name;}}package com.tr.demo.repository;import com.tr.demo.model.User;import org.springframework.stereotype.Repository;@RepositorypublicclassUserRepository{public User getUser(){// 伪代码
User user =newUser();
user.setId(1);
user.setName("张三");return user;}}package com.tr.demo.service;import com.tr.demo.model.User;import com.tr.demo.repository.UserRepository;import org.springframework.beans.factory.annotation.Autowired;import org.springframework.stereotype.Service;@ServicepublicclassUserService{@Autowiredprivate UserRepository userRepository;public User getUser(){return userRepository.getUser();}}package com.tr.demo.contoller;import com.tr.demo.model.User;import com.tr.demo.service.UserService;import org.springframework.beans.factory.annotation.Autowired;import org.springframework.stereotype.Controller;@ControllerpublicclassUserController{@Autowiredprivate UserService userService;public User getUser(){return userService.getUser();}}package com.tr.demo;import com.tr.demo.contoller.UserController;import org.springframework.context.ApplicationContext;import org.springframework.context.support.ClassPathXmlApplicationContext;/**
* 启动类
*/publicclassApp{publicstaticvoidmain(String[] args){
ApplicationContext context =newClassPathXmlApplicationContext("spring-config.xml");
UserController userController =
context.getBean("userController", UserController.class);
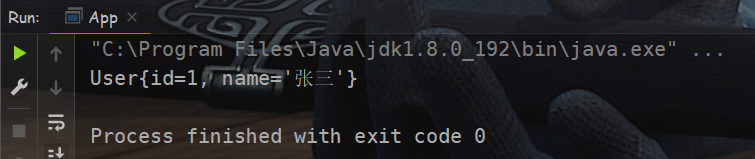
System.out.println(userController.getUser());}}
运行结果:
版权归原作者 韵秋梧桐 所有, 如有侵权,请联系我们删除。