文章目录
视频演示效果

【uniapp】实现买定离手小游戏
前言
Mqtt不同环境问题太多,新手可以看下
- 《【MQTT】Esp32数据上传采集:最新mqtt插件(支持掉线、真机调试错误等问题》
- 《一篇就够:uniapp-Mqtt系列问题详细攻略(解决掉线、真机调试错误等问题)》
- 《解决微信小程序MQTT真机连接问题与合法域名配置SSL问题》
- 《解决微信小程序MQTT通讯真机调试失败的问题附加可用代码》
- 《Esp8266-01s、51单片机实现连接MQTT踩坑:附加烧录安信可固件+宝塔搭建MQTT服务器 全套攻略》
以上的就是我所有的Mqtt踩坑记录,相信看完应该能解决了,今天这一篇文章,主要是记录
升级Mqtt5.0以及如何适配安卓端
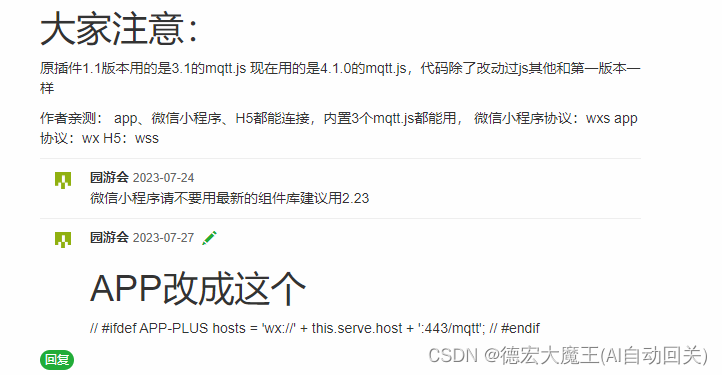
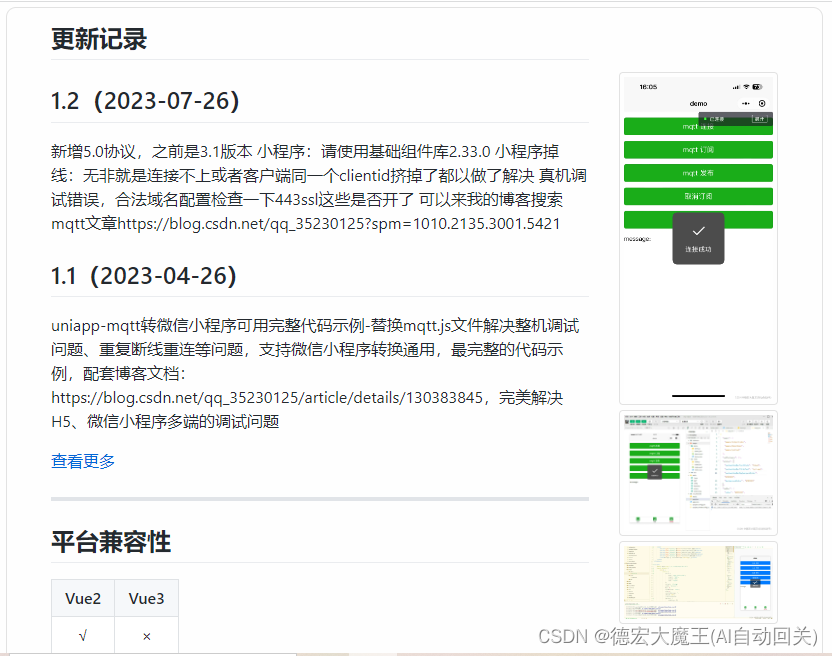
,如果不想看,也可以直接去下载插件:【uniapp】【5.0协议】最完整Mqtt示例代码(解决掉线、真机调试错误等问题)
注意:
插件代码不含如果要用在app端,请留意评论区的消息,换协议

一、分析
将原APP接入实时通讯,采用MQTT,有很多优点,这里就不列举了。这次对接的是我的打卡平台,
分为三个端:H5、APP、微信小程序
要保证三个端都通,我这里也不绕圈子了,协议我会放在本节底部,通过uniapp中的app.vue文件,将mqtt连接为全局状态,无论哪个页面都不会掉线,那么如何一对一接收呢?这里我做的思路是将客户端的订阅号订阅名改为自己的登陆账号,也就是说,用户未登录时不连接,检测到用户登录后将账户结合一些制定字符串作为onTopic,服务端指定发送过去即可,分析完之后我们开始实现客户端的连接。
连接案例:
var hosts = '';
// #ifdef APP-PLUS
hosts = 'wx://' + that.globalData.serve.host + ':443/mqtt';
// #endif

// #ifdef H5
hosts = 'wss://' + that.globalData.serve.host + ':443/mqtt';
// hosts = 'wss://' + that.globalData.serve.host + ':443/mqtt';

// hosts = 'tcp://' + this.globalData.serve.host + ':' + this.globalData.serve.wsport + this.globalData.serve.path;
//#endif
// #ifdef MP-WEIXIN
// wx仅仅可以使用体验版
hosts = 'wxs://' + that.globalData.serve.host + ':443/mqtt';
//#endif
二、全局注入MQTT连接
1.引入库
import mqtt from '@/utils/mqtt3.0.0.js'; // 导入MQTT库

库直接在插件中下载即可用:
【uniapp】【5.0协议】最完整Mqtt示例代码(解决掉线、真机调试错误等问题)
2.写入全局连接代码
App.vue是uni-app的主组件,所有页面都是在App.vue下进行切换的,是页面入口文件。但App.vue本身不是页面,这里不能编写视图元素,也就是没有。
这个文件的作用包括:调用应用生命周期函数、配置全局样式、配置全局的存储globalData
<script>
    export default {
        globalData: {
            text: 'text'
        }
    }
</script>
所以我们的代码:
<script>
  import mqtt from '@/utils/mqtt3.0.0.js'; // 导入MQTT库
    export default {
       globalData: {
           serve: {
            host: 'mqtt.taila.club',
            wsport: '8083',
            wssport:'443',
            path: 'mqtt',
           },
           onTopic: '',//订阅发送来的消息
           onSub: '',//
           Qos: 2,
           sendMassage: '',
           time:0,
           receiveMessage: '',
           client: null,
           //MQTT连接的配置
           options: {
            wsOptions: {},
            protocolVersion: 5, //MQTT连接协议版本
            clientId: '',
            keepalive: 60,
            clean: false,
            username: '',
            password: '',
            reconnectPeriod: 1000, //1000毫秒,两次重新连接之间的间隔
            connectTimeout: 30 * 1000, //1000毫秒,两次重新连接之间的间隔
            resubscribe: true //如果连接断开并重新连接,则会再次自动订阅已订阅的主题(默认true)
           },
              },
      onLaunch: function() {
         let that=this;
         console.log('======'+that.globalData.Qos)
         // console.log('======'+that.globalData.Qos)
        // 先断开
        that.unconnect();
        console.log('App Launch')

        //版本检查
        //调用示例 配置参数, 默认如下,其中api是接口地址,必须填写
        // #ifdef APP-PLUS

        //

        //版本检查


        //mqtt
        // 检查本地存储是否存在登录状态的信息
        that.check_account_mqtt_connect();

      },
      methods: {
        subscribe: function() {
            // 判断是否已成功连接
            if (!this.globalData.client || !this.globalData.client.connected) {
              this.showToast('客户端未连接', 1000)
              return;
            }

            this.globalData.client.subscribe(this.globalData.onTopic, {
              qos: this.globalData.Qos
            }, error => {
              if (!error) {
                this.showToast('订阅成功', 1000, 'success')
                console.log('订阅成功');
              }
            });


          },
          publish: function() {
            // 判断是否已成功连接
            if (!this.globalData.client || !this.globalData.client.connected) {
              this.showToast('客户端未连接', 1000)
              return;
            }
            if (this.globalData.sendMassage != '') {
              // var send = '{"code": 200, "msg": "发送打1111指令", "data": "2.doc"}';

               // 定义JSON对象
                const messageq = {
                  code: 200,
                  msg: '发送打印指令',
                  data: '2.doc'
                }

                // 将JSON对象转换为JSON字符串
                const message1 = JSON.stringify(messageq)
              this.globalData.client.publish(this.globalData.onSub,message1, error => {
                console.log(error || '消息发布成功');
                this.showToast('消息发布成功', 1000, 'success')
              });
            } else {
              this.showToast('发布消息为空', 1000)
            }

          },
          unsubscribe: function() {
            this.globalData.client.unsubscribe(

              this.globalData.onTopic,
              err => {
                console.log(err || '取消订阅成功');
                this.showToast('取消订阅成功', 1000, 'success')
              }
            );
          },
          unconnect: function() {
            if (!this.globalData.client || !this.globalData.client.connected) {
              this.showToast('客户端未连接', 1000)
              return;
            }
            this.client.end();
            this.client = null
            this.showToast('成功断开连接', 1000, 'success')
            console.log('断开连接');
          },
          showToast: function(title, time, icon = 'none') {
            uni.showToast({
              title: title,
              icon: icon,
            });
            setTimeout(function() {
              uni.hideToast();
            }, time);
          },

        check_account_mqtt_connect:function(){
          let that=this;
          const openid = uni.getStorageSync('openid');

           if (openid=='') {
            uni.showToast({
              title:'订阅消息连接失败',
            icon:'none'
            })
           }else{
             // 如果存在登录状态的信息,直接进行MQTT连接
             //构造必要数据
             let clientId = "mqtt_" + Math.random().toString(16).substr(2, 8)+openid;
             console.log("生成的随机clientId为:" + clientId);
              this.globalData.options.clientId=clientId;
             this.globalData.onTopic=openid;//定义订阅消息
             that.connect();
           }
        },
      connect: function() {
        let that = this;
        var hosts = '';
        // #ifdef APP-PLUS
      hosts = 'wx://' + that.globalData.serve.host + ':443/mqtt';
        // #endif

        // #ifdef H5
        hosts = 'wss://' + that.globalData.serve.host + ':443/mqtt';
        // hosts = 'wss://' + that.globalData.serve.host + ':443/mqtt';

         // hosts = 'tcp://' + this.globalData.serve.host + ':' + this.globalData.serve.wsport + this.globalData.serve.path;
        //#endif
        // #ifdef MP-WEIXIN
        // wx仅仅可以使用体验版
      hosts = 'wxs://' + that.globalData.serve.host + ':443/mqtt';
        //#endif
        console.log(hosts);
        if (that.globalData.client == null || that.globalData.client.connented == false) {
          uni.showLoading({
            title: '连接中···'
          });
          that.globalData.client = mqtt.connect(
            hosts,
            that.globalData.options
          );

          that.globalData.client.on('connect', () => {
            uni.hideLoading();
            that.showToast('连接成功', 1000, 'success');
            that.subscribe();
          });

          that.globalData.client.on('message', (topic, message) => {
            console.log('收到来自' + topic + '的消息' + message.toString());
            uni.showToast({
              title:'收到一条消息:请在主页查收',
          duration:4000,
          icon:'none'
            })
            // 在收到消息时调用onMessageArrived回调函数进行处理

          });
        }

        that.globalData.client.on('reconnect', error => {
          uni.hideLoading();
          that.showToast('正在重连···', 1000);
        });

        that.globalData.client.on('error', error => {
          uni.hideLoading();
          that.showToast('连接失败!', 1000);
        });
      },


      },
      onShow: function() {
        console.log('App Show')
      },
      onHide: function() {
        console.log('App Hide')
      }
    }
</script>

<style lang="scss">
  /* ==== App.vue 文件 ==== */
    /* 为了避免电脑浏览器中的滚动条影响到布局,可在 style 标记中添加如下 CSS 代码*/

    /* 条件编译,仅在H5平台生效 */
    // #ifdef H5
    body::-webkit-scrollbar,html::-webkit-scrollbar {
        display: none;
    }
    // #endif
      /*每个页面公共css */
      @import "@/uni_modules/b-ui/css/main.bundle.scss";
</style>
**
注意:
**
App.vue和其他页面不一样,我也是弄了好久才弄清楚,另外使用了全局globalData才编译成小程序时最新版本会报错,获取不到,应该时BUG,我当时用的是基础组件2.33版本就解决了
二、PHP环境建立
下载文章顶部的配套资源到服务器
修改封装的代码里面的连接信息,以及数据持久化
<?php
require_once("php_mqtt/mqtt.class.php");//基础组件
function send_mqtt_message($receiver, $content,$conn,$type)
{
    $server = "mqtt.taila.club";  // 服务代理地址(mqtt服务端地址)
    $port = 1883;                // 通信端口
    $username = "";              // 用户名(如果需要)
    $password = "";              // 密码(如果需要)
    $client_id = "clientx9293670xxctr_492344"; // 设置你的连接客户端id

    $mqtt = new Mqtt($server, $port, $client_id); // 实例化MQTT类
    if ($mqtt->connect(true, NULL, $username, $password)) {
        // 如果创建链接成功
        $message = array(
            'message_id' => uniqid(), // 使用uniqid生成唯一的消息ID
            'sender' => '153***9', // 消息的发送者,可以是用户ID或用户名
            'receiver' => $receiver, // 消息的接收者,可以是用户ID或用户名
            'content' => $content, // 消息的内容,可以是文本、图片、文件等
            'timestamp' => time(), // 消息的时间戳,记录消息的发送时间
            'type' => $type, // 消息的类型,用于区分不同类型的消息0系统消息
            'status' => '0'//0未读1已读
        );

        $json_message = json_encode($message); // 将PHP数组转换为JSON字符串

        $mqtt->publish("$receiver", $json_message, 2); // 发送JSON消息到主题 "gg"
        //持久化
       // $sql="INSERT INTO `message` (`message_id`, `sender`, `receiver`, `content`, `type`, `status`, `create_time`) VALUES (NULL, '15368666279', '$receiver', '$content', '$type', '0', CURRENT_TIMESTAMP)";
       // $conn->query($sql);
        $mqtt->close(); // 发送后关闭链接
    } else {
        echo "Time out!\n";
    }
}
?>
调用方式非常简单,新建index.php
<?php
include '../../api/conn.php';//连接数据库根据你情况来定
require_once("../../api/Message_push/mqtt_sender.php");

//消息发送
$receiver = $_GET["openid"];//发送手机号
$content = $_GET["msg"];//发送的消息
send_mqtt_message($receiver, $content,$conn,'1');
?>
总结
以上就是今天要讲的内容,本文仅仅简单介绍了【MQTT5】原生PHP对接Uni H5、APP、微信小程序实时通讯消息服务的使用
🍋希望你能喜欢我的其他作品
《记一次云之家签到抓包》
《记一次视频抓包m3u8解密过程》
《抓包部分软件时无网络+过代理检测 解决办法 安卓黄鸟httpcanary+vmos》
《Python】记录抓包分析自动领取芝麻HTTP每日免费IP(成品+教程)》
《某课抓包视频 安卓手机:黄鸟+某课app+VirtualXposed虚拟框架》
推荐专栏:
《Python爬虫脚本项目实战》
该专栏往期文章:
《【Python爬虫项目实战一】获取Chatgpt3.5免费接口文末付代码(过Authorization认证)》
🥦如果感觉看完文章还不过瘾,欢迎查看我的其它专栏
🥦作者对python有很大的兴趣,完成过很多独立的项目:例如滇医通等等脚本,但是由于版权的原因下架了,爬虫这一类审核比较严谨,稍有不慎就侵权违规了,所以在保证质量的同时会对文章进行筛选
如果您对爬虫感兴趣请收藏或者订阅该专栏哦《Python爬虫脚本项目实战》,如果你有项目欢迎联系我,我会同步教程到本专栏!
🚀Python爬虫项目实战系列文章!!
⭐⭐欢迎订阅⭐⭐
【Python爬虫项目实战一】获取Chatgpt3.5免费接口文末付代码(过Authorization认证)
【Python爬虫项目实战二】Chatgpt还原验证算法-解密某宝伪知网数据接口
⭐⭐欢迎订阅⭐⭐
Python爬虫脚本项目实战
版权归原作者 德宏大魔王(AI自动回关) 所有, 如有侵权,请联系我们删除。