
直播弹幕系统(二)- 整合RabbitMQ进行消息广播和异步处理
前言
上一篇文章 SpringCloud网关对WebSocket链接进行负载均衡 中把主要的架子搭建好了,这一篇文章就要开始写业务逻辑了。在分布式系统下,如何达到SpringBoot - WebSocket的使用和聊天室练习的效果。
一. Socket服务整合RabbitMQ
我们页面上,通过
WebSocket
发送弹幕信息的时候,后端通过
@OnMessage
注解修饰的函数进行接收。这里我们统一将原始的弹幕消息丢给
MQ
。让另一个专业的弹幕服务去消费处理。目的也是希望
WebSocket
服务它只负责消息的传递和
WebSocket
信息的维护,业务逻辑啥也不做。
1.添加
pom
依赖:
<dependency><groupId>org.springframework.boot</groupId><artifactId>spring-boot-starter-amqp</artifactId></dependency>
2.配置文件
bootstrap.yml
,添加RabbitMQ相关配置
server:port:81spring:application:name: tv-service-socket
  cloud:nacos:discovery:server-addr: 你的Nacos地址:8848rabbitmq:username: guest
    password: guest
    # 虚拟主机,默认是/virtual-host: /
    # 超时时间connection-timeout:30000listener:simple:# 消费模式,手动acknowledge-mode: manual
        # 并发数concurrency:5# 最大并发数max-concurrency:10# 限流,如果严格控制消费顺序,这里应该填1,数值越大,消费处理速度越快。MQ会把这个数值的消息放到缓存当中。# 因此数值越大,内存占用越大,还需要考虑消费的速度prefetch:10addresses: 你的RabbitMQ地址:5672
配置类:RabbitMQ
importorg.springframework.amqp.core.Binding;importorg.springframework.amqp.core.BindingBuilder;importorg.springframework.amqp.core.DirectExchange;importorg.springframework.amqp.core.Queue;importorg.springframework.context.annotation.Bean;importorg.springframework.context.annotation.Configuration;/**
 * @author Zong0915
 * @date 2022/12/15 下午1:29
 */@ConfigurationpublicclassRabbitMQConfig{@BeanpublicQueueinitDirectQueue(){returnnewQueue("originBullet-queue",true);}@BeanDirectExchangeinitDirectExchange(){returnnewDirectExchange("bulletPreProcessor-exchange",true,false);}@BeanBindinginitBindingDirect(){returnBindingBuilder.bind(TestDirectQueue()).to(TestDirectExchange()).with("bullet.originMessage");}}
4.写一个简单的消息体
OriginMessage
,发送到
MQ
的:
importlombok.Data;/**
 * @author Zong0915
 * @date 2022/12/15 下午1:30
 */@DatapublicclassOriginMessage{privateString sessionId;privateString userId;privateString roomId;privateString message;}
生产者MQ
:OriginMessageSender
/**
 * @author Zong0915
 * @date 2022/12/15 下午1:29
 */@ComponentpublicclassOriginMessageSender{@AutowiredprivateRabbitTemplate rabbitTemplate;publicvoidsend(OriginMessage originMessage){CorrelationData correlationData =newCorrelationData();
        correlationData.setId(UUID.randomUUID().toString());// 唯一IDMap<String,Object> map =newHashMap<>();
        map.put("message",JSONObject.toJSONString(originMessage));// 发送给消息预处理队列
        rabbitTemplate.convertAndSend("bulletPreProcessor-exchange",// 交换机名称"bullet.originMessage",// 路由Key
                map, correlationData);}}
6.我们再对
WebSocket
的监听类做一下小改动,将收到的消息,封装一下,然后调用生产者的
API
即可。只需要注意一下多例下属性的注入方式是怎么写的即可。
importkz.cache.SocketCache;importkz.entity.OriginMessage;importkz.producer.OriginMessageSender;importlombok.extern.slf4j.Slf4j;importorg.apache.commons.lang3.StringUtils;importorg.springframework.beans.factory.annotation.Autowired;importorg.springframework.stereotype.Component;importjavax.websocket.OnClose;importjavax.websocket.OnMessage;importjavax.websocket.OnOpen;importjavax.websocket.Session;importjavax.websocket.server.PathParam;importjavax.websocket.server.ServerEndpoint;importjava.util.concurrent.atomic.AtomicLong;importlombok.Getter;/**
 * @author Zong0915
 * @date 2022/12/9 下午3:45
 */@Component@ServerEndpoint("/websocket/live/{roomId}/{userId}")@Slf4j@GetterpublicclassBulletScreenServer{/**
     * 多例模式下的赋值方式
     */privatestaticOriginMessageSender originMessageSender;/**
     * 多例模式下的赋值方式
     */@AutowiredprivatevoidsetOriginMessageSender(OriginMessageSender originMessageSender){BulletScreenServer.originMessageSender = originMessageSender;}privatestaticfinalAtomicLong count =newAtomicLong(0);privateSession session;privateString sessionId;privateString userId;privateString roomId;/**
     * 打开连接
     * @param session
     * @OnOpen 连接成功后会自动调用该方法
     */@OnOpenpublicvoidopenConnection(Session session,@PathParam("roomId")String roomId,@PathParam("userId")String userId){// 如果是游客观看视频,虽然有弹幕,但是没有用户信息,所以需要用try
        count.incrementAndGet();
        log.info("*************WebSocket连接次数: {} *************", count.longValue());this.userId = userId;this.roomId = roomId;// 保存session相关信息到本地this.sessionId = session.getId();this.session = session;SocketCache.put(sessionId,this);}/**
     * 客户端刷新页面,或者关闭页面,服务端断开连接等等操作,都需要关闭连接
     */@OnClosepublicvoidcloseConnection(){SocketCache.remove(sessionId);}/**
     * 客户端发送消息给服务端
     * @param message
     */@OnMessagepublicvoidonMessage(String message){if(StringUtils.isBlank(message)){return;}// 将消息丢给MQ,业务上的处理什么也不管,交给弹幕业务来处理,并且达到削峰的目的
        originMessageSender.send(buildMessage(message));}privateOriginMessagebuildMessage(String message){OriginMessage originMessage =newOriginMessage();
        originMessage.setMessage(message);
        originMessage.setRoomId(roomId);
        originMessage.setSessionId(sessionId);
        originMessage.setUserId(userId);return originMessage;}}
备注:记得将另一个
Socket
项目也改造成同样的代码。
二. 弹幕服务创建
2.1 创建一个公共maven项目
我们创建一个
maven
项目:
service-bulletcommon
。先看下最终的项目架构: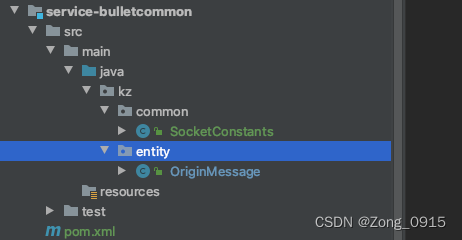
依赖添加一些常用的工具:pom
<groupId>bullet-service</groupId><artifactId>service-bulletcommon</artifactId><version>1.0-SNAPSHOT</version><dependencies><dependency><groupId>org.apache.commons</groupId><artifactId>commons-lang3</artifactId><version>3.12.0</version></dependency><dependency><groupId>com.alibaba</groupId><artifactId>fastjson</artifactId><version>1.2.79</version></dependency><dependency><groupId>org.projectlombok</groupId><artifactId>lombok</artifactId><version>1.18.24</version></dependency><dependency><groupId>commons-collections</groupId><artifactId>commons-collections</artifactId><version>3.2.2</version></dependency></dependencies>
2.创建一个常量定义类
SocketConstants
:
/**
 * @author Zong0915
 * @date 2022/12/15 下午3:59
 */publicclassSocketConstants{/**
     * 这条消息是否处理过
     */publicstaticfinalStringCORRELATION_SET_PRE="Correlation_Set_";/**
     * 同一个房间里面有哪些SessionID
     */publicstaticfinalStringROOM_LIVE_USER_SET_PRE="ROOM_LIVE_USER_Set_";publicstaticfinalStringMESSAGE="message";publicstaticfinalStringID="id";/**
     * 原始消息所在队列
     */publicstaticfinalStringORIGIN_BULLET_QUEUE="originBullet-queue";/**
     * 广播队列A
     */publicstaticfinalStringBULLET_SOCKET_QUEUE_A="bulletSocket-queueA";/**
     * 广播队列B
     */publicstaticfinalStringBULLET_SOCKET_QUEUE_B="bulletSocket-queueB";/**
     * 弹幕预处理交换机
     */publicstaticfinalStringBULLET_PRE_PROCESSOR_EXCHANGE="bulletPreProcessor-exchange";/**
     * 弹幕广播交换机
     */publicstaticfinalStringBULLET_FANOUT_EXCHANGE="bulletFanOut-exchange";/**
     * 弹幕预处理路由Key
     */publicstaticfinalStringBULLET_ORIGIN_MESSAGE_ROUTE_KEY="bullet.originMessage";}
3.创建一个消息传输体
OriginMessage
:
importlombok.Data;/**
 * @author Zong0915
 * @date 2022/12/15 下午2:07
 */@DatapublicclassOriginMessage{privateString sessionId;privateString userId;privateString roomId;privateString message;}
2.2 弹幕服务项目创建
1.我们创建一个
maven
项目:
service-bulletscreen
。先看下最终的项目架构: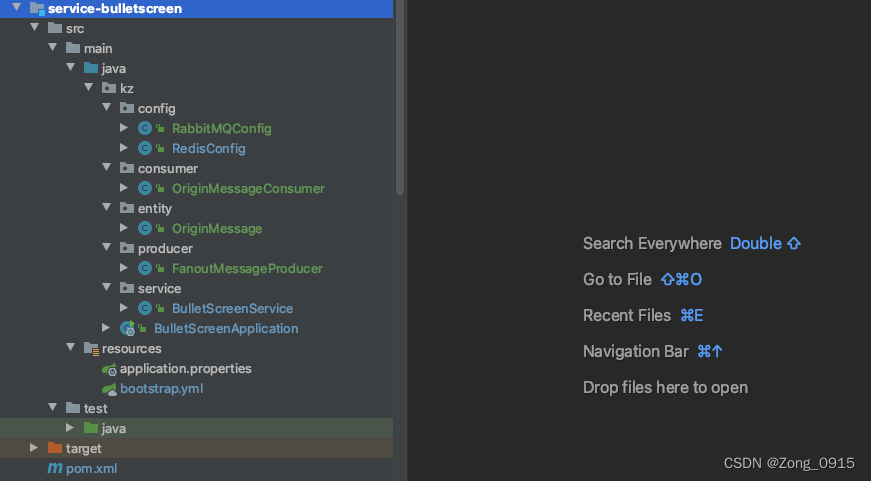
文件:pom
<parent><groupId>org.springframework.boot</groupId><artifactId>spring-boot-starter-parent</artifactId><version>2.3.2.RELEASE</version><relativePath/><!-- lookup parent from repository --></parent><dependencies><dependency><groupId>org.springframework.boot</groupId><artifactId>spring-boot-starter-web</artifactId></dependency><dependency><groupId>com.alibaba.cloud</groupId><artifactId>spring-cloud-starter-alibaba-nacos-discovery</artifactId><version>2.2.1.RELEASE</version><exclusions><exclusion><artifactId>archaius-core</artifactId><groupId>com.netflix.archaius</groupId></exclusion><exclusion><artifactId>commons-io</artifactId><groupId>commons-io</groupId></exclusion><exclusion><artifactId>commons-lang3</artifactId><groupId>org.apache.commons</groupId></exclusion><exclusion><artifactId>fastjson</artifactId><groupId>com.alibaba</groupId></exclusion><exclusion><artifactId>guava</artifactId><groupId>com.google.guava</groupId></exclusion><exclusion><artifactId>httpclient</artifactId><groupId>org.apache.httpcomponents</groupId></exclusion><exclusion><artifactId>servo-core</artifactId><groupId>com.netflix.servo</groupId></exclusion></exclusions></dependency><dependency><groupId>org.springframework.boot</groupId><artifactId>spring-boot-starter-amqp</artifactId></dependency><dependency><groupId>org.springframework.boot</groupId><artifactId>spring-boot-starter-data-redis</artifactId><version>2.6.7</version><exclusions><exclusion><artifactId>log4j-api</artifactId><groupId>org.apache.logging.log4j</groupId></exclusion></exclusions></dependency><dependency><groupId>bullet-service</groupId><artifactId>service-bulletcommon</artifactId><version>1.0-SNAPSHOT</version></dependency></dependencies>
:application.properties
spring.application.name=tv-service-bulletscreen
spring.cloud.nacos.discovery.server-addr=你的Nacos地址:8848
文件:bootstrap.yml
server:
  port:83

spring:
  application:
    name: tv-service-bulletscreen
  redis:
    database:0 # Redis数据库索引(默认为0)
    host: 你的Redis地址 # Redis的服务地址
    port:6379 # Redis的服务端口
    password: 密码
    jedis:
      pool:
        max-active:8 # 连接池最大连接数(使用负值表示没有限制)
        max-wait:-1 # 连接池最大阻塞等待时间(使用负值表示没有限制)
        max-idle:8 # 连接池中的最大空闲连接
        min-idle:0 # 连接池中的最小空闲链接
    timeout:30000 # 连接池的超时时间(毫秒)
  cloud:
    nacos:
      discovery:
        server-addr: 你的Nacos地址:8848
  rabbitmq:
    username: guest
    password: guest
    # 虚拟主机,默认是/
    virtual-host:/
    # 超时时间
    connection-timeout:30000
    listener:
      simple:
        # 消费模式,手动
        acknowledge-mode: manual
        # 并发数
        concurrency:5
        # 最大并发数
        max-concurrency:10
        # 限流,如果严格控制消费顺序,这里应该填1,数值越大,消费处理速度越快。MQ会把这个数值的消息放到缓存当中。
        # 因此数值越大,内存占用越大,还需要考虑消费的速度
        prefetch:10
    addresses: 你的RabbitMQ地址:5672
配置类Redis
:RedisConfig
importorg.springframework.boot.autoconfigure.condition.ConditionalOnMissingBean;importorg.springframework.context.annotation.Bean;importorg.springframework.context.annotation.Configuration;importorg.springframework.data.redis.connection.RedisConnectionFactory;importorg.springframework.data.redis.core.RedisTemplate;importorg.springframework.data.redis.core.StringRedisTemplate;importorg.springframework.data.redis.serializer.GenericJackson2JsonRedisSerializer;importorg.springframework.data.redis.serializer.StringRedisSerializer;@ConfigurationpublicclassRedisConfig{/**
     * 实例化 RedisTemplate 对象
     *
     * @return
     */@BeanpublicRedisTemplate<String,Object>functionDomainRedisTemplate(RedisConnectionFactory redisConnectionFactory){RedisTemplate<String,Object> redisTemplate =newRedisTemplate<>();initDomainRedisTemplate(redisTemplate, redisConnectionFactory);return redisTemplate;}/**
     * 设置数据存入 redis 的序列化方式,并开启事务
     *
     * @param redisTemplate
     * @param factory
     */privatevoidinitDomainRedisTemplate(RedisTemplate<String,Object> redisTemplate,RedisConnectionFactory factory){//如果不配置Serializer,那么存储的时候缺省使用String,如果用User类型存储,那么会提示错误User can't cast to String!
        redisTemplate.setKeySerializer(newStringRedisSerializer());
        redisTemplate.setHashKeySerializer(newStringRedisSerializer());
        redisTemplate.setHashValueSerializer(newGenericJackson2JsonRedisSerializer());
        redisTemplate.setValueSerializer(newGenericJackson2JsonRedisSerializer());// 开启事务
        redisTemplate.setEnableTransactionSupport(true);
        redisTemplate.setConnectionFactory(factory);}@Bean@ConditionalOnMissingBean(StringRedisTemplate.class)publicStringRedisTemplatestringRedisTemplate(RedisConnectionFactory redisConnectionFactory){StringRedisTemplate template =newStringRedisTemplate();
        template.setConnectionFactory(redisConnectionFactory);return template;}}
2.2.1 创建队列和广播型交换机
创建一个广播模式的交换机
bulletFanOut-exchange
:其实用
direct
也可以,因为我只要监听的队列用同一个即可,这里只是进行一个模拟。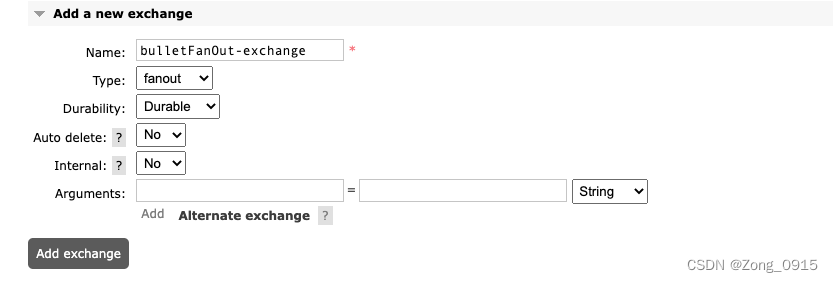
分别为两个
Socket
服务创建个队列,用来接收处理好的消息(练习下广播模式):
bulletSocket-queueAbulletSocket-queueB
再分别为他们和上述创建好的交换机进行绑定。
我们的弹幕服务主要做两件事:
- 监听预处理队列,数据来自:
originBullet-queue。 - 将处理完的消息通过广播,发送给
bulletSocket-queueA/B两个队列。
RabbitMQ
配置类如下:
importkz.common.SocketConstants;importorg.springframework.amqp.core.*;importorg.springframework.beans.factory.annotation.Qualifier;importorg.springframework.context.annotation.Bean;importorg.springframework.context.annotation.Configuration;/**
 * @author Zong0915
 * @date 2022/12/15 下午1:29
 */@ConfigurationpublicclassRabbitMQConfig{@BeanpublicQueueinitDirectQueue(){returnnewQueue(SocketConstants.ORIGIN_BULLET_QUEUE,true);}@BeanpublicQueueinitFanoutSocketQueueA(){returnnewQueue(SocketConstants.BULLET_SOCKET_QUEUE_A,true);}@BeanpublicQueueinitFanoutSocketQueueB(){returnnewQueue(SocketConstants.BULLET_SOCKET_QUEUE_B,true);}@BeanDirectExchangeinitDirectExchange(){returnnewDirectExchange(SocketConstants.BULLET_PRE_PROCESSOR_EXCHANGE,true,false);}@Bean("fanoutExchange")FanoutExchangeinitFanoutExchange(){returnnewFanoutExchange(SocketConstants.BULLET_FANOUT_EXCHANGE,true,false);}@BeanBindinginitBindingDirect(){returnBindingBuilder.bind(initDirectQueue()).to(initDirectExchange()).with(SocketConstants.BULLET_ORIGIN_MESSAGE_ROUTE_KEY);}@BeanBindinginitBindingFanoutA(@Qualifier("fanoutExchange")FanoutExchange fanoutExchange){returnBindingBuilder.bind(initFanoutSocketQueueA()).to(fanoutExchange);}@BeanBindinginitBindingFanoutB(@Qualifier("fanoutExchange")FanoutExchange fanoutExchange){returnBindingBuilder.bind(initFanoutSocketQueueB()).to(fanoutExchange);}}
2.2.2 生产者发送最终弹幕数据
创建
FanoutMessageProducer
类:记得向我们上面绑定的广播交换机发送数据。
importcom.alibaba.fastjson.JSONObject;importkz.entity.OriginMessage;importorg.springframework.amqp.rabbit.connection.CorrelationData;importorg.springframework.amqp.rabbit.core.RabbitTemplate;importorg.springframework.beans.factory.annotation.Autowired;importorg.springframework.stereotype.Component;importjava.util.HashMap;importjava.util.Map;importjava.util.UUID;/**
 * @author Zong0915
 * @date 2022/12/15 下午2:51
 */@ComponentpublicclassFanoutMessageProducer{@AutowiredprivateRabbitTemplate rabbitTemplate;publicvoidsend(OriginMessage originMessage){CorrelationData correlationData =newCorrelationData();
        correlationData.setId(UUID.randomUUID().toString());// 唯一IDMap<String,Object> map =newHashMap<>();
        map.put("message",JSONObject.toJSONString(originMessage));

        rabbitTemplate.convertAndSend("bulletFanOut-exchange",// 交换机名称"",// 路由Key
                map, correlationData);}}
2.2.3 消费者监听原始弹幕数据
创建
OriginMessageConsumer
类:
importcom.alibaba.fastjson.JSONObject;importcom.rabbitmq.client.Channel;importkz.service.BulletScreenService;importlombok.extern.slf4j.Slf4j;importorg.springframework.amqp.rabbit.annotation.*;importorg.springframework.beans.factory.annotation.Autowired;importorg.springframework.messaging.handler.annotation.Headers;importorg.springframework.messaging.handler.annotation.Payload;importorg.springframework.stereotype.Component;importjava.io.IOException;importjava.util.Map;/**
 - @author Zong0915
 - @date 2022/12/15 下午1:57
 */@Component@Slf4jpublicclassOriginMessageConsumer{@AutowiredprivateBulletScreenService bulletScreenService;/**
     * 处理原始消息
     *
     * @param testMessage Map类型的消息体
     * @param headers     消息头
     * @param channel     消息所在的管道
     */@RabbitListener(
            bindings =@QueueBinding(
                    value =@Queue(value ="originBullet-queue", durable ="true"),// 默认的交换机类型就是direct
                    exchange =@Exchange(name ="bulletPreProcessor-exchange", type ="direct"),
                    key ="bullet.originMessage"))@RabbitHandlerpublicvoidonOriginMessage(@PayloadMap testMessage,@HeadersMap<String,Object> headers,Channel channel)throwsIOException{
        log.info("***********消费开始*************");
        log.info("消费体:{}",JSONObject.toJSONString(testMessage));
        bulletScreenService.processMessage(testMessage, headers, channel);}}
2.创建
BulletScreenService
类用于原始弹幕的业务处理,主要考虑的几个点:
- 消息的合法性校验。
- 消息的幂等性保证,这里用了
Redis做个存储。 - 将原始数据处理完后,在丢给
MQ进行广播。
importcom.alibaba.fastjson.JSONObject;importcom.rabbitmq.client.Channel;importkz.common.SocketConstants;importkz.entity.OriginMessage;importkz.producer.FanoutMessageProducer;importlombok.extern.slf4j.Slf4j;importorg.apache.commons.lang3.StringUtils;importorg.springframework.amqp.support.AmqpHeaders;importorg.springframework.beans.factory.annotation.Autowired;importorg.springframework.data.redis.core.StringRedisTemplate;importorg.springframework.scheduling.annotation.Async;importorg.springframework.stereotype.Service;importjava.io.IOException;importjava.util.Map;importjava.util.Optional;importjava.util.UUID;importjava.util.concurrent.TimeUnit;/**
 * @author Zong0915
 * @date 2022/12/9 下午3:45
 */@Service@Slf4jpublicclassBulletScreenService{@AutowiredprivateStringRedisTemplate redisTemplate;@AutowiredprivateFanoutMessageProducer fanoutMessageProducer;@AsyncpublicvoidprocessMessage(Map testMessage,Map<String,Object> headers,Channel channel)throwsIOException{OriginMessage originMessage =getOriginMessage(testMessage);// 合法性校验if(!validMessage(testMessage, headers, originMessage)){return;}// 处理消息
        log.info("***********业务处理,弹幕: {}***********", originMessage.getMessage());String correlationId = headers.get(SocketConstants.ID).toString();// 存入Redis并设置过期时间1天
        redisTemplate.opsForSet().add(SocketConstants.CORRELATION_SET_PRE+ originMessage.getRoomId(), correlationId);
        redisTemplate.expire(SocketConstants.CORRELATION_SET_PRE+ originMessage.getRoomId(),1,TimeUnit.DAYS);// 将处理好的消息发送给MQ,通过广播队列,将消息发送给所有的Socket服务,一般这里还会对originMessage进行一些二次封装// 本案例就不做处理了,原样返回
        fanoutMessageProducer.send(originMessage);// 确认消息Long deliveryTag =(Long) headers.get(AmqpHeaders.DELIVERY_TAG);
        channel.basicAck(deliveryTag,false);}publicOriginMessagegetOriginMessage(Map testMessage){String messageJson =(String) testMessage.get(SocketConstants.MESSAGE);if(StringUtils.isBlank(messageJson)){returnnull;}OriginMessage originMessage =JSONObject.parseObject(messageJson,OriginMessage.class);return originMessage;}/**
     * 对消息进行合法性校验
     */publicbooleanvalidMessage(Map testMessage,Map<String,Object> headers,OriginMessage originMessage){// 判空if(testMessage ==null|| testMessage.size()==0|| originMessage ==null){returnfalse;}if(headers ==null|| headers.size()==0){returnfalse;}// 幂等性校验,如果消息已经被消费过了,那么这个弹幕消息就不应该被二次消费,这个消息就直接把他处理掉UUID correlationId =(UUID) headers.get(SocketConstants.ID);Boolean exist = redisTemplate.opsForSet().isMember(SocketConstants.CORRELATION_SET_PRE+ originMessage.getRoomId(), correlationId.toString());return!Optional.ofNullable(exist).orElse(false);}}
最后就是启动类
BulletScreenApplication
:
importorg.springframework.boot.SpringApplication;importorg.springframework.boot.autoconfigure.SpringBootApplication;importorg.springframework.cloud.client.discovery.EnableDiscoveryClient;importorg.springframework.scheduling.annotation.EnableAsync;/**
 * @author Zong0915
 * @date 2022/12/10 下午9:44
 */@SpringBootApplication@EnableDiscoveryClient@EnableAsyncpublicclassBulletScreenApplication{publicstaticvoidmain(String[] args){SpringApplication.run(BulletScreenApplication.class, args);}}
2.3 Socket服务监听弹幕数据并返回前端
记得在
pom
依赖中引入上面的公共包:
<dependency><groupId>bullet-service</groupId><artifactId>service-bulletcommon</artifactId><version>1.0-SNAPSHOT</version></dependency>
2.3.1 配置类
RabbitMQ
配置类增加下队列和交换机的配置信息:绑定
bulletSocket-queueA
@BeanpublicQueueinitFanoutSocketQueueA(){returnnewQueue(SocketConstants.BULLET_SOCKET_QUEUE_A,true);}@Bean("fanoutExchange")FanoutExchangeinitFanoutExchange(){returnnewFanoutExchange(SocketConstants.BULLET_FANOUT_EXCHANGE,true,false);}@BeanBindinginitBindingFanoutA(@Qualifier("fanoutExchange")FanoutExchange fanoutExchange){returnBindingBuilder.bind(initFanoutSocketQueueA()).to(fanoutExchange);}
另一个
Socket
项目,添加以下配置:绑定
bulletSocket-queueB
@BeanpublicQueueinitFanoutSocketQueueB(){returnnewQueue(SocketConstants.BULLET_SOCKET_QUEUE_B,true);}@Bean("fanoutExchange")FanoutExchangeinitFanoutExchange(){returnnewFanoutExchange(SocketConstants.BULLET_FANOUT_EXCHANGE,true,false);}@BeanBindinginitBindingFanoutA(@Qualifier("fanoutExchange")FanoutExchange fanoutExchange){returnBindingBuilder.bind(initFanoutSocketQueueB()).to(fanoutExchange);}
再写一个缓存工具类,通过直播间号获得同一个直播间下的所有WebSocket信息:
publicclassSocketCache{publicstaticList<BulletScreenServer>getSocketGroupByRoomId(String roomId){ArrayList<BulletScreenServer> res =newArrayList<>();if(StringUtils.isBlank(roomId)){return res;}for(Map.Entry<Integer,ConcurrentHashMap<String,BulletScreenServer>> hashMapEntry :CACHE_SEGMENT.entrySet()){ConcurrentHashMap<String,BulletScreenServer> map = hashMapEntry.getValue();if(map ==null|| map.size()==0){continue;}for(BulletScreenServer server : map.values()){if(server.getSession().isOpen()&&StringUtils.equals(roomId, server.getRoomId())){
                    res.add(server);}}}return res;}}
2.3.2 消费者
重点就是消费者的业务代码了,对最终的弹幕数据进行广播,创建
FanOutMessageConsumer
类:
importcom.alibaba.fastjson.JSONObject;importcom.rabbitmq.client.Channel;importkz.cache.SocketCache;importkz.common.SocketConstants;importkz.entity.OriginMessage;importkz.service.BulletScreenServer;importlombok.extern.slf4j.Slf4j;importorg.apache.commons.lang3.StringUtils;importorg.springframework.amqp.rabbit.annotation.*;importorg.springframework.amqp.support.AmqpHeaders;importorg.springframework.messaging.handler.annotation.Headers;importorg.springframework.messaging.handler.annotation.Payload;importorg.springframework.stereotype.Component;importjava.io.IOException;importjava.util.List;importjava.util.Map;/**
 * @author Zong0915
 * @date 2022/12/15 下午1:57
 */@Component@Slf4jpublicclassFanOutMessageConsumer{/**
     * 处理弹幕消息,开始广播
     *
     * @param testMessage Map类型的消息体
     * @param headers     消息头
     * @param channel     消息所在的管道
     */@RabbitListener(
            bindings =@QueueBinding(
                    value =@Queue(value ="bulletSocket-queueA", durable ="true"),// 默认的交换机类型就是direct
                    exchange =@Exchange(name ="bulletFanOut-exchange", type ="fanout")))@RabbitHandlerpublicvoidonOriginMessage(@PayloadMap testMessage,@HeadersMap<String,Object> headers,Channel channel)throwsIOException{
        log.info("***********消费开始, Socket服务A接收到广播消息*************");
        log.info("消费体:{}",JSONObject.toJSONString(testMessage));OriginMessage originMessage =getOriginMessage(testMessage);if(originMessage ==null){return;}// 根据roomID去找到同一个直播间下的所有用户并广播消息List<BulletScreenServer> socketGroupByRoomId =SocketCache.getSocketGroupByRoomId(originMessage.getRoomId());for(BulletScreenServer bulletScreenServer : socketGroupByRoomId){
            bulletScreenServer.getSession().getBasicRemote().sendText(JSONObject.toJSONString(originMessage));}// 确认消息Long deliveryTag =(Long) headers.get(AmqpHeaders.DELIVERY_TAG);
        channel.basicAck(deliveryTag,false);}publicOriginMessagegetOriginMessage(Map testMessage){String messageJson =(String) testMessage.get(SocketConstants.MESSAGE);if(StringUtils.isBlank(messageJson)){returnnull;}OriginMessage originMessage =JSONObject.parseObject(messageJson,OriginMessage.class);return originMessage;}}
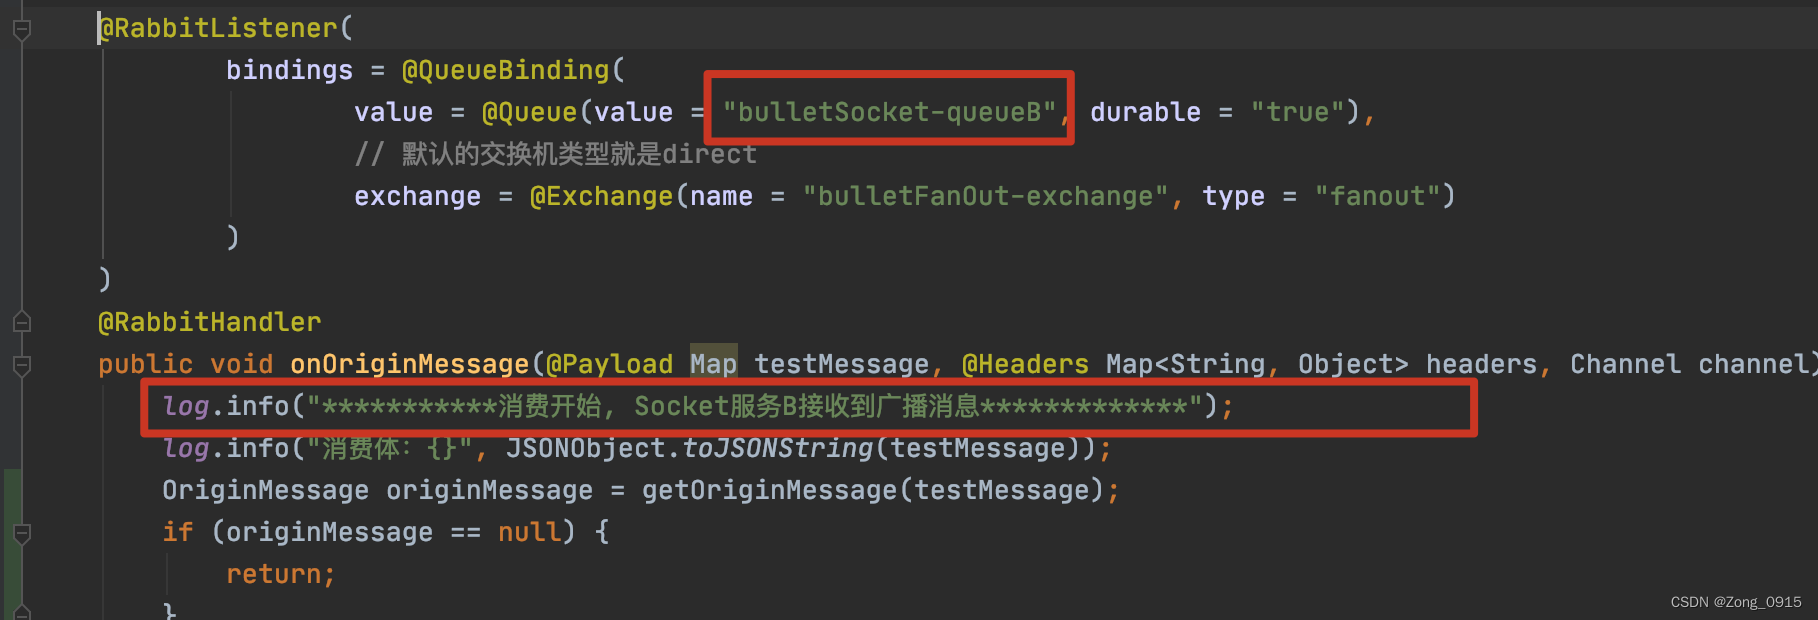
另一个
Socket
服务则改一下消费者的监听队列和日志内容即可:
2.4 测试
打开同一个直播间的两个用户,让两个WebSocket正好建立到不同的服务器上:
此时
Socket
服务A: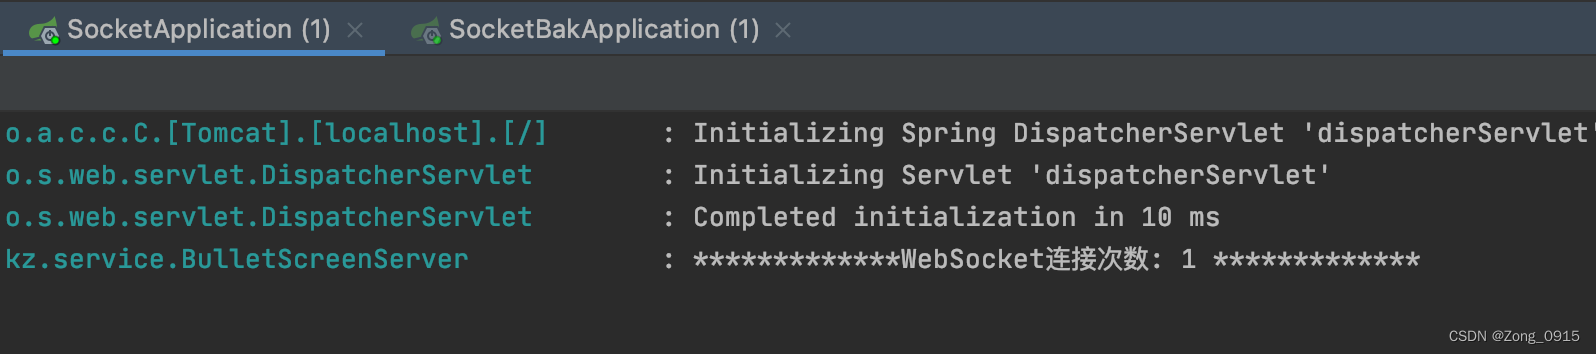
Socket
服务B: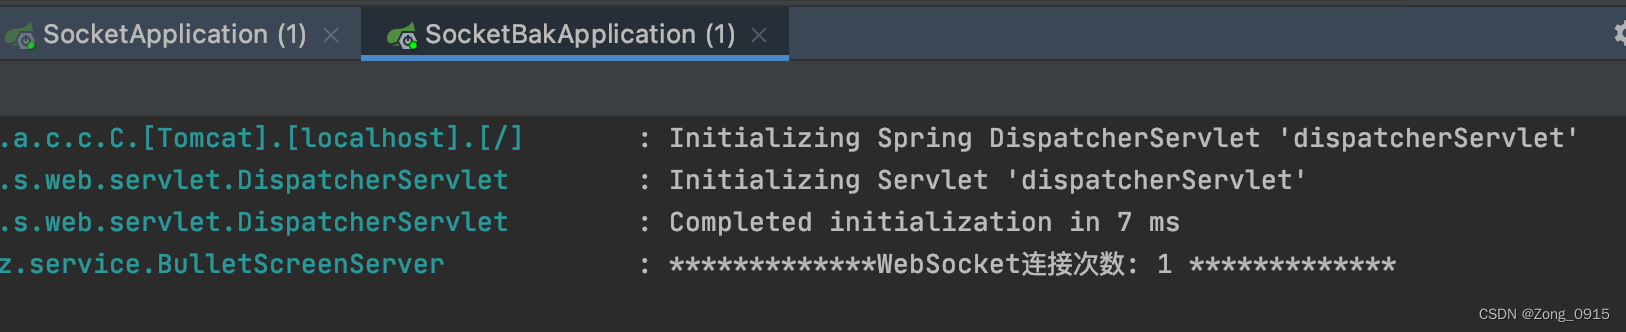
页面A中随便发送一条弹幕: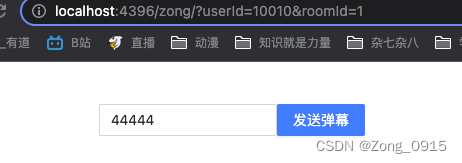
页面B中随便发送一条弹幕: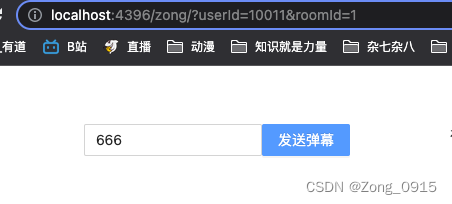
1.前端发送一条弹幕,后端监听到,开始向预处理队列丢消息。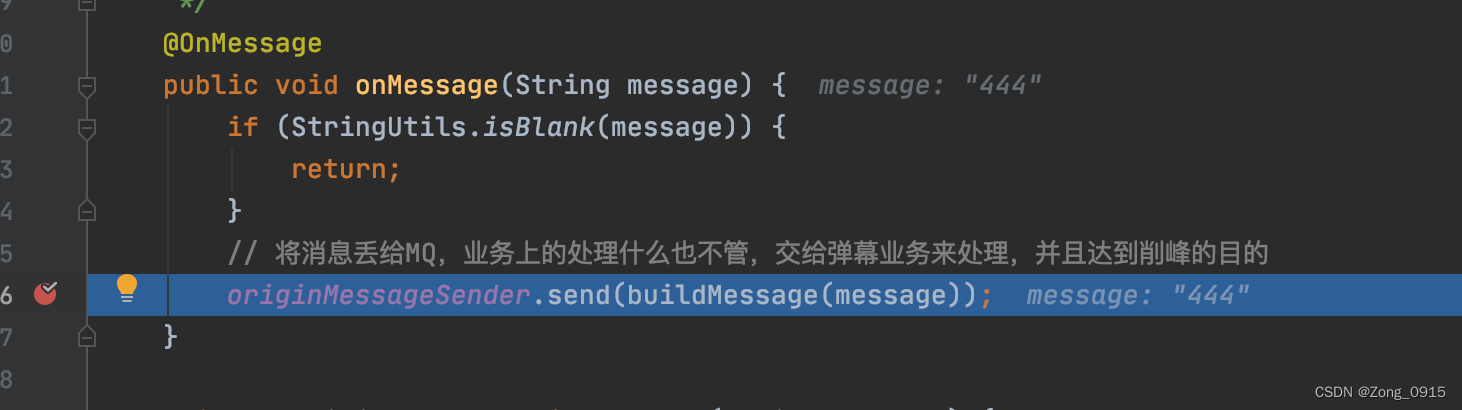
2.
service-bulletscreen
服务,监听到预处理队列数据,开始进行处理。

3.经过一系列校验和幂等性处理之后,将处理完的弹幕通过交换机发送给广播队列:
4.
Socket
服务B接收到消息: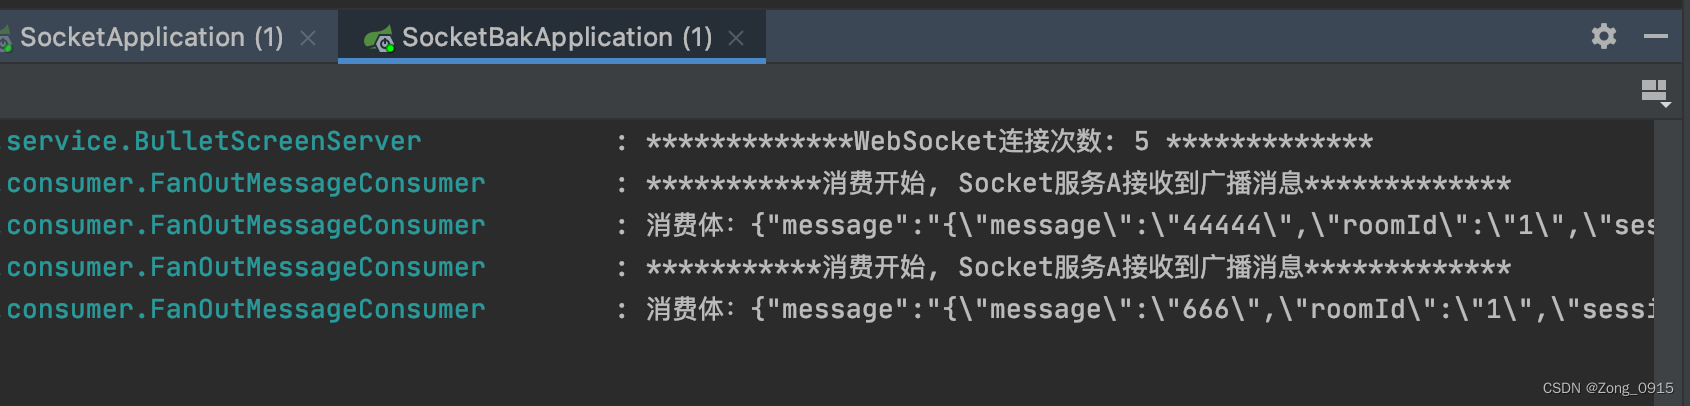
Socket
服务
A
接收到广播消息: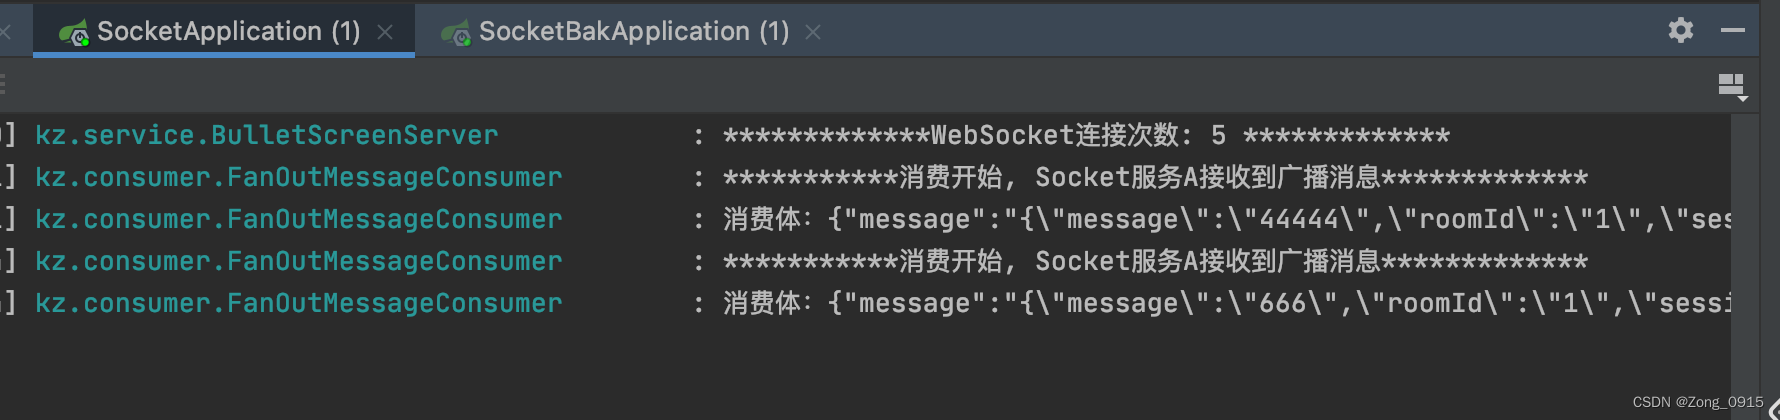
5.前端页面展示:
页面A: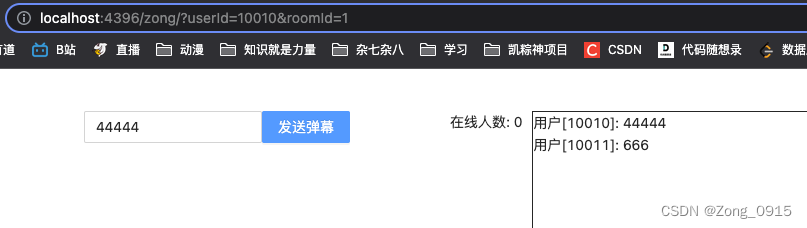
页面B: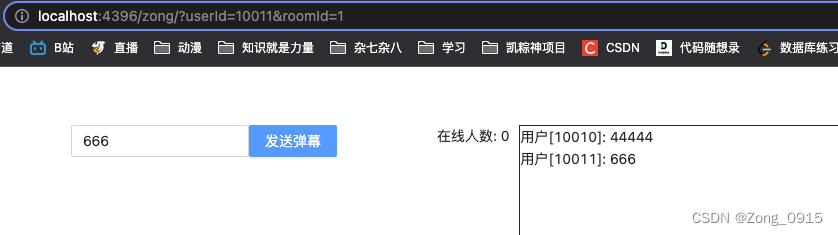
到这里,一个聊天服务就完成了。不过大家也看到在线人数这块咱没做。可以用
Redis
缓存来记录每个直播间的人数。这个功能放到下一篇文章来讲。
版权归原作者 Zong_0915 所有, 如有侵权,请联系我们删除。