1. 配置 SSH Key
由于提交代码每次输入用户名和密码,很繁琐,所以直接配置 SSH Key,直接自动验证,减少提交代码的操作步骤。
2. 查看配置命令
git config --list 查看当前Git环境所有配置,还可以配置一些命令别名之类的。
core.symlinks=false
core.autocrlf=true
core.fscache=true
color.diff=auto
color.status=auto
color.branch=auto
color.interactive=true
help.format=html
rebase.autosquash=true
http.sslcainfo=D:/git/Git/mingw64/ssl/certs/ca-bundle.crt
diff.astextplain.textconv=astextplain
filter.lfs.clean=git-lfs clean -- %f
filter.lfs.smudge=git-lfs smudge -- %f
filter.lfs.required=true
filter.lfs.process=git-lfs filter-process
credential.helper=manager
user.name=Rattenking
[email protected]
alias.co=checkout
alias.ci=commit
alias.st=status
alias.pl=pull
alias.ps=push
:...skipping...
core.symlinks=false
core.autocrlf=true
core.fscache=true
color.diff=auto
color.status=auto
color.branch=auto
color.interactive=true
help.format=html
rebase.autosquash=true
http.sslcainfo=D:/git/Git/mingw64/ssl/certs/ca-bundle.crt
diff.astextplain.textconv=astextplain
filter.lfs.clean=git-lfs clean -- %f
filter.lfs.smudge=git-lfs smudge -- %f
filter.lfs.required=true
filter.lfs.process=git-lfs filter-process
credential.helper=manager
user.name=Rattenking
[email protected]
alias.co=checkout
alias.ci=commit
alias.st=status
alias.pl=pull
alias.ps=push
alias.df=diff
alias.lg=log
alias.cp=cherry-pick
alias.ca=commit -a
alias.br=branch
alias.mg=merge
3. 配置全局name和email
3.1 配置命令
git config --global user.name "xxx"
git config --global user.email "xxx"
3.2 配置结果

4. 切换到 ~/.ssh文件夹下
4.1 切换命令
cd ~/.ssh
4.2 切换结果

5. 检查是否存在SSH Key
5.1 检查命令
ls
或
ll
5.2 检查结果

由于我之前没有配置 SSH Key,所以不存在 id_rsa 和 id_rsa.pub文件,如果存在,说明已经有SSH Key。
6. 生成 SSH Key
6.1 生成命令
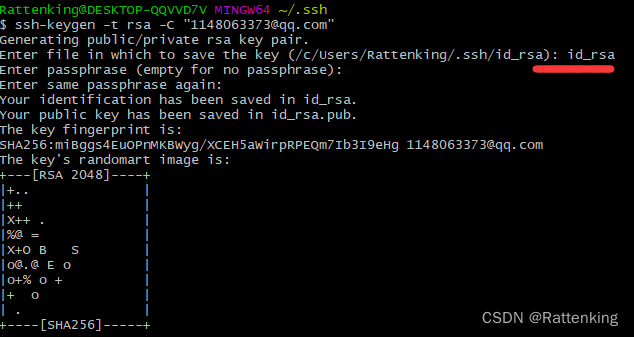
ssh-keygen -t rsa -C "xxx"
6.2 生成结果

注意:保存文件的名字输入 id_rsa!!!
6.3 再次查询

7. 获取SSH Key
7.1 获取命令
cat id_rsa.pub
7.2 获取结果

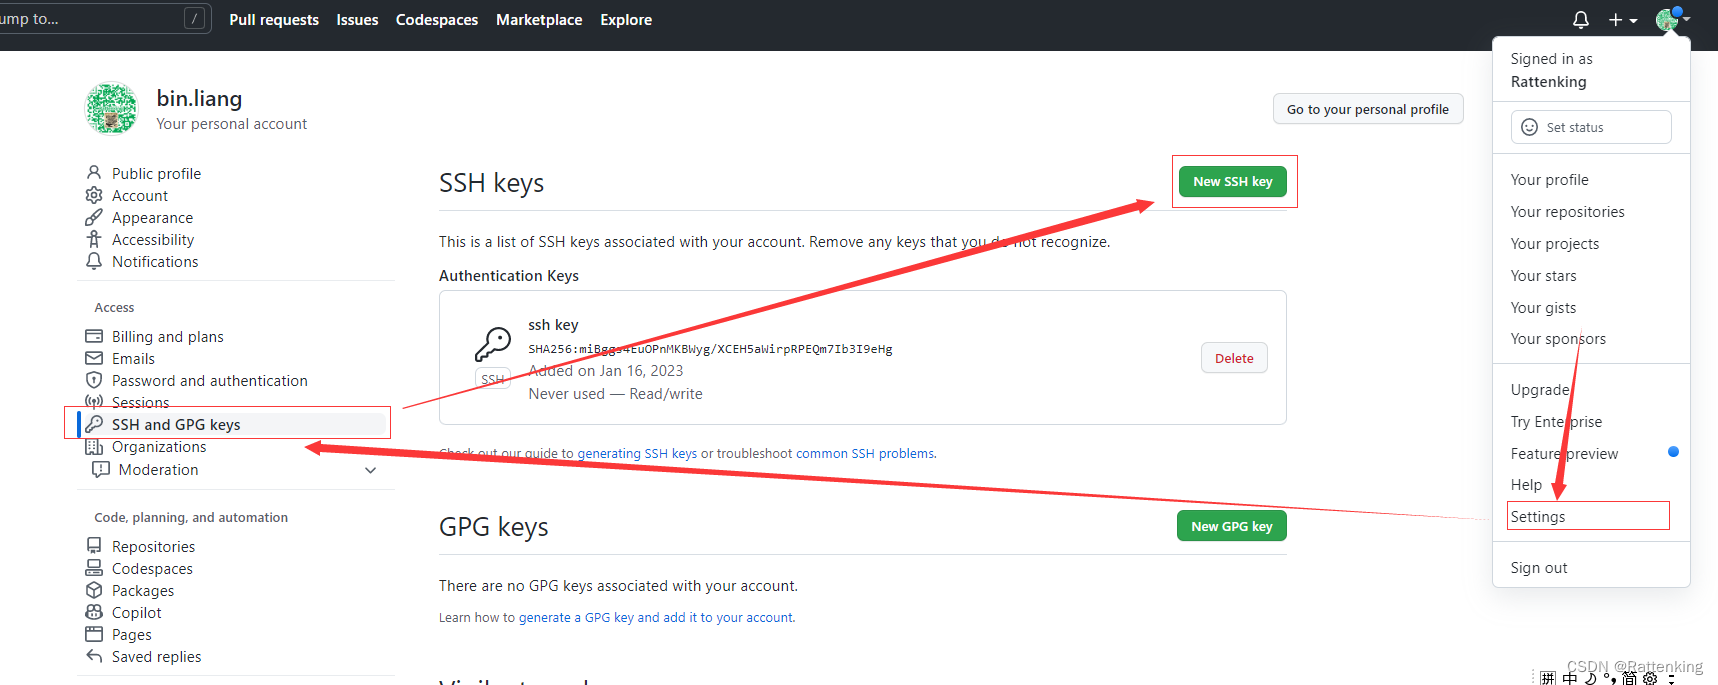
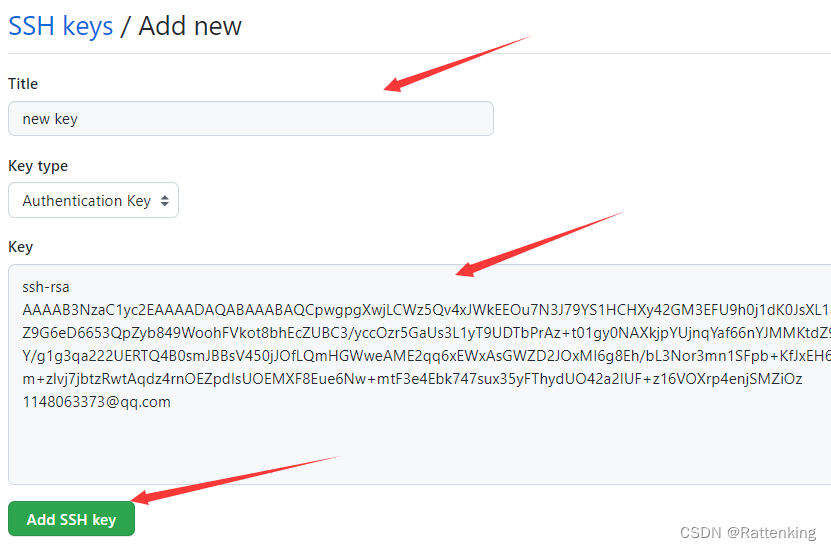
8. GitHub添加SSH Key
将第七步中的【ssh-rsa开头】密钥拷贝输入!!!
9. 验证
9.1 验证命令
ssh -T [email protected]
9.2 验证成功的输出

10. 总结
- 配置 SSH Key 完成,网上的教程很多,但是我们需要留下自己的记录,在自己需要的时候能够快速的找到!
版权归原作者 Rattenking 所有, 如有侵权,请联系我们删除。

