性别分类对于人机交互应用和计算机辅助生理或心理分析等商业领域的许多应用至关重要,因为它包含有关男女特征差异的广泛信息。
本次案例收集了接近二十万的男女数据集图片。

文章目录
性别分类简介
性别分类越来越受到关注,因为性别包含有关男性和女性社会活动的丰富而独特的信息。性别分类旨在根据区分男性气质和女性气质的特征来识别一个人的性别。
在人工智能领域,性别分类被认为是模式识别方法最重要的应用之一。性别分类研究的进展带来了许多潜在的应用。
例如,具有性别识别功能的计算机系统在基础和应用研究领域有着广泛的应用,包括人机交互、安全工业和监控、人口统计研究、商业开发、移动应用和视频游戏。
此外,还提出了多种机制来提高性别识别在准确性和效率方面的表现。
使用 Python 进行性别分类的机器学习项目
导入相关库和数据
import os
from tensorflow.keras import layers
from tensorflow.keras import Model
from tensorflow.keras.preprocessing.image import ImageDataGenerator
import tensorflow as tf
现在让我们读取并导入我们将用于训练神经网络模型的图像数据集:
# ImageDataGenerator 函数
# (1)图片生成器,负责生成一个批次一个批次的图片,以生成器的形式给模型训练;
# (2)对每一个批次的训练图片,适时地进行数据增强处理(data augmentation);

# 训练
train_datagen =ImageDataGenerator(rescale =1./255,  # 设置放缩因子为1/255,把像素值放缩到0和1之间有利于模型的收敛,避免神经元“死亡”
      rotation_range=40,   #旋转范围
      width_shift_range=0.2, #水平平移范围
      height_shift_range=0.2,  #垂直平移范围
      shear_range=0.2, #  透视变换的范围
      zoom_range=0.2, #缩放范围,参数大于0小于1时,执行的是放大操作,当参数大于1时,执行的是缩小操作。
      horizontal_flip=True,  #水平不反转
      fill_mode='nearest') #填充模式

test_datagen =ImageDataGenerator( rescale =1.0/255)

# flow_from_directory()从路径生成增强数据,和flow方法相比最大的优点在于不用一次将所有的数据读入内存当中,这样减小内存压力,
# 这样不会发生OOM,血的教训
train_generator = train_datagen.flow_from_directory("Dataset/Train/",
                                                    batch_size =256,
                                                    class_mode ='binary',
                                                    target_size =(64,64))
# 验证数据集
validation_generator =  test_datagen.flow_from_directory("Dataset/Validation/",
                                                          batch_size  =256,
                                                          class_mode  ='binary',
                                                          target_size =(64,64))
如下:
Found 160000 images belonging to 2 classes.
Found 22598 images belonging to 2 classes.
模型搭建和训练
现在我们需要使用 Python 训练和编译用于性别分类任务的神经网络模型:
from tensorflow.keras.optimizers import Adam # 优化器adam
# Sequential()方法是一个容器,描述了神经网络的网络结构,在Sequential()的输入参数中描述从输入层到输出层的网络结构
# Sequential([网络结构])'''
tf.keras.layers.Conv2D卷积层
tf.keras.layers.Conv2D(filter = 卷积核个数,kernel_size = 卷积核尺寸, strides = 卷积步长, activation ="激活函数“,padding = ”valid“ or "same")'''
model = tf.keras.models.Sequential([
    # 1st conv
  tf.keras.layers.Conv2D(96,(11,11),strides=(4,4), activation='relu', input_shape=(64,64,3)),
   # BatchNormalization是BN算法
  tf.keras.layers.BatchNormalization(),
  # 用于2D输入的最大池化层(例如图像).
  tf.keras.layers.MaxPooling2D(2, strides=(2,2)),
    # 2nd conv
  tf.keras.layers.Conv2D(256,(11,11),strides=(1,1), activation='relu',padding="same"),
  tf.keras.layers.BatchNormalization(),
     # 3rd conv
  tf.keras.layers.Conv2D(384,(3,3),strides=(1,1), activation='relu',padding="same"),
  tf.keras.layers.BatchNormalization(),
    # 4th conv
  tf.keras.layers.Conv2D(384,(3,3),strides=(1,1), activation='relu',padding="same"),
  tf.keras.layers.BatchNormalization(),
    # 5th Conv
  tf.keras.layers.Conv2D(256,(3,3), strides=(1,1), activation='relu',padding="same"),
    # 批量标准化层应用了一种转换,使得数据的均值趋于0,标准差趋于1。
  tf.keras.layers.BatchNormalization(),
  tf.keras.layers.MaxPooling2D(2, strides=(2,2)),
  # To Flatten layer
  # 使输入展平,不会影响批处理的大小
  tf.keras.layers.Flatten(),
  # To FC layer 1
    # 设置4096 神经元
  tf.keras.layers.Dense(4096, activation='relu'),
    # 防止过拟合
  tf.keras.layers.Dropout(0.5),
  #To FC layer 2
  tf.keras.layers.Dense(4096, activation='relu'),
  tf.keras.layers.Dropout(0.5),
  tf.keras.layers.Dense(1, activation='sigmoid')])
# 模型编译,配置训练方法
model.compile(
    optimizer=Adam(lr=0.001),  # 使用Adam优化器,学习率为0.001
    loss='binary_crossentropy', #配置损失函数
    metrics=['accuracy']  #标注网络评价指标
   )
# 模型训练
hist = model.fit_generator(generator=train_generator,  # 训练数据生成器
                    validation_data=validation_generator,  # 验证数据生成器
                    steps_per_epoch=256,   #
                    validation_steps=256,
                    epochs=50) #迭代次数epochs为50
模型测试
在测试这个模型之前,让我们先看看模型在准确性方面的表现:
import matplotlib.pyplot as plt
acc = hist.history['accuracy'] # acc
val_acc = hist.history['val_accuracy'] #  验证acc
loss = hist.history['loss'] # loss
val_loss = hist.history['val_loss'] # 验证losss

epochs =range(len(acc))

plt.plot(epochs, acc,'r', label='Training accuracy') # 每一次迭代训练准确度
plt.plot(epochs, val_acc,'b', label='Validation accuracy') # # 每一次迭代验证准确度
plt.title('Training and validation accuracy') # 训练和验证准度度
plt.legend(loc=0)
plt.figure()
plt.show()
如下:
预测
import numpy as np

from keras.preprocessing import image
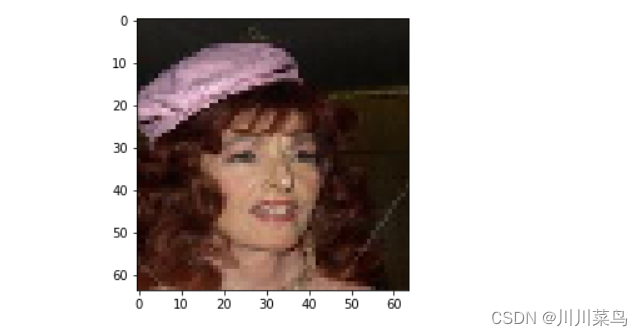
path ="Dataset/Test/Female/160001.jpg"  # 读取一张图片来测试
img = image.load_img(path, target_size=(64,64)) # 加载
x = image.img_to_array(img)
x = np.expand_dims(x, axis=0)

images = np.vstack([x])
classes = model.predict(images, batch_size=1) # 预测
print(classes[0])if classes[0]>0.5:print("is a man")else:print(" is a female")
plt.imshow(img)
如下:
[0.]
 is a female

版权归原作者 川川菜鸟 所有, 如有侵权,请联系我们删除。