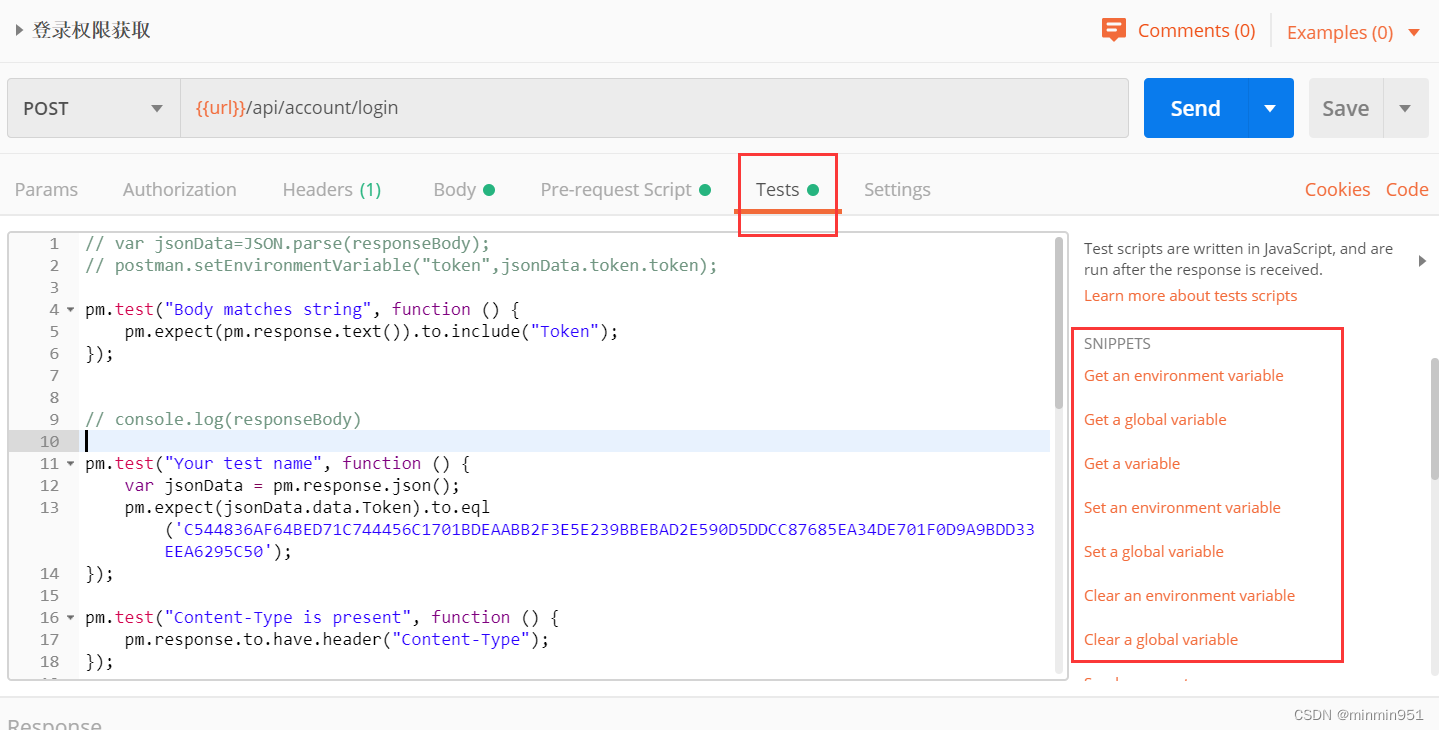
postman的自动化断言:
一些刚学习postman的朋友可能只把postman当成调用接口的工具,殊不知,postman还有更高级的用法哟,执行请求后还可自动化断言响应的内容,
入口:切换到“Tests”页签下,可在中间编辑区域编写,也可点击右侧区域内的内容快速获得断言的内容。
** **
一些内容复制如下,供参考:
// var jsonData=JSON.parse(responseBody);
// postman.setEnvironmentVariable("token",jsonData.token.token);pm.test("Body matches string", function () {
pm.expect(pm.response.text()).to.include("Token");
});// console.log(responseBody)
pm.test("Your test name", function () {
var jsonData = pm.response.json();
pm.expect(jsonData.data.Token).to.eql('C544836AF64BED71C744456C1701BDEAABB2F3E5E239BBEBAD2E590D5DDCC87685EA34DE701F0D9A9BDD33EEA6295C50');
});pm.test("Content-Type is present", function () {
pm.response.to.have.header("Content-Type");
});pm.test("Response time is less than 200ms", function () {
pm.expect(pm.response.responseTime).to.be.below(500);
});pm.test("Status code is 200", function () {
pm.response.to.have.status(200);
});var data2=JSON.parse(responseBody)
var data3=data2.data.Tokenvar schema = {
"properties": {
"code": {"type":"number"},
"data":{"type":"object"},
"data3":{"type":"string"}
}
};pm.test('Schema is valid', function() {
pm.expect(tv4.validate(data2, schema)).to.be.true;
});
postman的自动化执行:
postman也可用命令行来执行,这样就可以做持续集成。
步骤是:
1.先安装nodejs
2.安装nodejs后,再安装newman(npm install -g newman)
3.安装完nodejs和newman后,可执行命令:newman run .\test\test.json --reporters cli
无人值守运行postman(两种方式):(无需测试人员参与)
一种方式是:定时定点的执行postman接口任务:
安装jenkins后,创建一个jenkins测试任务,在构建-Execute Windows batch command的命令框里输入命令:newman run .\test\test.json --reporters cli,并设置自动构建任务(构建触发器->Build periodically输入框里)。
此时就能定时执行postman的接口了。
另一种无人值守方式是:
开发提交代码后,自动开始执行jenkins测试任务。
那么可以在jenkins测试任务里面,配置“构建触发器”(Build after other projects are built)--此处选择开发人员的jenkins任务,这样就能实现开发提交代码后,自动执行jenkins测试任务(postman命令)
此时就实现了:开发提交代码-->触发jenkins上开发任务构建-->触发jenkins上测试任务构建(测试任务自动执行)
此时的测试报告是怎么生成的呢?
newman会自动生成报告,但是不建议用,建议使用allure(生成企业级美观的报告样式)
命令为:newman run .\test\test.json --reporters allure --reporter-allure-export report11
report11是输出测试报告的文件夹
版权归原作者 minmin951 所有, 如有侵权,请联系我们删除。