
前言
Element-ui,一套为开发者、设计师和产品经理准备的基于 Vue 2.0 的组件库,提供了配套设计资源,帮助你的网站快速成型。由饿了么公司前端团队开源。
一、安装(所有内容)
npm i element-ui -S 终端安装
在main.js中引入,此方法引入了所有功能,会导致项目文件较大,推荐按需引入,需要什么引入什么
import ElementUI from 'element-ui';

import 'element-ui/lib/theme-chalk/index.css';

Vue.use(ElementUI);
二、按需引入
npm i element-ui -S 终端安装
npm install babel-plugin-component -D 安装 开发依赖
修改babel.config.js
module.exports = {
  presets: [
    '@vue/app',
["@babel/preset-env", { "modules": false }]
  ],
   plugins: [
      [
        "component",
        {
          "libraryName": "element-ui",
          "styleLibraryName": "theme-chalk"
        }
      ]
    ]
}
新创一个专属的引入文件夹与src同级,引入想要引入的内容
import Vue from 'vue'
import {Button,Form,FormItem,Input,Col,Row,Message} from 'element-ui';

Vue.use(Button)
Vue.use(Form)
Vue.use(FormItem)
Vue.use(Input)
Vue.use(Col)
Vue.use(Row)
// 弹出框挂载到vue原型身上,这样每个组件都是用this.message
Vue.prototype.$message = Message
main.js引入文件夹路径,这里拿我的为例
import '@/plugins/element'
三、案例演示
1.案前整理
提前准备了图片,样式,来配合实现一个较为美观的登录框,如果需要源码样式,私信留下邮箱免费领取,看见就回
这里我还使用了简单的路由效果,来展现跳转页面,下面展示基础的效果
2.代码演示(后附源码)
首先我们需要创建一个路由组件,将内容样式导入,这里直接跳过,样式代码后附,我们直接看如何引入element的代码
虽然官网已经有了演示代码,但是我们要简单了解一下,每一步的意义
如上的演示,我们很清楚需要利用的是input、button这种表单的样式,所以需要使用到<el-input><el-input/> <el-button><el-button/>按钮是为了最后判断是否满足后台数据(此案例没有),也可以一起判断是否满足所有的规则,需要使用点击事件触发绑定@click
第一步在新的组件中写入以下代码,也可以说是路由组件
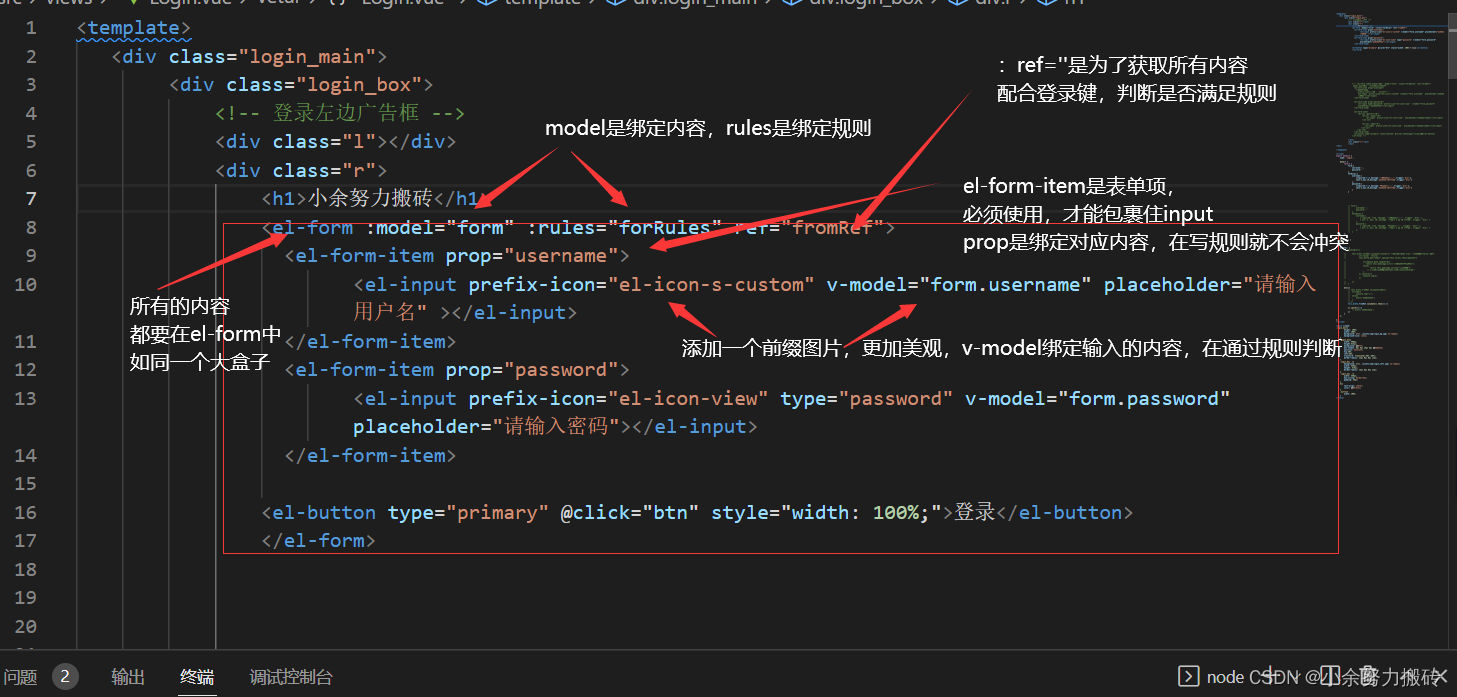
如上图在v-from中使用到了:model :rules来绑定,我需要在data中写入对应的绑定内容

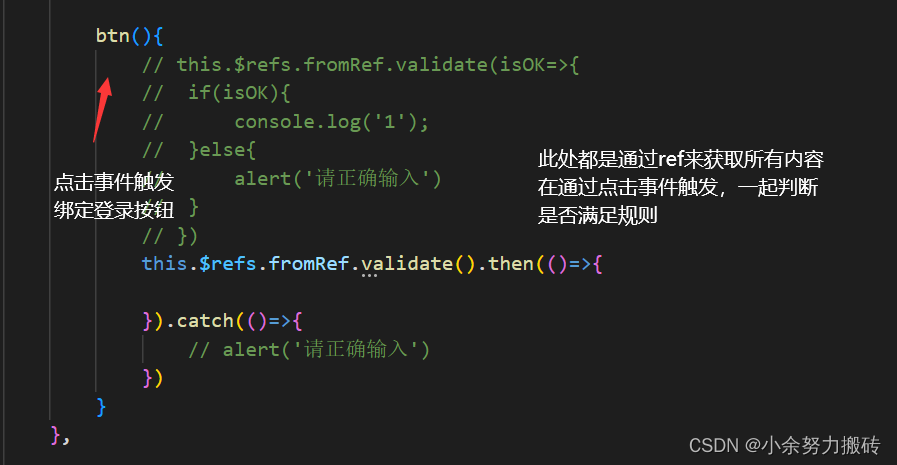
** 登录按钮判断是否全都满足**
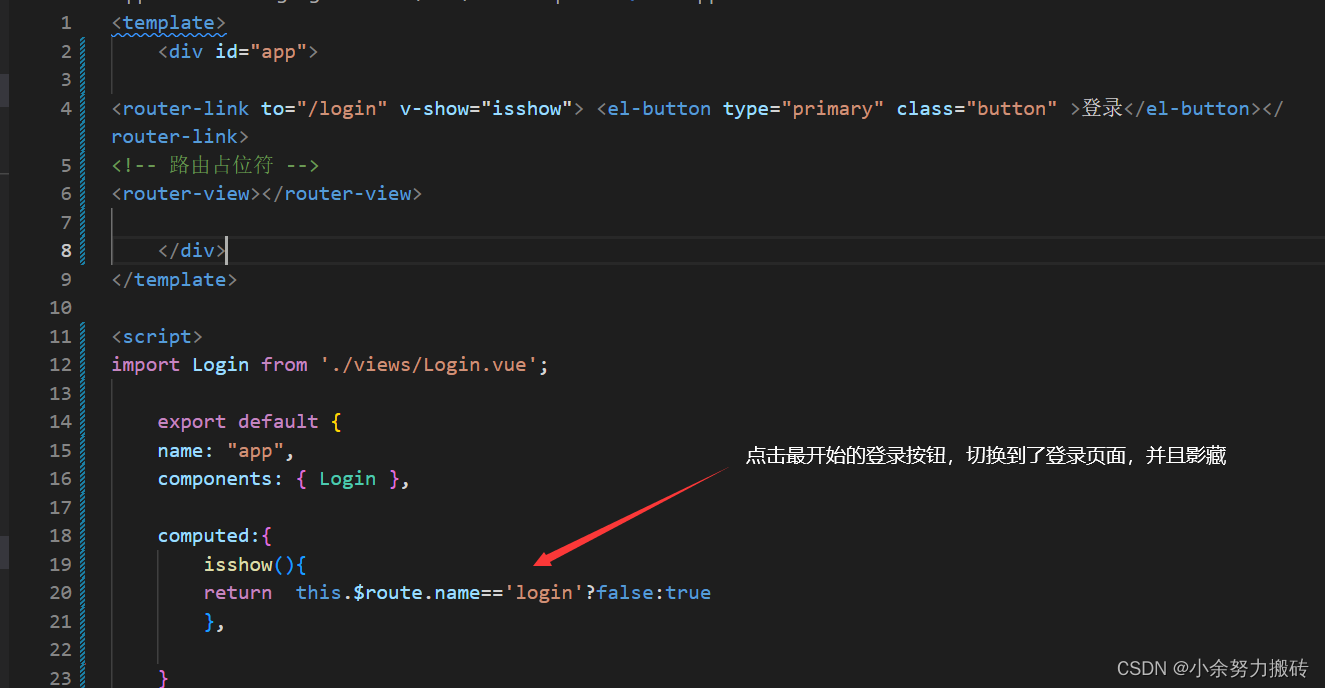
** 在父组件APP中我们需要写入路由、占位符、给router-link绑定了v-show是为了让点击登录,登录按钮就会消失,其中也使用了element自带的美化按钮,直接使用,前提都是自定义安装中要有**
router代码中注册
3.源码
APP.vue代码
<template>
    <div id="app">
        <!-- 路由占位符 -->
<router-link to="/login" v-show="isshow"> <el-button type="primary" class="button" >登录</el-button></router-link>

<router-view></router-view>

    </div>
</template>

<script>
import Login from './views/Login.vue';

    export default {
    name: "app",
    components: { Login },

    computed:{
        isshow(){
        return    this.$route.name=='login'?false:true
        },

    }
}
</script>
<style>
@import url('./assets/style.css');
.button{
    position: fixed;
    z-index: 9999999;
}
</style>
** 路由组件代码**
<template>
   <div class="login_main">
        <div class="login_box">
            <!-- 登录左边广告框 -->
            <div class="l"></div>
            <div class="r">
                <h1>小余努力搬砖</h1>
                <el-form :model="form" :rules="forRules" ref="fromRef">
                  <el-form-item prop="username">
                        <el-input prefix-icon="el-icon-s-custom" v-model="form.username" placeholder="请输入用户名" ></el-input>
                  </el-form-item>
                  <el-form-item prop="password">
                        <el-input prefix-icon="el-icon-view" type="password" v-model="form.password" placeholder="请输入密码"></el-input>
                  </el-form-item>

                <el-button type="primary" @click="btn" style="width: 100%;">登录</el-button>
                </el-form>
</div>
            <div class="c"></div>
            </div>
</div>

</template>

<script>
export default {
    name: 'Login',

    data() {
        return {
            form:{
                username:'',
                password:''
            },
            forRules:{
                username:[
                    {required:true,message:'用户名不能为空',trigger:'blur'},
                    {min:3,max:10,message:'请输入3~10个字符',trigger:'blur'}
                ],
                password:[
                    {required:true,message:'密码不能为空',trigger:'blur'},
                    {min:3,max:10,message:'请输入3~10个字符',trigger:'blur'}
                ]
            }
        };
    },

    mounted() {

    },
btn(){
            // this.$refs.fromRef.validate(isOK=>{
            //     if(isOK){
            //         console.log('1');
            //     }else{
            //         alert('请正确输入')
            //     }
            // })
            this.$refs.fromRef.validate().then(()=>{

            }).catch(()=>{
                // alert('请正确输入')
            })
        }
    },

};
</script>

<style scoped>
.login_main{
        height: 100%;
        width: 100%;
        background: url(../assets/img/login_bg.jpg) no-repeat;
        background-size: cover;
    }
    .login_box{
        width: 900px;
        height:515px;
        background: #fff;
        box-shadow: 0px 0px 10px 5px #ddebfe;
        position: absolute;
        top:50%;
        left:50%;
        transform: translate(-50%,-50%);
        border-radius: 12px 0px 0px 12px;
    }
    .login_box .l{
        background: url(../assets/img/login_left.jpg) no-repeat;
        width: 350px;
        height: 515px;
        border-radius: 12px 0px 0px 12px;
    }
    .login_box .r{
        width: 550px;
        box-sizing: border-box;
        padding: 30px;
    }
    h1{
        text-align: center;
        color: #4c4c4c;
    }
    .button{
        width: 100%;
    }
</style>
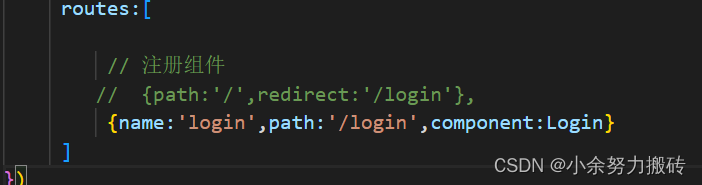
router代码
 routes:[

         // 注册组件
        //  {path:'/',redirect:'/login'},
         {name:'login',path:'/login',component:Login}
     ]
})
assets css代码引入到app.vue中
html,body,div,ul,p{
    margin: 0;
    padding: 0;
}
html,body,#app{
    height: 100%;
}
.l{
    float: left;
}
.r{
    float: right;
}
.c{clear: both;}
两张图片也放在assets使用时引入,如下点击自取图片
背景图片
登录图片
结束语:分享到此就结束啦,有问题随时私聊
版权归原作者 小余努力搬砖 所有, 如有侵权,请联系我们删除。