
文章目录

📋前言
这篇文章记录一下 Vue3 计算属性和侦听器 (computed、watch) 实战的内容,这篇文章我们在有计算属性和侦听器的基础上,我们来制作一个简易点餐页面,接下来我们一起来从零到一开始制作。
计算属性和侦听器相关文章推荐:
深入与浅谈 Vue 中计算属性和侦听器的区别和使用(Vue3版本为例)
浅谈在 Vue2 和 Vue3 中计算属性和侦听器的一些变化
🎯项目介绍
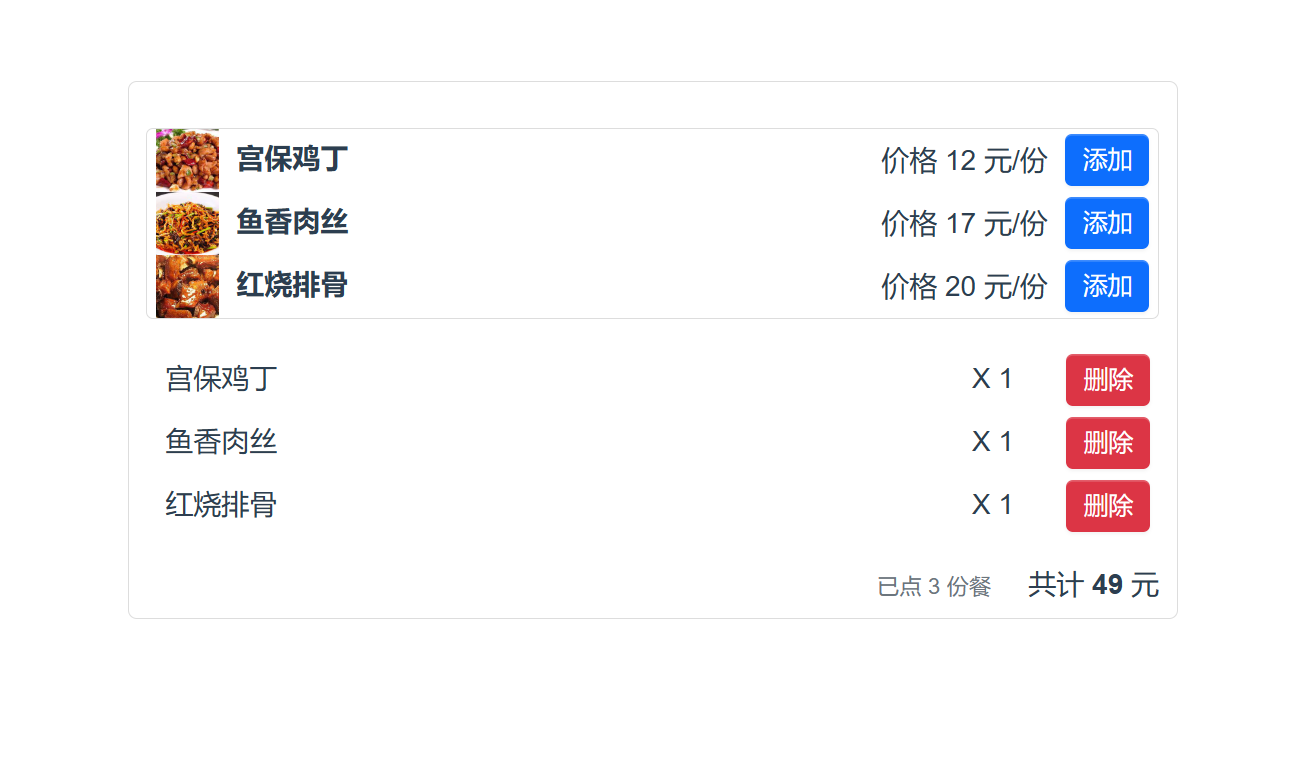
在创建项目之前,我们先简单看一下这次项目需要完成的页面内容,如下图。主页列表罗列着菜品名称、图片介绍,用户通过单机添加按钮,实现菜品添加的点餐功能。最后在页面的下方会显示用户点餐详情以及总数和总价,同时可以通过单机删除按钮,实现菜品的删除的取消点餐功能。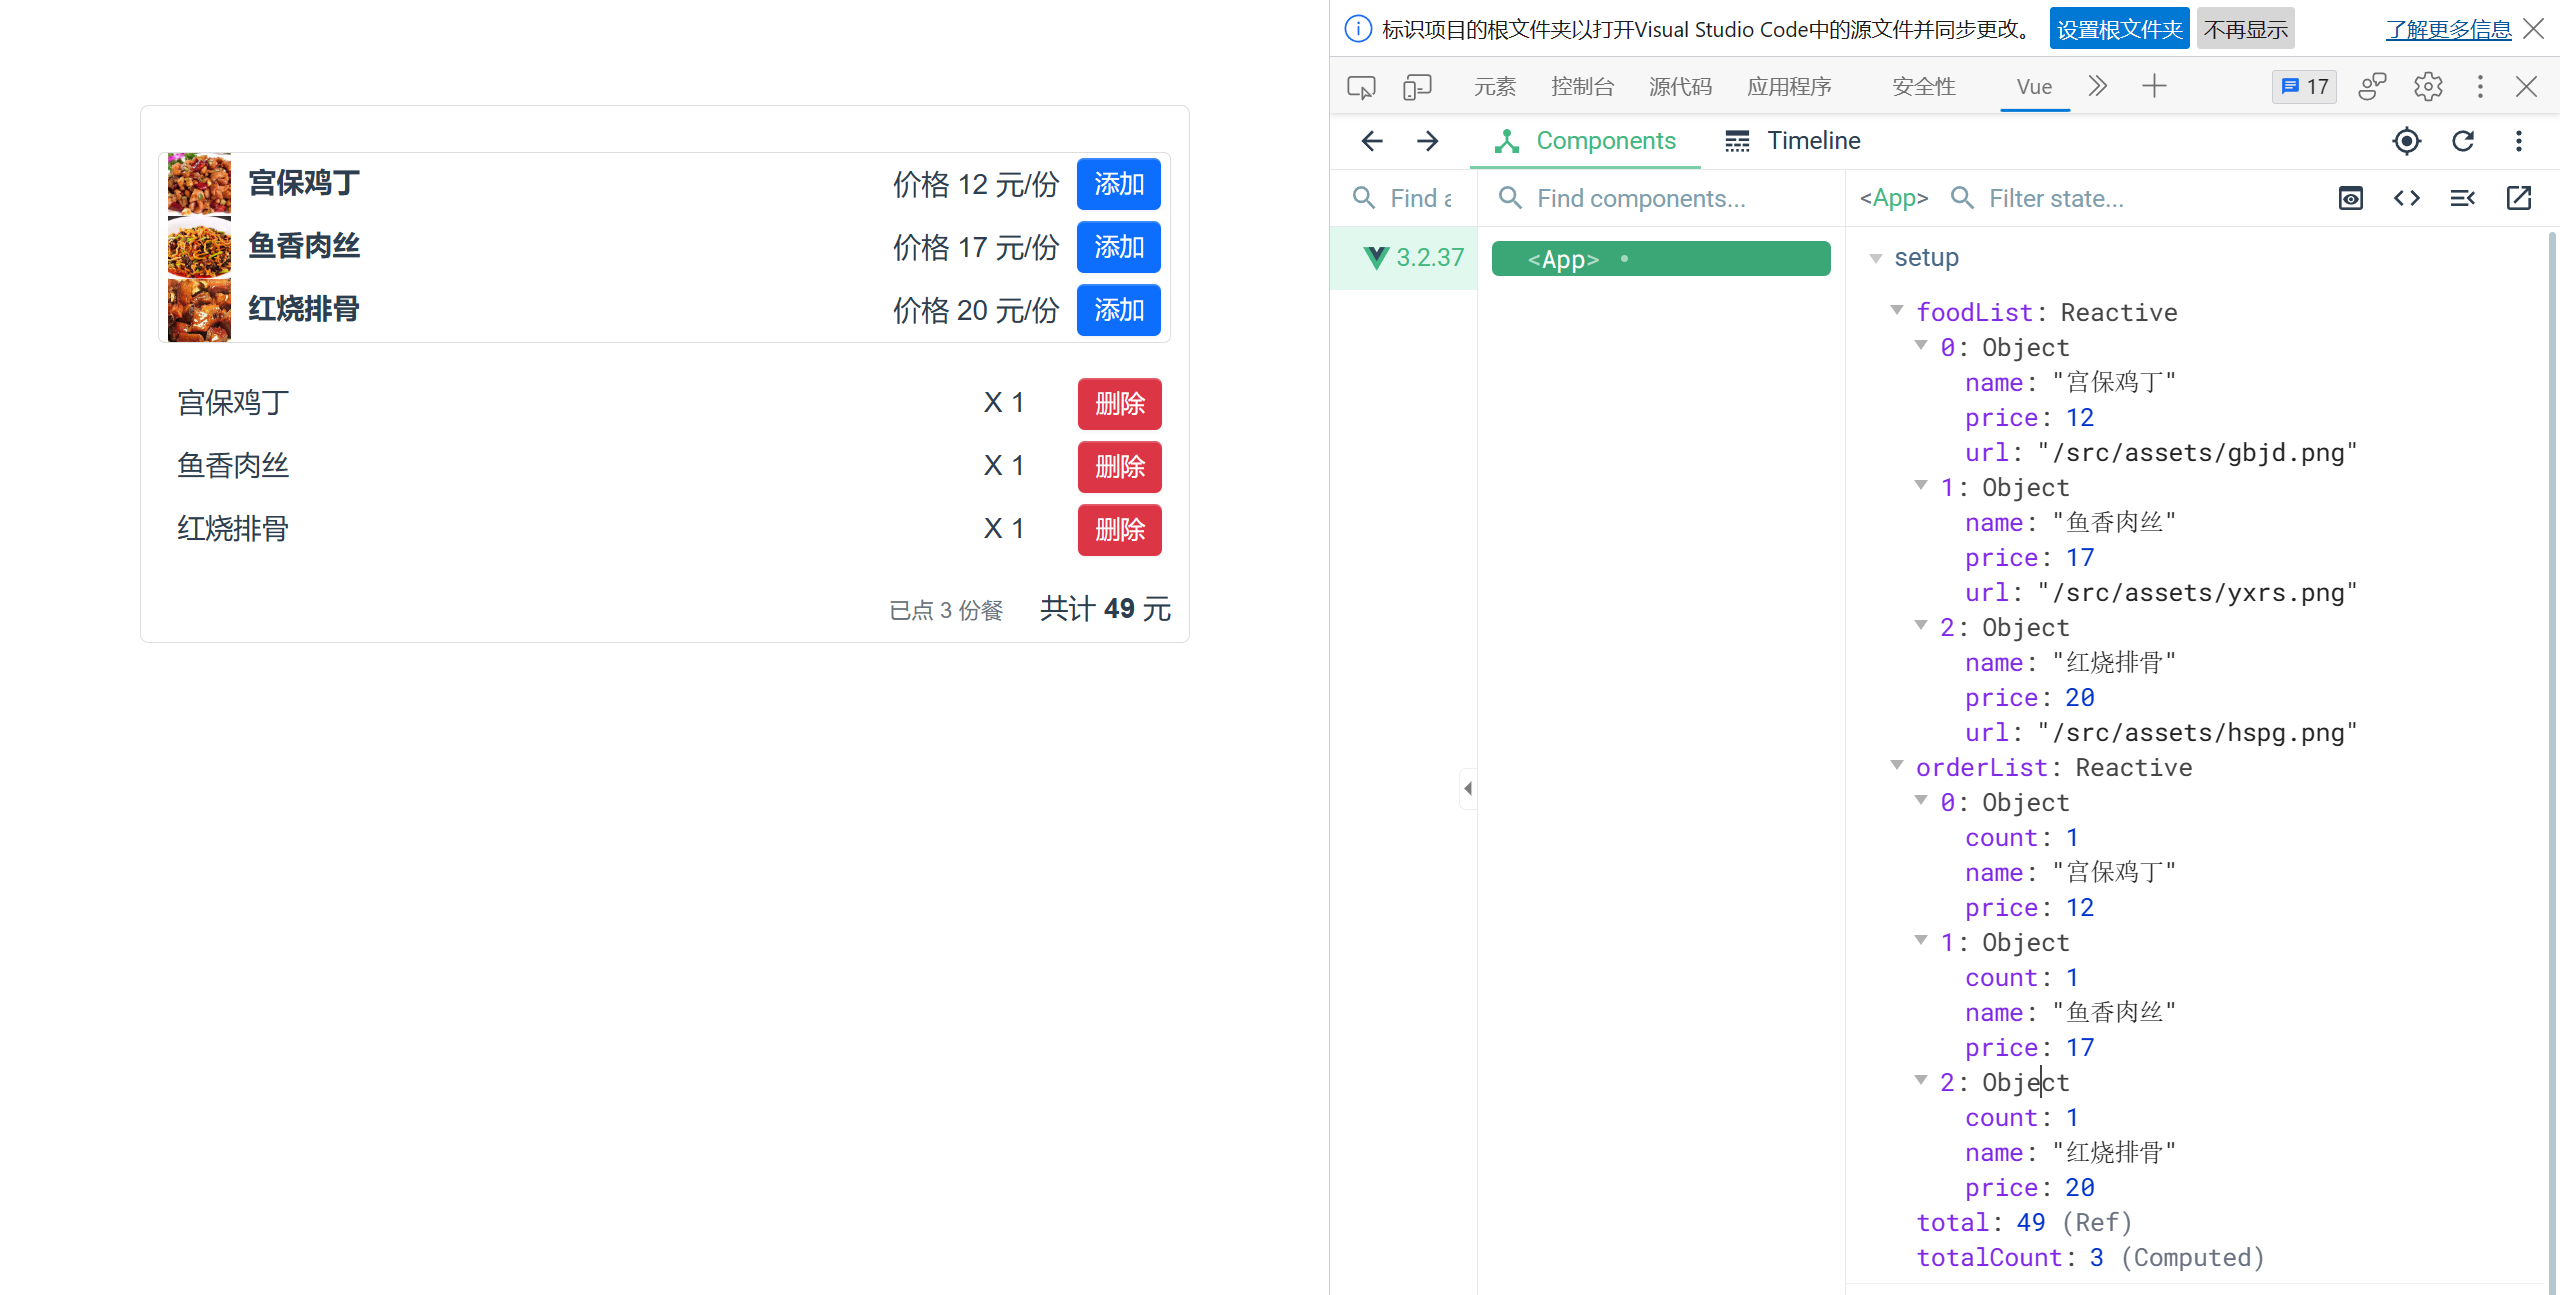
🎯项目创建
要创建一个
Vite
项目,需要先安装
Vite
。可以使用
npm
或者
yarn
进行安装。在命令行中输入:
npm install vite -g  # 全局安装 vite
或者
yarn global add vite  # 全局安装 vite
然后通过以下命令创建一个
Vite
项目,名称是 vite-demo。
npm init vite@latest vite-demo
选择 Vue 。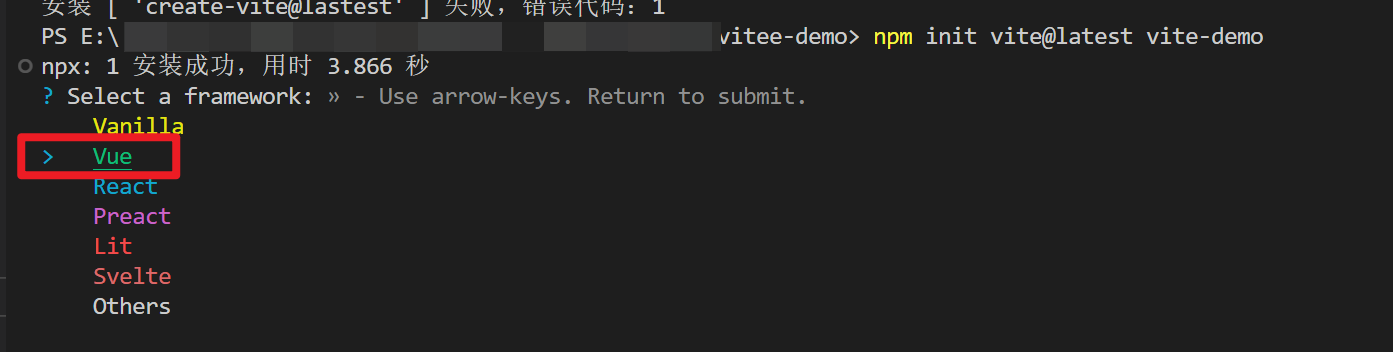
然后选择 TypeScript 。
默认生成的项目结构如下,然后在控制台输入
npm install
安装相关依赖 (主要选择当前文件夹)。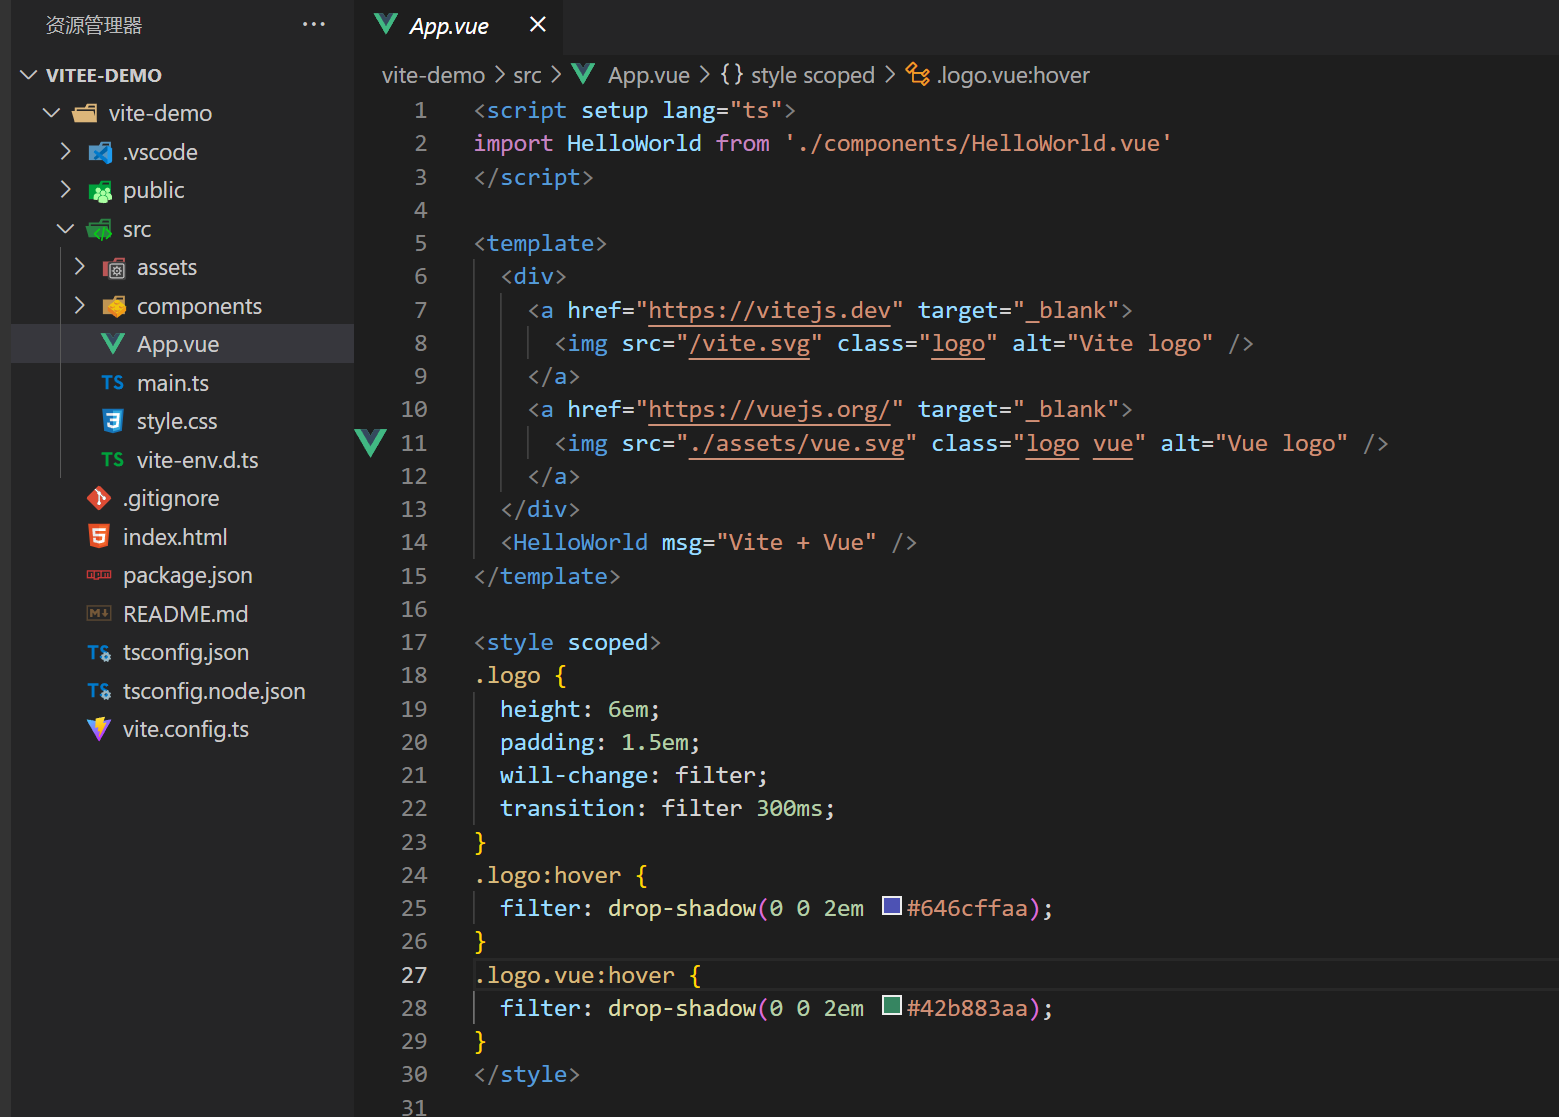
最后输入
npm run dev
启动项目,出现如下页面表示运行成功。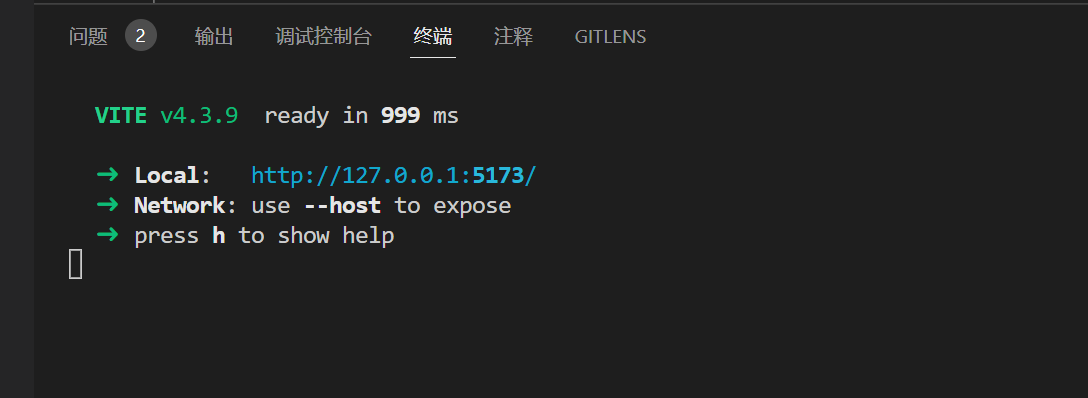

到此项目创建完成,接下来我们来看看具体代码。
🎯代码分析
我们根据上面项目介绍的图片展示,点餐页面分为三个部分,即菜品列表、点餐列表以及消费价格。可以先根据这个页面设计来实现代码的布局。在项目中的
App.vue
文件中,修改
template
模板部分的代码。
<template><divclass="food-container"><divclass="food-wrap"><!-- 菜品列表 --><ulclass="food-main"><liv-for="(item, index) in foodList":key="item.name"><img:src="item.url"class="food-image"/><label><span>{{item.name}}</span></label><buttonclass="btn btn-add"@click="orderFood(index)">添加</button><spanclass="food-price">价格 {{item.price}} 元/份</span></li></ul><!-- 点餐列表 --><divclass="food-order"><ulclass="order-main"><liclass="order-item"v-for="(item, index) in orderList":key="item.name"><label>{{item.name}}</label><div><spanclass="order-count"> X {{item.count}}</span><buttonclass="btn btn-delete"@click="removeFood(index)">删除</button></div></li></ul></div><!-- 总消费价格 --><divclass="food-total-price"><span><spanclass="total-count">已点 {{totalCount}} 份餐</span><span>共计 <b>{{total}}</b> 元</span></span></div></div></div></template>
在这段代码里,使用
v-for
指令分别渲染菜品列表和点餐列表。添加按钮和删除按钮分别绑定 orderFood() 和 removeFood() 方法。最后通过 totalCount 的值是否为 0 来显示点餐份数。
接下来我们来实现点餐页面的业务逻辑,修改
App.vue
文件中的
script
部分代码。
<script setup lang="ts">import{ computed, reactive, ref, watch }from'vue';// 菜品接口类interfaceFood{name: string;url: string;price: number;}// 订单接口类interfaceOrder{name: string;price: number;count: number;}// 菜品数据列表const foodList = reactive<Food[]>([{name:'宫保鸡丁',url:'/src/assets/gbjd.png',price:12.0},{name:'鱼香肉丝',url:'/src/assets/yxrs.png',price:17.0},{name:'红烧排骨',url:'/src/assets/hspg.png',price:20.0},]);// 订单数据列表const orderList = reactive<Order[]>([]);// 总价const total =ref(0);// 总个数const totalCount =computed(():number=>{let count =0;
  orderList.forEach((item: Order)=>{
    count += item.count;})return count;});// 点餐函数const orderFood =(index: number):void=>{// 查看当前菜品是否已经被点const isOrdered = orderList.filter((item: Order):boolean=>{return item.name === foodList[index].name;});if(isOrdered.length){
    isOrdered[0].count +=1;}else{
    orderList.push({name: foodList[index].name,price: foodList[index].price,count:1,})}};// 取消点餐操作const removeFood =(index: number):void=>{if(orderList[index].count >0){
    orderList[index].count -=1;}if(orderList[index].count ===0){
    orderList.splice(index,1);}};// 监听订单列表变化watch(()=> orderList,()=>{
    total.value =0;
    orderList.forEach((order: Order)=>{
      total.value += order.count * order.price;});},{deep:true});</script>
这里首先分别定义了 Food 和 Order 两个类型。然后初始化 foodList、orderList 和 total 变量,对应的菜品列表、点餐列表和消费总价。接下来使用一个 totalCount 计算属性统计总点餐份数。orderFood() 方法和 removeFood() 方法分别对应模板的添加和删除按钮。最后使用侦听器属性,检测 orderList 对象的变化。通过 orderList 数据变化来计算总点餐花费。这样,一个简单的点餐页面就完成了,运行效果如下。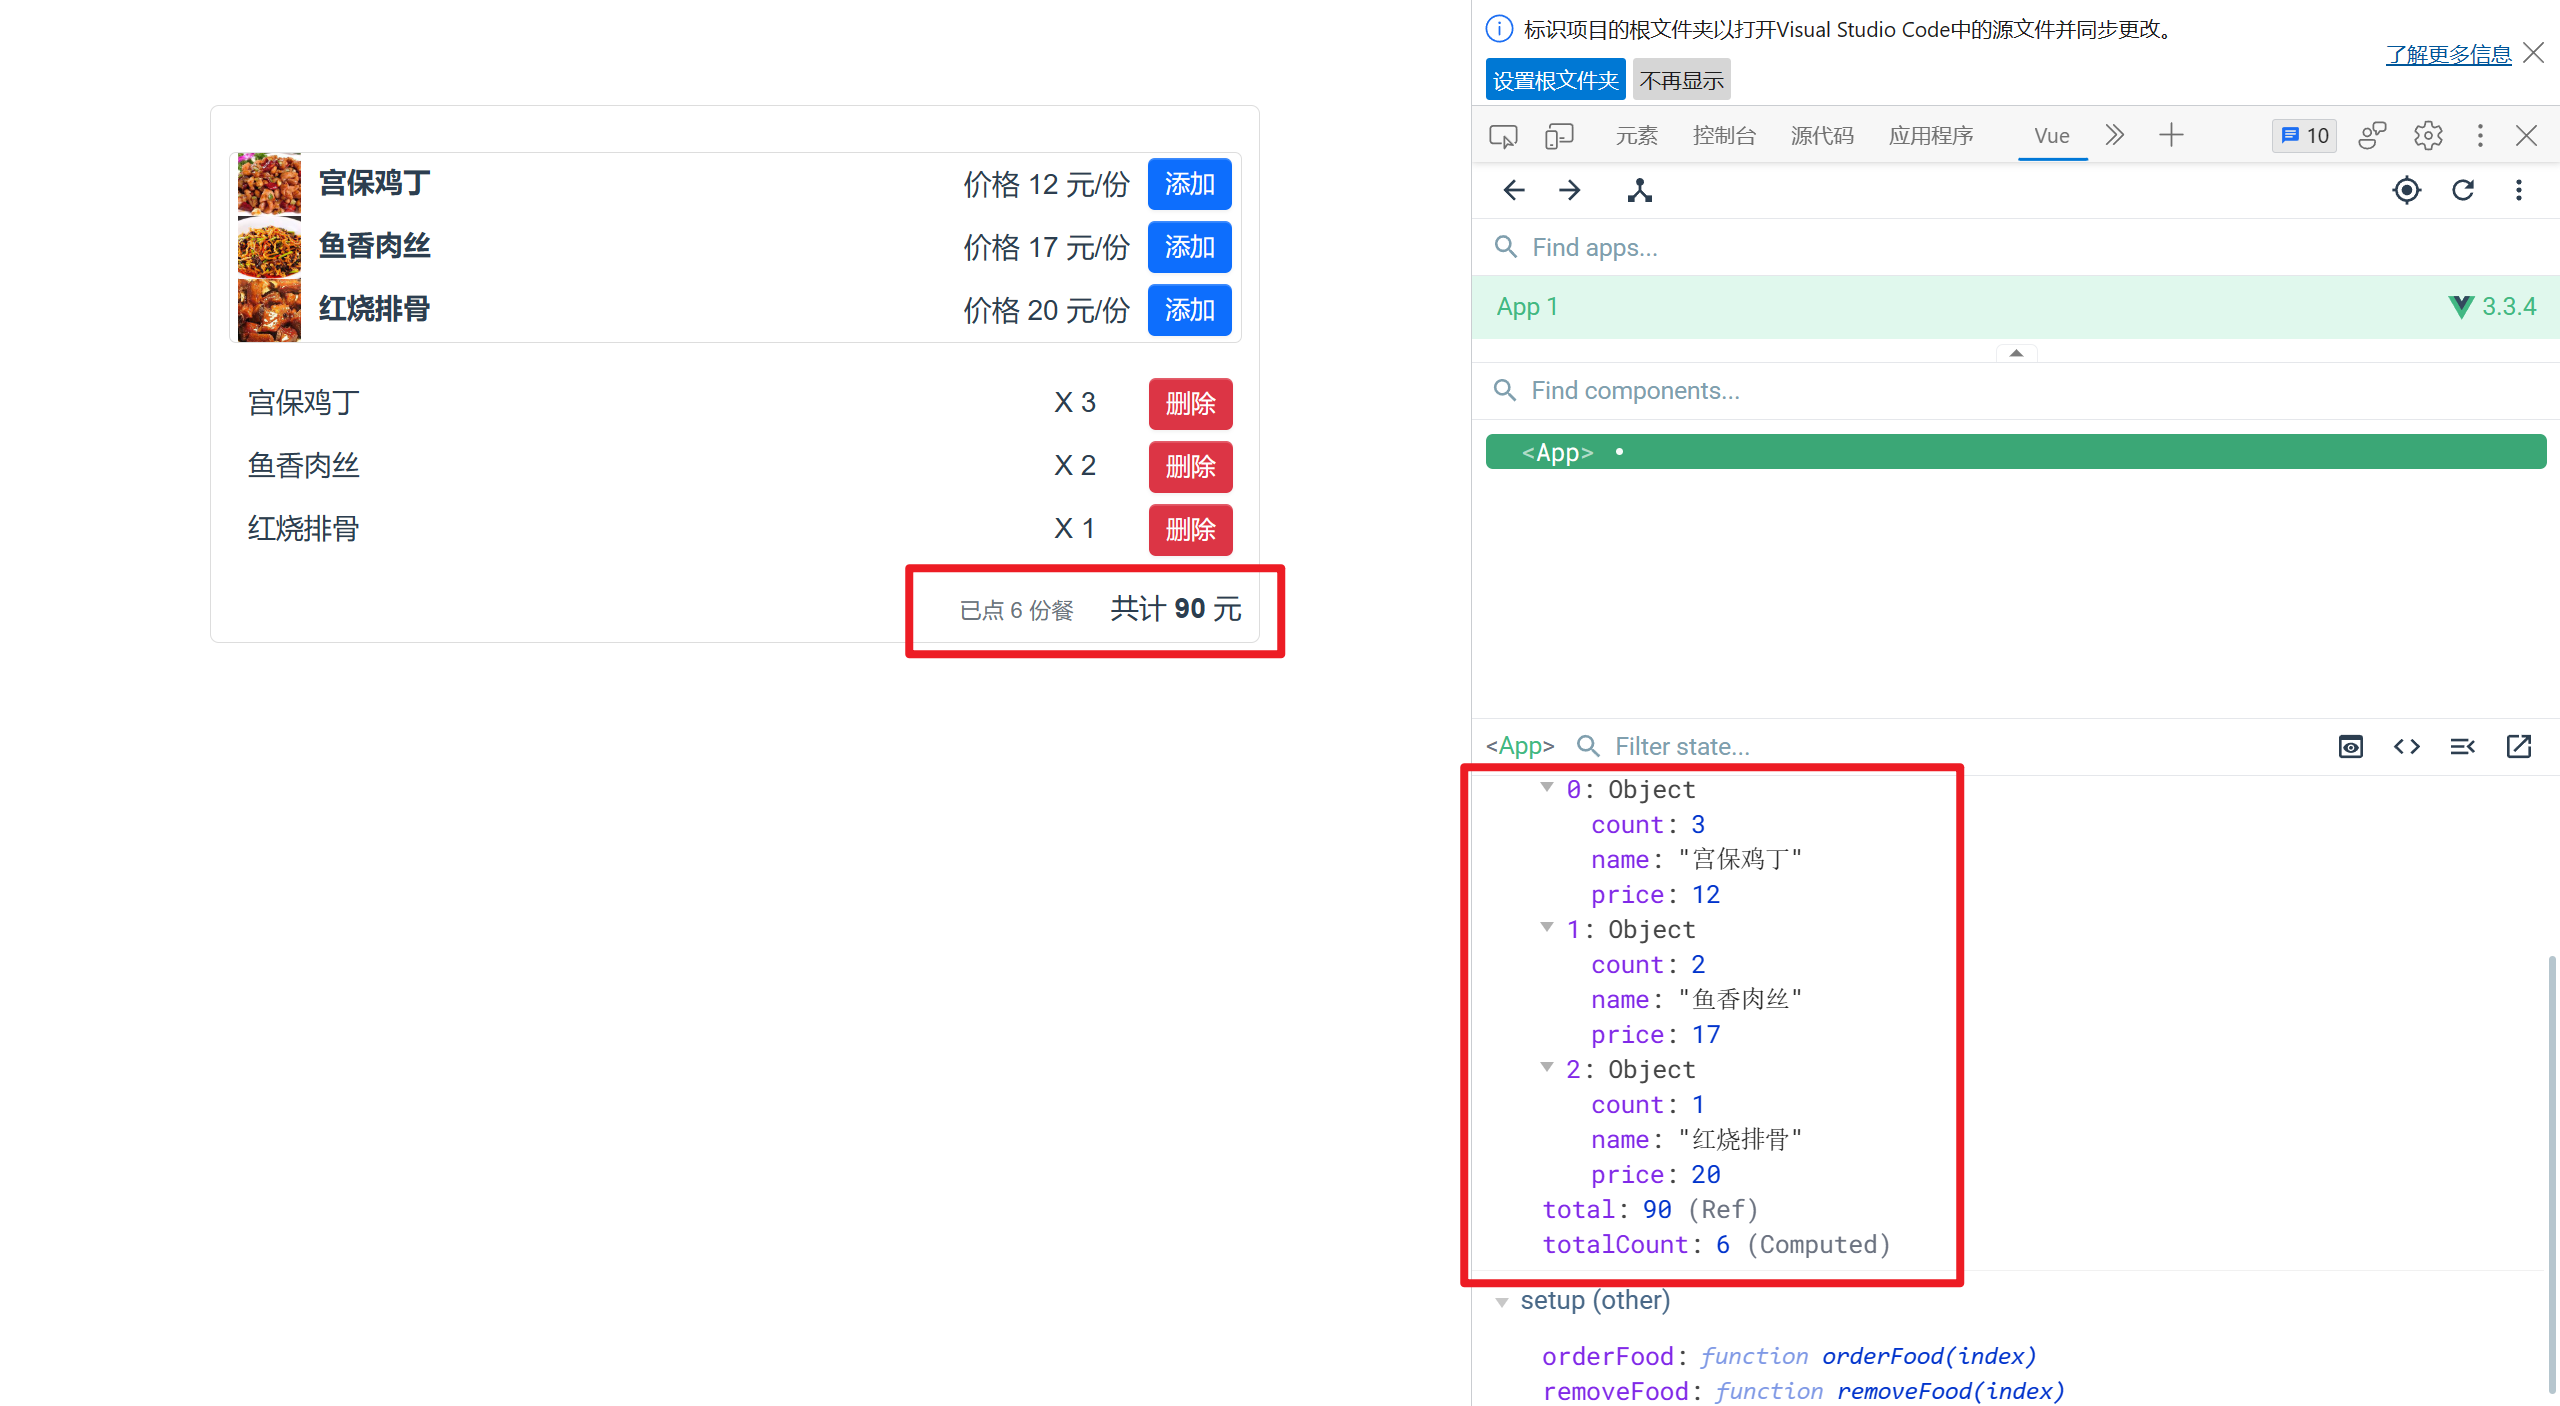
🎯完整代码(含 CSS 代码)
<scriptsetuplang="ts">import{ computed, reactive, ref, watch }from'vue';// 菜品接口类interfaceFood{name: string;url: string;price: number;}// 订单接口类interfaceOrder{name: string;price: number;count: number;}// 菜品数据列表const foodList = reactive<Food[]>([{name:'宫保鸡丁',url:'/src/assets/gbjd.png',price:12.0},{name:'鱼香肉丝',url:'/src/assets/yxrs.png',price:17.0},{name:'红烧排骨',url:'/src/assets/hspg.png',price:20.0},]);// 订单数据列表const orderList = reactive<Order[]>([]);// 总价const total =ref(0);// 总个数const totalCount =computed(():number=>{let count =0;
  orderList.forEach((item: Order)=>{
    count += item.count;})return count;});// 点餐函数const orderFood =(index: number):void=>{// 查看当前菜品是否已经被点const isOrdered = orderList.filter((item: Order):boolean=>{return item.name === foodList[index].name;});if(isOrdered.length){
    isOrdered[0].count +=1;}else{
    orderList.push({name: foodList[index].name,price: foodList[index].price,count:1,})}};// 取消点餐操作const removeFood =(index: number):void=>{if(orderList[index].count >0){
    orderList[index].count -=1;}if(orderList[index].count ===0){
    orderList.splice(index,1);}};// 监听订单列表变化watch(()=> orderList,()=>{
    total.value =0;
    orderList.forEach((order: Order)=>{
      total.value += order.count * order.price;});},{deep:true});</script><template><divclass="food-container"><divclass="food-wrap"><!-- 菜品列表 --><ulclass="food-main"><liv-for="(item, index) in foodList":key="item.name"><img:src="item.url"class="food-image"/><label><span>{{item.name}}</span></label><buttonclass="btn btn-add"@click="orderFood(index)">添加</button><spanclass="food-price">价格 {{item.price}} 元/份</span></li></ul><!-- 点餐列表 --><divclass="food-order"><ulclass="order-main"><liclass="order-item"v-for="(item, index) in orderList":key="item.name"><label>{{item.name}}</label><div><spanclass="order-count"> X {{item.count}}</span><buttonclass="btn btn-delete"@click="removeFood(index)">删除</button></div></li></ul></div><!-- 总消费价格 --><divclass="food-total-price"><span><spanclass="total-count">已点 {{totalCount}} 份餐</span><span>共计 <b>{{total}}</b> 元</span></span></div></div></div></template><style>#app{font-family: Avenir, Helvetica, Arial, sans-serif;-webkit-font-smoothing: antialiased;-moz-osx-font-smoothing: grayscale;text-align: center;color: #2c3e50;margin-top: 60px;}.btn{display: inline-block;padding: 8px 10px;margin-bottom: 0;font-size: 14px;line-height: 14px;text-align: center;vertical-align: middle;cursor: pointer;box-shadow: inset 0 1px rgba(255, 255, 255, 0.2),
    0 1px 2px rgba(0, 0, 0, 0.05);border-radius: 4px;}.btn-add{color: #fff;background-color: #0d6efd;border: none;}.btn-delete{color: #fff;background-color: #dc3545;border: none;}.btn-delete:hover{color: #fff;background-color: #bb2d3b;}.btn-add:hover{color: #fff;background-color: #0b5ed7;}.food-container{width: 600px;margin: 40px auto;}.food-wrap{padding: 10px;border: 1px solid #ddd;border-radius: 5px;}.food-price{float: right;margin-right: 10px;}.food-main{margin-left: 0px;border: 1px solid #ddd;border-radius: 4px;padding: 0px;}.food-image{float: left;height: 100%;}.order-main{margin-left: 0px;padding: 0px;}.order-main li{display: flex;}.order-item{display: flex;flex-direction: row;justify-content: space-between;}li{list-style: none;height: 36px;line-height: 36px;padding: 0 5px;}.food-main li label{float: left;cursor: pointer;vertical-align: middle;margin-right: 6px;position: relative;top: -1px;font-weight: bold;margin-left: 10px;}.food-main li button{float: right;margin-top: 3px;}li:before{content: initial;}li:last-child{border-bottom: none;}.total-count{font-size: 0.8rem;color: #6c757d;margin-right: 21px;}.food-main li:hover{background-color: #ddd;}.order-count{margin-right: 30px;}.food-order{line-height: 40px;padding-left: 6px;margin-top: 5px;}.food-order label{display: inline-block;margin-right: 20px;cursor: pointer;}.food-total-price{display: flex;justify-content: end;}</style>
📝最后
到此文章结束,这就是 Vue3 计算属性和侦听器 (computed、watch) 实战的全部内容了,通过这篇文章我们从零到一制作了一个简易点餐页面,这样可以提高我们使用计算属性和侦听器的熟练程度。
版权归原作者 黛琳ghz 所有, 如有侵权,请联系我们删除。