
theme: smartblue
持续创作,加速成长!这是我参与「掘金日新计划 · 6 月更文挑战」的第n天,点击查看活动详情
本文简介
点赞 + 关注 + 收藏 = 学会了
对于前端来说,网络请求主要就是用
ajax
的方式去处理。所以本文也会站在前端角度简单讲解
Node
中如何使用
http
模块。
前后端对接时,现在常用的请求方法有
GET
、
POST
、
PUT
、
PATCH
、
DELETE
。当然,还有其他方法,但本文主要面向新手,希望能做到快速起步。所以本文只讲
GET
和
POST
这两种最最最常用的方法。
在敲代码前,你首先需要准备一个 编辑器(我用vs code)、浏览器、postman 还有安装好
Node.js
。
创建服务
Node.js
提供了
http
模块,可用于网络请求。
创建一个
js
文件,输入以下代码。(本例的文件命名为 index.js)
const server = http.createServer((res, req) => { req.end('hello world') })

server.listen(8000, () => { console.log('http://localhost:8000') }) ```

解释:


- ```Node.js``` 使用 ```commonjs``` 语法,所以引入 ```http``` 模块使用了 ```require``` 的方法。
- ```http``` 模块有一个 ```createServer``` 方法,该方法的参数是一个函数,函数里又有2个参数,```res``` 是前端发送请求带过来的信息;```req``` 是后端返回信息给前端时的一些方法和属性的集合。
- 通过 ```req.end``` 方法,可以返回一段字符串给前端。
- 通过 ```listen``` 方法可以设置需要监听的端口号,第二个参数是一个函数,我在控制台里输出 ```http://localhost:8000``` 是方便启动服务后方便自己打开这个地址。

使用
Node.js
运行上面的代码:
node index.js
运行完上面的命令,控制台应该会输出
,此时打开浏览器,输入
后页面上会出现 “hello world”,证明服务创建成功,并且可以访问了。

## GET
其实上一步所用的也是
GET
方法来访问后端,但上一步并没有解析参数。
get
请求的参数通常是挂在
url
后面的,比如
http://localhost:8000?msg=hello
如果有参数,会用
?
开始,然后使用
参数名=值
 的写法。

如果有多个参数,会使用
&
将参数区分开来:
http://localhost:8000?key1=value1&key2=value2&key3=value3
在
Node.js
里,如果需要解析
url
的参数,可以使用
node:querystring
模块。
```js const http = require('http') // 引入 htpp 模块 const querystring = require('node:querystring') // 引入 node:querystring 模块解析url
const server = http.createServer((req, res) => { console.log('method: ', req.method) // 打印请求方法,GET
const url = req.url console.log('url: ', url) // 打印被访问的url
req.query = querystring.parse(url.split('?')[1]) // 通过 ? 问号 分隔参数,并使用 querystring.parse 解析问号后面的参数 console.log('query: ', req.query) // 输出参数 res.end(JSON.stringify(req.query)) // 将参数返回给前端 })
server.listen(8000, () => { console.log('http://localhost:8000') }) ```
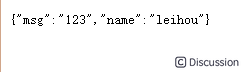
执行上面的代码,并在浏览器访问
http://localhost:8000/?msg=123&name=leihou
在浏览器会显示出如下内容
解析:
- ```req.url``` 可以获取到当前访问后端的 ```url``` 路径
- ```url.split('?')[1]``` 使用字符串的方法根据 ```?``` 进行切割,然后获取后面那段
- 使用 ```querystring.parse``` 方法将参数转换成对象的形式
- ```res.end``` 将参数返回给前端。
- 前端在浏览器地址栏输入 ```http://localhost:8000/?msg=123&name=leihou``` 时,后端会把参数返回,前端在页面中渲染出返回的参数。
## POST
POST
请求会被
GET
更安全,同时也更麻烦。不能直接在浏览器地址栏输入
url
 请求。

你可以写一段前端代码,通过
ajax
的方式请求。但本文主要讲解
Node.js
,所以我还是建议你使用
postman
发起
POST
请求。因为
postman
 无需你处理跨域等问题。

```js const http = require('http') const server = http.createServer((req, res) => { if (req.method === 'POST') { // 数据格式 console.log('content-type', req.headers['content-type']) // 接收数据 let postData = '' req.on('data', chunk => { postData += chunk.toString() }) req.on('end', () => { console.log(postData) res.end('hello world') // 在这里返回,因为是异步 }) } })

server.listen(8000 () => { console.log('http://localhost:8000') }) ```

和
GET
不同,
POST
接收数据需要用
req.on('data')
进行接收,用
req.on('end')
 处理接收数据完成的操作。

在
Node.js
里除了接收数据外,其他用法和
GET
 有点像。

最后在
postman
访问
,并在
Body
的
raw
里填写
JSON
数据

按下
Send
键后,控制台会输出
postman
 发送过来的数据。

## 综合实例

如果理解了
GET
和
POST
 请求的话,我们就可以尝试将这两个请求结合起来使用了。

```js const http = require('http') const querystring = require('node:querystring')

const server = http.createServer((req, res) => { const method = req.method const url = req.url const path = url.split('?')[0] const query = querystring.parse(url.split('?')[1])

// 设置返回格式 JSON res.setHeader('Content-type', 'application/json') // 这里返回JSON。如果是 text/html 返回html

// 返回的数据 const resData = { method, url, path, query, }

// 返回 if (method === 'GET') { res.end( JSON.stringify(resData) ) } if (method === 'POST') { let postData = '' req.on('data', chunk => { postData += chunk.toString() }) req.on('end', () => { resData.postData = JSON.parse(postData) // 返回 res.end( JSON.stringify(resData) ) }) } })

server.listen(8000, () => { console.log('http://localhost:8000') }) ```

上面的代码最主要是判断
method
是
GET
还是
POST
 ,因为两者接收数据的方式是不一样的。

你可以运行上面的代码,尝试在浏览器和
postman
各发送一下
GET
和
POST
```
测试一下。
推荐阅读
👍《『uni-app』web-view》
👍《『uni-app、小程序』蓝牙连接、读写数据全过程》
👍《Vue3 - $attrs 的几种用法(1个或多个根元素、Options API 和 Composition API)》
👍《Vue3 过10种组件通讯方式》
版权归原作者 德育处主任Pro 所有, 如有侵权,请联系我们删除。