文章目录
- 一、准备工作- - 1. 安装Anaconda、pycharm- 2. Jupyter官网- 3. Jupyter常用命令- 二、PyCharm配置 Jupyter Notebook- - 1. 启动Jupyter Notebook 服务器- 2. 复制URL 地址- 3. 配置Jupyter服务器- - 访问令牌 token注意事项- 4. Jupyter服务器设置密码(避免每次输入token)- - 输入密码登录- 三、测试 Jupyter Notebook- - 1. 新建Jupyter Notebook文件- 2. 运行单元- - 未启动Jupyter- 启动Jupyter
- 注意如果jupyter notebook不能运行???,则安装Jupyter Lab
- Jupyter Lab | 安装、配置、插件推荐、多用户使用教程
- Jupyter Lab安装和配置- - 1.Jupyter Lab安装- 2.Jupyter Lab配置- 3. Jupyter Lab启动- 4. Jupyter Lab插件推荐- 5. Jupyter Lab多用户使用
一、准备工作
1. 安装Anaconda、pycharm
(也可以使用独立安装和使用,无需依赖 Anaconda)
pip install jupyter notebook
2. Jupyter官网
3. Jupyter常用命令
Jupyter
usage: jupyter [-h][--version][--config-dir][--data-dir][--runtime-dir][--paths][--json][--debug][subcommand]

Jupyter: Interactive Computing

positional arguments:
subcommand     the subcommand to launch

optional arguments:
-h, --help     show this help message and exit--version      show the versions of core jupyter packages and exit
--config-dir   show Jupyter config dir
--data-dir     show Jupyter data dir
--runtime-dir  show Jupyter runtime dir--paths        show all Jupyter paths. Add --jsonfor machine-readable format.
--json         output paths as machine-readable json
--debug        output debug information about paths

Available subcommands: bundlerextension console dejavu events execute kernel kernelspec lab labextension labhub
migrate nbclassic nbconvert nbextension notebook qtconsole run script server serverextension troubleshoot trust

Please specify a subcommand or one of the optional arguments.
二、PyCharm配置 Jupyter Notebook
1. 启动Jupyter Notebook 服务器
终端输入:
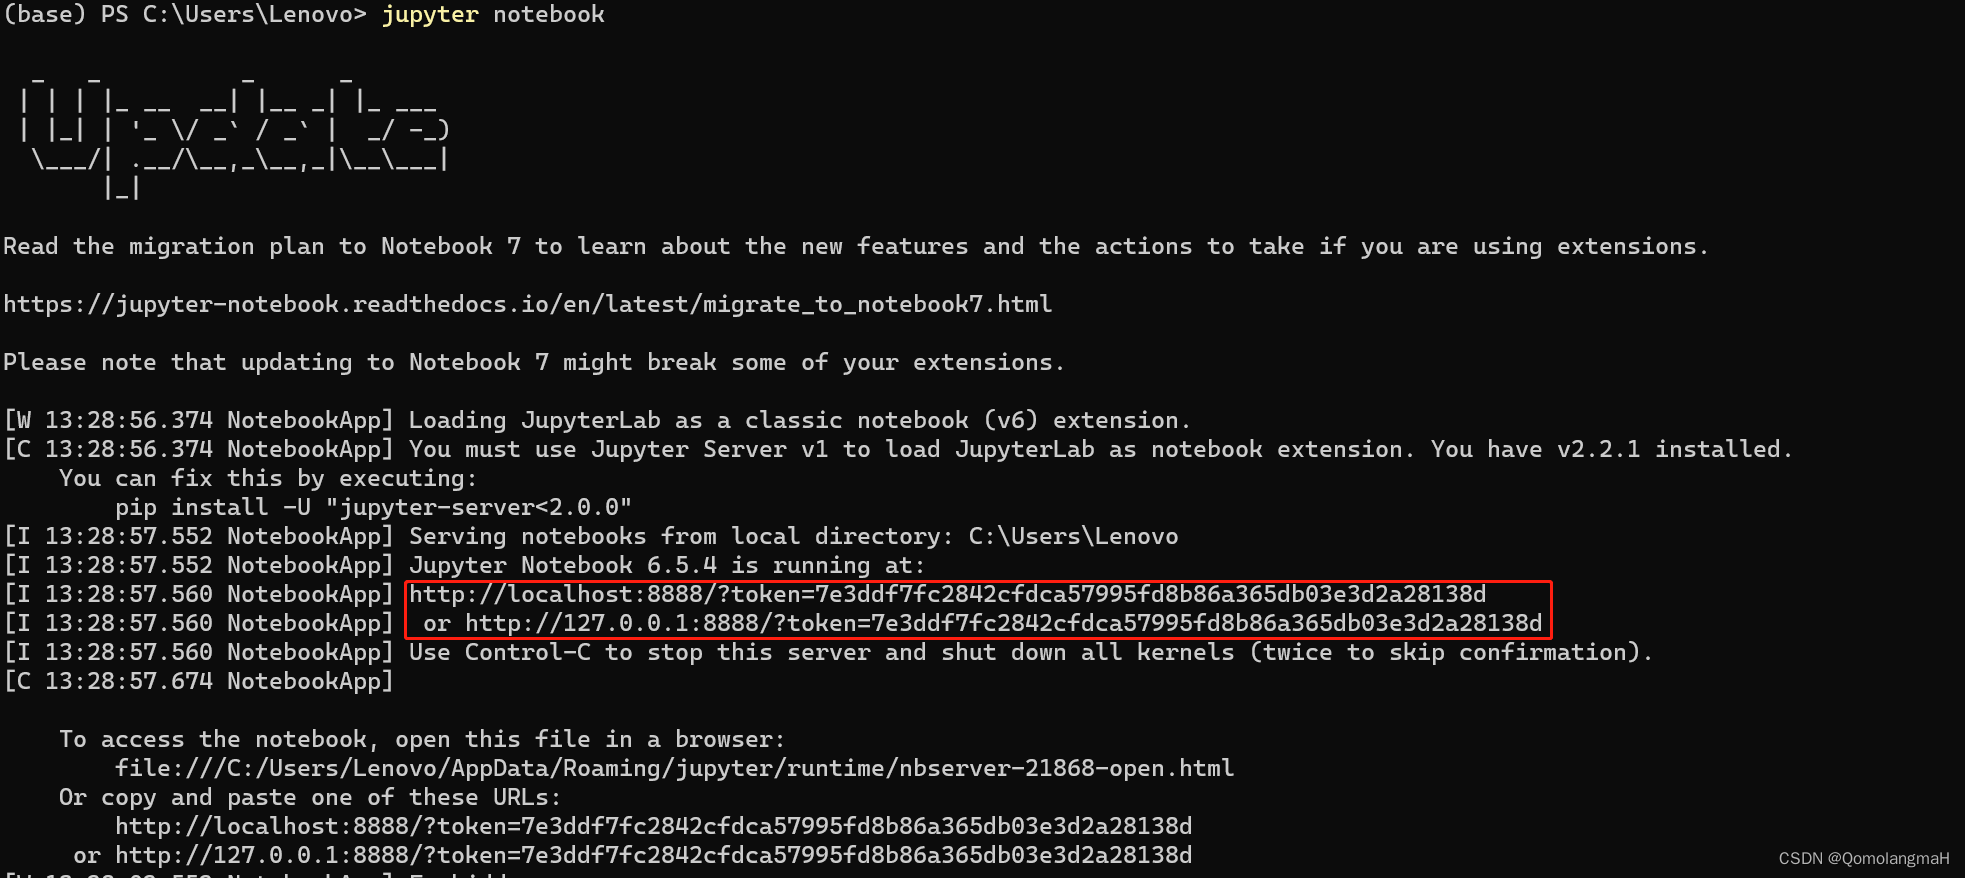
jupyter notebook
2. 复制URL 地址
如图,终端中显示 Jupyter Notebook 服务器的 URL 地址(通常是 http://localhost:8888/),复制如下任一链接(包括token部分)
3. 配置Jupyter服务器
- 打开项目:


- 或直接找:
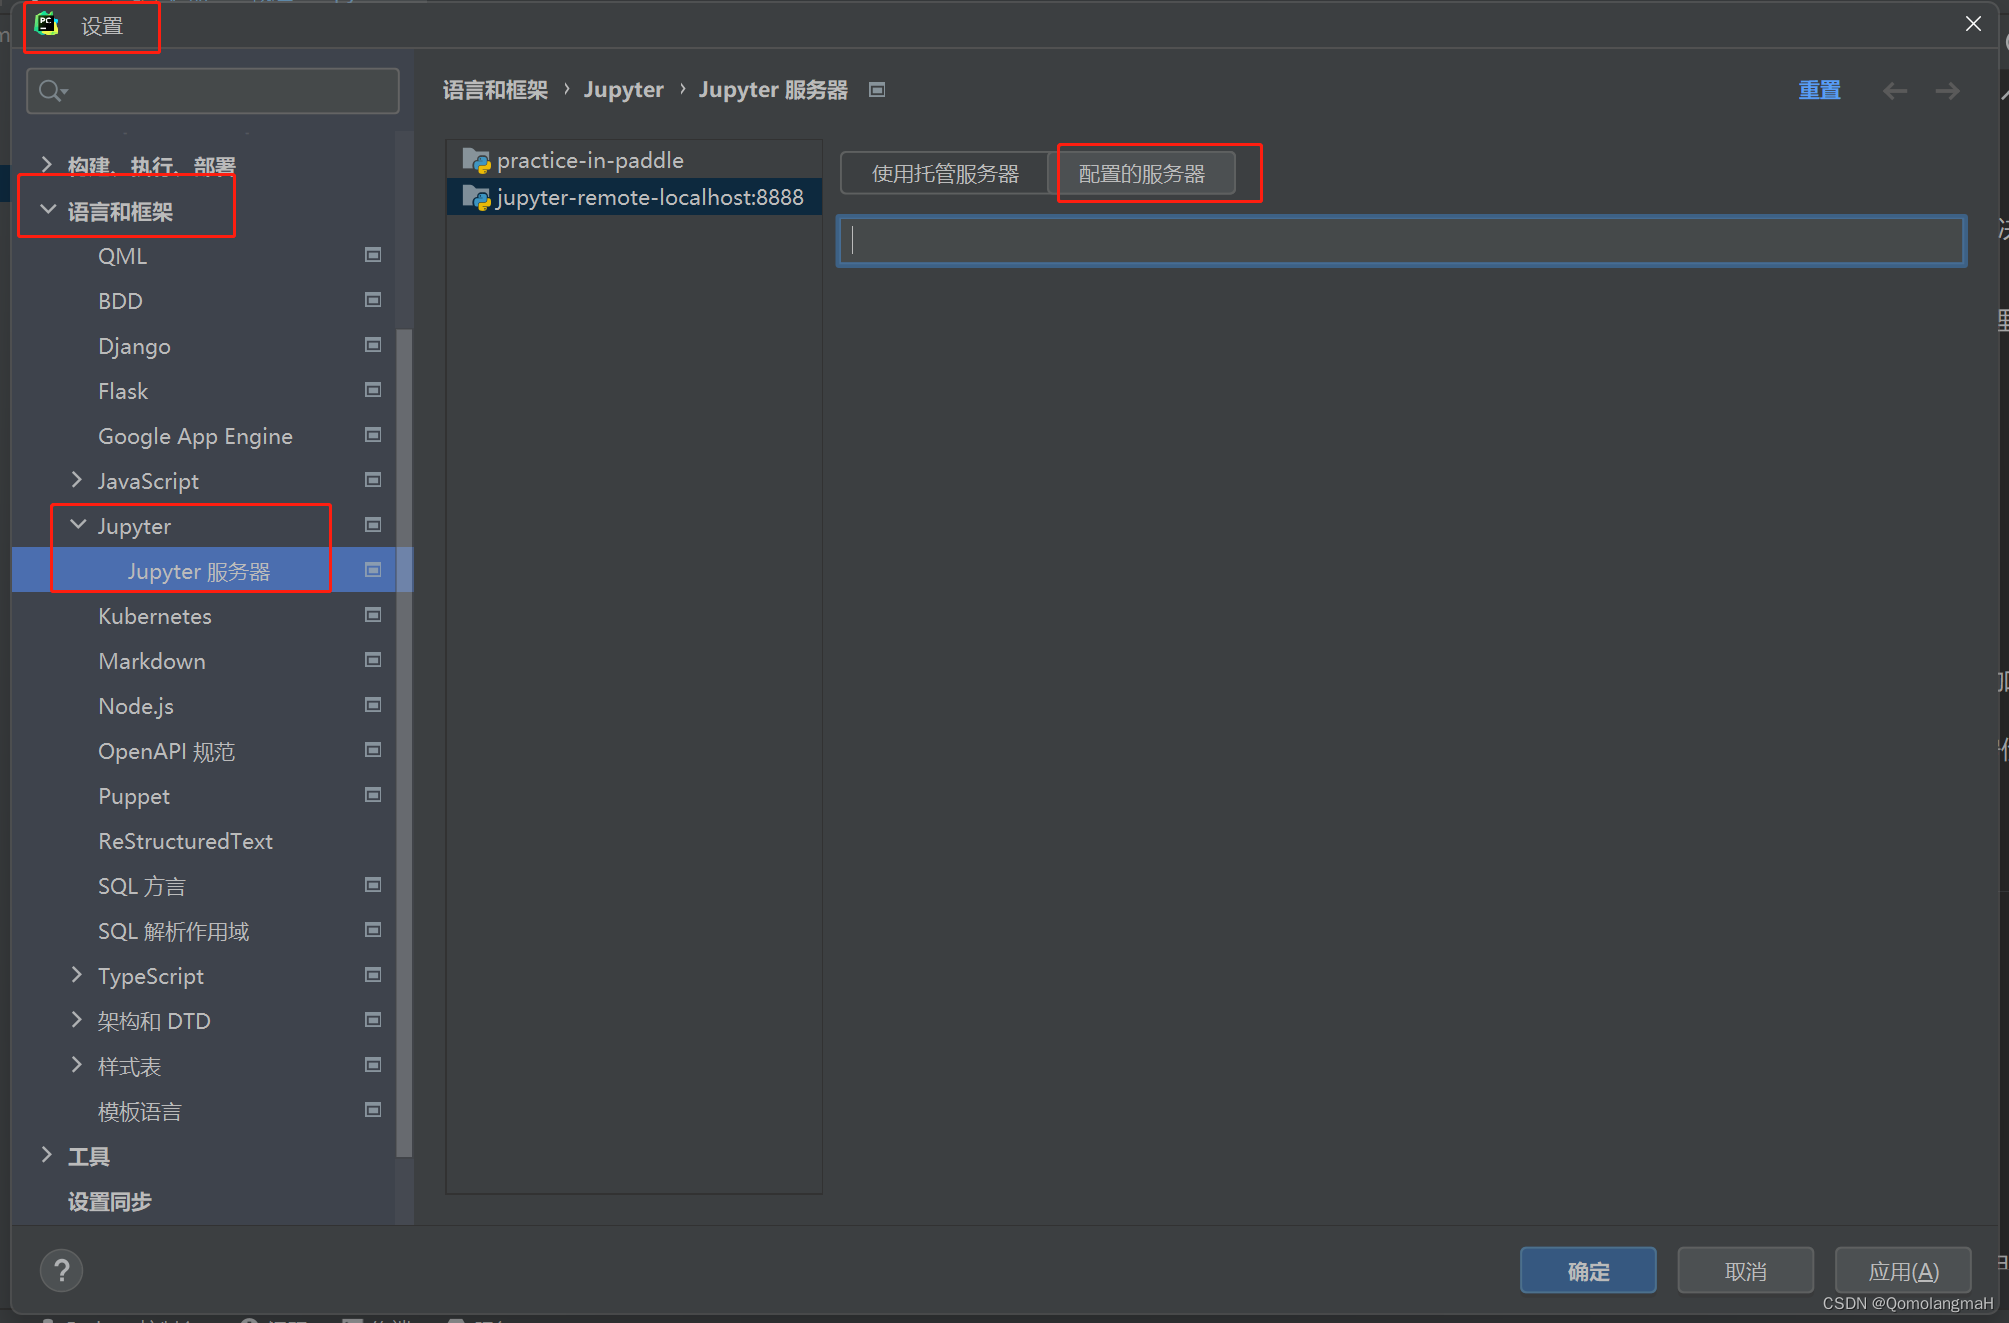
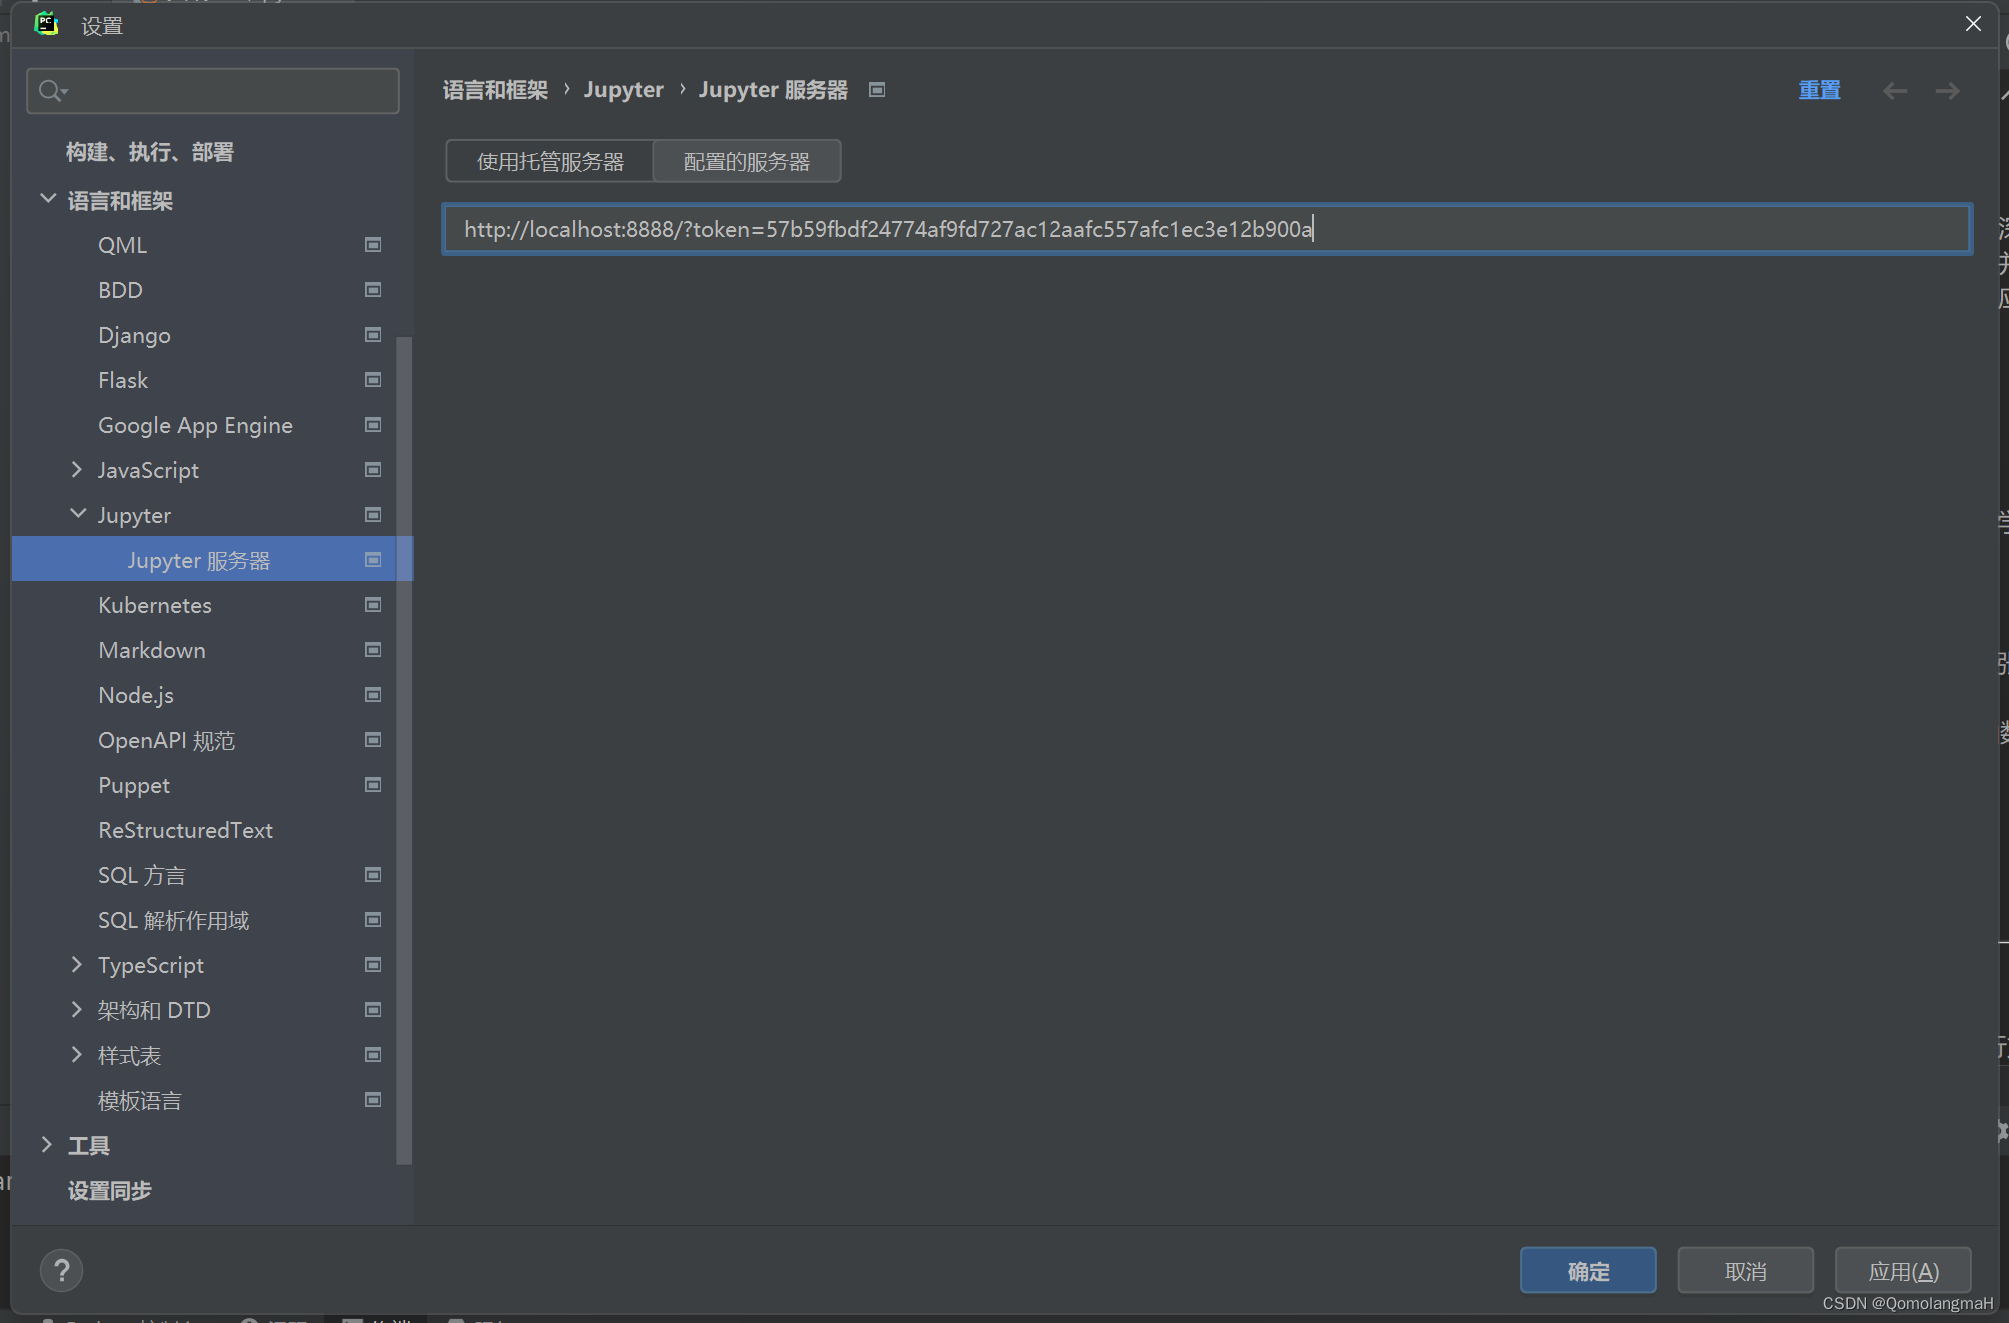
- 填入上述的链接(包括访问令牌 token)
访问令牌 token注意事项
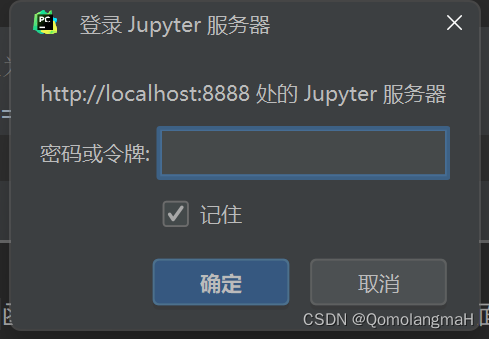
每次Jupyter提供的token不一样,若重新启动Jupyter需重新填充token
4. Jupyter服务器设置密码(避免每次输入token)
终端输入:
jupyter notebook password
注意:输入密码不显示

建议设置简单密码(如123456)
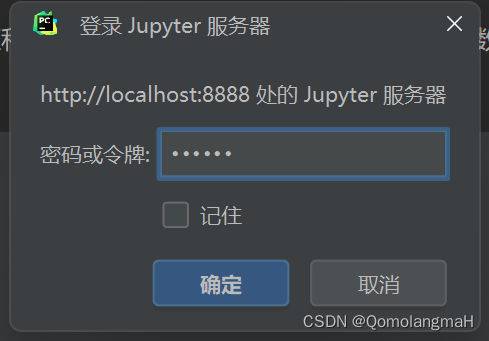
输入密码登录
三、测试 Jupyter Notebook
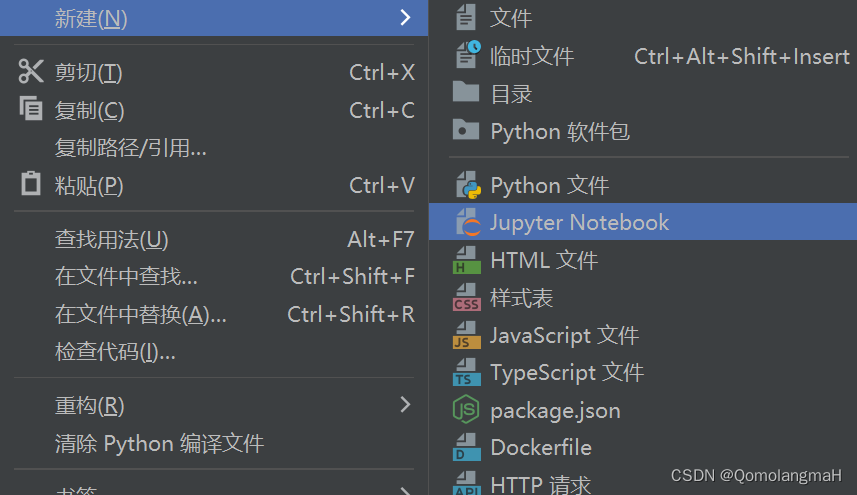
1. 新建Jupyter Notebook文件
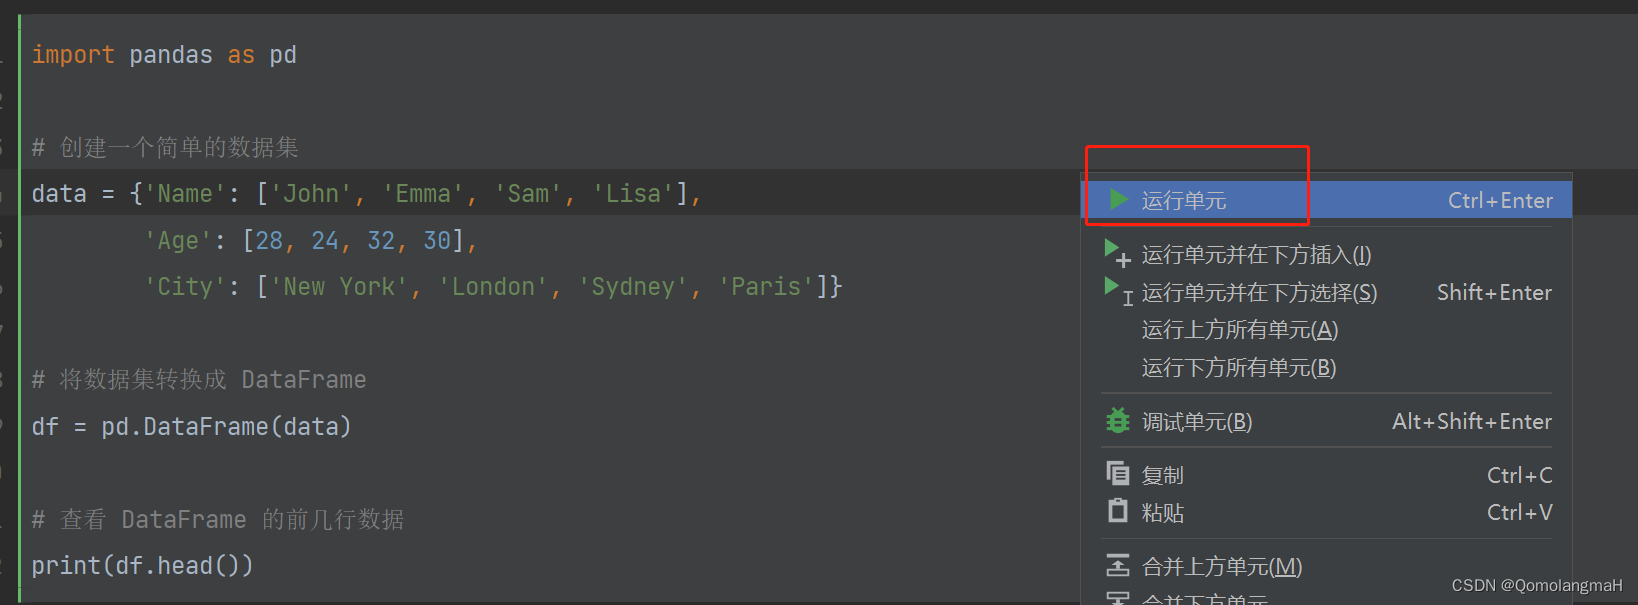
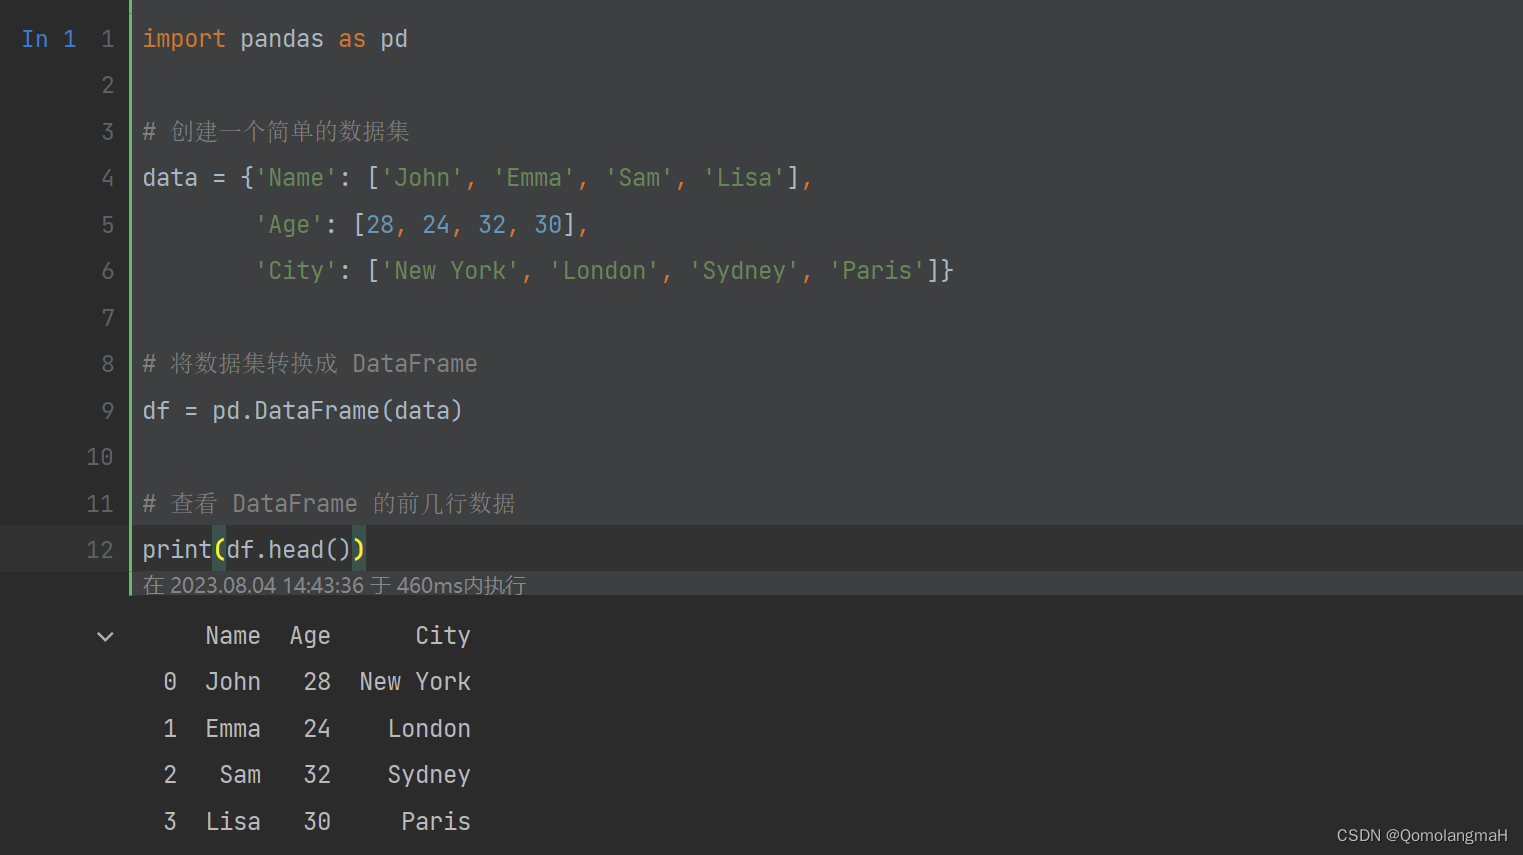
2. 运行单元
import pandas as pd

# 创建一个简单的数据集
data ={'Name':['John','Emma','Sam','Lisa'],'Age':[28,24,32,30],'City':['New York','London','Sydney','Paris']}# 将数据集转换成 DataFrame
df = pd.DataFrame(data)# 查看 DataFrame 的前几行数据print(df.head())
鼠标右键
未启动Jupyter

启动Jupyter
注意如果jupyter notebook不能运行???,则安装Jupyter Lab
Jupyter Lab | 安装、配置、插件推荐、多用户使用教程
首先相信很多使用过python的人都或多或少地了解过
Jupyter Notebook
这个应用。
Jupyter Notebook
是一个开源Web应用程序,可让用户创建和共享包含实时代码、公式、可视化和叙述文本的文档。 用途包括:数据清理和转换、数值模拟、统计建模、数据可视化、机器学习等等。
而
Jupyter Lab
则是Jupyter的下一代笔记本界面。
Jupyter Lab
是一个基于Web的交互式开发环境,用于Jupyter notebook、代码和数据。
Jupyter Lab
非常灵活,可支持数据科学、科学计算和机器学习领域的广泛工作。
Jupyter Lab
是可扩展和模块化的,其可编写插件来添加新组件并与现有组件相集成。
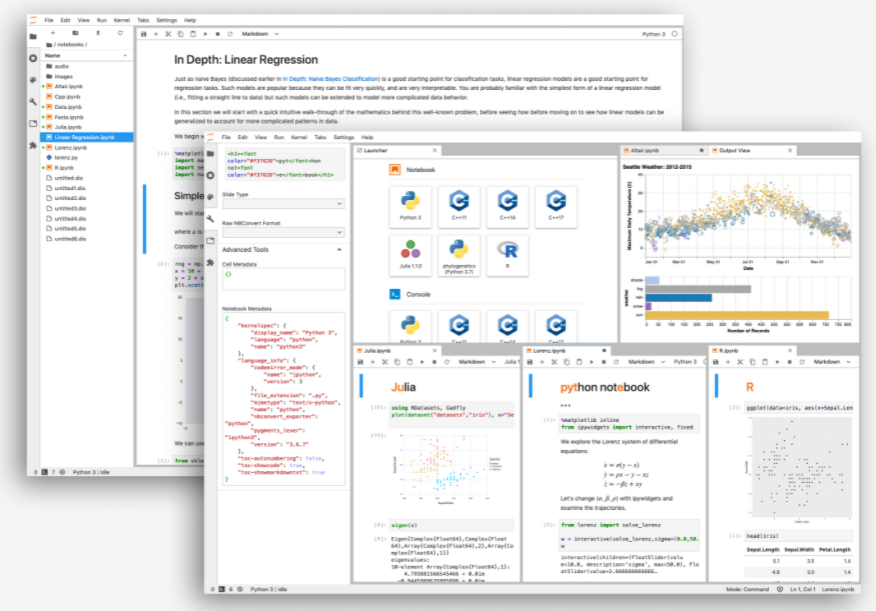
image-20211125180351537
Jupyter Lab安装和配置
1.Jupyter Lab安装
首先进入自己的
Python
环境或者其他
Conda
虚拟环境:
source activate XXXXXXX
然后在
terminal
或者
cmd
输入安装命令:
pip install jupyterlab
//或者
conda install -c conda-forge jupyterlab
等待安装完成!
2.Jupyter Lab配置
使用命令创建配置文件,其会生成
C:\Users\用户名\.jupyter\jupyter_notebook_config.py
或者
/home/用户名/.jupyter/jupyter_notebook_config.py
jupyter lab --generate-config
使用编辑器打开配置文件,在文件上方添加:
c.ServerApp.ip ='*'
c.ServerApp.port =8000
c.ServerApp.open_browser = False
c.ServerApp.root_dir ='/xxxx/xxxx/xxx'
c.ServerApp.password_required = True
c.ServerApp.password ='xxxxxxx'
其中
ip
代表允许访问的ip,
*
代表全部,
port
用于设置端口,
open_browser
用于设置启动lab时是否打开浏览器,
root_dir
用于设置lab启动文件夹根路径,
password_required
用于设置是否需要密码,
password
用于设置(加密)密码,这个加密密码的获取方式如下:
#打开python或者ipython环境

from notebook.auth import passwd
passwd()
#Enter password:
#Verify password:
#Out[2]:'argon2:f704bjkasjdfkjasdjfkasjdkjfklmasjdfkalflakdkf'
复制上方输出的加密密码即可。
当然也可以在
Terminal
强制设置/修改密码:
jupyter lab password
更多配置可以查看默认配置文件下方的注释!
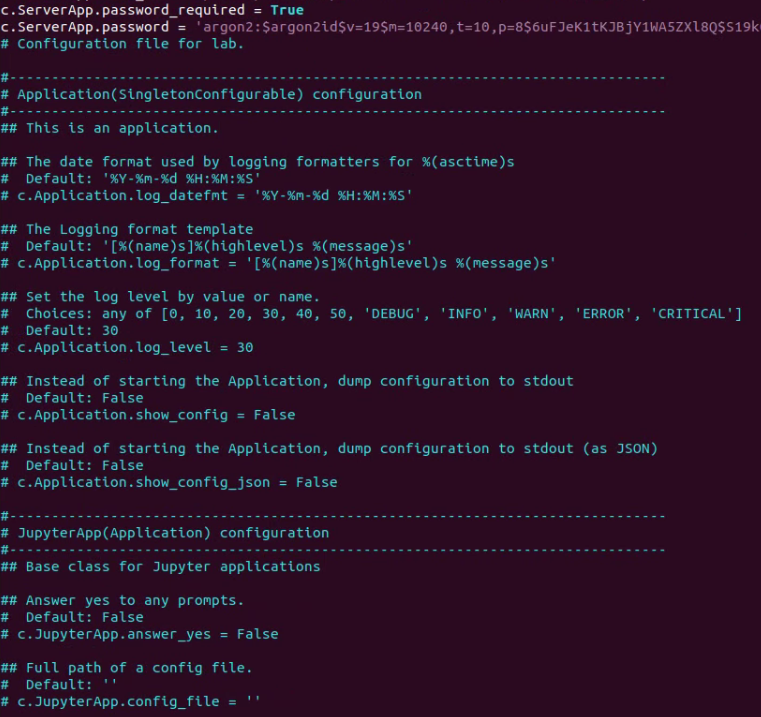
image-20211120214858878
3. Jupyter Lab启动
在
Terminal
输入:
jupyter lab -p 9090--no-browser
更多启动命名可通过
jupyter lab --help
查看,启动之后即可在浏览器输入:ip+端口 ,进行访问,如:
127.0.0.0:9090
。
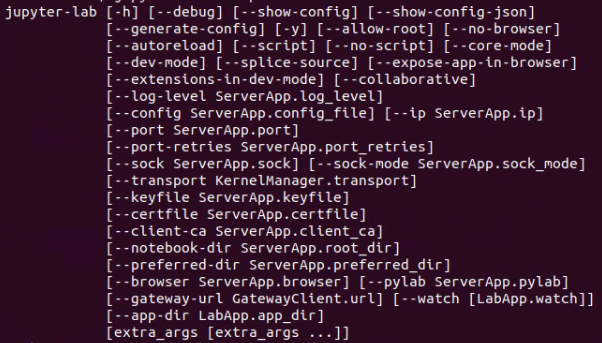
image-20211120215159090
4. Jupyter Lab插件推荐
首先启动Jupyter Lab,在Lab中打开菜单栏的
Setting
里的
Advanced Setting Editor
,接着找到
Extension Manager
,并在右边填入
{'enabled':true}
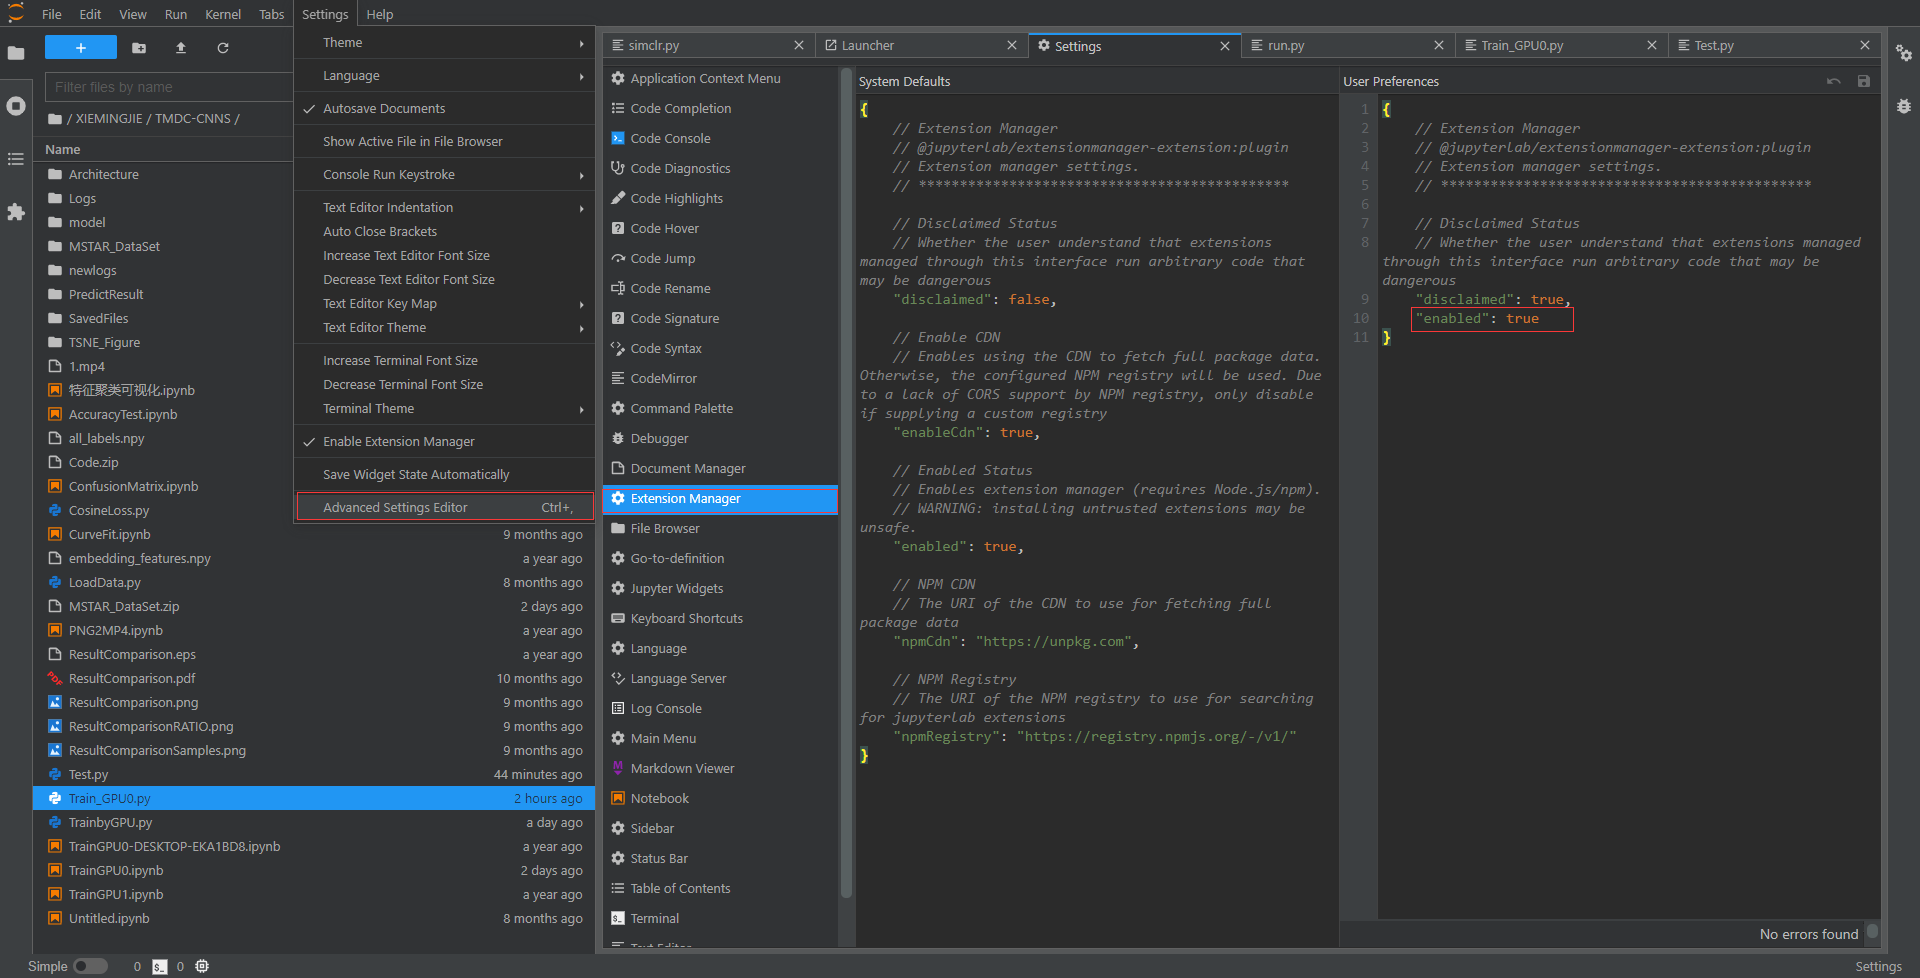
image-20211120215625334
然后即可在左边菜单栏找到插件安装符号,在里面就可以搜索插件,推荐如下:
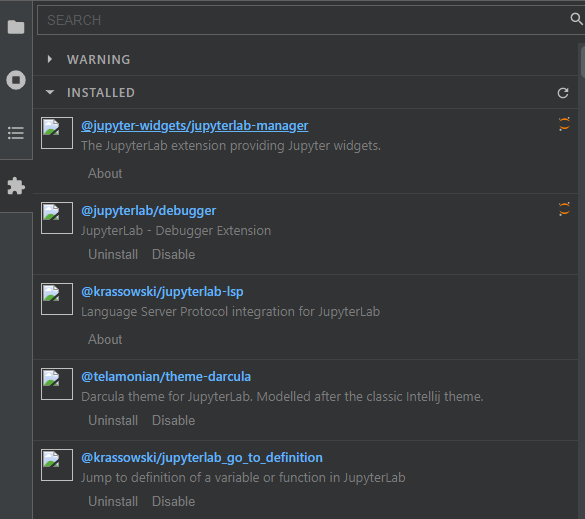
image-20211120215754890
- theme-darcula:一个好看的主题配色
- jupyterlab_go_to_definition:跳转到定义
- jupyterlab_lsp:代码跳转+代码补全
- 还有很多如:latex,git,html,plotly,bokeh,matplotlib,drawio等等
5. Jupyter Lab多用户使用
复制配置文件到指定位置,例如:
cp /home/admin555/.jupyter/jupyter_notebook_config.py /指定位置/jupyter_notebook_config.py
之后启动时,使用命令:
jupyter lab --config /指定位置/jupyter_notebook_config.py
版权归原作者 小酒馆燃着灯 所有, 如有侵权,请联系我们删除。