
mac安装并使用wireshark
1 介绍
我们在日常开发过程中,遇到了棘手的问题时,免不了查看具体网络请求情况,这个时候就需要用到抓包工具。比较著名的抓包工具就属:wireshark、fildder。我这里主要介绍wireshark。
2 安装
以mac安装为例。
- 去官网下载对应的mac版本即可。(注意观察自己的芯片是intel的还是Apple的) https://www.wireshark.org/download.html
- 下载好之后,直接双击.dmg,然后拖动安装即可。
- 安装成功后,来到应用程序,双击wireshark图标即可。
- 如果发现双击之后wireshark报错:
表明wireshark没有对应的网卡权限来抓取网卡对应的流量情况。 执行如下命令,然后重新打开wireshark即可。
sudochmod777 /dev/bpf*
3 使用
3.1 判断网卡
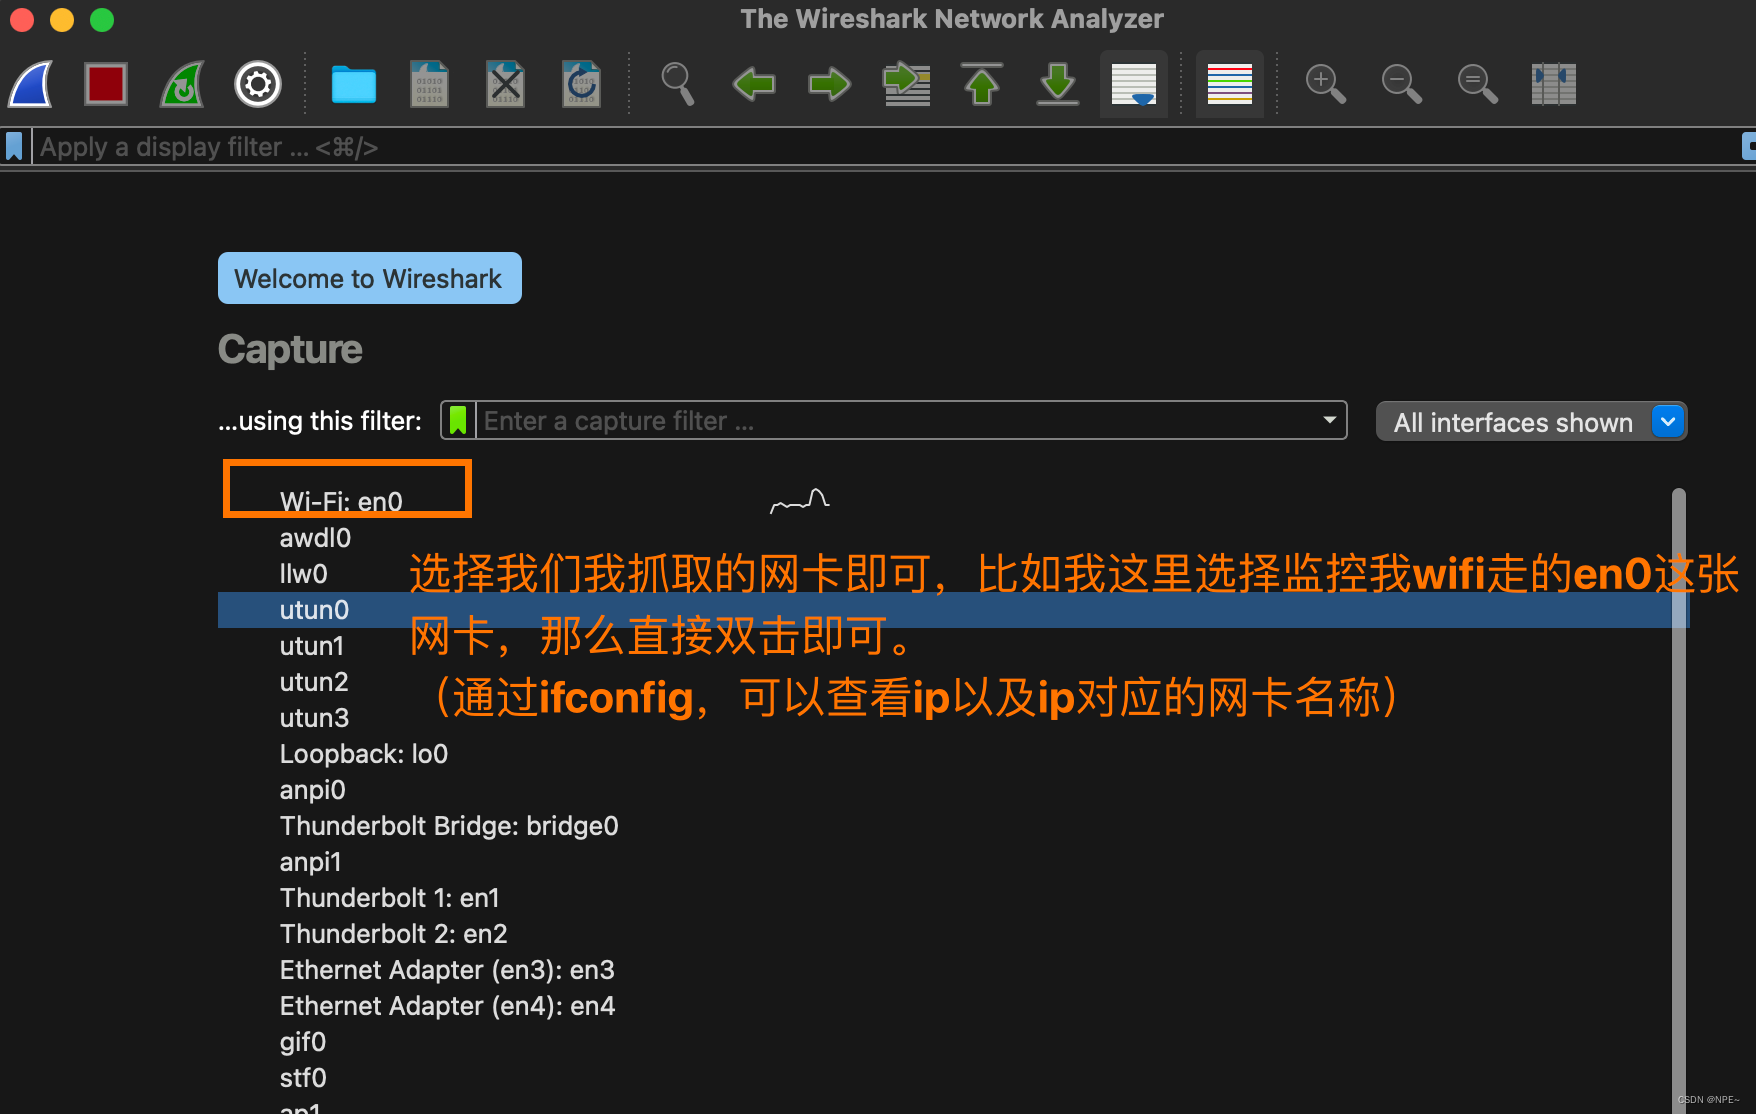
如果我们的电脑有多张网卡,如何判断自己该监控哪张网卡呢?
- 方法一:ifconfig查看ip所属的网卡名,然后在wireshark上点击监控即可
- 方法二:将鼠标移到wireshark页面所展示的网卡名,wireshark会自动显示ip地址,然后选择我们要监控ip所在的网卡即可
3.2 过滤IP(源或目标)
①ip.src eq 192.168.1.145 or ip.dst eq 192.168.1.145
或者ip.addr eq 192.168.1.145
- 直接使用 ip.addr == 192.168.1.145也行

提示: 在Filter编辑框中,收入过虑规则时,如果语法有误,框会显红色,如正确,会是绿色。
②ip.src == 192.168.1.145
3.3 过滤端口
①tcp.port == 80(不管源或目标)
tcp.port eq 80 // 不管端口是来源的还是目标的都显示
tcp.port == 80
tcp.port eq 2722
tcp.port eq 80 or udp.port eq 80
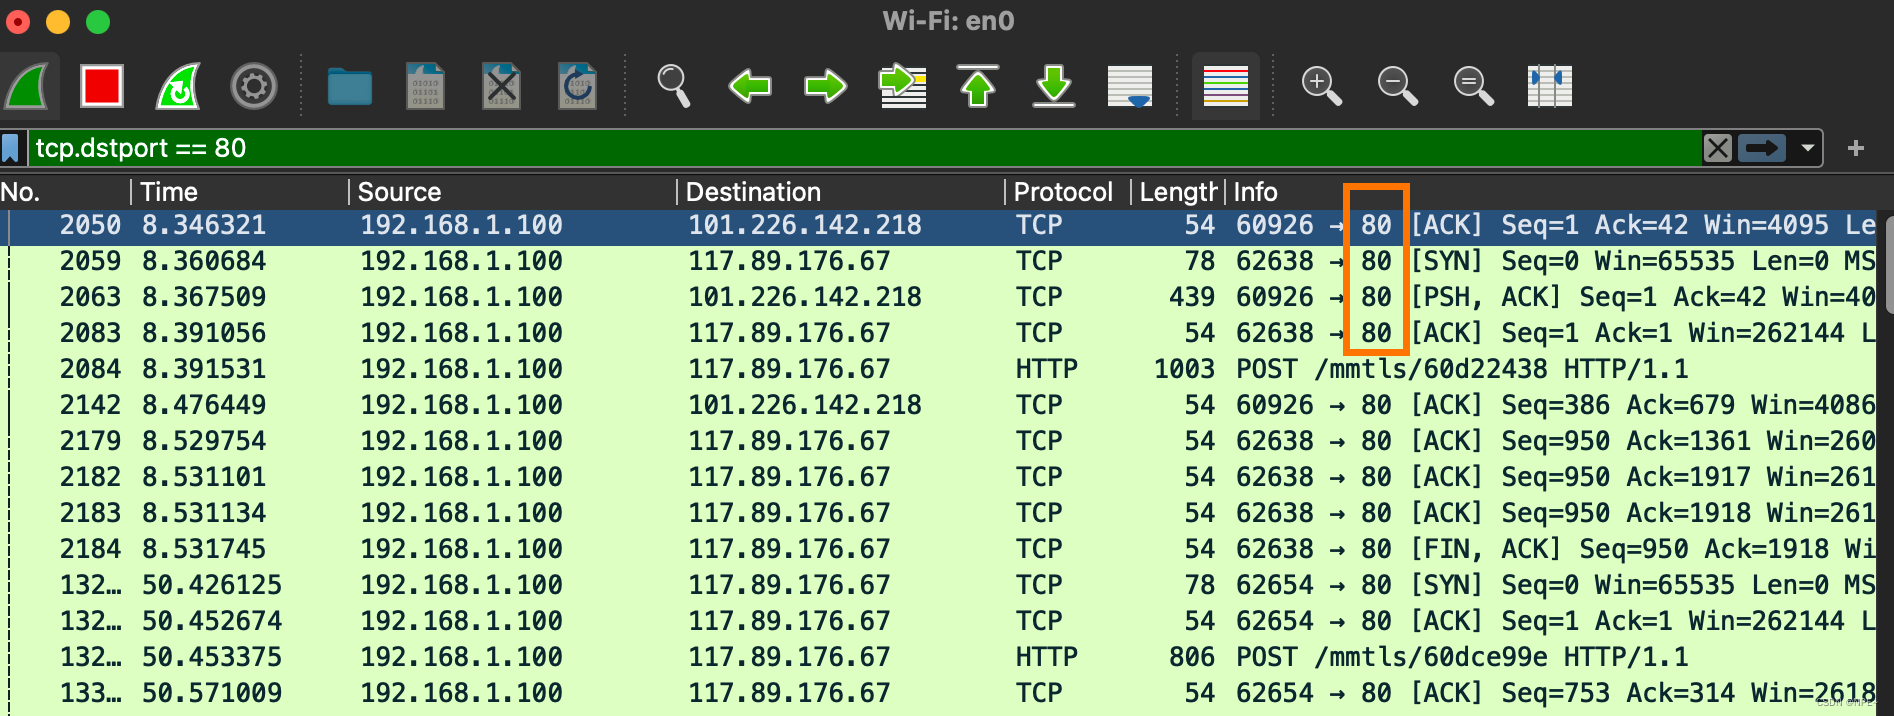
tcp.dstport == 80 // 只显tcp协议的目标端口80
tcp.srcport == 80 // 只显tcp协议的来源端口80
②tcp.dstport == 80(只显示tcp协议的目标端口为80的)
③udp.port == 1500
④tcp.port >= 1 and tcp.port <= 80
3.4 过滤协议
例子:
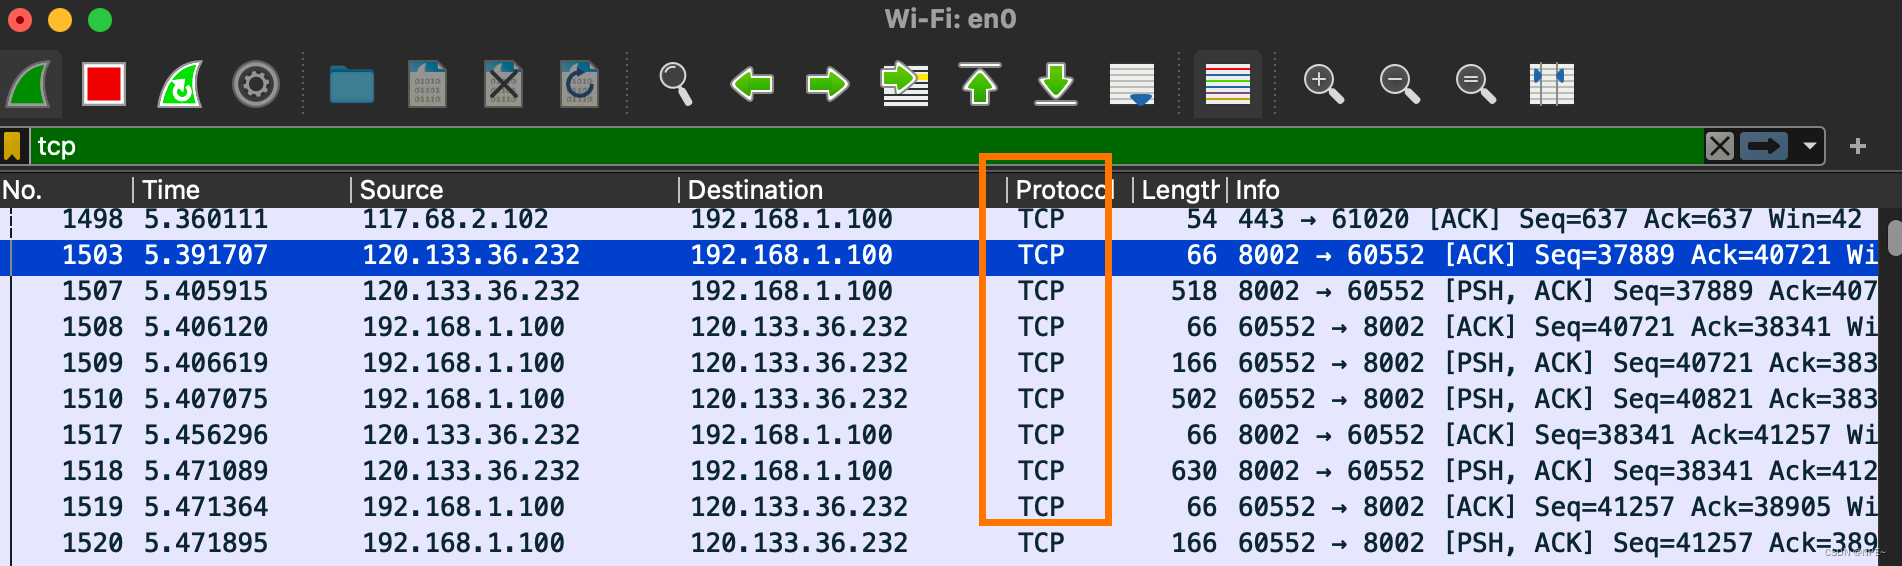
tcp
udp
smb
arp
icmp
http
smtp
ftp
dns
msnms
ip
ssl
oicq
bootp
等等
①tcp(筛选tcp协议)
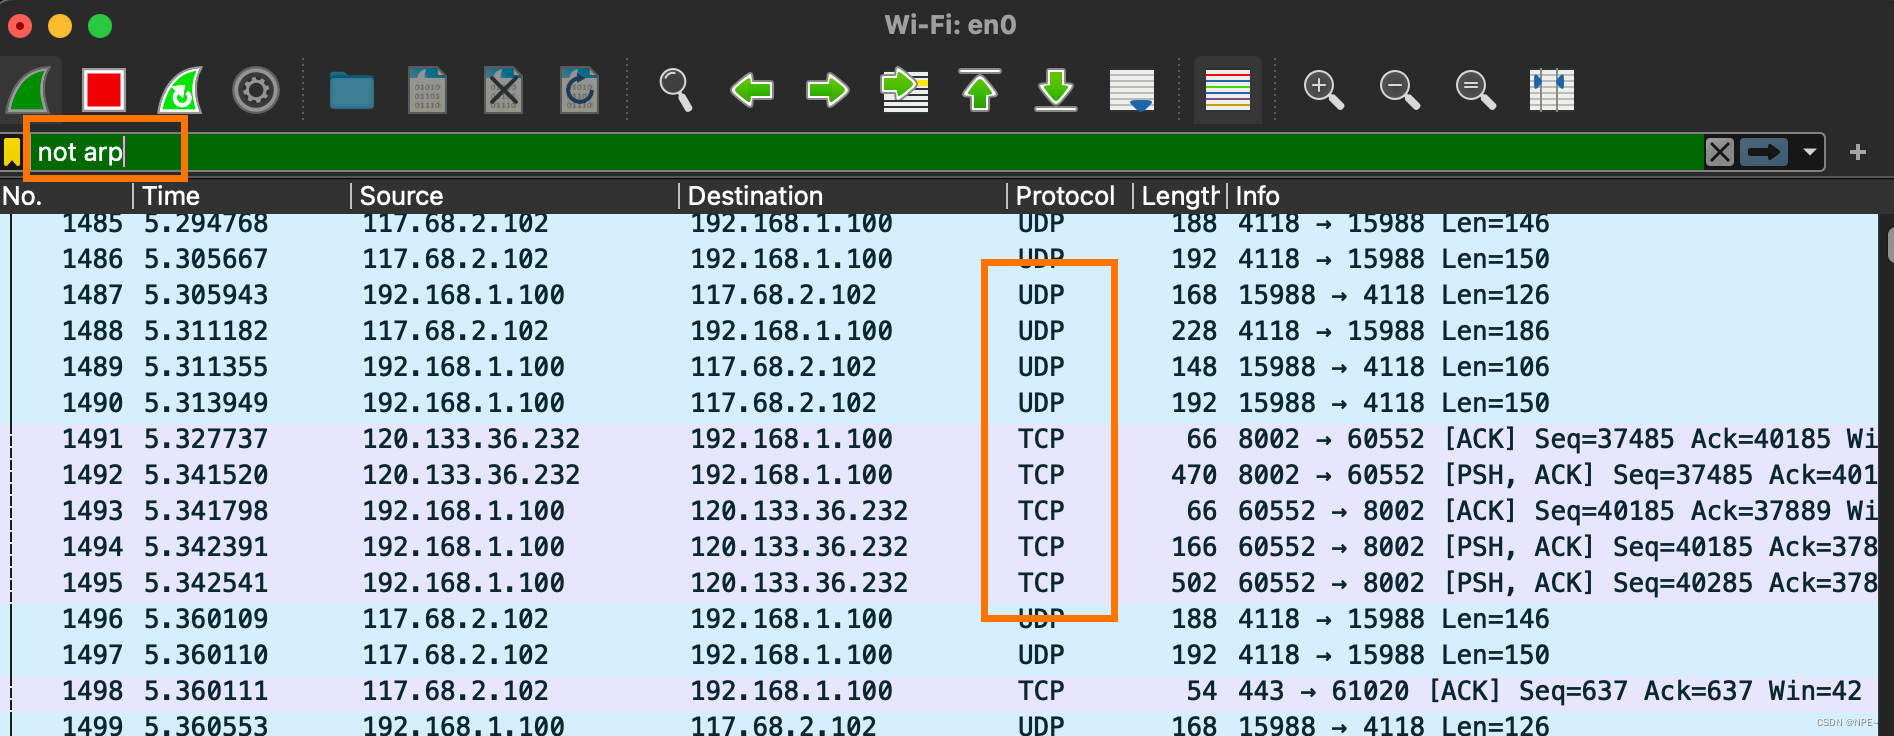
②not arp(排除arp协议)
或者
!arp
3.5 过滤MAC
①eth.dst == A0:00:00:04:C5:84 过滤目标mac
②eth.src == A0:00:00:04:C5:84 过滤来源mac
eth.src eq A0:00:00:04:C5:84 // 过滤来源mac
eth.dst == A0:00:00:04:C5:84
eth.dst == A0-00-00-04-C5-84
eth.addr eq A0:00:00:04:C5:84 // 过滤来源MAC和目标MAC都等于A0:00:00:04:C5:84的
less than 小于 < lt
小于等于 le
等于 eq
大于 gt
大于等于 ge
不等 ne
3.6 包长度过滤
①udp.length == 26(udp本身固定长度8+数据包之后为26的)
这个长度是指udp本身固定长度8加上udp下面那块数据包之和
②tcp.len >= 7 指的是ip数据包(不包括tcp本身)
③ip.len == 94 除了以太网固定长度14,其他都算是ip.len
即:从ip本身到最后
④frame.len == 119 整个数据包长度,从eth开始到最后
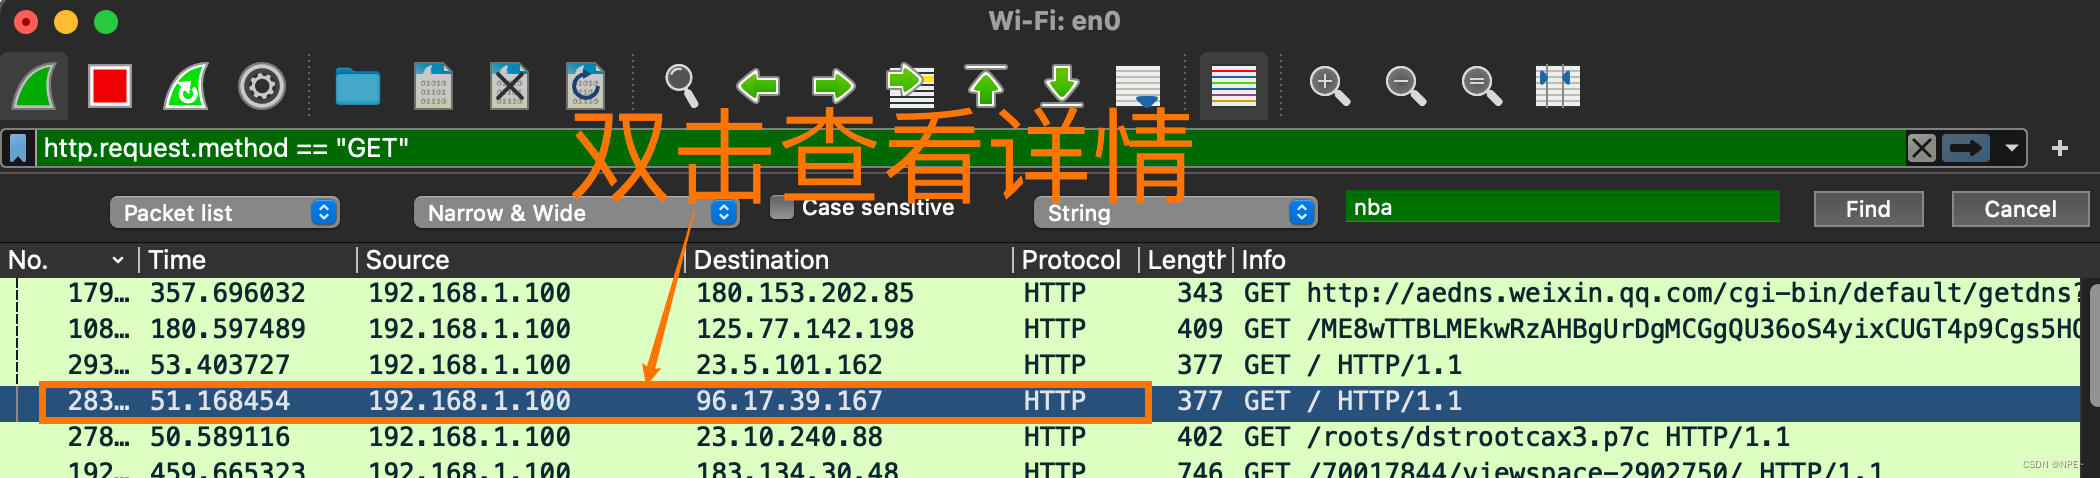
3.7 http模式过滤
①http.request.method == “GET”
http.request.method == “POST”

②http.request.uri == “/img/demo.png”
③http contains “GET”
④http contains “HTTP/1.” (区分大小写)
注意:区分大小写
⑤GET包
http.request.method == “GET” && http contains "Host: "
http.request.method == “GET” && http contains "User-Agent: "
⑥POST包
http.request.method == “POST” && http contains "Host: "

http.request.method == “POST” and http contains "Host: "也可以
http.request.method == “POST” && http contains "User-Agent: "
⑦响应包
http contains “HTTP/1.1 200 OK” && http contains "Content-Type: "
http contains “HTTP/1.0 200 OK” && http contains "Content-Type: "
3.8 TCP参数过滤
①tcp.flags 显示包含TCP标志的封包
②tcp.flags.syn == 0x02 显示包含TCP SYN标志的封包
③tcp.window_size == 0 && tcp.flags.reset != 1
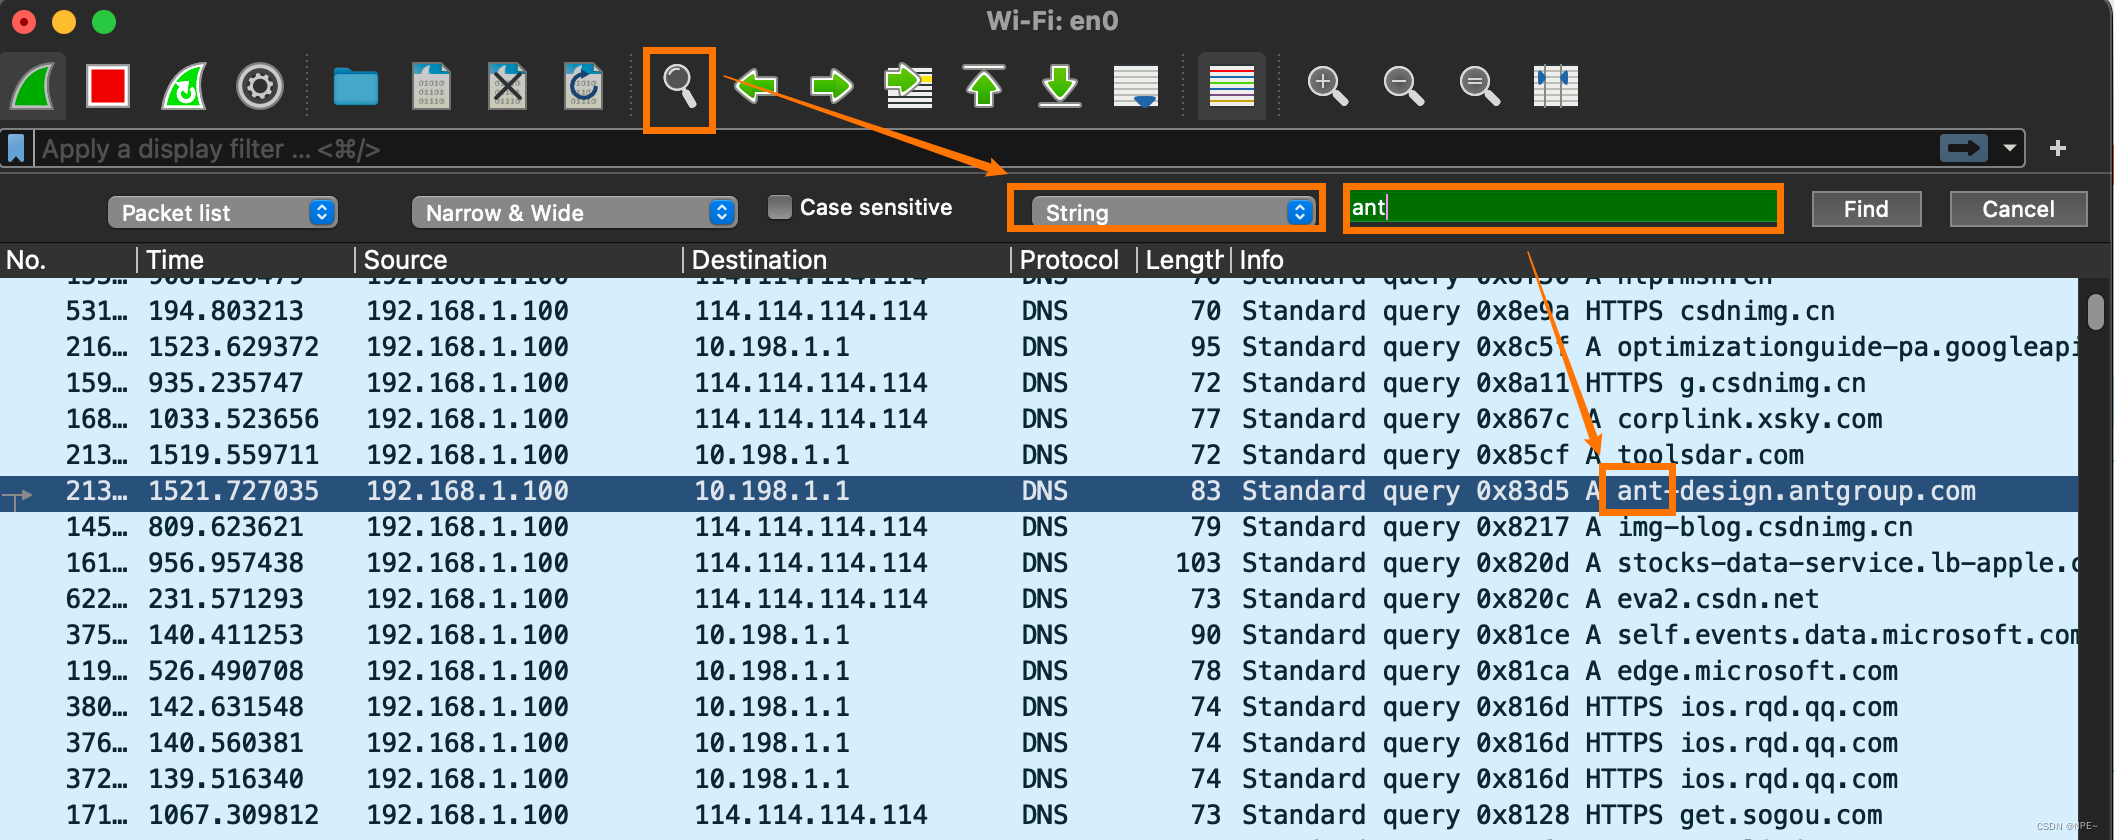
3.9 包内容过滤
①tcp[20:8]表示从20开始,取8个字符
②通过页面操作
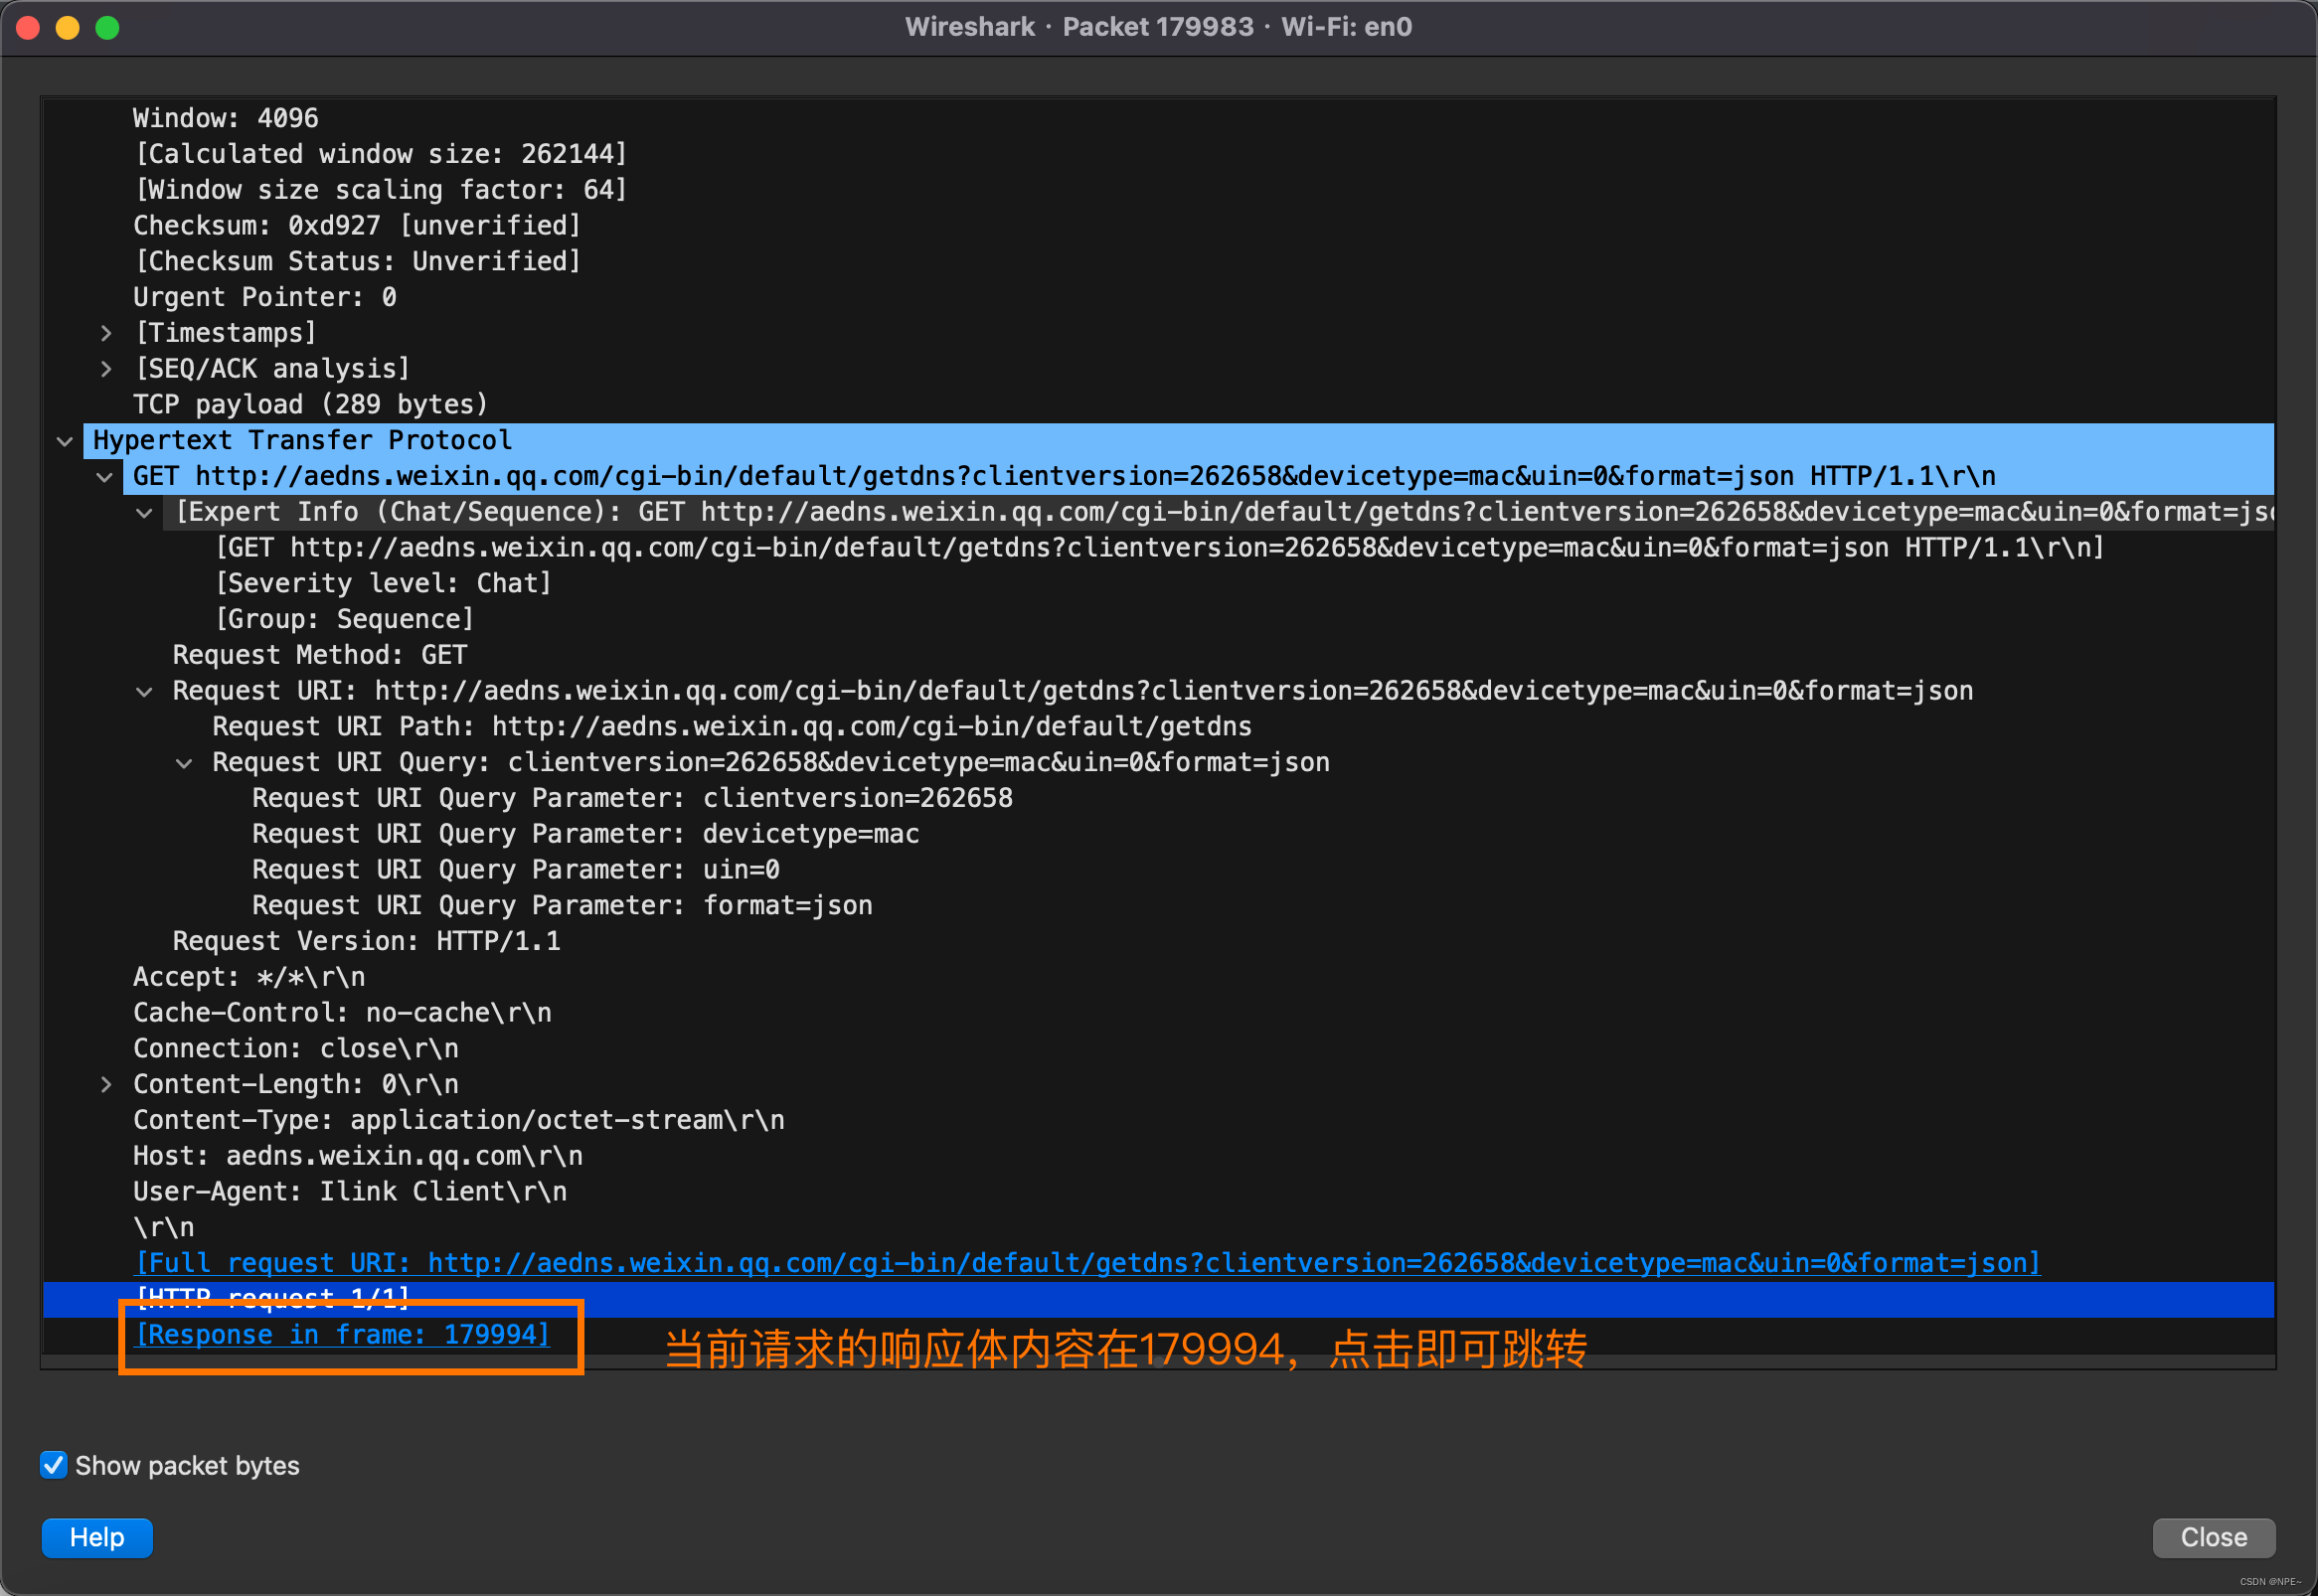
4 查看详情
双击即可进入详情查看:
详情中会展示请求体、请求头等,包括请求的响应链接地址
参考文章:
https://blog.csdn.net/wojiaopanpan/article/details/69944970
版权归原作者 NPE~ 所有, 如有侵权,请联系我们删除。