一 环境范围设置
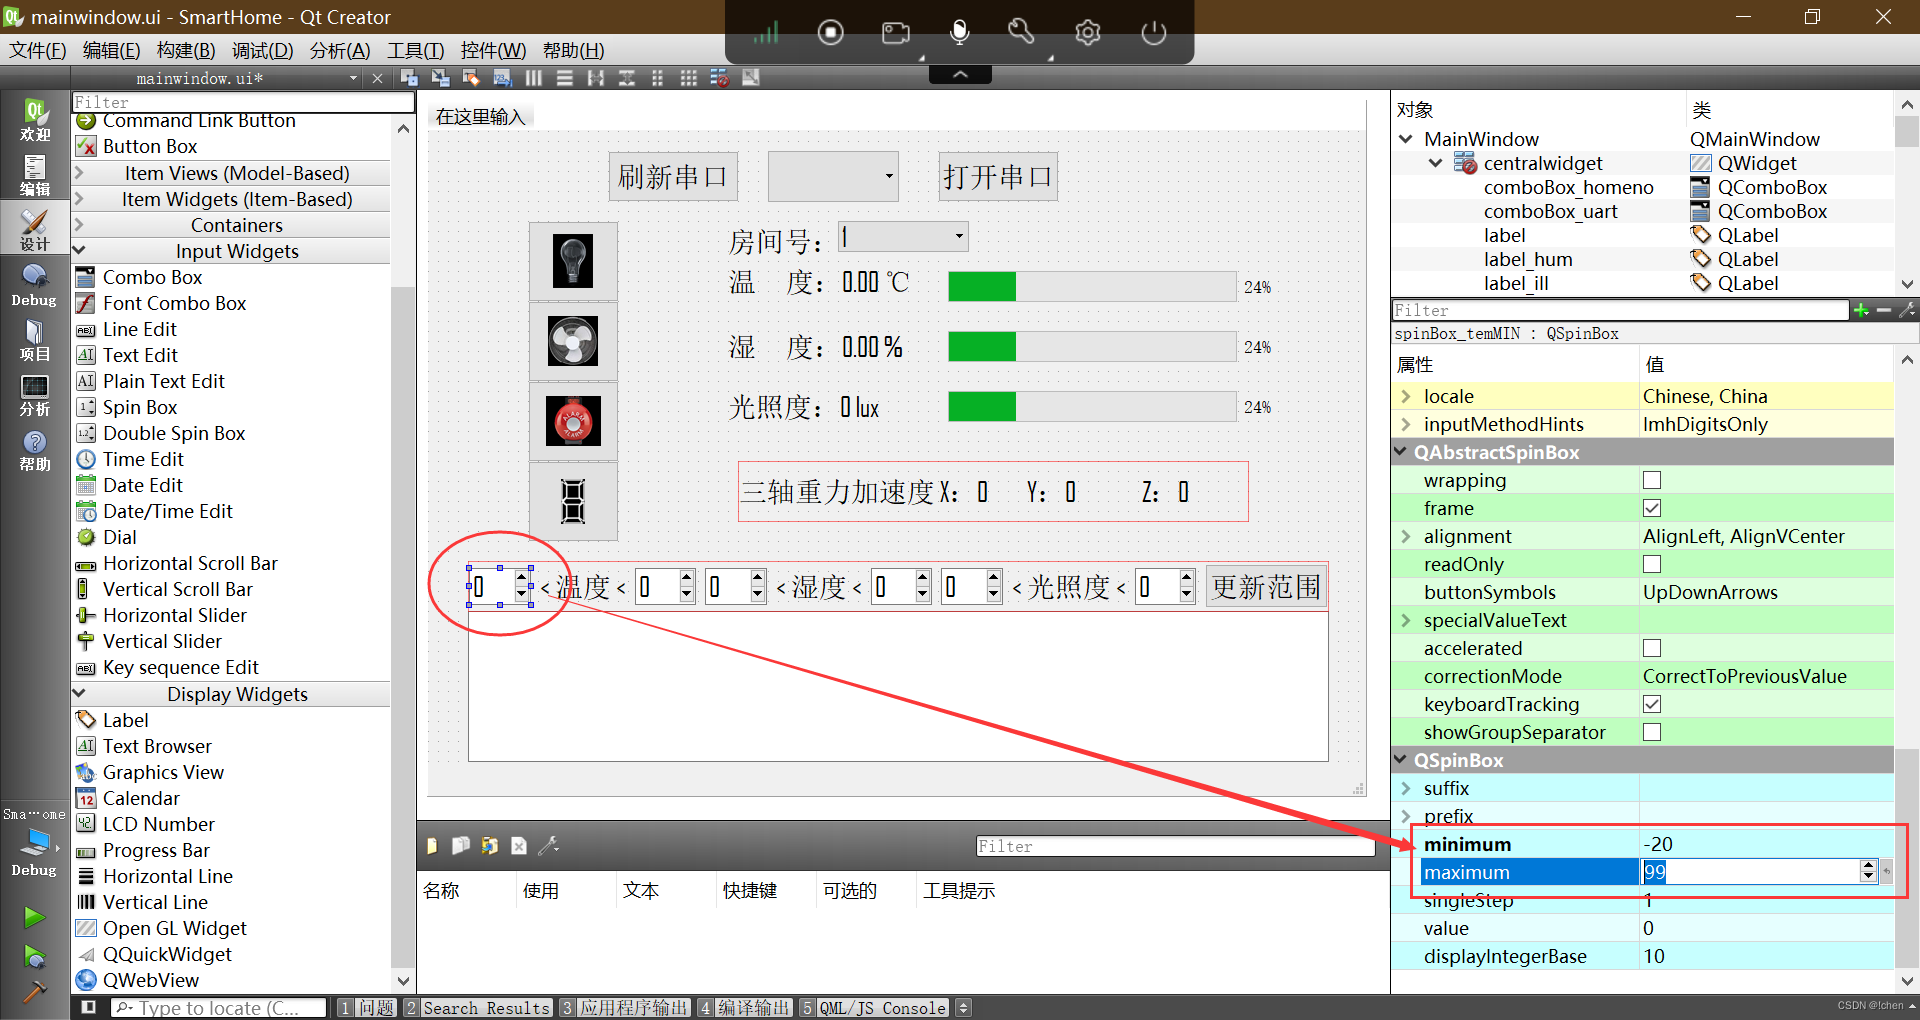
(1)界面添加新控件
在mainwindow.ui 添加控件:
控件的类型
文本内容
对象名(唯一)
是否有槽函数
QLabel
<温度<
lable_随意
否
QLabel
<湿度<
lable_随意
否
QLabel
<光照度<
lable_随意
否
QPushButton
更新范围
PushButton_range
是 clicked()
控件的类型
当前值
最大值
最小值
对象名(唯一)
是否有槽函数
QSpinBox
0
99
-20
spinBox_temMIN
否
QSpinBox
50
100
-19
spinBox_temMAX
否
QSpinBox
0
99
0
spinBox_humMIN
否
QSpinBox
50
100
1
spinBox_humMAX
否
QSpinBox
0
3999
0
spinBox_illMIN
否
QSpinBox
1000
4000
1
spinBox_illMAX
否


(2)实现”更新范围”槽函数

在mainwindow.h 添加:
#include "daosingleton.h" *// range-1 *单例模式类的头文件
*//在public: *下面添加
void setProgressBarRange(RangeEntity &e);*//*设置进度条的范围
在mainwindow.cpp 添加槽函数 :
*//**更新范围按钮 *槽函数
void MainWindow::on_pushButton_range_clicked()
{
*//(a) *从界面上获得新的范围range
RangeEntity range;
range.temMAX = ui->spinBox_temMAX->value();
range.temMIN = ui->spinBox_temMIN->value();
range.humMAX = ui->spinBox_humMAX->value();
range.humMIN = ui->spinBox_humMIN->value();
range.illMAX = ui->spinBox_illMAX->value();
range.illMIN = ui->spinBox_illMIN->value();
*//range-3 **修改当前房间的环境范围 -- *数据库
bool ok = DaoSingleton::getInstance()->getDaoUser()->updateRange(homeNo, range);
if(ok){
ui->textBrowser->append("更新环境范围成功");
setProgressBarRange(range);*//**设置进度的最大值+*最小值
}else
ui->textBrowser->append("更新环境范围失败");
}
*//**设置进度的范围(**最大值+*最小值)
void MainWindow::setProgressBarRange(RangeEntity &e)
{
if(ui->progressBar_tem->value()>= e.temMIN
&& ui->progressBar_tem->value()<= e.temMAX){
ui->progressBar_tem->setMinimum(e.temMIN);
ui->progressBar_tem->setMaximum(e.temMAX);
}else{
ui->textBrowser->append("温度进度条设置失败,原因:当前数据超出设置范围");
}
if(ui->progressBar_hum->value()>= e.humMIN
&& ui->progressBar_hum->value()<= e.humMAX){
ui->progressBar_hum->setMinimum(e.humMIN);
ui->progressBar_hum->setMaximum(e.humMAX);
}else{
ui->textBrowser->append("湿度进度条设置失败,原因:当前数据超出设置范围");
}
if(ui->progressBar_ill->value()>= e.illMIN
&& ui->progressBar_ill->value()<= e.illMAX){
ui->progressBar_ill->setMinimum(e.illMIN);
ui->progressBar_ill->setMaximum(e.illMAX);
}else{
ui->textBrowser->append("光照强度进度条设置失败,原因:当前数据超出设置范围");
}
}
(3)修改房间编号槽函数
在mainwindow.cpp 添加:
*//**房间号 **修改/**切换房间 对应的槽函数 arg1修改后的值*
void MainWindow::on_comboBox_homeno_currentTextChanged(const QString &arg1)
{
homeNo = arg1.toInt(); *//*新的房间号
ui->textBrowser->setText("您已进入新的房间:");
*//range-2 **查看新房间的环境的范围 -- *数据库
RangeEntity range;*// *存储查找到的范围
bool ok = DaoSingleton::getInstance()->getDaoUser()->selectRange(homeNo, range);
if(ok)
{ *// *将查找到的范围显示到界面上
ui->spinBox_temMAX->setValue(range.temMAX);
ui->spinBox_temMIN->setValue(range.temMIN);
ui->spinBox_humMAX->setValue(range.humMAX);
ui->spinBox_humMIN->setValue(range.humMIN);
ui->spinBox_illMAX->setValue(range.illMAX);
ui->spinBox_illMIN->setValue(range.illMIN);
setProgressBarRange(range);*//**设置进度的最大值+*最小值
}
}
二 优化
(1)代码优化
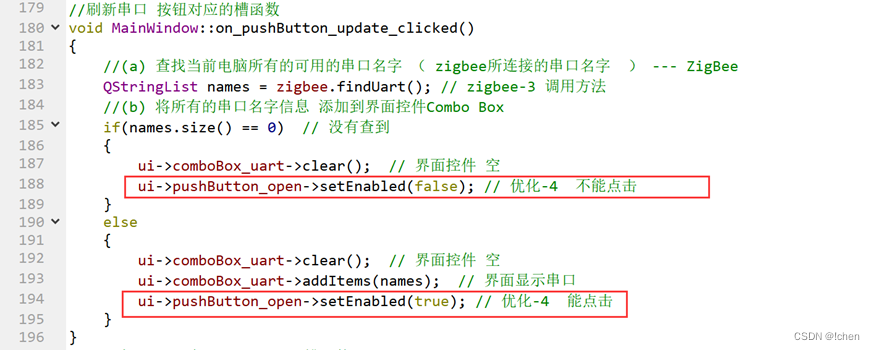
在mainwindow.cpp中对代码进行优化1--5:
*//*在构造函数中添加
on_comboBox_homeno_currentTextChanged("1"); *//**优化-1 **默认 调用一次切换到1号房间*
on_pushButton_update_clicked(); *//**优化-1 **默认 *刷新一次串口

*//**在on_comboBox_homeno_currentTextChanged()*函数中添加
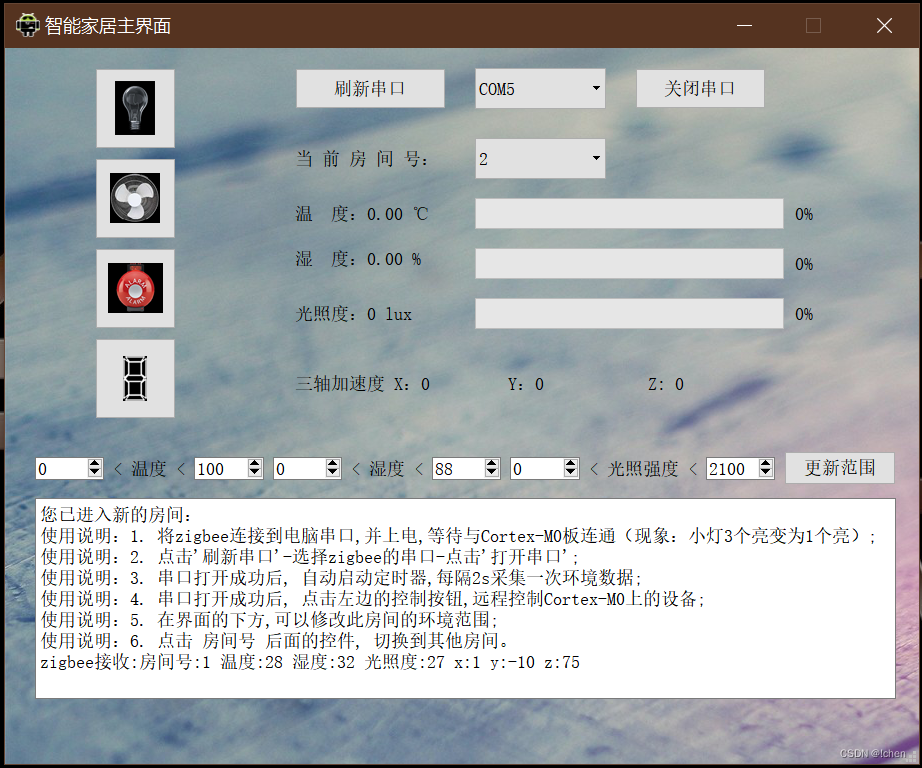
ui->textBrowser->setText("您已进入新的房间:");*// **优化-2 *使用说明
ui->textBrowser->append("使用说明:1. 将zigbee连接到电脑串口,并上电,等待与Cortex-M0板连通(现象:小灯3个亮变为1个亮);");
ui->textBrowser->append("使用说明:2. 点击'刷新串口'-选择zigbee的串口-点击'打开串口'; ");
ui->textBrowser->append("使用说明:3. 串口打开成功后, 自动启动定时器,每隔2s采集一次环境数据; ");
ui->textBrowser->append("使用说明:4. 串口打开成功后, 点击左边的控制按钮,远程控制Cortex-M0上的设备; ");
ui->textBrowser->append("使用说明:5. 在界面的下方,可以修改此房间的环境范围; ");
ui->textBrowser->append("使用说明:6. 点击 房间号 后面的控件, 切换到其他房间。");

*//**在saveHomeEnv()*函数中添加
*// **优化-3 **新的房间上线 ,将新的房间号插入到comboBox_homeno控件中*
int index = ui->comboBox_homeno->findText( QString("%1").arg(e.homeno));
if(index <0)// *新的房间号
{
ui->comboBox_homeno->addItem( QString("%1").arg(e.homeno));//*插入到控件中
}

*//**在on_pushButton_update_clicked()*函数中添加
ui->pushButton_open->setEnabled(false);*// **优化-4 *不能点击
ui->pushButton_open->setEnabled(**true**);*// **优化-4 **能点击*

*//**在timerEvent()*函数中添加
else *//*优化-5
{
ui->textBrowser->append("zigbee接收:失败,原因:请用户检查zigbee是否与Cortex-M0连通,或者等一会;");
}

(2)界面布局和背景图片
第一个界面Login : 布局居中

第一个界面Login : 背景图片


第二个界面MainWindow : 背景图片


第二个界面MainWindow : 窗口大小固定

三 运行测试
(1)注册功能测试

(2)登录功能测试


(3)串口功能测试——接收环境信息


(4)串口功能测试——发送控制命令


(5)更新环境范围测试

(6)切换房间


(7)关闭串口

版权归原作者 !chen 所有, 如有侵权,请联系我们删除。