
前言
项目中需要用到工作流引擎来设计部分业务流程,框架选型最终选择了 Camunda7,关于 Camunda以及 Activity 等其他工作流 引擎的介绍及对比不再介绍,这里只介绍与现有Springboot项目的集成以及具体使用及配置
概念
流程(PROCESS): 通过工具建模最终生成的BPMN文件,里面有整个流程的定义
流程实例(Instance):流程启动后的实例
流程变量(Variables):流程任务之间传递的参数
任务(TASK):流程中定义的每一个节点
流程部署:将之前流程定义的.bpmn文件部署到工作流平台
核心组件
Process Engine-流程引擎
Web Applicatons-web应用:基于web的管理页面
API介绍
官方文档
Process Engine API | docs.camunda.org
下面是官网的一些文档,有时间可以看看,下面说一些核心的东西。
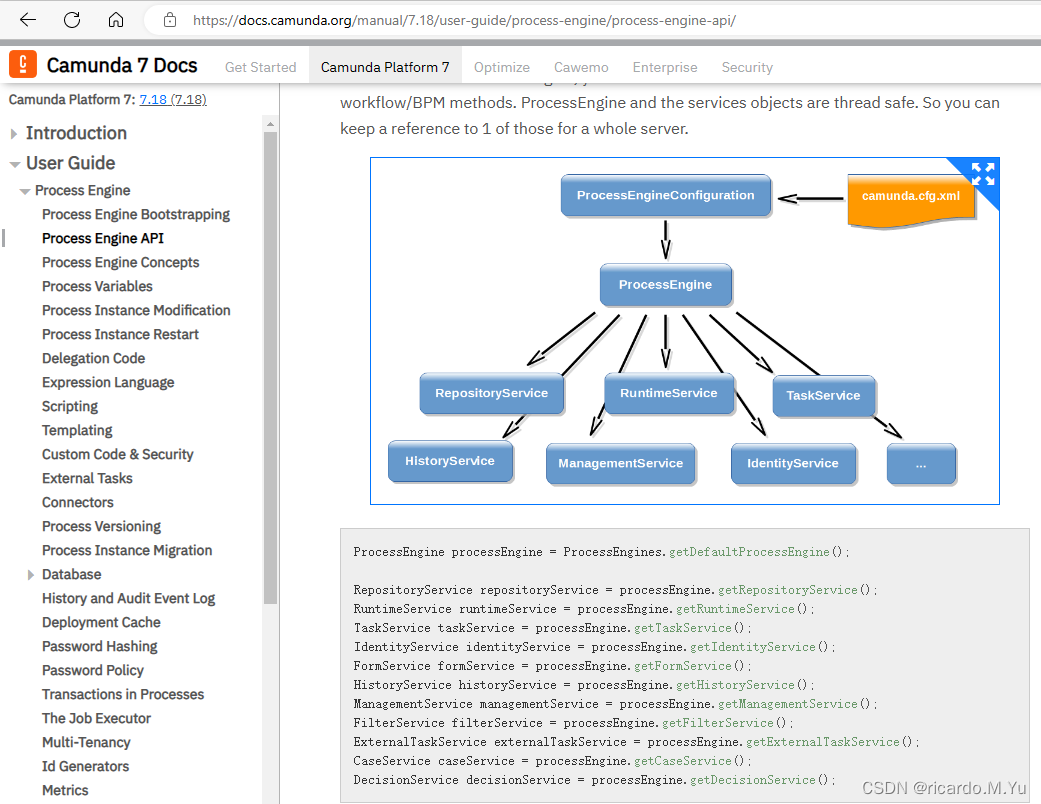
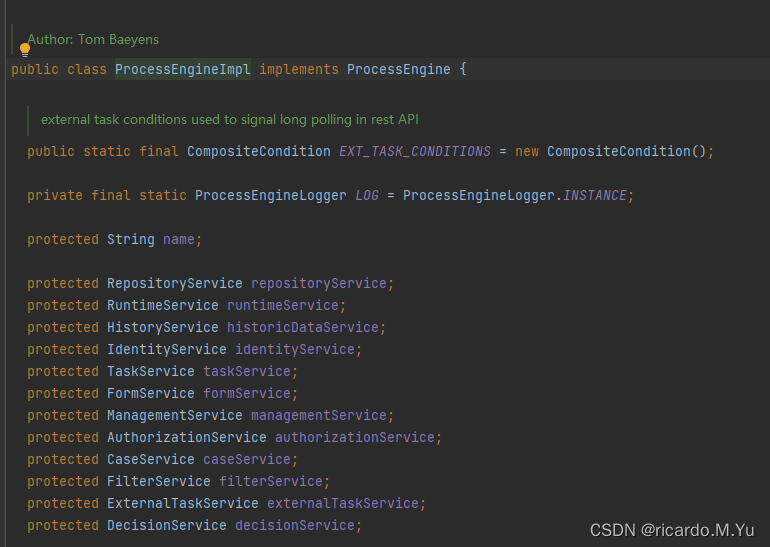
ProcessEngine
为流程引擎,可以通过他获取相关service,里面集成了很多相关service,默认实现如下:
RepositoryService
此服务提供用于管理和操作部署和流程定义的操作,使用camunda的第一要务
RuntimeService
运行相关,启动流程实例、删除、搜索等
TaskService
所有围绕任务相关的操作,如完成、分发、认领等
HistoryService
提供引擎搜集的历史数据服务
IdentityService
用户相关,实际中用不太到
Springboot集成
依赖集成
maven
https://mvnrepository.com/search?q=org.camunda.bpm.springboot
可以根据需要引用版本,我这边用的是 7.18
需要3个maven依赖,分别是对应 流程引擎、Web管理平台、提供rest api操作接口包
        <dependency>
            <groupId>org.camunda.bpm.springboot</groupId>
            <artifactId>camunda-bpm-spring-boot-starter</artifactId>
            <version>7.18.0</version>
        </dependency>
        <dependency>
            <groupId>org.camunda.bpm.springboot</groupId>
            <artifactId>camunda-bpm-spring-boot-starter-rest</artifactId>
            <version>7.18.0</version>
        </dependency>
        <dependency>
            <groupId>org.camunda.bpm.springboot</groupId>
            <artifactId>camunda-bpm-spring-boot-starter-webapp</artifactId>
            <version>7.18.0</version>
        </dependency>
数据库
我这边使用的是mysql,建了个新库 camunda(可自定义),启动后会自动生成所需表结构
POM文件
<?xml version="1.0" encoding="UTF-8"?>
<project xmlns="http://maven.apache.org/POM/4.0.0" xmlns:xsi="http://www.w3.org/2001/XMLSchema-instance"
         xsi:schemaLocation="http://maven.apache.org/POM/4.0.0 https://maven.apache.org/xsd/maven-4.0.0.xsd">
    <modelVersion>4.0.0</modelVersion>
    <parent>
        <groupId>org.springframework.boot</groupId>
        <artifactId>spring-boot-starter-parent</artifactId>
        <version>2.7.3</version>
        <relativePath/> <!-- lookup parent from repository -->
    </parent>
    <groupId>com.example</groupId>
    <artifactId>camunda-demo</artifactId>
    <version>0.0.1-SNAPSHOT</version>
    <name>camunda-demo</name>
    <description>camunda-demo</description>

    <properties>
        <java.version>17</java.version>
    </properties>

    <dependencies>
        <dependency>
            <groupId>org.springframework.boot</groupId>
            <artifactId>spring-boot-starter</artifactId>
        </dependency>
        <dependency>
            <groupId>org.camunda.bpm.springboot</groupId>
            <artifactId>camunda-bpm-spring-boot-starter</artifactId>
            <version>7.18.0</version>
        </dependency>
        <dependency>
            <groupId>org.camunda.bpm.springboot</groupId>
            <artifactId>camunda-bpm-spring-boot-starter-rest</artifactId>
            <version>7.18.0</version>
        </dependency>
        <dependency>
            <groupId>org.camunda.bpm.springboot</groupId>
            <artifactId>camunda-bpm-spring-boot-starter-webapp</artifactId>
            <version>7.18.0</version>
        </dependency>
        <dependency>
            <groupId>mysql</groupId>
            <artifactId>mysql-connector-java</artifactId>
            <version>8.0.32</version>
        </dependency>
        <dependency>
            <groupId>org.springframework.boot</groupId>
            <artifactId>spring-boot-starter-test</artifactId>
            <scope>test</scope>
        </dependency>
    </dependencies>

    <build>
        <plugins>
            <plugin>
                <groupId>org.springframework.boot</groupId>
                <artifactId>spring-boot-maven-plugin</artifactId>
            </plugin>
        </plugins>
    </build>

</project>
application.yml
server:
  port: 8081

# camunda登录信息配置
camunda.bpm:
  admin-user:
    id: admin  #用户名
    password: 123456  #密码
    firstName: yu
  filter:
    create: All tasks

# mysql连接信息
spring:
  datasource:
    driver-class-name: com.mysql.cj.jdbc.Driver
    url: jdbc:mysql://localhost:8101/camunda
    username: root
    password: 123456
    type: com.mysql.cj.jdbc.MysqlDataSource
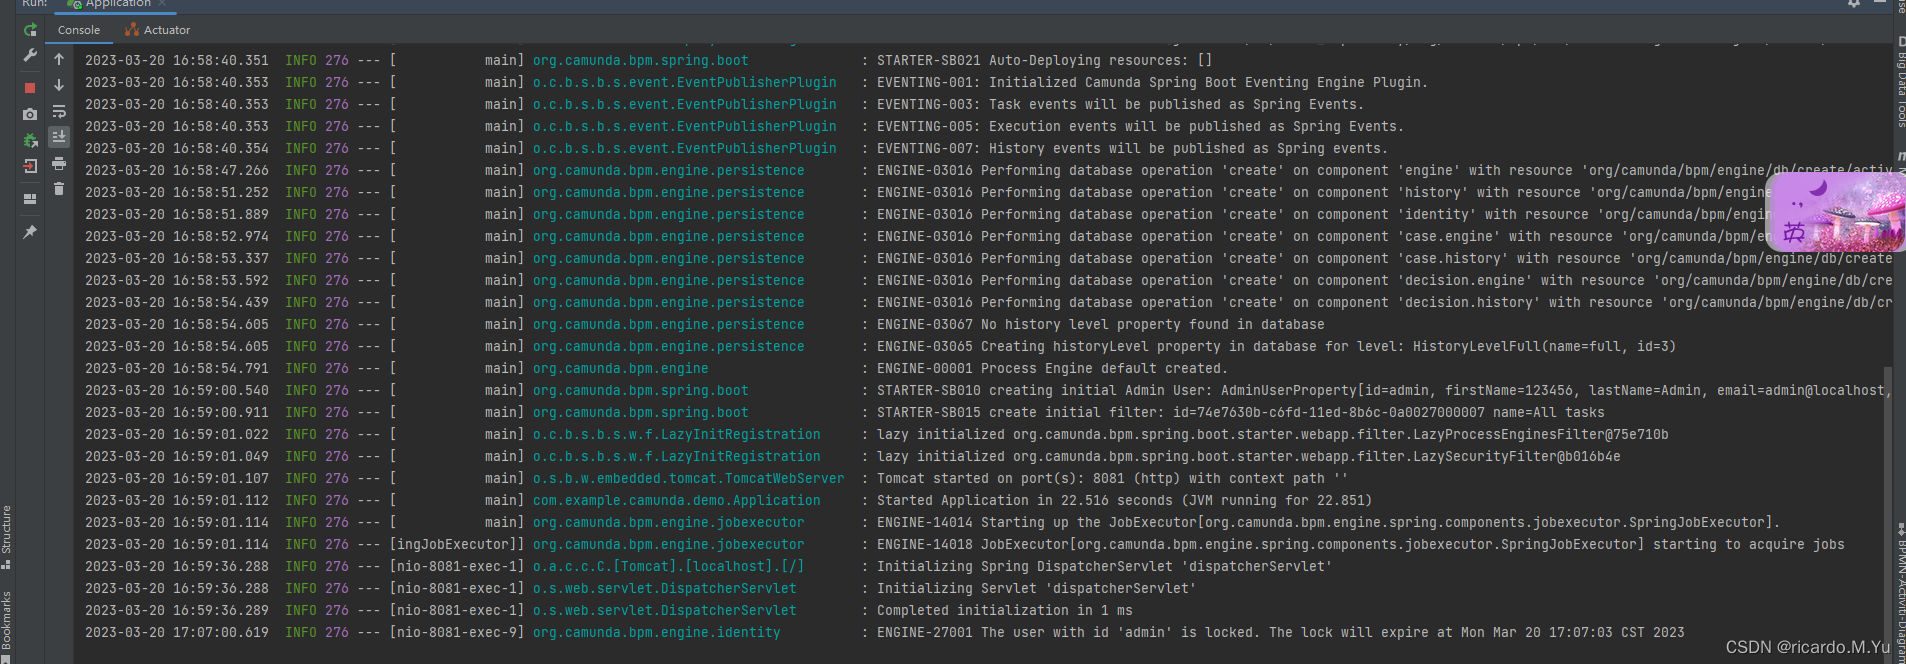
启动效果
准备好前置工作,启动后效果如下:
数据库表结构
启动后自动生成的表结构如下
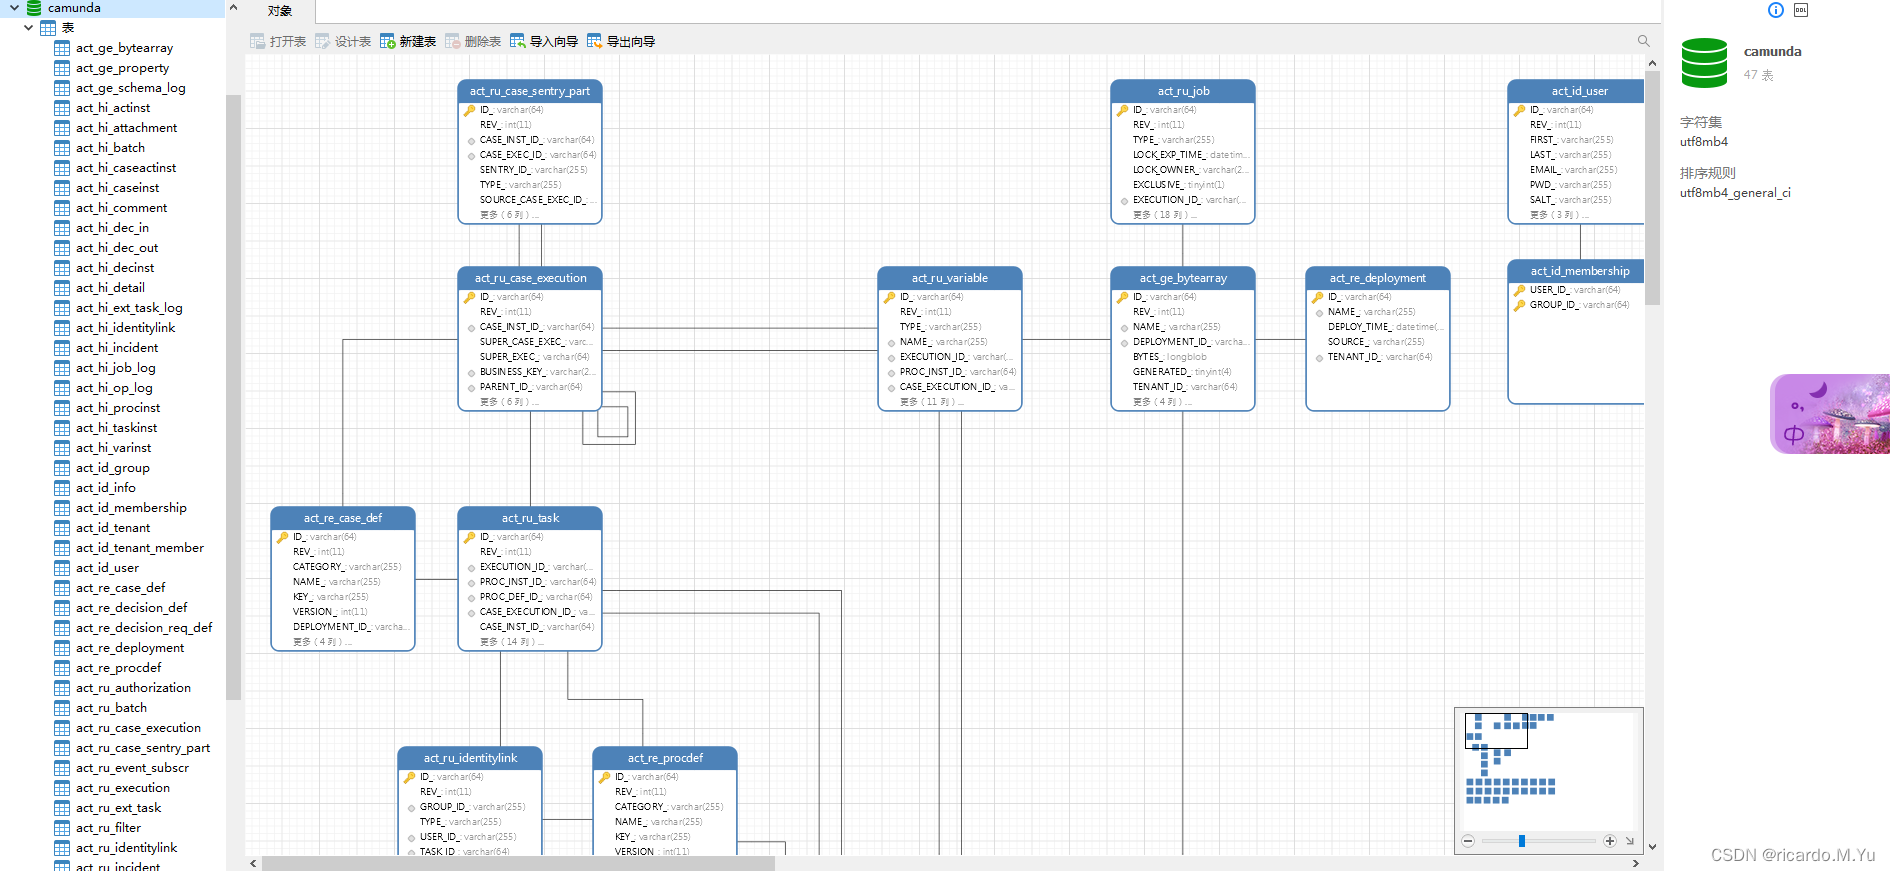
大概有这么几个表模块,重要的详细介绍下:
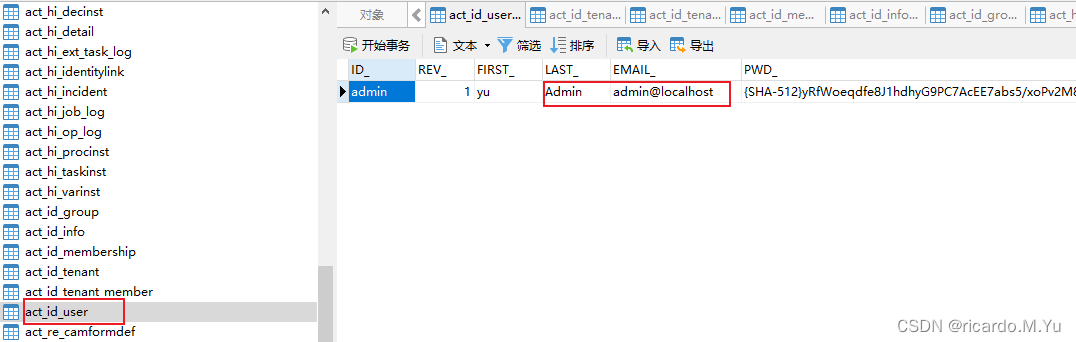
ACT_ID_
这部分表示用户模块,配置文件里面的用户,信息就在此模块
ACT_HI_
表示流程历史记录
act_hi_actinst: 执行的活动历史
act_hi_taskinst:执行任务历史
act_hi_procinst:执行流程实例历史
act_hi_varinst:流程变量历史表
ACT_RE_
表示流程资源存储
act_re_procdef:流程定义存储
act_re_deployment: 自动部署,springboot每次启动都会重新部署,生成记录
ACT_RU_
表示流程运行时表数据,流程结束后会删除
act_ru_execution:运行时流程实例
act_ru_task:运行时的任务
act_ru_variable:运行时的流程变量
ACT_GE_
流程通用数据
act_ge_bytearray:每次部署的文件2进制数据,所以如果文件修改后,重启也没用,因为重新生成了记录,需要清掉数据库,或者这个表记录
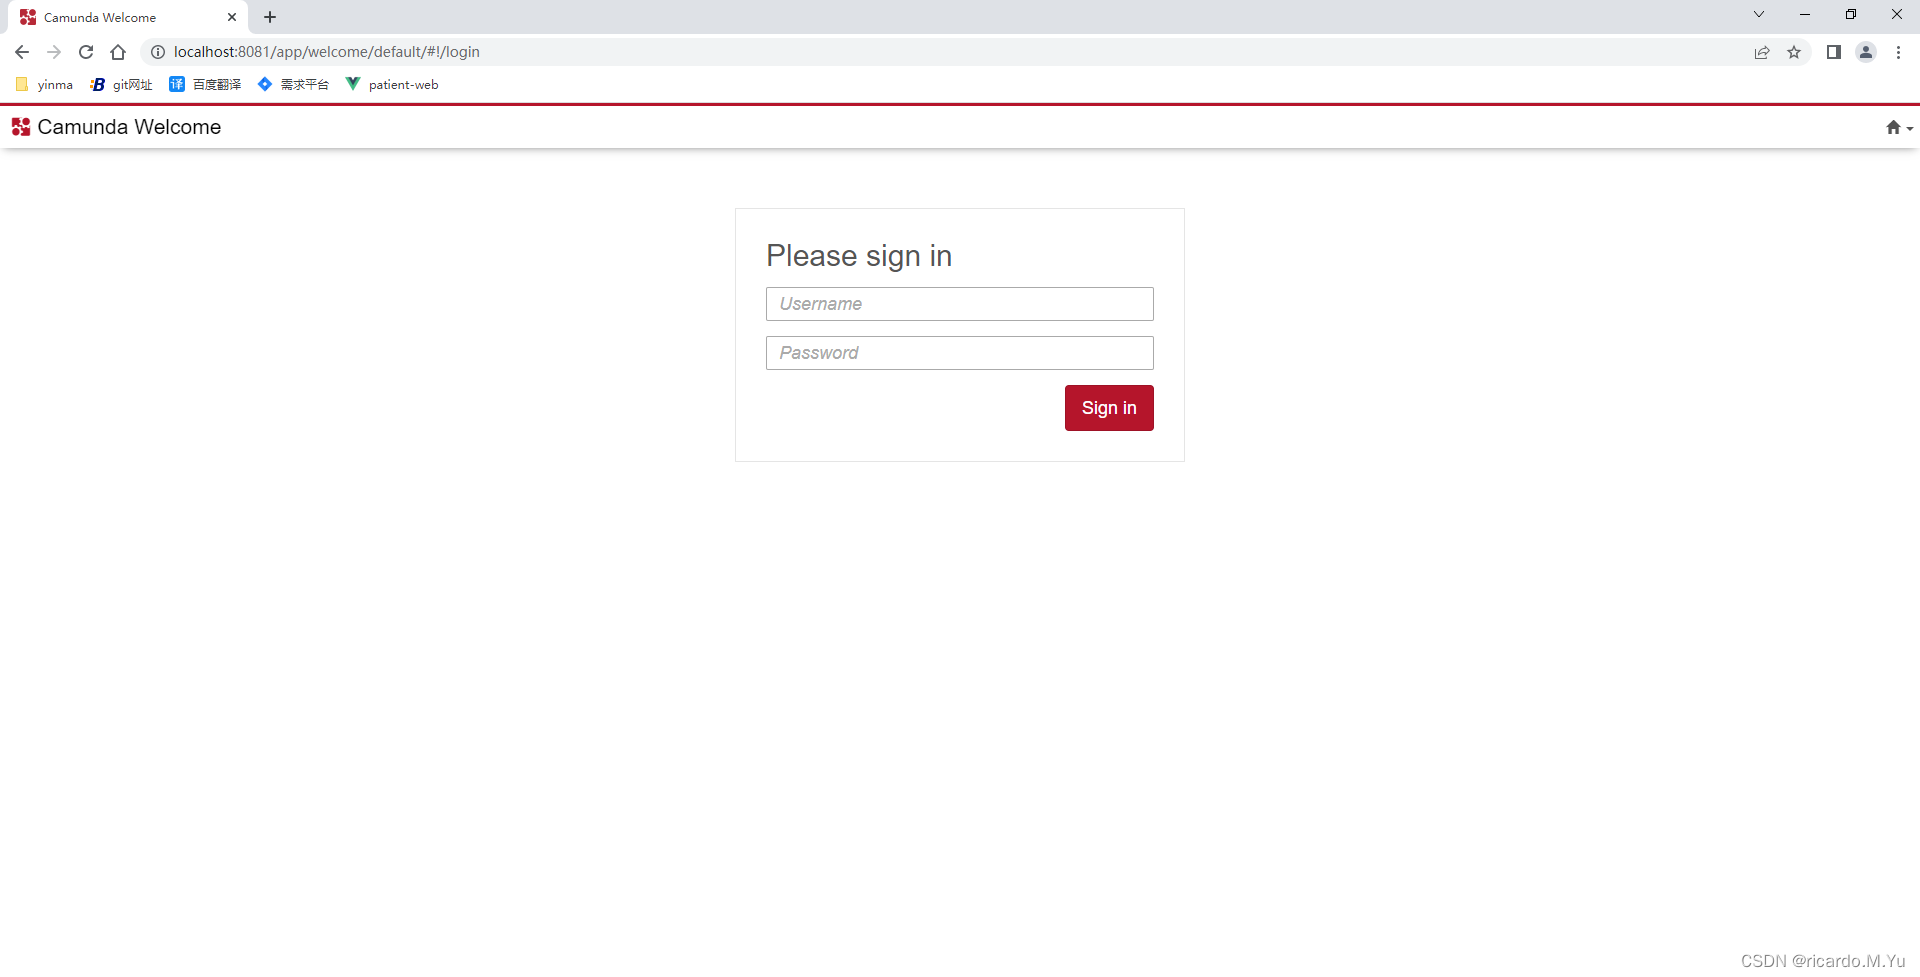
登录界面
登录地址为 http://localhost:8081/,输入用户名密码即为配置文件里面的 admin,123456
主控制台
登陆成功后,如下所示,具体的使用在下面介绍

具体业务集成
绘制流程图
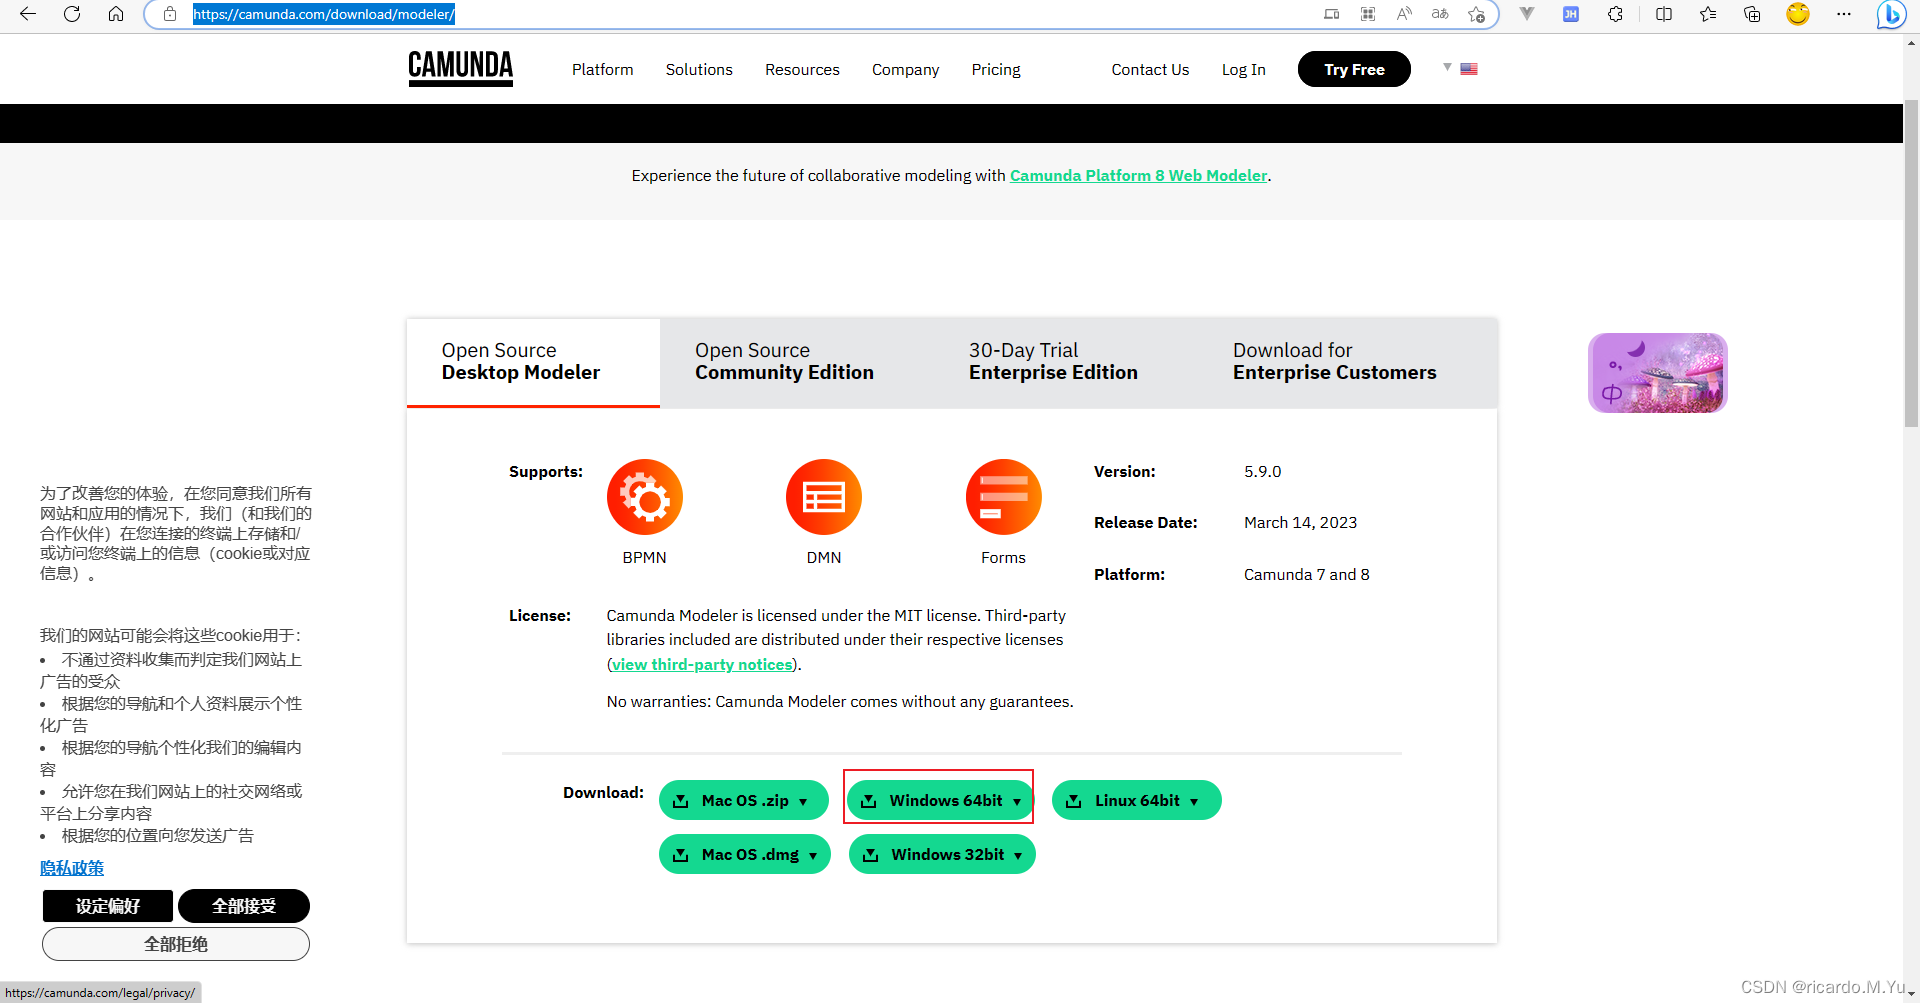
下载
首先需要一个工具 Camunda Modeler 来画,下载地址。Download The Camunda BPMN / DMN Process Modeler | Camunda,选择合适版本
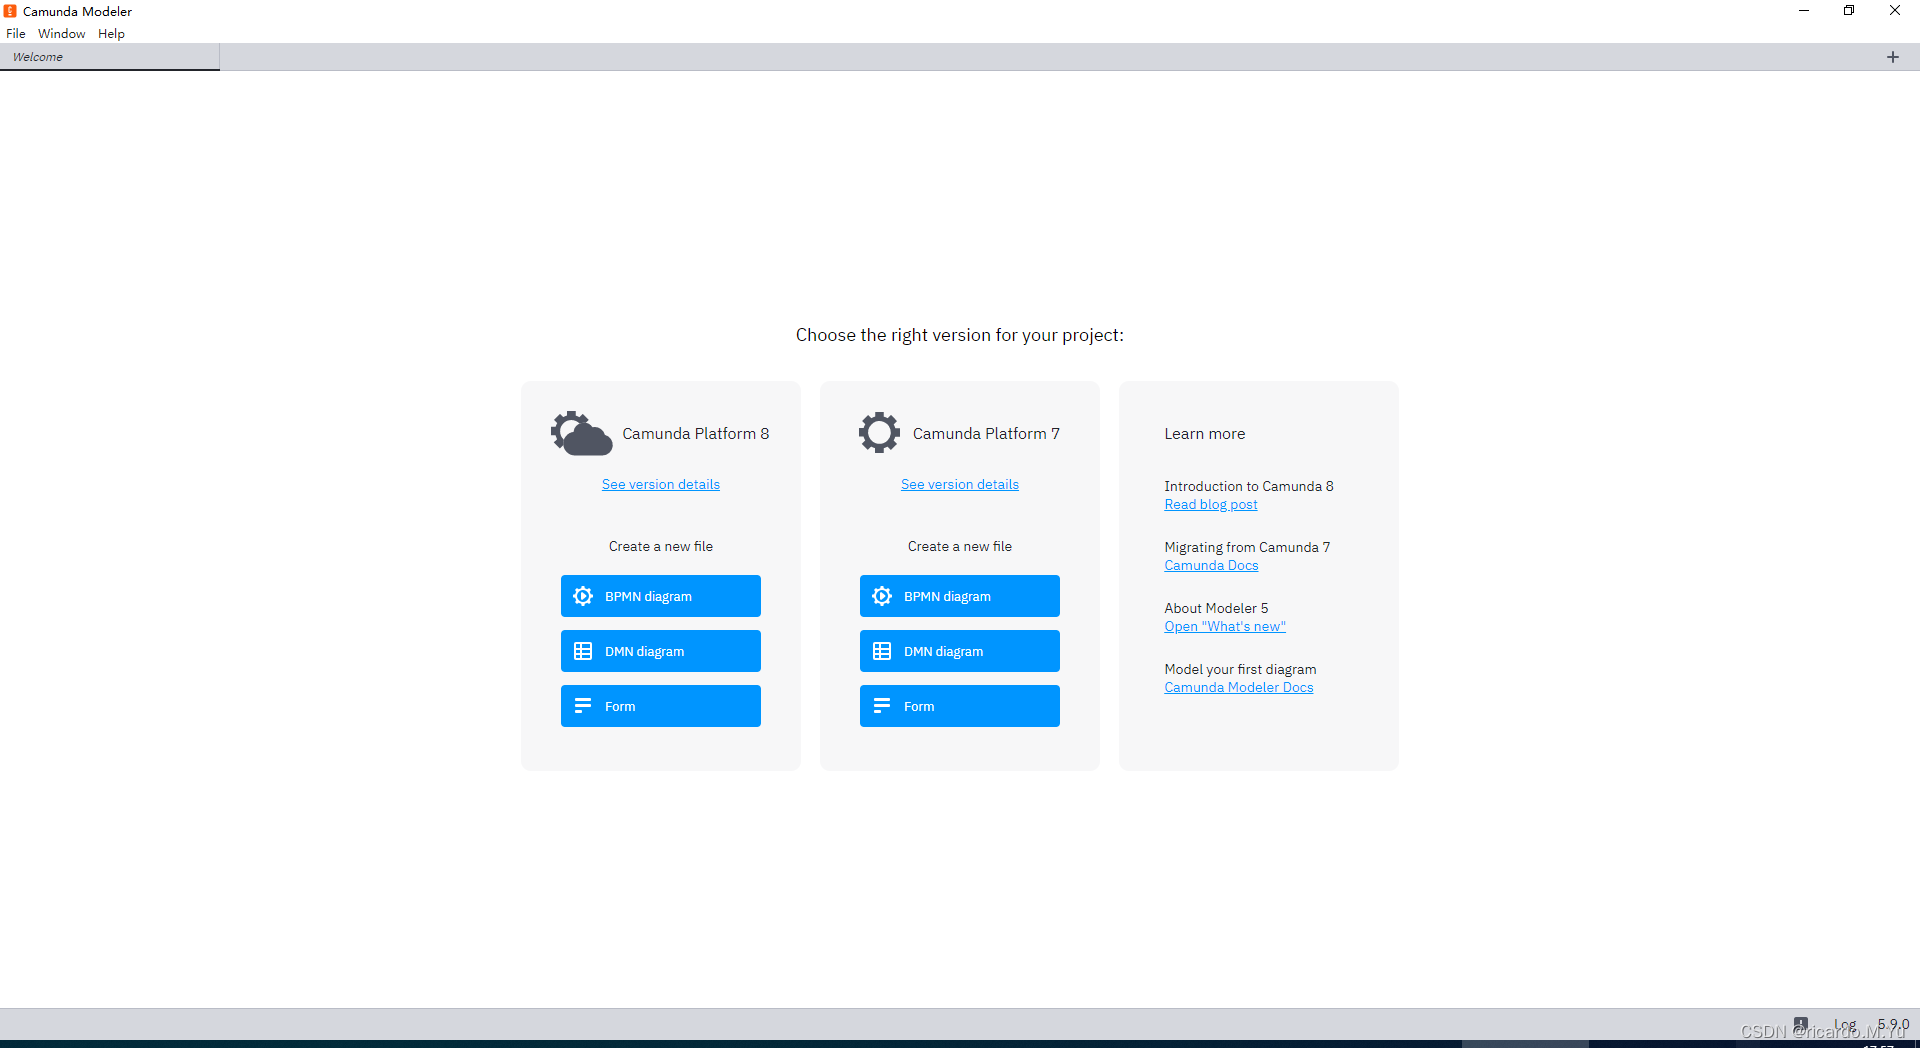
解压缩后打开如下:
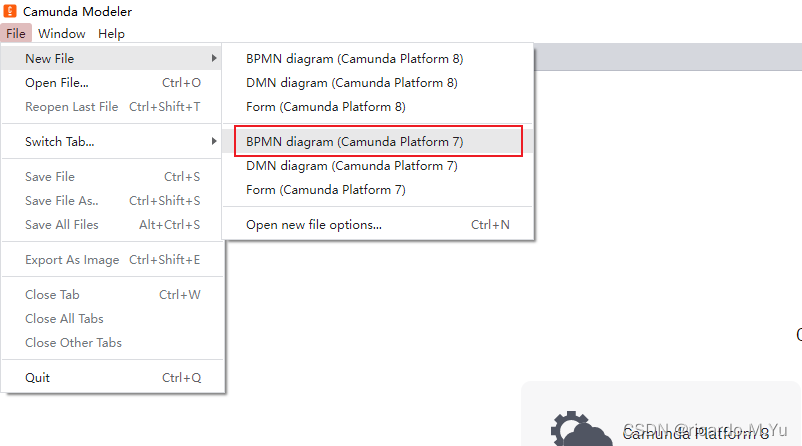
绘制
新建一个
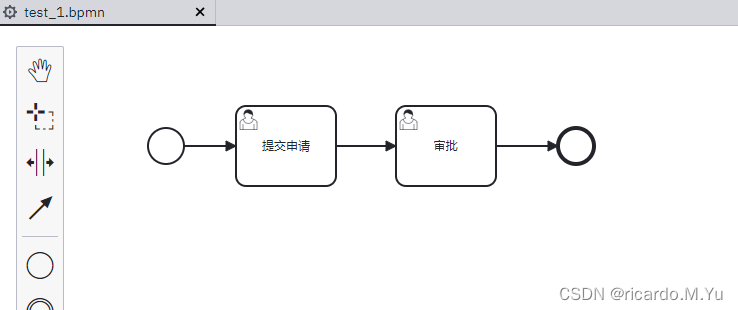
我这边稍微画了一个,具体怎么画,就不在细说了,最后效果如下,模拟了个OA的流程
任务分类
只介绍最常用的两种
用户任务 (User Task)
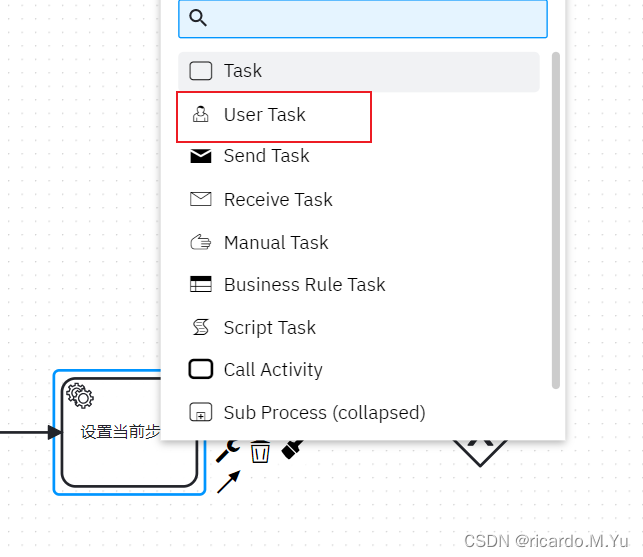
具体来说就是需要手动执行的任务,即需要我们这变写完业务代码后,调用代码
taskService.complete(taskId, variables);
才会完成的任务
系统任务(Service Task)
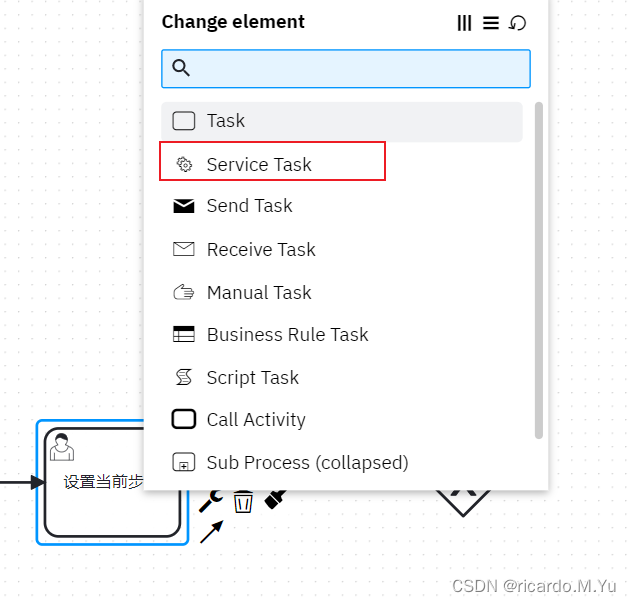
系统会自动帮我们完成的任务
网关
分为这么几类,会根据我们传入的流程变量及设定的条件走
排他网关(exclusive gateway)
这个网关只会走一个,我们走到这个网关时,会从上到下找第一个符合条件的任务往下走
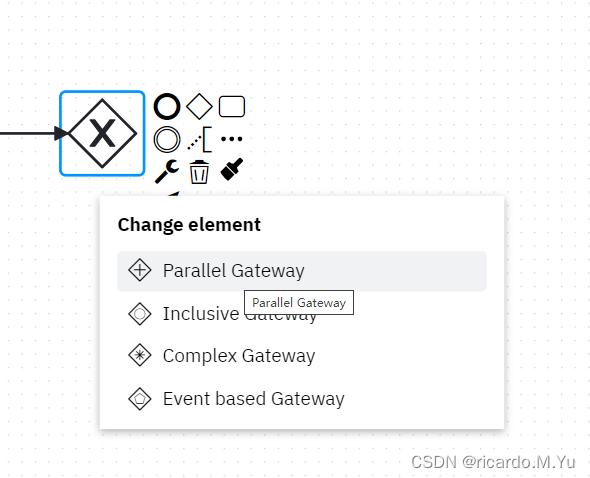
并行网关(Parallel Gateway)
这个网关不需要设置条件,会走所有的任务
包含网关(Inclusive Gateway)
这个网关会走一个或者多个符合条件的任务
示例
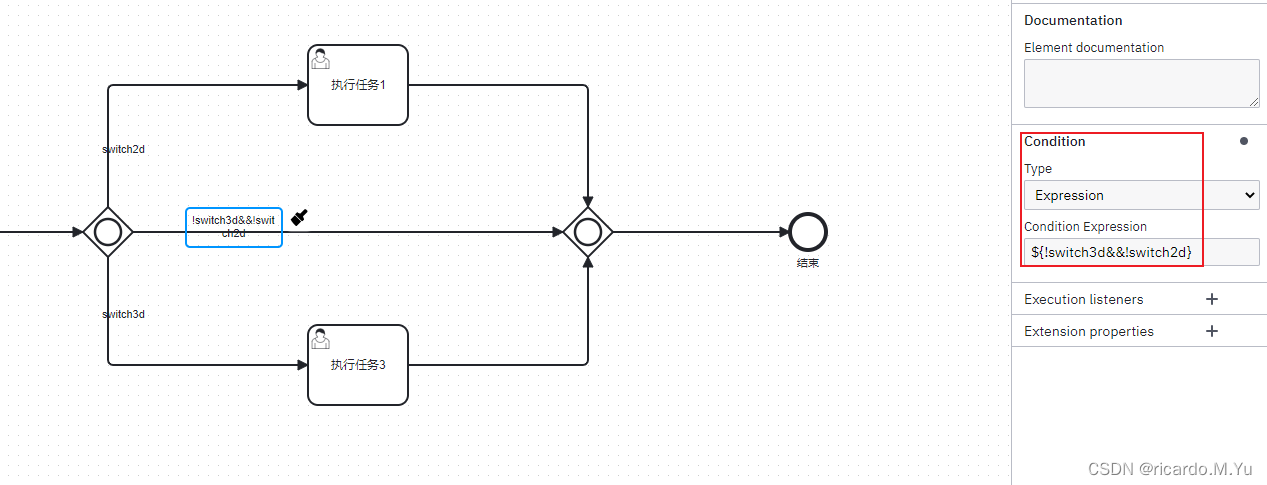
如上图包含网关,需要在网关的连线初设置表达式 condition,
参数来自于流程变量
两个参数:
switch2d 、 switch3d
如果 都为true,则走任务1,3
如果 switch2d 为true switch3d为false,则只走任务1
如果 switch3d 为true switch2d为false,则只走任务3
如果都为false,则直接走网关,然后结束
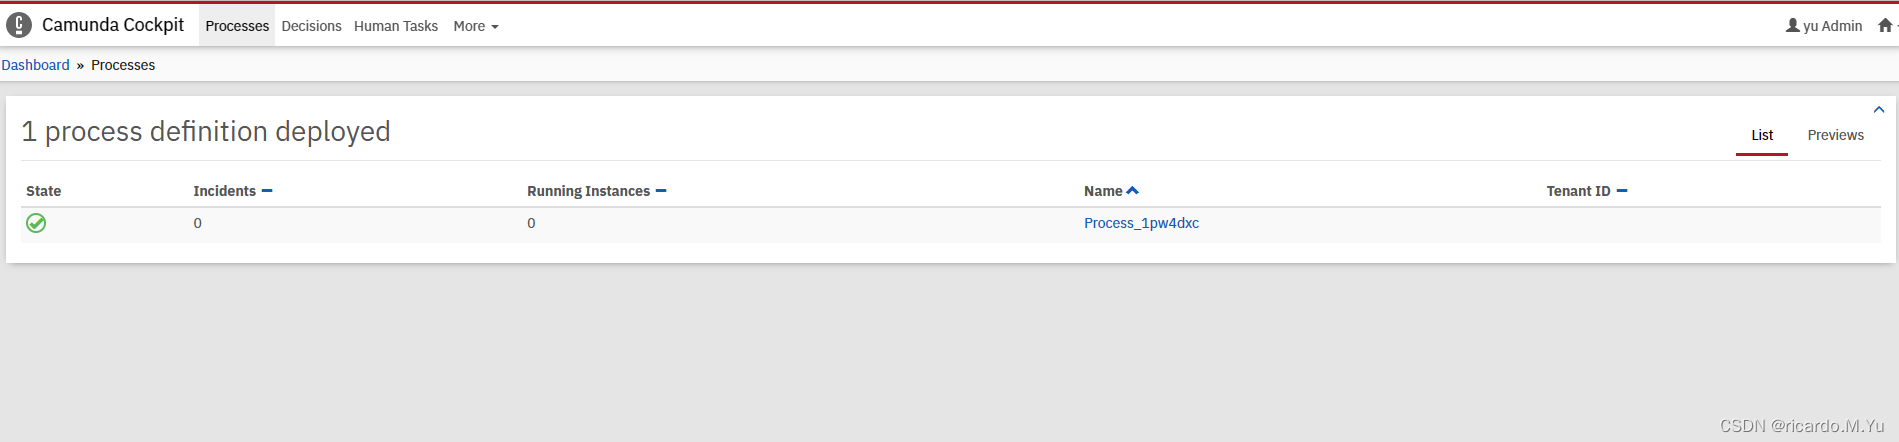
引入项目
将画好的流程图保存文件为 test_1.bpmn,在刚才的springboot项目中resources新建一个bpmn文件夹,放进去,
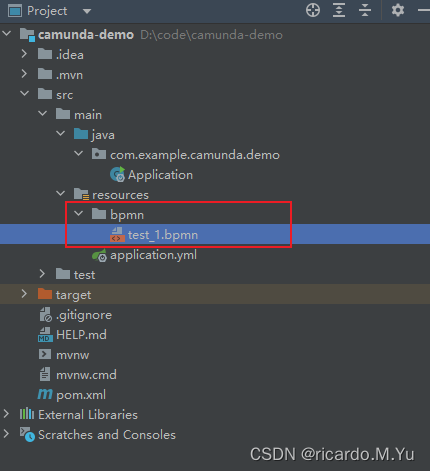
重启项目,发现web界面中已经被集成进来了
具体开发
写几个测试controller和service
controller
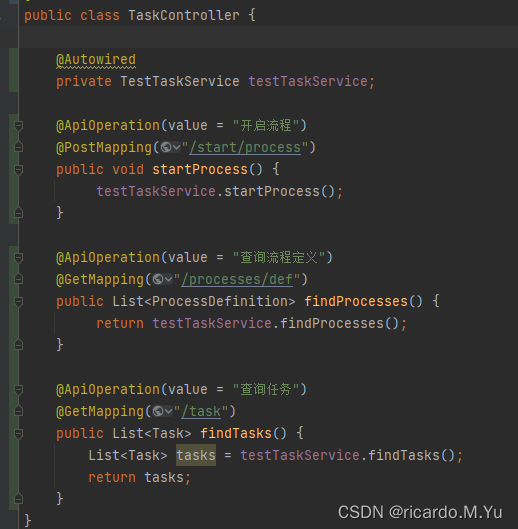
service
    public void startProcess() {
        ProcessInstance instance = runtimeService.startProcessInstanceByKey("key");
        System.out.println(instance.toString());
    }

    public List<ProcessDefinition> findProcesses() {
        return repositoryService.createProcessDefinitionQuery().list();
    }

    public List<Task> findTasks() {
        return taskService.createTaskQuery().list();
    }
启动流程成功,说明问题不大,接下来详细业务改进。
下一篇介绍详细的业务集成及各种API(变量传递、自动任务)的使用
API使用
流程相关API
创建流程:
会同时创建第一个任务
ProcessInstance instance = runtimeService.startProcessInstanceByKey(processKey, params);
暂停流程
流程暂停后,再执行相关任务会报错,需要先重新激活任务
runtimeService.suspendProcessInstanceById(instance.getId());
重新激活流程
runtimeService.activateProcessInstanceById(instance.getId());
删除流程
会同时删除任务
runtimeService.deleteProcessInstance(instance.getId(), "手动删除");
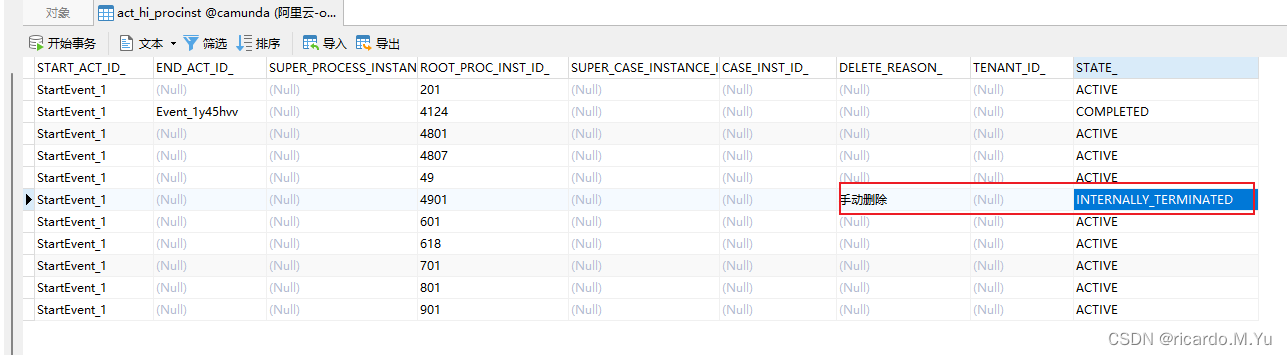
以上都可以在流程历史表 act_hi_procinst 里查询
任务相关API
基于service的查询类,都可先构建一个 query,然后在附上查询条件,实例几个
List<ProcessDefinition> list = repositoryService.createProcessDefinitionQuery().list();
List<Task> list = taskService.createTaskQuery().taskAssignee("zhangsan").list();
List<ProcessInstance> instances = runtimeService.createProcessInstanceQuery().listPage(1, 10);
查询历史任务
List<HistoricProcessInstance> list = historyService.createHistoricProcessInstanceQuery().list();
查询当前任务/分页
List<Task> list = taskService.createTaskQuery().orderByTaskCreateTime().desc().list();
任务回退
大体思路是拿到当前的任务,及当前任务的上一个历史任务,然后重启
代码示例
 Task activeTask = taskService.createTaskQuery()
                .taskId(taskId)
                .active()
                .singleResult();
        List<HistoricTaskInstance> historicTaskInstance = historyService.createHistoricTaskInstanceQuery()
                .processInstanceId(instanceId)
                .orderByHistoricActivityInstanceStartTime()
                .desc()
                .list();

        List<HistoricTaskInstance> historicTaskInstances = historicTaskInstance.stream().filter(v -> !v.getTaskDefinitionKey().equals(activeTask.getTaskDefinitionKey())).toList();

        Assert.notEmpty(historicTaskInstances, "当前已是初始任务!");
        HistoricTaskInstance curr = historicTaskInstances.get(0);

        runtimeService.createProcessInstanceModification(instanceId)
                .cancelAllForActivity(activeTask.getTaskDefinitionKey())
                .setAnnotation("重新执行")
                .startBeforeActivity(curr.getTaskDefinitionKey())
                .execute();
流程变量
包括流程中产生的变量信息,包括控制流程流转的变量,网关、业务表单中填写的流程需要用到的变量等。很多地方都要用到
流程变量变量传递
变量最终会存在 act_ru_variable 这个表里面
在绘制流程图的时候,如果是用户任务(userService) 可以设置变量,比如执行人,
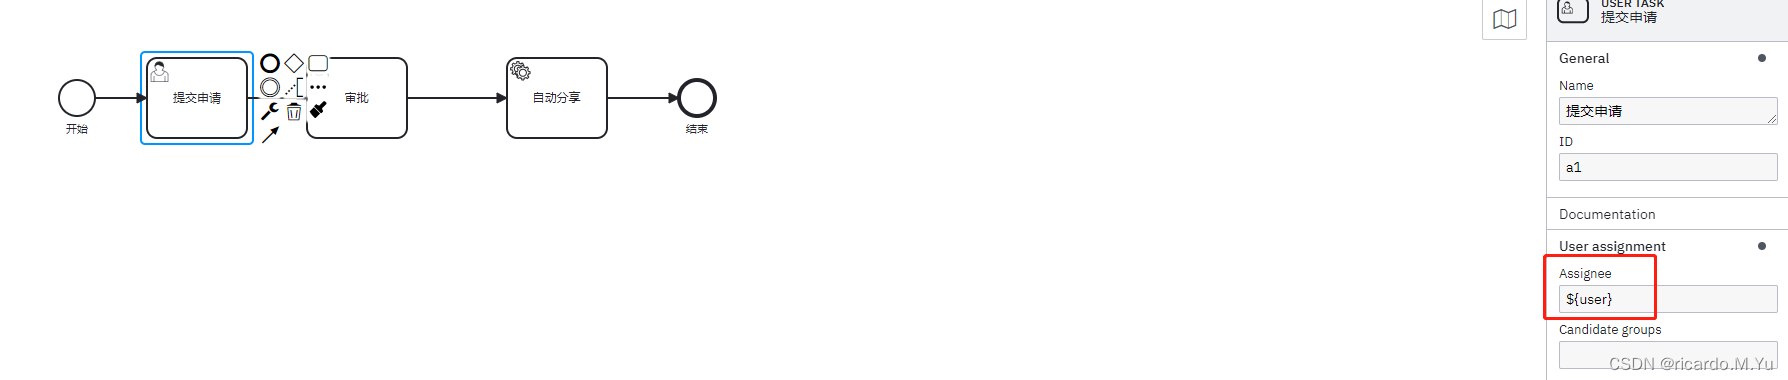
写法有这么几种方式
写死,就比如 zhangsan
表达式,比如上面写的 ${user},这种需要传入参数,其实就是启动参数的时候传入,传入参数,可选值为一个Map<String, Object>,之后的流程可查看次参数,上面写的是 user, 所以map里面的key需要带着user,不然会报错。
关于扩展变量,可在流程图绘制这么设定,传递方式还是一样,
流程图里面在下面写:

代码:
ProcessInstance instance = runtimeService.startProcessInstanceByKey(key, new HashMap<>());
变量设置
runtimeService.setVariable(instance.getId(), Constants.PATIENT_ID, relatedId);
变量查询
Object variable = runtimeService.getVariable(instance.getId(), Constants.GENERAL_ID);
历史变量查询
 HistoricVariableInstance variableInstance = historyService.createHistoricVariableInstanceQuery().processInstanceId(bo.getId().toString()).
            variableName(Constants.PATIENT_ID).singleResult();
//变量值
variableInstance.getValue();
//变量名称
variableInstance.getName();
针对后端来说任务类型主要有两种。
用户任务-userTask
即需要用户参与的任务,因为工作流执行过程中需要涉及到审批、过审之类的需要用户参与的任务,这个时候需要用户参与,然后调用接口完成任务。
服务任务-serviceTask
即自动执行的任务,比如用户提交后,系统自动存储、修改状态等自动完成的任务。
Type
任务类型是关键,可根据配型配置实现调用 java的方法,spring 的bean方法,等等有这么几种类型
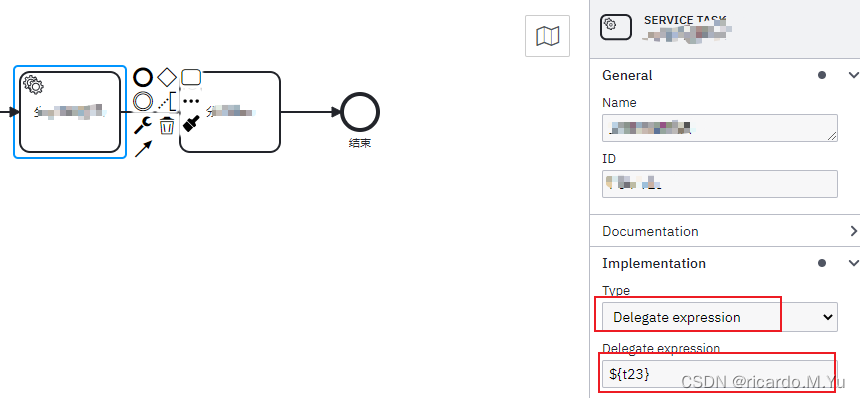
推荐使用 -- Delegate Expression !!!
在系统任务中,因为是自动执行,所以实际应用中需要嵌入各种业务逻辑,可以在流程图设计中,按照下面方式调用java代码执行,在spring中配置同名的bean
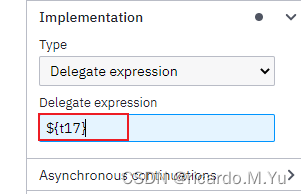
配置表达式,可以实现JavaDelegate接口使用类名配置,快捷写法如下,比较推荐下面这种,此种可灵活配置bean和spring结合使用,注入service等业务方法
  @Bean("t17")
    JavaDelegate t17() {
        return execution -> {
            Map<String, Object> variables = execution.getVariables();
            Task task = taskService.createTaskQuery().processInstanceId(execution.getProcessInstanceId()).singleResult();
            //业务逻辑
            task.setOwner(String.valueOf(dentistId));
        };
    }
Java Class :
配置java类名,需要实现JavaDelegate接口,注意是全路径名,不可以使用Spring的bean配置!!!
@Component
public class T17Delegate implements JavaDelegate {

    @Override
    public void execute(DelegateExecution execution) throws Exception {
            String taskId = execution.getId();
            String instanceId = execution.getProcessInstanceId();
            Map<String, Object> variables = execution.getVariables();
    }
}
下面两种可使用spring的配置
Expression:
EL表达式,调用java类的方法 ,规范:
expression=“#{monitorExecution.execution(execution)}”
@Component("monitorExecution")
public class MonitorExecution {
    public void execution(DelegateExecution execution){
        String processInstanceId = execution.getProcessInstanceId();
    }
}
任务监听器 - Task Listener
任务监听器用于在某个与任务相关的事件发生时执行自定义Java逻辑或表达式。它只能作为用户任务的子元素添加到流程定义中。请注意,这也必须作为BPMN 2.0扩展元素的子级和Camunda命名空间中发生,因为任务侦听器是专门为Camunda引擎构建的。
适用场景:
@Bean
    TaskListener t21() {
        return delegateTask -> {

            String taskId = delegateTask.getId();
            String instanceId = delegateTask.getProcessInstanceId();

            Map<String, Object> variables = delegateTask.getVariables();
            // TODO: 20log/3/22
            delegateTask.setVariable("", "");
        };
    }
执行监听器 - Execution Listener
执行侦听器在流程执行过程中发生某些事件时执行外部Java代码或计算表达式。可以用在任何任务中,可以捕获的事件有:
流程实例的开始和结束。
进行过渡。
活动的开始和结束。
网关的开始和结束。
中间事件的开始和结束。
结束开始事件或开始结束事件
适用场景:每个任务结束时设置任务进度
 public class ExampleExecutionListenerOne implements ExecutionListener {

    public void notify(DelegateExecution execution) throws Exception {
      execution.setVariable("variableSetInExecutionListener", "firstValue");
      execution.setVariable("eventReceived", execution.getEventName());
    }
  }
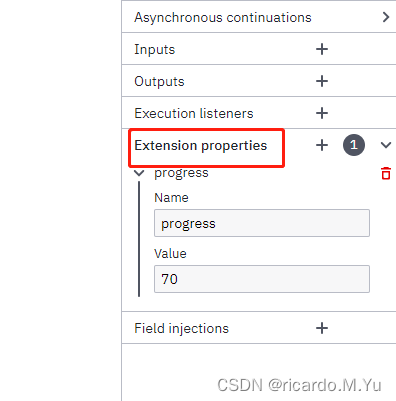
扩展属性- Extension properties
扩展属性适用于很多自定义的业务属性,比如设置业务流程进度
流程权限及创建人设置
IdentityService为鉴权相关服务,但是我们实际开发中,一般会用到我们自己的鉴权系统,所以可以使用camunda提供的api来设置,具体可以看IdentityServiceImpl这个类,其中也是使用了ThreadLocal来保存鉴权信息 ,代码在下面
private ThreadLocal<Authentication> currentAuthentication = new ThreadLocal<Authentication>();
用户信息设置:
// Userutil是我们自己封装的用户工具类
identityService.setAuthenticatedUserId(UserUtil.getUserId().toString());

//获取
Authentication authentication = identityService.getCurrentAuthentication();
他内置很多比如开启流程时候,会默认找当前登录的人,这个类DefaultHistoryEventProducer
  // set super process instance id
    ExecutionEntity superExecution = executionEntity.getSuperExecution();
    if (superExecution != null) {
      evt.setSuperProcessInstanceId(superExecution.getProcessInstanceId());
    }

    //state
    evt.setState(HistoricProcessInstance.STATE_ACTIVE);

    // set start user Id
    evt.setStartUserId(Context.getCommandContext().getAuthenticatedUserId());
任务执行人及发起人设置
//根据任务id设置执行人
taskService.setAssignee(task.getId(), UserUtil.getUserId().toString());
版权归原作者 ricardo.M.Yu 所有, 如有侵权,请联系我们删除。