
Vue:插槽Slot
一、默认插槽
1、代码演示
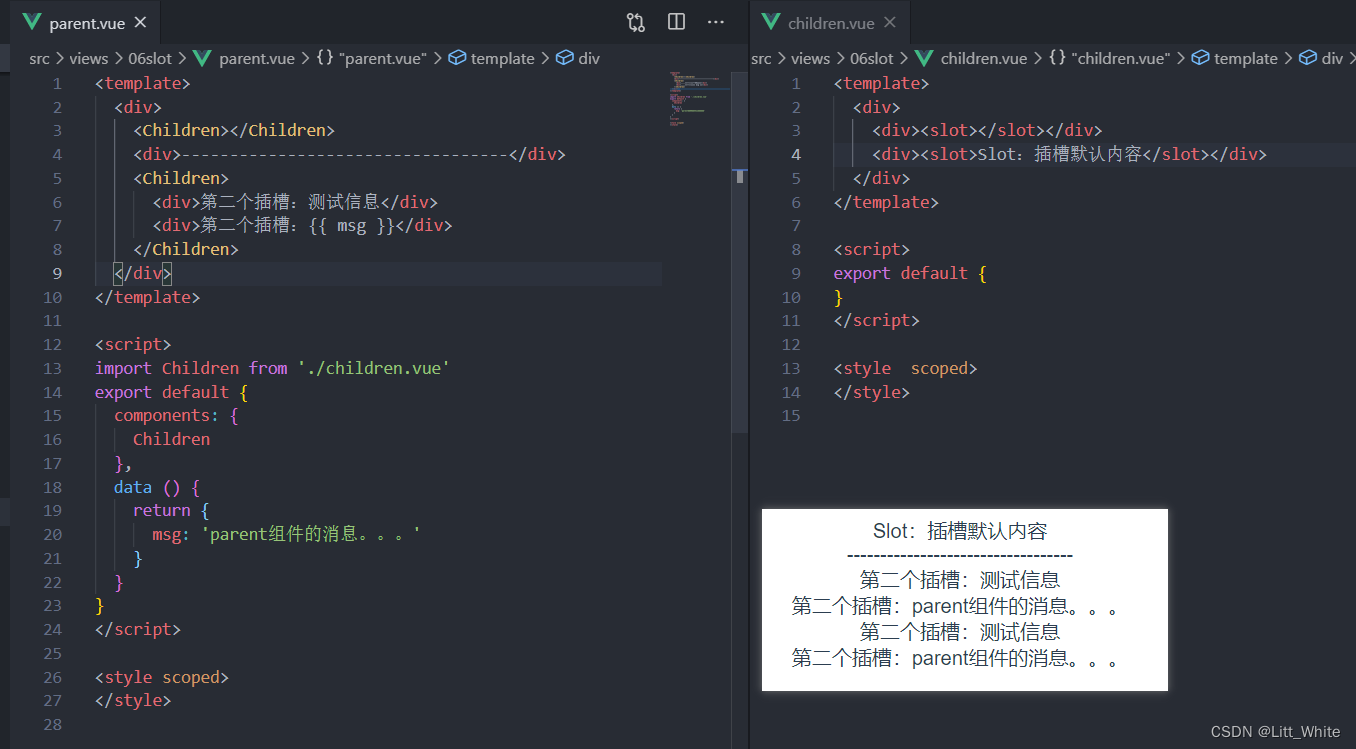
通过上述代码,我们至少了解以下2点:
1.插槽里可以有默认内容,
2.默认插槽,组件的内容会全部替换到插槽中
2.父组件的数据也可以显示到子组件中(数据的作用域,后面作用域插槽会用到)
2、语法
定义插槽:
<slot>插槽的默认内容</slot>
使用插槽:
<组件> 内容全部替换到插槽中 </组件>
二、具名插槽
1、代码演示
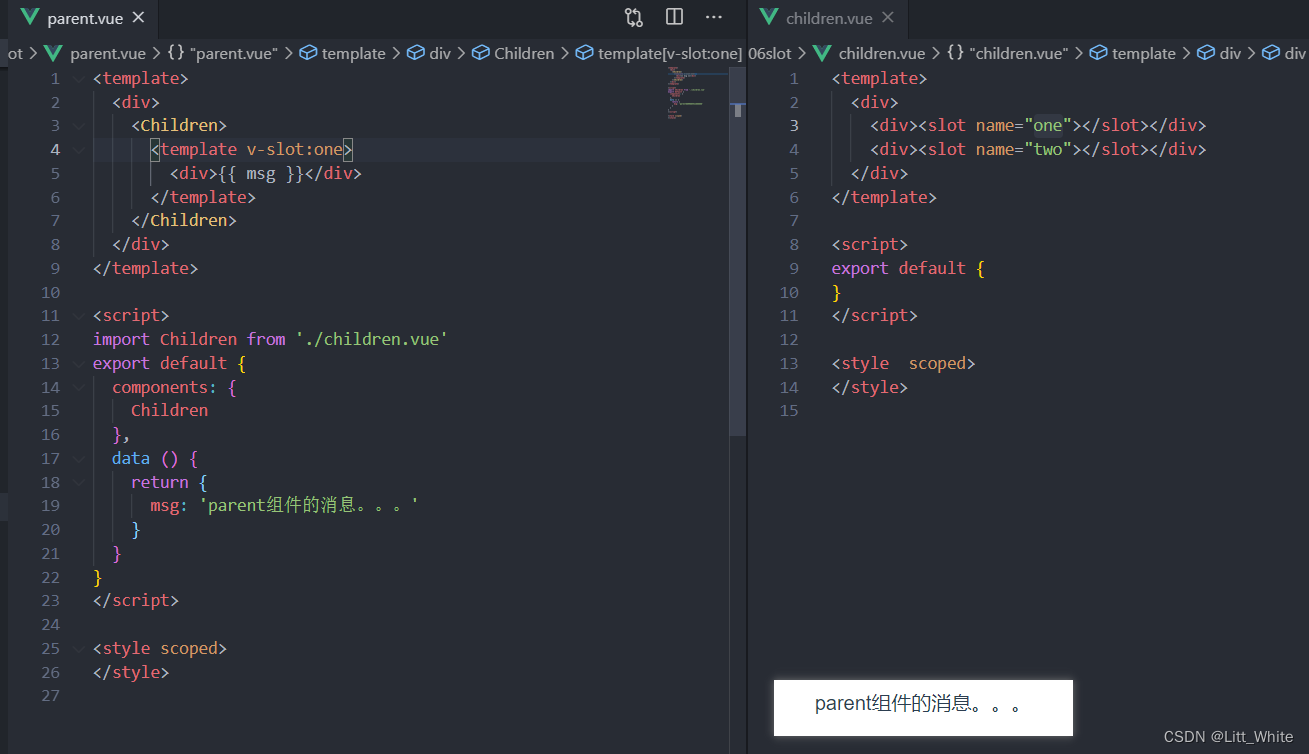
具名插槽:简单理解,就是为每个
<slot>进行命名,以进行区分。
注意:默认插槽也是有name的,
name='default'
2、语法
定义插槽:
<slot name="one"></slot>
使用插槽:
<template v-slot:one> <div>{{ msg }}</div> </template>
插槽简写:
<template #one> <div>{{ msg }}</div> </template>
3、动态插槽名
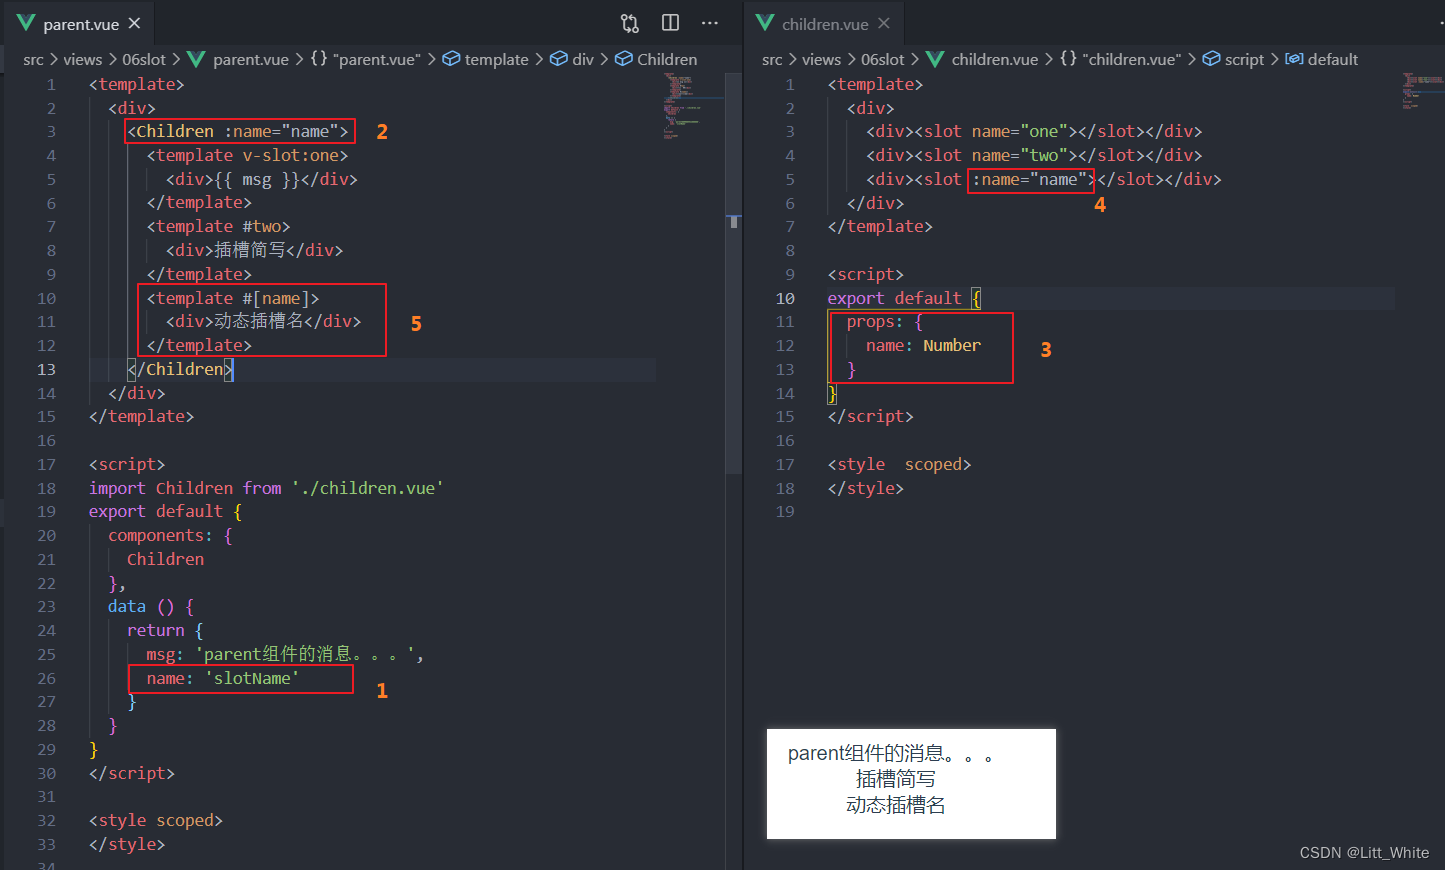
动态插槽名:
现在定义的插槽名都是固定写死的,Vue也支持将插槽名定义为变量。
定义插槽:
<slot :name="name"></slot>
使用插槽:
<template #[name]> <div>动态插槽名</div> </template>
三、作用域插槽
1、渲染作用域

渲染作用域:
父级模板里的所有内容都是在父级作用域中编译的
子模板里的所有内容都是在子作用域中编译的
因此也产生了一个问题:
假设第一个场景,需要你写一个商品卡片组件,并通过循环去展示多个卡片,
并且要求能响应每个卡片上的点击事件而跳转到商品详情页,你会怎么写?
我会使用如下的处理方式,
- 首先将商品卡片写成一个组件
card.vue,- 在
cardList.vue中用一个v-for来处理商品卡片列表的展示。card.vue组件通过$emit向父组件传递cardClick事件,并携带商品数据,- 父组件即可在
onClick方法中得到数据,进行业务处理,- 这样便完成了一个基本的由子到父的数据传递。
// cardList.vue
<template><divclass="card"><Cardv-for="item in cardData":key="item"@cardClick="onClick()"></Card></div></template>

// card.vue
<template><divclass="div"@click="onClick()">卡片</div></template><script>exportdefault{methods:{onClick(){this.$emit('cardClick')}}}</script>
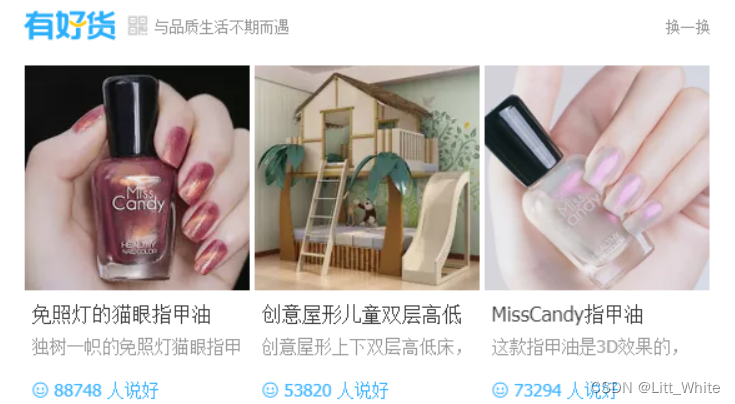
如果再往上抽象一下呢?
比如有多个运营栏目,像淘宝首页有“有好货”,“爱逛街”这样两个栏目,每个栏目下都需要有一个商品卡片列表,那么商品卡片列表
cardList.vue
就要抽成组件了。而这个包含多个运营栏目的vue组件我假设它叫
finalList.vue
,在其中通过
v-for
调用了
cardList.vue
组件。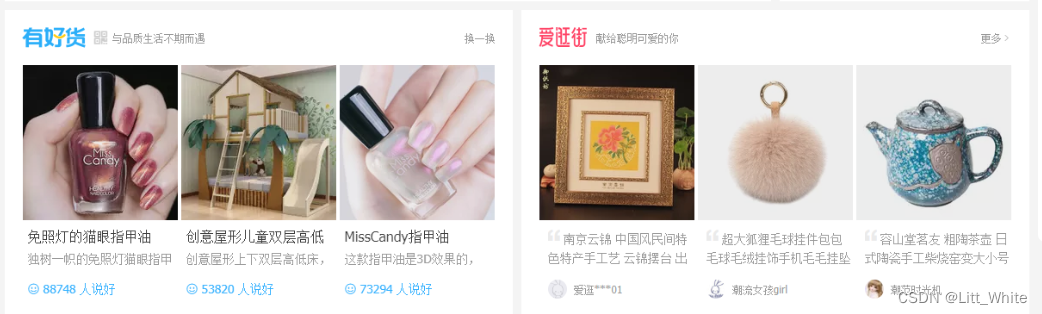
注意:
需求来了—>我希望把点击商品卡片的业务放在
finalList.vue
中处理。要如何处理呢?
方法1:
- 商品按钮点击时,
card.vue组件用$emit通知cardList.vue,cardList.vue继续用$emit往上抛,通知finalList.vuefinalList.vue用事件接收处理。
这样做完全没有问题,但是显得子组件很不纯粹,跟业务都扯上关系了。
2、作用域插槽(实战应用)
那么如何优雅地解决上面的问题呢?这个时候,作用域插槽真正派上用场了。
我们先看下通过作用域插槽是如何解决上面问题的。
(1)finalList.vue
// src\views\06slot\finalList.vue
<template><div><divv-for="item in '123'":key="item"><divstyle="text-align: left;">第{{ item }}个</div><CardList:cardData="cardData"class="cardlist"><templatev-slot="scope"><Card:cardObj="scope.row"@click.native="cardClick(scope.row)"class="card"></Card></template></CardList></div></div></template><script>import Card from'./card.vue'import CardList from'./cardList.vue'exportdefault{components:{
Card,
CardList
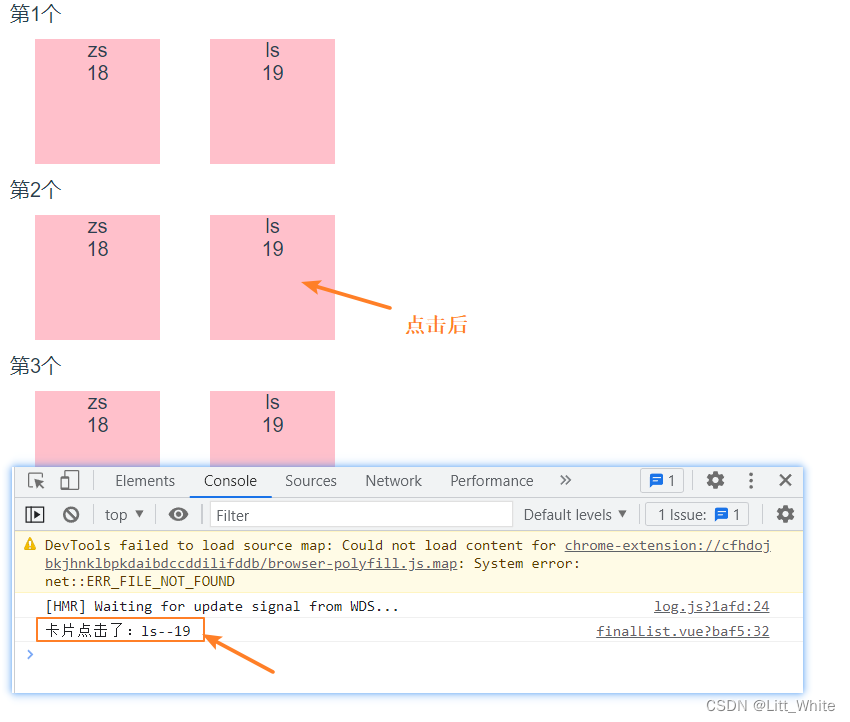
},data(){return{cardData:[{name:'zs',age:18},{name:'ls',age:19}]}},methods:{cardClick(row){
console.log('卡片点击了:'+ row.name +'--'+ row.age)}}}</script><stylescoped>.cardlist{display: flex;}.card{margin: 10px 20px;}</style>
(2)cardList.vue
// src\views\06slot\cardList.vue
<template><div><divv-for="(item, index) in cardData":key="index"><slot:row="item"></slot></div></div></template><script>exportdefault{props:{cardData:{type: Array
    }}}</script><stylescoped></style>
(3)card.vue
// src\views\06slot\card.vue
<template><divclass="div"><div>{{ cardObj.name }}</div><div>{{ cardObj.age }}</div></div></template><script>exportdefault{props:{cardObj:{type: Object,default:()=>{}}}}</script><stylescoped>.div{width: 100px;height: 100px;background-color: pink;}</style>
(4)最终效果
小结
关于作用域插槽:
简单理解:作用域插槽就是简化子组件通过$emit向父组件
多层传递数据的另一种表现
适用的场景:至少是包含三级以上的组件层级,是一种优秀的组件化方案!
3、简单应用demo
- 父组件访问子组件的数据: - 父组件获取组件slot属性:
v-slot="slotProps",- 子组件将数据绑定到动态属性中:<slot :item="item"></slot> - 按照父组件期望的形式进行数据展示: - 子组件中定义slot插槽:
<slot :item="item" :index="index"></slot>- 父组件通过插槽的方式替换子组件的插槽内容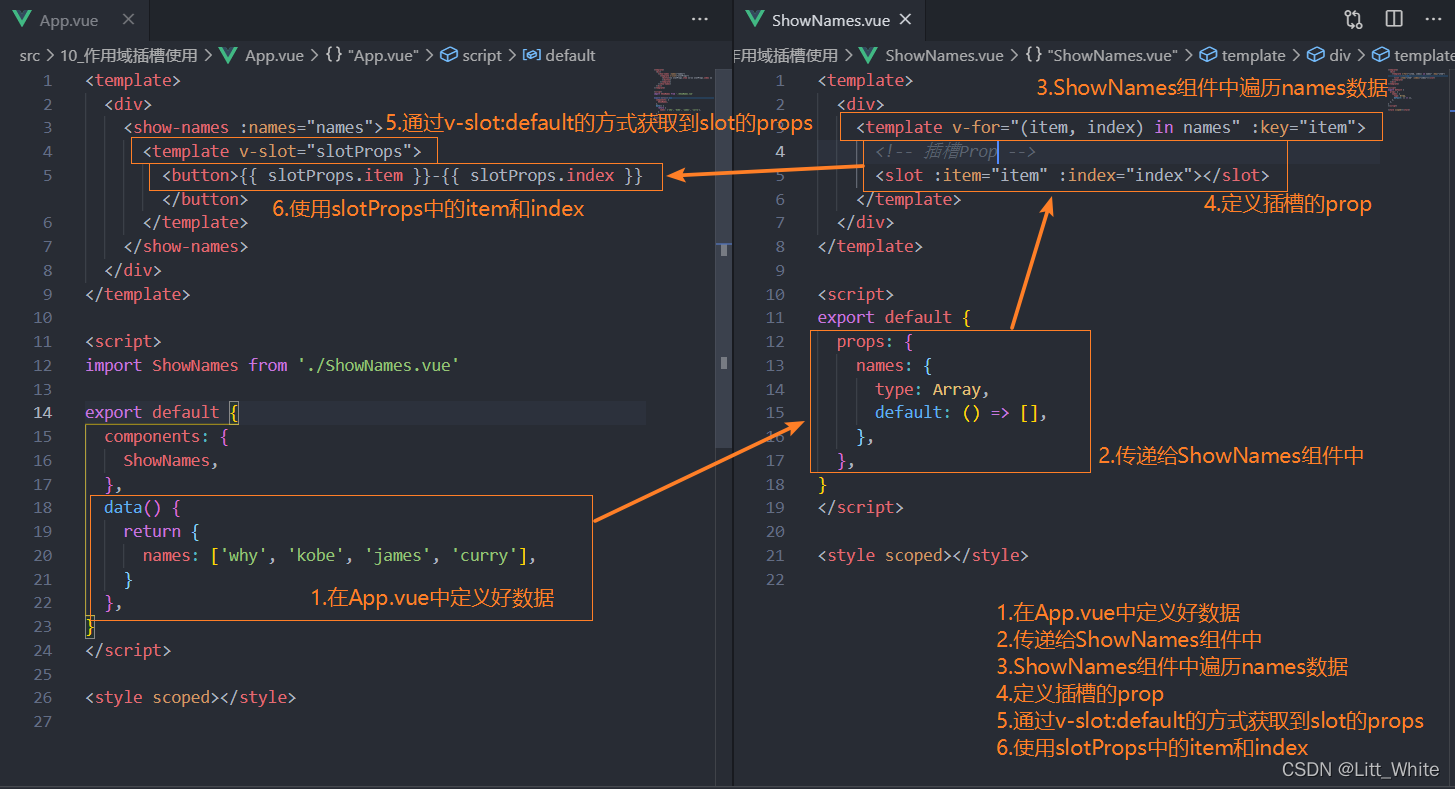
四、插槽的多层嵌套
1、需求
A、B、C三个组件,A组件插槽的内容传给B组件,B组件再传递给C组件。
2、代码演示
// src\views\06slot\parent.vue
<template><div><Children1><templatev-slot:one><div>根节点信息</div></template></Children1></div></template>

// src\views\06slot\children1.vue
<template><div><div>children1</div><Children2><slotname="one"slot="two"></slot></Children2></div></template>

// src\views\06slot\children2.vue
<template><div><div>children2</div><slotname="two"></slot></div></template>
3、代码效果

4、核心点
- A组件用
v-slot:one将内容传递给B组件 - B组件用
name="one"接收插槽的内容,并通过slot="two"将内容传递个C组件。即:<slot name="one" slot="two"></slot> - C组件用
<slot name="two"></slot>接收A组件的内容
本文转载自: https://blog.csdn.net/Litt_White/article/details/128885511
版权归原作者 Litt_White 所有, 如有侵权,请联系我们删除。
版权归原作者 Litt_White 所有, 如有侵权,请联系我们删除。