开源了,免费使用GPT4(Windows一键启动脚本)
大家好,我打算每日花1小时来写一篇文章,这一小时包括文章主题思考和实现,连续日更几天,看看能不能被官方推荐。(帮我点点赞哦~)
今天的主题是:给之前写的文章开源了,免费使用GPT4,添加一个Windows/Linux/Mac 一键启动脚本,这篇文章如果对你帮助极大,欢迎你分享给你的朋友、她、他,一起成长。
也欢迎大家留言,说说自己想看什么主题的Python文章,留言越具体,我写的越快,比如留言:我想看Python 自动操作Excel 相关文章。
如果你有具体的需求想通过使用Python实现自动化,那将更好,欢迎私聊我微信,一起交流探讨。
今天给大家分享《黑客&网络安全入门&进阶学习资源包&GPT4》,朋友们如果有需要,可以保存下方卡片后,V扫描免肺领取哦~

Windows 一键启动脚本
我看 开源了,免费使用GPT4 文章有很多朋友留言说想要对应启动脚本的 Windows 版本,所以这篇文章给大家这个脚本,顺便介绍下如何写Windows脚本。
我已经fork项目,并添加了我写的几个脚本(已测试过运行ok)。
注意:启动脚本中的 G4F_PROXY 环境变量值 http://127.0.0.1:7890/ 需要大家替换成自己的网络地址,没有这个访问不了的,不用多说了哈🤣
大家可以输入以下指令git clone 我修改过的项目。
git clone https://mirror.ghproxy.com/https://github.com/XksA-me/gpt4free
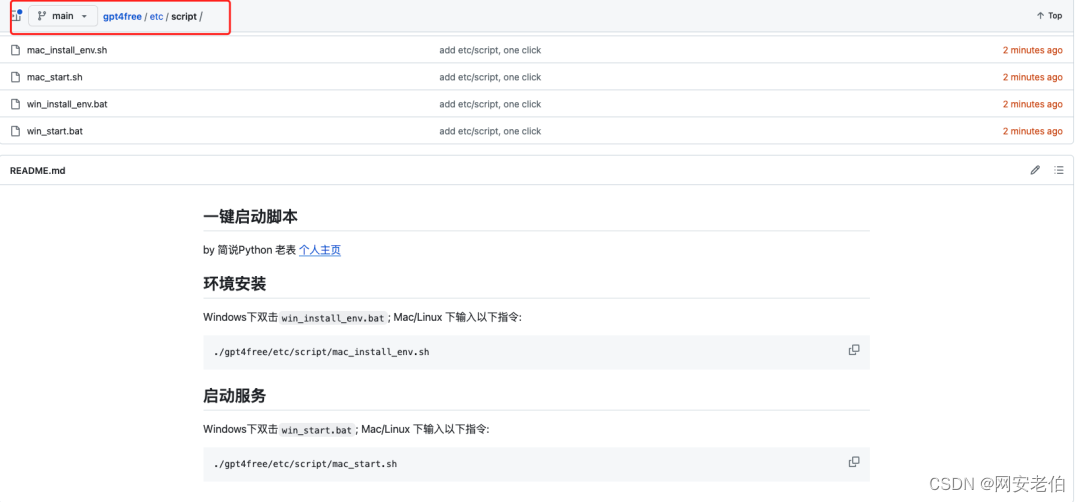
我在源项目 etc 下新建了一个 script 文件夹存放了本文提到的四个一键启动脚本。

Windows 脚本分为2个,第一个 win_install_env.bat,内容如下,主要功能是安装 conda 和创建环境,只需要运行一遍即可。
@echo off

echo Installing Miniconda...
curl https://repo.anaconda.com/miniconda/Miniconda3-latest-Windows-x86_64.exe -o miniconda.exe
start /wait "" miniconda.exe /SILENT /AddToPath=1
del miniconda.exe

echo Installing Git for Windows...
curl -L https://mirror.ghproxy.com/https://github.com/git-for-windows/git/releases/download/v2.43.0.windows.1/Git-2.43.0-64-bit.exe -o git-install.exe
start /wait "" git-install.exe /SILENT /AddToPath=1
del git-install.exe

echo Cloning the repository...
git clone https://mirror.ghproxy.com/https://github.com/xtekky/gpt4free
cd gpt4free
conda  activate gpt4free && pip install -r requirements.txt && pip install g4f

第二个 win_start.bat,内容如下,主要功能是启动服务,需要启动的时候点击运行。
@echo off

echo Setting G4F_PROXY environment variable...
setx G4F_PROXY "http://127.0.0.1:7890"

echo Running the application...
cd gpt4free
conda activate gpt4free && python g4f/gui/run.py
浏览器访问:
http://127.0.0.1:8080
即可。

Linux/Mac 一键启动脚本
顺便完善下 Linux/Mac 的脚本内容。
第一个 mac_install_env.sh,内容如下,主要功能是安装 conda 和创建环境,只需要运行一遍即可。
#! /bin/bash

wget https://mirrors.tuna.tsinghua.edu.cn/anaconda/miniconda/Miniconda3-py38_22.11.1-1-Linux-x86_64.sh
chmod +x Miniconda3-py38_22.11.1-1-Linux-x86_64.sh
./Miniconda3-py38_22.11.1-1-Linux-x86_64.sh -b && /root/miniconda3/bin/conda init bash && /root/miniconda3/bin/conda clean -ya
# 安装 gpt4free 环境
git clone https://mirror.ghproxy.com/https://github.com/xtekky/gpt4free
cd gpt4free
conda create -n gpt4free python=3.9
source activate gpt4free && pip install -r requirements.txt && pip install g4f
第二个 mac_start.sh,内容如下,主要功能是启动服务,需要启动的时候运行。
#! /bin/bash
cd gpt4free
export G4F_PROXY=http://127.0.0.1:7890
source activate gpt4free && python g4f/gui/run.py
Linux/Mac .sh 脚本运行方法:
# 给予可执行权限
chmod +x mac_install_env.sh mac_start.sh
# 运行一遍即可
bash mac_install_env.sh
# 启动服务运行它
bash mac_start.sh

版权归原作者 网安老伯 所有, 如有侵权,请联系我们删除。