文章目录
概述
nginx自带的
ngx_http_proxy_module
和
ngx_http_upstream_module
提供了基本的负载均衡功能,但确实缺少对后端节点健康状态的主动检测机制。
为了实现健康检查并避免请求转发到故障节点,可以考虑使用第三方模块
nginx_upstream_check_module
,这个模块可以有效地检测后端服务的健康状态,并在后端服务器不可用时暂停转发请求。
ngx_http_upstream_module
是淘宝技术团队开发的nginx模快
nginx_upstream_check_module
来检测后方服务的健康状态,如果后端服务器不可用,则所有的请求不转发到这台服务器。
使用
nginx_upstream_check_module
可以实现以下步骤:
- 安装
nginx_upstream_check_module模块。 - 配置nginx以使用该模块,并设置健康检查参数,如检查间隔、超时等。
- 配置负载均衡器的upstream,使用
ngx_http_upstream_module定义后端节点,并使用nginx_upstream_check_module进行健康检查。 - 当后端节点被标记为不可用时,nginx将停止向该节点转发请求,直到节点恢复正常。
简单的示例配置:
http {
    upstream backend {
        server backend1.example.com;
        server backend2.example.com;
        check interval=3000rise=2fall=5timeout=1000type=http;}

    server {
        location / {
            proxy_pass http://backend;}}}
在这个示例中,我们定义了一个名为
backend
的负载均衡器,其中包含两个后端节点。check指令启用了健康检查,并指定了检查的参数,如间隔、成功次数、失败次数和超时时间。
这样,nginx将定期检查后端节点的健康状态,并根据检查结果决定是否向该节点转发请求。如果后端节点被标记为不可用,nginx将暂停将请求转发到该节点,直到其恢复为可用状态。
upstream_check_module模块安装和配置指南
upstream_check_module
模块用于Nginx的upstream节点(后端服务器)的健康检查。它可以定期检查每个节点的状态,自动标记不可用的节点,从而实现负载均衡的高可用性。
模块安装步骤
- 下载Nginx源代码:
wget http://nginx.org/download/nginx-1.24.0.tar.gztar-xzvf nginx-1.24.0.tar.gzcd nginx-1.24.0 - 下载
upstream_check_module源代码:git clone https://github.com/yaoweibin/nginx_upstream_check_module.gitcd nginx_upstream_check_module - 应用补丁:
patch -p1< nginx_upstream_check_module/check_1.24.0+.patchcd.. - 编译Nginx:
./configure --add-module=./nginx_upstream_check_modulemakesudomakeinstall
基本配置示例
在Nginx配置文件中添加以下内容:
worker_processes 1;# 设置Nginx工作进程的数量为1

events {
    worker_connections 1024;# 每个工作进程的最大连接数为1024}

http {
    include       mime.types;# 包含MIME类型配置文件
    default_type  application/octet-stream;# 默认MIME类型为application/octet-stream
    sendfile        on;# 启用sendfile系统调用传输文件
    keepalive_timeout  65;# 客户端与服务器之间的keep-alive连接超时时间为65秒

    upstream i4t.com {# 定义名为i4t.com的负载均衡器
       server 10.4.81.41:900;# 后端服务器1的IP地址和端口号
       server 10.4.81.42:900;# 后端服务器2的IP地址和端口号
       check interval=3000rise=2fall=5timeout=1000type=http ;# 启用健康检查功能,检查间隔为3000毫秒,成功次数达到2次则标记为上线,失败次数达到5次则标记为下线,超时时间为1000毫秒,检查类型为http }

    server {
        listen       80;# 监听80端口,接收HTTP请求
        server_name  localhost;# 服务器名为localhost

        location / {
         proxy_pass http://ip:port/xxxx;# 请求代理}
        location /status1 {
           stub_status on;# 启用内置的状态信息页面
           access_log  off;# 关闭对该位置的访问日志记录}
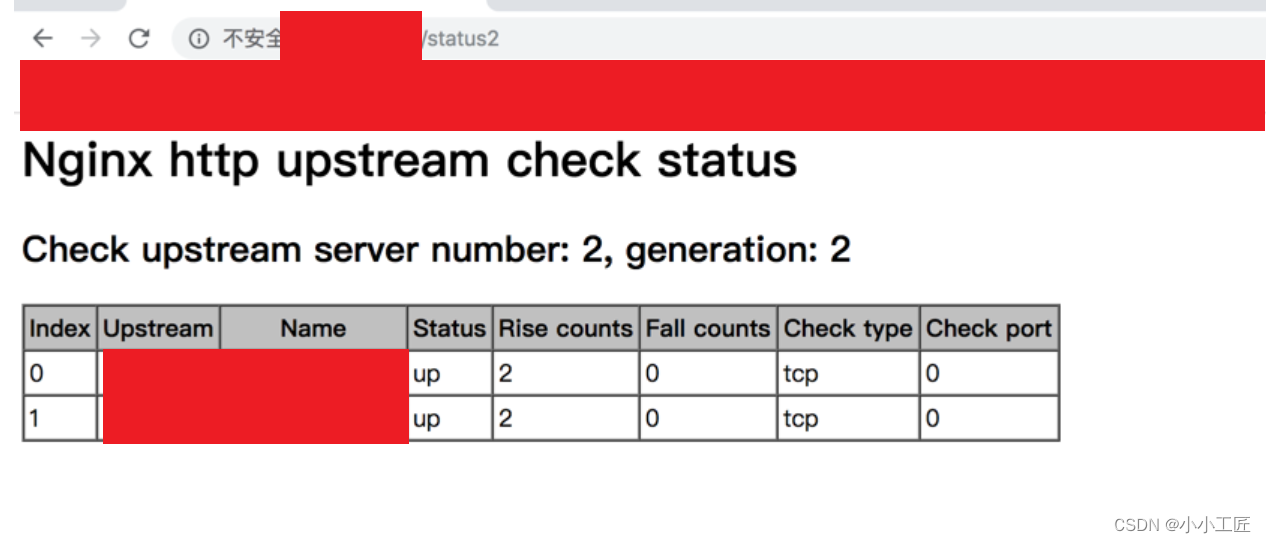
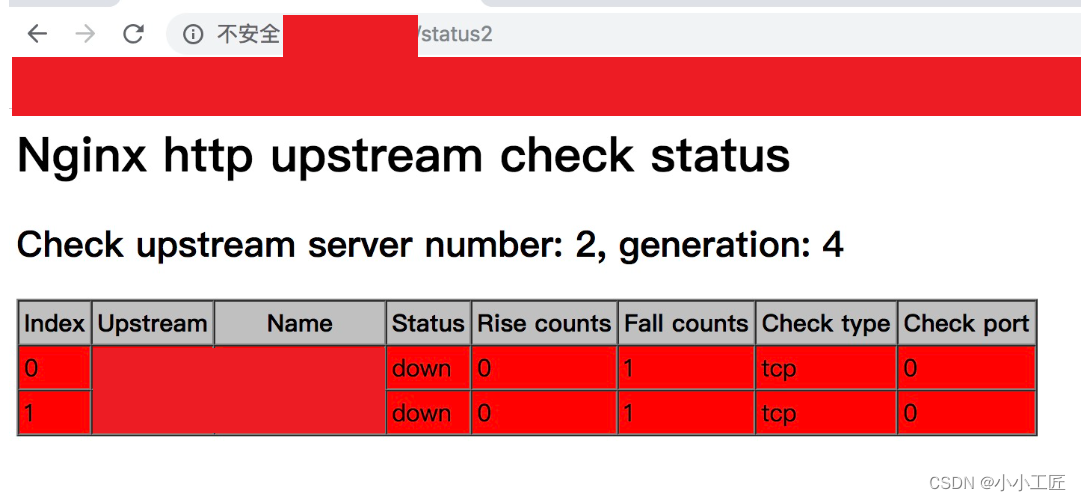
        location /status2 {# 配置使用upstream_check_module模块的健康检查
           check_status;# 启用upstream_check_module的状态信息页面
           access_log off;# 关闭对该位置的访问日志记录#allow SOME.IP.ADD.RESS; #可以设置允许网段访问#deny all;}}}


详细配置说明
- interval:健康检查的时间间隔(毫秒)。
- rise:连续成功响应的次数。
- fall:连续失败响应的次数。
- timeout:健康检查的超时时间(毫秒)。
- type:检查类型(如
http,tcp等)。
检查类型和参数

- HTTP检查:
check_http_send "GET /health_check HTTP/1.0\r\n\r\n";check_http_expect_alive http_2xx http_3xx; - TCP检查:
check interval=3000 rise=2 fall=5 timeout=1000 type=tcp; - MySQL检查:
check interval=3000 rise=2 fall=5 timeout=1000 type=mysql;check_mysql_send "select 1";check_mysql_expect_alive success;
常见问题及解决方案
- Nginx无法启动:- 检查Nginx配置文件中的语法是否正确,使用命令
nginx -t进行验证。 - 健康检查失败:- 确认后端服务器的健康检查端点是否正确响应。- 检查防火墙设置是否允许Nginx进行健康检查。
- 补丁应用失败:- 确认所用的Nginx版本与补丁版本是否匹配。
SSL检查和DNS解析功能
述如何使用
upstream_check_module
模块实现SSL检查和DNS解析功能。
SSL检查配置示例和说明
要对后端节点进行SSL检查,可以在配置中指定检查类型为
ssl_hello
或者使用
https
进行更详细的HTTP请求检查。
配置示例
- SSL握手检查:
upstream backend { server backend1.example.com:443; server backend2.example.com:443;# 添加SSL握手健康检查 check interval=3000rise=2fall=5timeout=1000type=ssl_hello;} - HTTPS请求检查:
upstream backend { server backend1.example.com:443; server backend2.example.com:443;# 添加HTTPS健康检查 check interval=3000rise=2fall=5timeout=3000type=https; check_http_send "GET /health_check HTTP/1.1\r\nHost: backend1.example.com\r\n\r\n"; check_http_expect_alive http_2xx http_3xx;}
DNS解析配置示例和说明
对于动态解析upstream节点,可以使用
resolver
指令来配置DNS服务器。
配置示例
http {
    resolver 8.8.8.8 8.8.4.4 valid=300s;

    upstream backend {
        server backend1.example.com:80;
        server backend2.example.com:80;# 添加健康检查
        check interval=3000rise=2fall=5timeout=1000type=http;}

    server {
        listen 80;

        location / {
            proxy_pass http://backend;}}}
在上述配置中,
resolver
指令配置了DNS服务器地址,并设置了300秒的缓存时间。
结合实际应用场景的高级配置示例
综合SSL检查与DNS解析
http {
    resolver 8.8.8.8 8.8.4.4 valid=300s;

    upstream backend {
        server backend1.example.com:443;
        server backend2.example.com:443;# 添加SSL握手健康检查
        check interval=3000rise=2fall=5timeout=1000type=ssl_hello;# 或者使用HTTPS请求检查
        check interval=3000rise=2fall=5timeout=3000type=https;
        check_http_send "GET /health_check HTTP/1.1\r\nHost: backend1.example.com\r\n\r\n";
        check_http_expect_alive http_2xx http_3xx;}

    server {
        listen 80;

        location / {
            proxy_pass https://backend;
            proxy_ssl_server_name on;}}}
在此配置中,我们结合了SSL检查和DNS解析,确保后端节点既能够通过DNS动态解析,又能通过SSL握手或HTTPS请求进行健康检查。
总结和常见问题解决
- SSL证书问题:- 确保后端服务器的SSL证书是有效的,可以使用工具(如
openssl s_client)手动验证证书。- 在使用https检查时,确保check_http_send中的Host头部信息正确。 - DNS解析问题:- 确保Nginx能够访问配置的DNS服务器。- 确认解析的域名在DNS服务器上是可解析的,并且记录是正确的。

动态权重调整和自定义健康检查脚本
如何在Nginx中实现动态权重调整和自定义健康检查脚本。
动态权重调整
动态权重调整允许根据服务器的健康状态或负载情况动态调整负载均衡的权重,从而更有效地分配请求。虽然Nginx本身不直接支持动态权重调整,但可以通过外部工具和脚本结合Nginx的API实现。
配置示例
假设我们使用一个外部工具来监控服务器负载,并通过Nginx的HTTP API来调整权重。
- 设置HTTP API模块: 需要启用Nginx的
nginx-http-api-module模块,该模块通常需要自行编译:./configure --add-module=path/to/nginx-http-api-modulemakesudomakeinstall - 配置示例:
http { upstream backend { server backend1.example.com:80 weight=5; server backend2.example.com:80 weight=5;} server { listen 80; location / { proxy_pass http://backend;} location /upstream_conf { api; allow 127.0.0.1;# 仅允许本地访问API deny all;}}} - 动态调整权重: 通过HTTP API来调整权重,示例如下:
curl-X POST "http://localhost/upstream_conf?upstream=backend&server=backend1.example.com:80&weight=10"
自定义健康检查脚本
Nginx的
upstream_check_module
支持自定义健康检查脚本,这些脚本可以用来执行特定的检查逻辑,并返回健康状态。
自定义健康检查示例
假设我们编写一个自定义脚本,检查后端服务器上一个特定的服务是否正常运行。
- 编写自定义健康检查脚本: 创建一个名为
custom_check.sh的脚本:#!/bin/bashresponse=$(curl-s-o /dev/null -w"%{http_code}" http://backend1.example.com/health_check)if["$response"-eq200];thenecho"up"elseecho"down"fi - 配置Nginx使用自定义脚本:
http { upstream backend { server backend1.example.com:80; server backend2.example.com:80;# 添加自定义健康检查 check interval=5000rise=2fall=5timeout=1000type=external; check_external_cmd /path/to/custom_check.sh;} server { listen 80; location / { proxy_pass http://backend;}}}
综合配置示例
以下示例结合了动态权重调整和自定义健康检查脚本:
http {
    resolver 8.8.8.8 8.8.4.4 valid=300s;

    upstream backend {
        server backend1.example.com:80 weight=5;
        server backend2.example.com:80 weight=5;# 添加自定义健康检查
        check interval=5000rise=2fall=5timeout=1000type=external;
        check_external_cmd /path/to/custom_check.sh;}

    server {
        listen 80;

        location / {
            proxy_pass http://backend;}

        location /upstream_conf {
            api;
            allow 127.0.0.1;# 仅允许本地访问API
            deny all;}}}
总结和常见问题解决
- 动态权重调整:- 确保外部工具或脚本能够正确监控和反馈服务器负载情况。- 使用HTTP API进行权重调整时,确保API的安全性,如限制访问权限。
- 自定义健康检查脚本:- 脚本需要具有可执行权限,并确保路径正确。- 确保脚本返回的状态符合Nginx的预期,如"up"或"down"。

版权归原作者 小小工匠 所有, 如有侵权,请联系我们删除。
