
网络安全之防火墙 server nat 基本配置实验
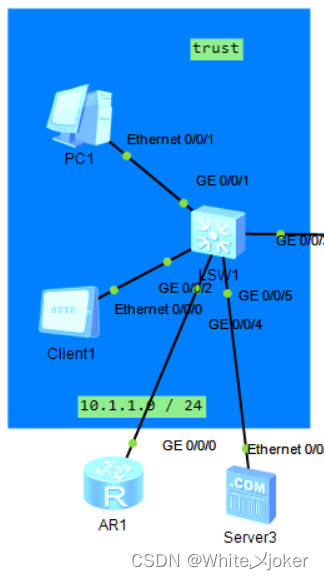
实验图

1.进入视图模式
<USG6000V1>system-view
[USG6000V1] int g 0/0/0
[USG6000V1-GigabitEthernet0/0/0]ip address 192.168.160.1 24
[USG6000V1-GigabitEthernet0/0/0]service-manage all permit

2.配置端口IP地址即区域
防火墙


untrust区域
server1

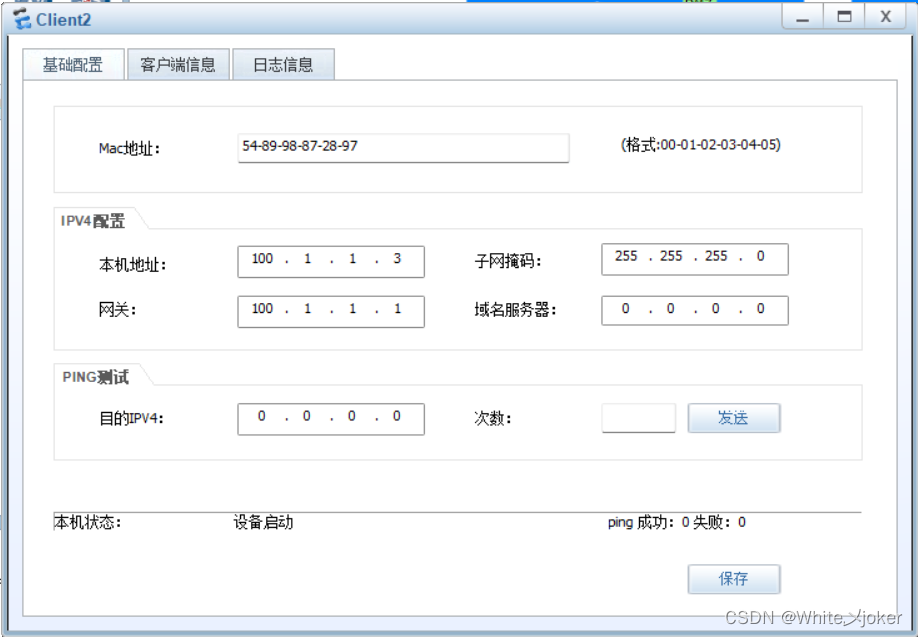
Client 2
DMZ区域

trust区域
PC 1

Client 1

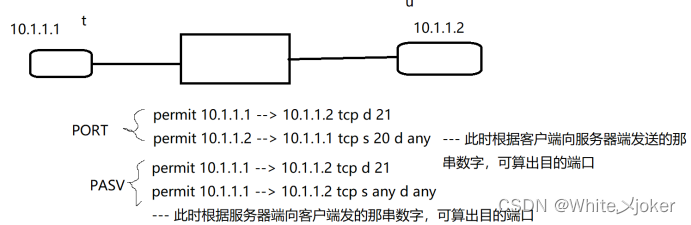
配置trust-untrust区域的ftp
在untrust区域中的server1开启ftp服务

配置trust-untrust区域的ftp的安全策略

登陆ftp


R1配置
<Huawei>system-view
Enter system view, return user view with Ctrl+Z.
[Huawei]sy
[Huawei]sysname R1
[R1]int g 0/0/0
[R1-GigabitEthernet0/0/0]ip address 10.1.1.4 24
[R1-GigabitEthernet0/0/0]q
[R1]ip route-static 0.0.0.0 0 10.1.1.1
登陆ftp

查找server-map
<USG6000V1>dis firewall server-map
2023-03-27 21:20:33.470 +08:00
 Current Total Server-map : 0
<USG6000V1>
Mar 27 2023 21:21:01+08:00 USG6000V1 DS/4/DATASYNC_CFGCHANGE:OID 1.3.6.1.4.1.201
1.5.25.191.3.1 configurations have been changed. The current change number is 30
, the change loop count is 0, and the maximum number of records is 4095.
<USG6000V1>dis firewall server-map
2023-03-27 21:21:11.940 +08:00
 Current Total Server-map : 1
 Type: ASPF,  10.1.1.3 -> 100.1.1.2:2053,  Zone:---
 Protocol: tcp(Appro: ftp-data),  Left-Time:00:00:07
 Vpn: public -> public
<USG6000V1>display firewall session table
2023-03-27 21:33:41.470 +08:00
 Current Total Sessions : 11
 ftp  VPN: public --> public  10.1.1.3:2059 +-> 100.1.1.2:21
 tcp  VPN: default --> default  192.168.160.2:58333 --> 192.168.160.1:8443
 netbios-name  VPN: default --> default  192.168.160.2:137 --> 192.168.160.255:1
37
 ftp  VPN: public --> public  10.1.1.3:2053 --> 100.1.1.2:21
 tcp  VPN: default --> default  192.168.160.2:59265 --> 192.168.160.1:8443
 ftp  VPN: public --> public  10.1.1.4:49901 --> 100.1.1.2:21
 ftp  VPN: public --> public  10.1.1.3:2057 +-> 100.1.1.2:21
 ftp  VPN: public --> public  10.1.1.3:2061 +-> 100.1.1.2:21
 tcp  VPN: default --> default  192.168.160.2:53849 --> 192.168.160.1:8443
 ftp-data  VPN: public --> public  10.1.1.3:2062 --> 100.1.1.2:2055
 ftp  VPN: public --> public  10.1.1.3:2055 --> 100.1.1.2:21
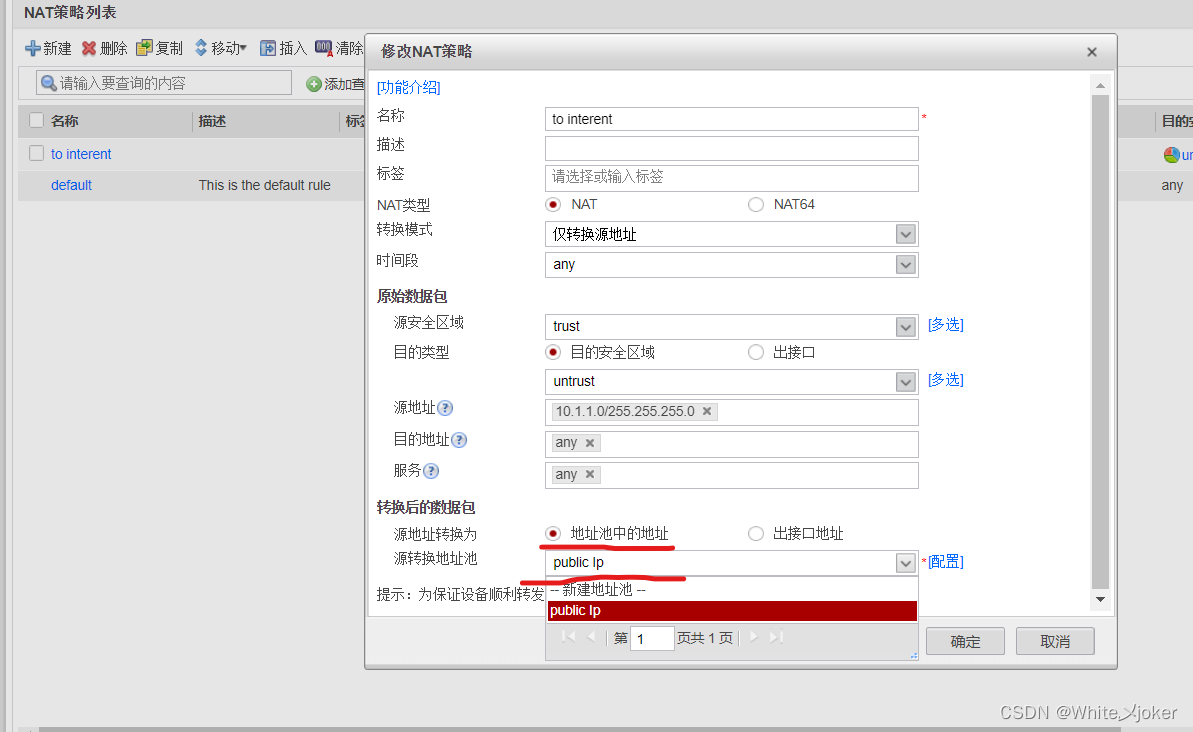
配置 nat
配置Internet nat策略
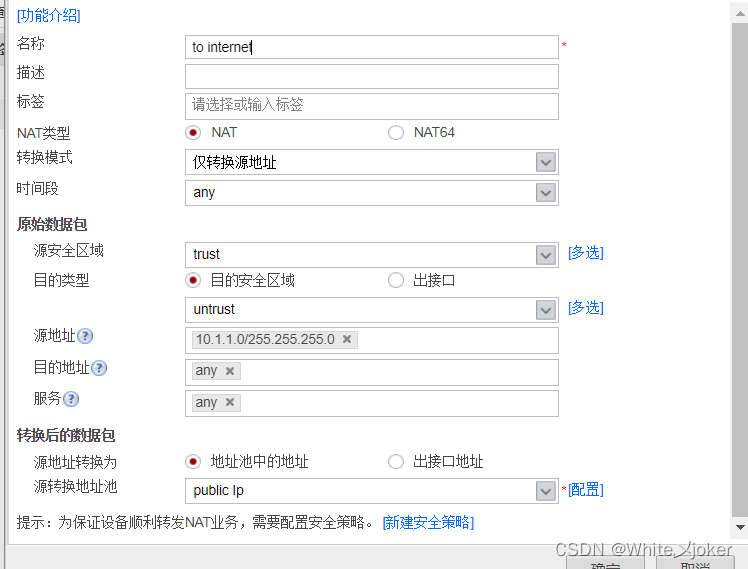
修改安全策略

测试
<R1>ping 100.1.1.3
  PING 100.1.1.3: 56  data bytes, press CTRL_C to break
    Reply from 100.1.1.3: bytes=56 Sequence=1 ttl=254 time=70 ms
    Reply from 100.1.1.3: bytes=56 Sequence=2 ttl=254 time=40 ms
    Reply from 100.1.1.3: bytes=56 Sequence=3 ttl=254 time=40 ms
    Reply from 100.1.1.3: bytes=56 Sequence=4 ttl=254 time=30 ms
    Reply from 100.1.1.3: bytes=56 Sequence=5 ttl=254 time=50 ms

  --- 100.1.1.3 ping statistics ---
    5 packet(s) transmitted
    5 packet(s) received
    0.00% packet loss
    round-trip min/avg/max = 30/46/70 ms
抓包

配置目的转换地址池
新建源地址转换池


** 注意:**
配置路由黑洞,防止该虚拟设备被当做一个真实的设备使用。
修改nat策略
访问


此时,源地址变为地址池的地址
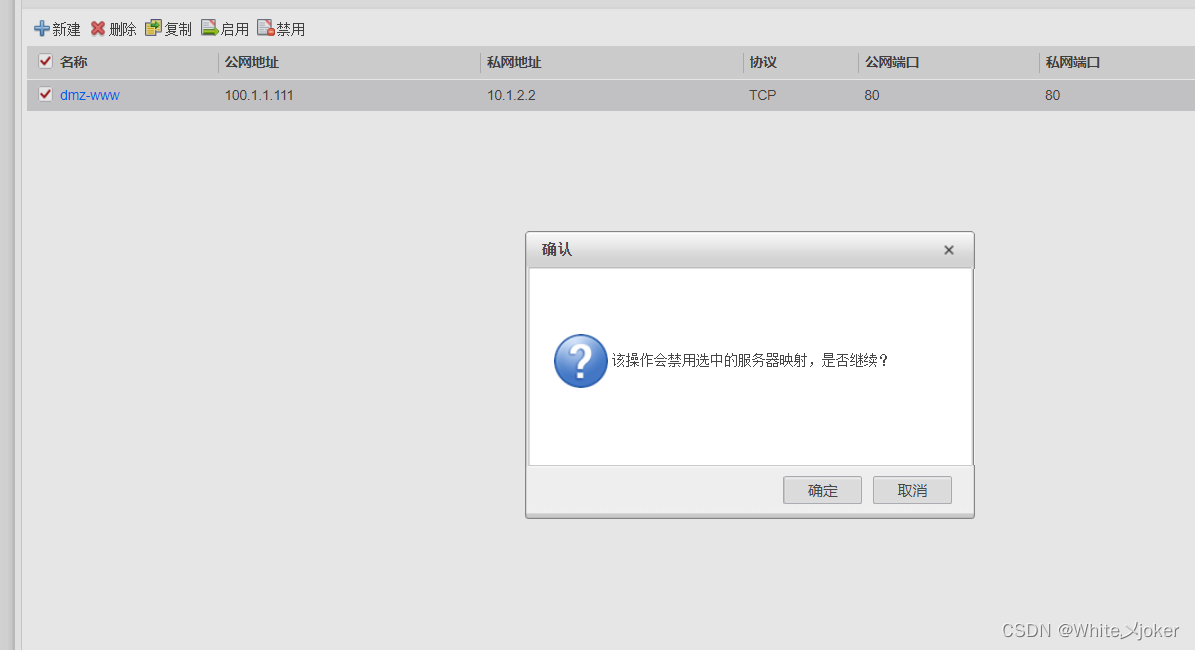
配置服务器映射
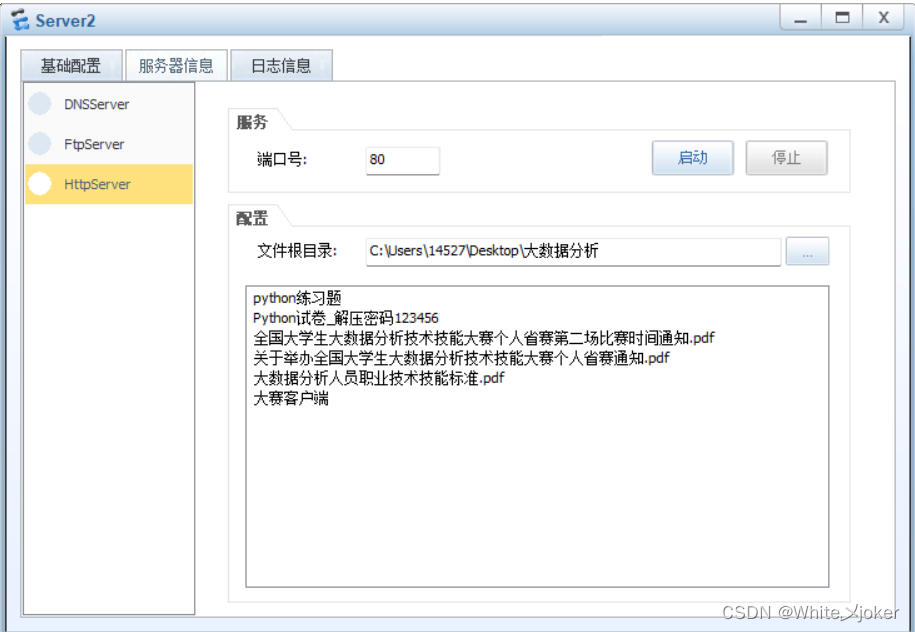
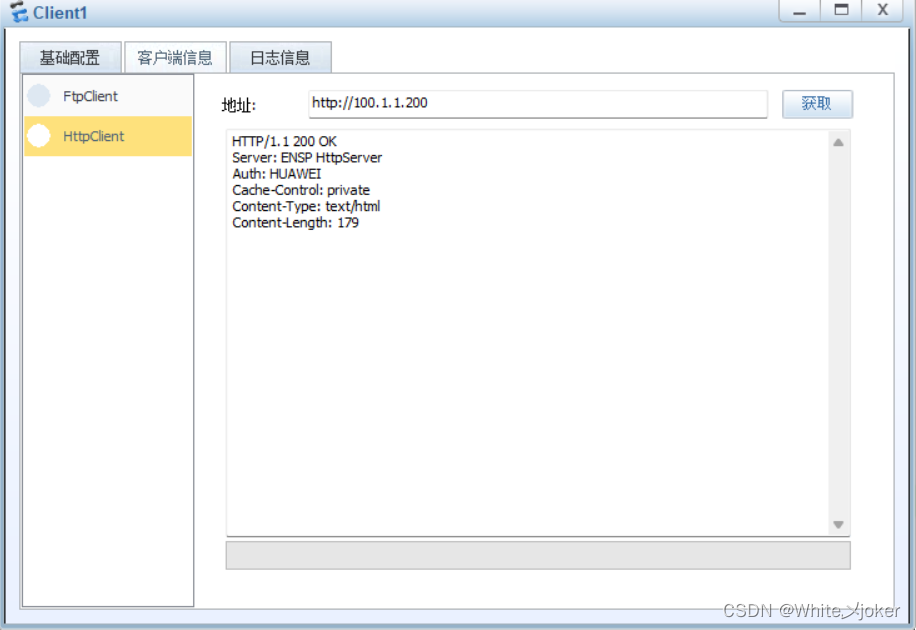
server2配置HTTP服务
配置服务器映射

安全区域 --- 发到哪里就选哪个区域
黑洞路由 --- 防止当作真实服务器去访问
公网地址 --- 服务器映射不能直接配置到接口地址(NAT策略可以,服务器映射不可以)
配置untrust to dmz-www区域的安全策略

目的地址 --- 写私网地址,私网地址为真正的服务器,公网只是个Ip(服务器所在的地址)
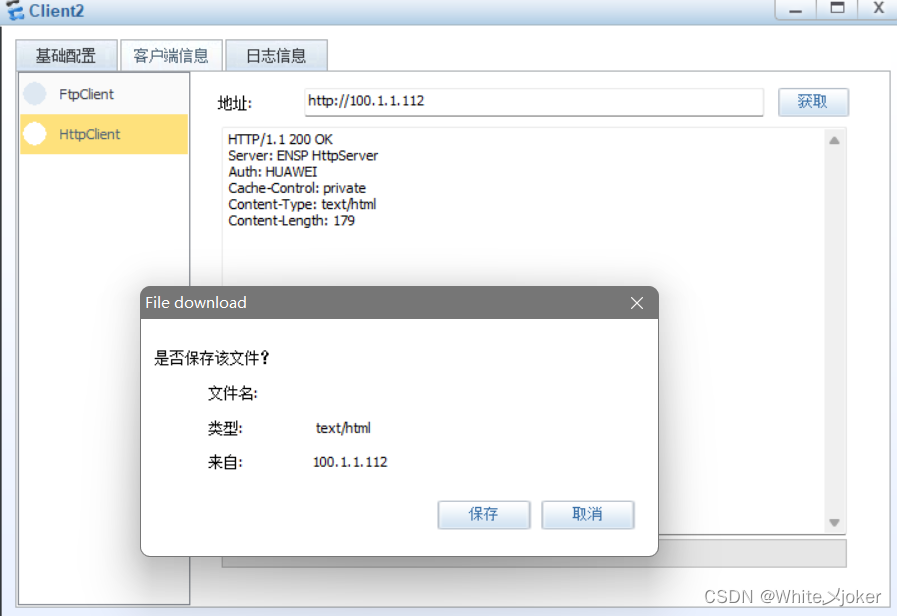
测试

<USG6000V1>display firewall server-map
2023-03-28 11:16:00.810 +08:00
 Current Total Server-map : 1
 Type: Nat Server,  ANY -> 100.1.1.111:80[10.1.2.2:80],  Zone: untrust ,  protoc
ol:tcp
 Vpn: public -> public

<USG6000V1>
server nat 调用 server-map的隐秘通道,将公网流量放进来实行转换
配置接口地址来映射私网地址
关闭服务器映射
配置 dmz nat

测试

配置源、目双转换(nat域外双转)
前提:
公网地址源地址不是私网地址,公网地址访问的对象不能直接写为私网地址
新建原转换地址池

配置nat策略

目的地址 --- 可以转为端口
测试

nat域内双转
trust区域添加一个server
配置服务器映射(放通公网)
检查

启动server的http服务

配置安全策略(外网访问)

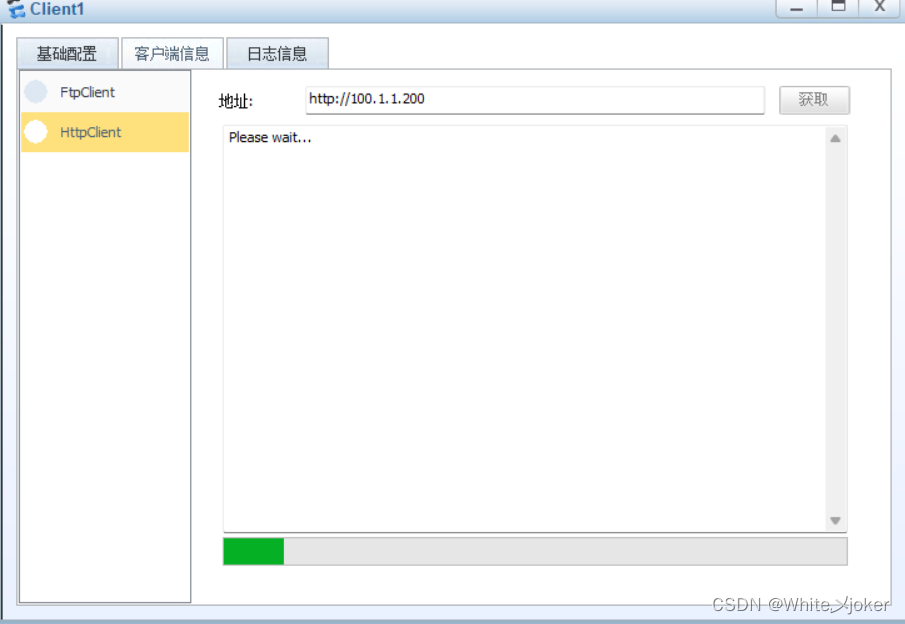
测试 (外网访问)

测试(内网访问)
内网无法通,解决办法:配置双转
新建原地址池

目的地址转换池

配置nat双转

测试
本文转载自: https://blog.csdn.net/qq_57289939/article/details/129803395
版权归原作者 White乄joker 所有, 如有侵权,请联系我们删除。
版权归原作者 White乄joker 所有, 如有侵权,请联系我们删除。