在上一节中,学习了如何生成自动Golang CRUD代码,本节将学习如何为这些
CRUD
操作编写单元测试。
1. 测试 CreateAccount
从
account.sql.go
里面的
CreateAccount
开始,在项目的
db/sqlc
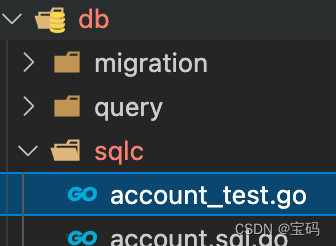
目录下新建一个文件
account_test.go

在
Golang中有个约定,就是把测试文件和代码放在同一个文件夹内,并且测试文件的命名要以
test后缀结尾。
这个测试文件的包名是
db
, 在文件里定义个函数
TestCreateAccount
。
Go中的每个单元测试函数都必须以
Test开头,并且以
testing.T作为输入参数。
将使用这个
T
对象来管理测试状态。代码如下:
package db

import"testing"funcTestCreateAccount(t *testing.T){}
我们需要一个数据库连接才能与数据库交互,所以,为了编写单元测试,必须先设置连接和查询对象(
Queries object
), 在
db/sqlc
下再新建个文件
main_test.go
,在这里执行相关操作。
定义个
testQueries
全局变量,因为在所有的单元测试中都会用到它。
var testQueries *Queries
定义函数
TestMain
,以
testing.M
类型作为参数
Golang约定
TestMain函数是所有单元测试的入口
package db

import"testing"var testQueries *Queries

funcTestMain(m *testing.M){}
在这里先创建与数据库的连接,目前先用硬编码的方式把dbDriver和dbSource作为常量,后面我们将改进它
package db

import("database/sql""log""os""testing")var testQueries *Queries

const(
    dbDriver ="postgres"
    dbSource ="postgresql://root:123456@localhost:5432/simple_bank?sslmode=disable")funcTestMain(m *testing.M){
    conn, err := sql.Open(dbDriver, dbSource)if err !=nil{
        log.Fatal("cannot connect to db:", err)}

    testQueries =New(conn)

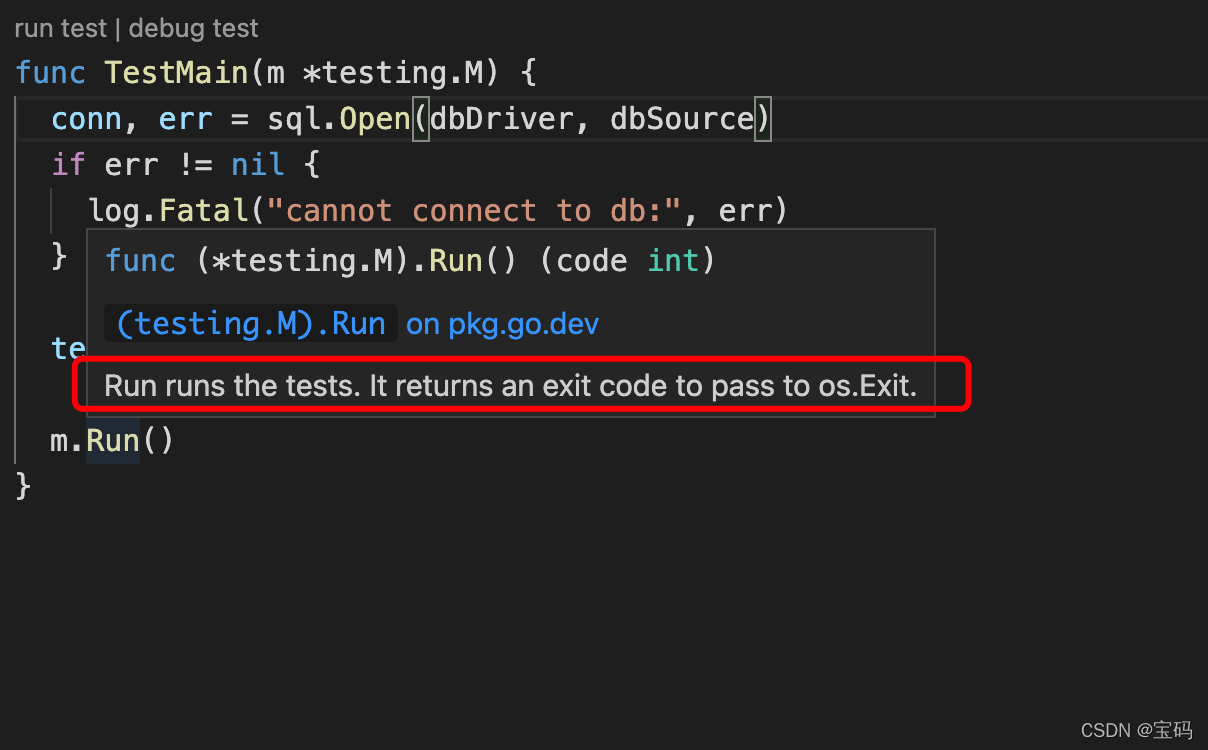
    os.Exit(m.Run())}
m.Run()
代表开始运行单元测试,这个函数返回一个退出码,然后
os.Exit
将运行结果告诉测试运行器。
点击,
run test
运行一下,看到报错了,这是因为
database/sql
包只提供了访问数据库的通用接口,它需要和数据库驱动结合使用,才能与指定的数据库进行连接。
在项目终端里,安装一下
postgres
的驱动
go get github.com/lib/pq
打开项目里的
go.mod
文件,可以看到增加了
github.com/lib/pq
,后面有个
indirect
注释,这是因为我们还没有在代码里面导入和使用它。
回到
main_test.go
文件,把
github.com/lib/pq
导入进来,这里的代码并没有直接使用到它,直接保存的话,会被格式化掉,需要在前面加个
_
, 如下:
import("database/sql""log""os""testing"_"github.com/lib/pq")
再次,对
TestMain
run test
,可以看到执行结果成功了!
在项目终端执行下面的命令,清理一下依赖项,之后,可以看到
go.mod
文件里的
indirect
注释消失了,因为我们的代码里已经使用到了它。
go mod tidy
现在,正式开始为
CreateAccount
函数编写第一个单元测试,打开
account_test.go
,填充一下
TestCreateAccount
函数的内容。
首先,声明一个新的参数:
CreateAccountParams
:
arg := CreateAccountParams{
        Owner:"张三",
        Balance:100,
        Currency:"RMB",}
然后,调用
testQueries.CreateAccount()
传入一个后台上下文和
arg
:
account, err := testQueries.CreateAccount(context.Background(), arg)
这里的
testQueries
就是之前我们在
main_test.go
里面定义的那个全局变量。返回一个
account
对象或一个
err
。
为了检测测试结果,推荐使用
testify
库,https://github.com/stretchr/testify,安装一下,在项目终端里执行:
go get github.com/stretchr/testify
装完后,在
account_test.go
里导入这个包
"github.com/stretchr/testify/require"
,然后使用:
require.NoError(t, err)
它会检查错误是否必须为nil,如果不是,则单元测试将失败。接下来,我们要求返回的
account
不能是空的对象:
require.NotEmpty(t, account)
之后,我们要检查,账户的所有者、余额和币种是否与输入的一致:
    require.Equal(t, arg.Owner, account.Owner)
    require.Equal(t, arg.Balance, account.Balance)
    require.Equal(t, arg.Currency, account.Currency)
另外,还要检查一下账户的
ID
是否是由
postgres
自动生成的,必须不是0:
require.NotZero(t, account.ID)
最后,看一下
created_at
也应该是当前的时间戳,不为0,完整的代码如下:
package db

import("context""testing""github.com/stretchr/testify/require")funcTestCreateAccount(t *testing.T){
    arg := CreateAccountParams{
        Owner:"张三",
        Balance:100,
        Currency:"RMB",}

    account, err := testQueries.CreateAccount(context.Background(), arg)// err 必须为 nil
    require.NoError(t, err)// account 不能为空对象
    require.NotEmpty(t, account)// 账户的所有者、余额和币种是否与输入的一致
    require.Equal(t, arg.Owner, account.Owner)
    require.Equal(t, arg.Balance, account.Balance)
    require.Equal(t, arg.Currency, account.Currency)// 检查ID是否自动生成的,必须不为0
    require.NotZero(t, account.ID)

    require.NotZero(t, account.CreatedAt)}
点击,
run test
运行它
可以看到
ok
测试通过了,打开
navicat
连到数据库看一下
accounts
表,可以看到数据也插入进来了。
也可以点击,
Run package tests
来运行这个包中的所有单元测试,目前只有1个测试,测试代码覆盖率也提示出来了。
打开
account.sql.go
,可以看到被测试通过的代码标记成了绿色背景。
红色背景的代码,表示单元测试没有被覆盖到。
之后,我们将写更多的单元测试来覆盖它们。
2. 生成测试数据
有一种更好的方法来生成测试数据,而不是像之前硬编码那样手动填写
张三
这样的测试数据。
通过生成随机数据,我们将节省大量的时间来确定要使用的值,代码也会更简洁易懂,并且由于数据是随机的,它将帮我们避免多个单元测试之间的冲突,比如,数据库中某个字段有唯一约束。
好的,让我们在项目根目录下创建个新目录
util
,在这个目录里新建
random.go
文件,包名就用
package util
。
首先,需要编写一个特殊的函数
init()
,这个函数会在第一次使用包时自动调用。我们将通过调用
rand.Seed()
来设置随机生成器的种子值,参数就用当前的时间
time.Now().UnixNano()
,代码如下:
package util

import("math/rand""time")funcinit(){
    rand.Seed(time.Now().UnixNano())}
先写个生成随机整数的函数
RandomInt
funcRandomInt(min, max int64)int64{return min + rand.Int63n(max-min+1)}
接下来,再编写一个生成随机字符串的函数,为此,需要声明一个包含所有字符串的字母表,简单起见,只用了26个小写字母:
var alphabet ="abcdefghijklmopqrstuvwxyz"funcRandomString(n int)string{var sb strings.Builder
    k :=len(alphabet)for i :=0; i < n; i++{
        c := alphabet[rand.Intn(k)]
        sb.WriteByte(c)}return sb.String()}
这样,我们可以编写随机生成账户所有者的函数了,这里我们只是返回一个随机的6字母字符串,后面,我们会改进
随机生成中文的姓名
funcRandomOwner()string{returnRandomString(6)}
同样,定义一个生成随机金额的函数,假设它是0到1000的整数
funcRandomMoney()int64{returnRandomInt(0,1000)}
还需要一个生成随机币种的函数,这里我们只使用4种货币,
"RMB", "USD", "EUR", "CAD"
funcRandomCurrency()string{
    currencies :=[]string{"RMB","USD","EUR","CAD"}
    n :=len(currencies)return currencies[rand.Intn(n)]}
完整
random.go
代码如下:
package util

import("math/rand""strings""time")var alphabet ="abcdefghijklmopqrstuvwxyz"funcinit(){
    rand.Seed(time.Now().UnixNano())}/**
* 生成随机整数
 */funcRandomInt(min, max int64)int64{return min + rand.Int63n(max-min+1)}/**
* 生成随机字符串
 */funcRandomString(n int)string{var sb strings.Builder
    k :=len(alphabet)for i :=0; i < n; i++{
        c := alphabet[rand.Intn(k)]
        sb.WriteByte(c)}return sb.String()}/**
* 随机生成账户所有者
 */funcRandomOwner()string{returnRandomString(6)}/**
* 随机生成金额
 */funcRandomMoney()int64{returnRandomInt(0,1000)}/**
* 随机生成币种
 */funcRandomCurrency()string{
    currencies :=[]string{"RMB","USD","EUR","CAD"}
    n :=len(currencies)return currencies[rand.Intn(n)]}
好了,回到我们的
account_test.go
文件:
- 把
"张三"替换为util.RandomOwner() 100替换为util.RandomMoney()RMB替换为util.RandomCurrency()如下:
    arg := CreateAccountParams{
        Owner:    util.RandomOwner(),
        Balance:  util.RandomMoney(),
        Currency: util.RandomCurrency(),}
再次,
run test
,刷新
navicat
,可以看到新插入的数据是随机生成的了。
现在,我们再向
Makefile
文件里添加一个测试命令
test:
    go test -v -cover ./...
-v
表示输出日期,
-cover
测量代码覆盖率,由于我们的项目将会有多个包,所以加上参数
./...
运行所有包下面的单元测试。目前的
Makefile
postgres:
    docker run --name postgres14 -e POSTGRES_PASSWORD=123456 -e POSTGRES_USER=root -p 5432:5432 -d postgres:14-alpine

createdb:
    dockerexec -it postgres14 createdb --username=root --owner=root simple_bank

dropdb:
    dockerexec -it postgres14 dropdb simple_bank

migrateup:
    migrate --path db/migration --database="postgresql://root:123456@localhost:5432/simple_bank?sslmode=disable" -verbose up

migratedown:
    migrate --path db/migration --database="postgresql://root:123456@localhost:5432/simple_bank?sslmode=disable" -verbose down

sqlc:
    sqlc generate

test:
    go test -v -cover ./...

.PHONY: postgres, createdb, dropdb, migrateup, migratedown, sqlc, test
来到项目终端,运行:
maketest
可以看到,运行完成测试时打印出了详细的日志。
注意:多次运行
make test,回从缓存中执行,如果想不从缓存中执行,可以加上
-count=1参数,如:
go test -v -cover ./... -count=1
3. 编写其他的
CRUD
单元测试
从
GetAccount
开始,在
account_test.go
文件里新增
TestGetAccount
函数,这里需要知道,要测试其他的
CRUD
操作,都必须先创建一个
Account
,我们需要确保它们彼此独立。为什么需要这样,因为,如果我们有几百个相互依赖的单元测试,这将变得很难维护。
最不希望的是,修改其中一个单元测试而影响到其他的一些测试结果,出于这个原因,每个单元测试都应该创建自己的
Account
数据,为了避免代码重复,我们编写一个单独的函数来随机创建
Account
。
把之前的代码重构一下,如下:
package db

import("context""simplebank/util""testing""time""github.com/stretchr/testify/require")funccreateRandomAccount(t *testing.T) Account {
    arg := CreateAccountParams{
        Owner:    util.RandomOwner(),
        Balance:  util.RandomMoney(),
        Currency: util.RandomCurrency(),}

    account, err := testQueries.CreateAccount(context.Background(), arg)// err 必须为 nil
    require.NoError(t, err)// account 不能为空对象
    require.NotEmpty(t, account)// 账户的所有者、余额和币种是否与输入的一致
    require.Equal(t, arg.Owner, account.Owner)
    require.Equal(t, arg.Balance, account.Balance)
    require.Equal(t, arg.Currency, account.Currency)// 检查ID是否自动生成的,必须不为0
    require.NotZero(t, account.ID)

    require.NotZero(t, account.CreatedAt)return account
}funcTestCreateAccount(t *testing.T){createRandomAccount(t)}funcTestGetAccount(t *testing.T){
    account1 :=createRandomAccount(t)// 查询 account, 参数为 account1 的 id,把结果给 account2
    account2, err := testQueries.GetAccount(context.Background(), account1.ID)// 这里应该没错误
    require.NoError(t, err)// account2 也必须不是空的
    require.NotEmpty(t, account2)// account2 的所有字段的值应该和 account1 所有字段的值相同
    require.Equal(t, account2.ID, account1.ID)
    require.Equal(t, account2.Owner, account1.Owner)
    require.Equal(t, account2.Balance, account1.Balance)
    require.Equal(t, account2.Currency, account1.Currency)
    require.WithinDuration(t, account1.CreatedAt, account2.CreatedAt, time.Second)}
对
TestGetAccount
运行一下测试
run test
,可以看到测试通过了!
接着,编写
TestUpdateAccount()
,首先,创建个随机账户
account1 :=createRandomAccount(t)
然后,定义参数,如下:
funcTestUpdateAccount(t *testing.T){
    account1 :=createRandomAccount(t)

    arg := UpdateAccountParams{
        ID:      account1.ID,
        Balance: util.RandomMoney(),}

    account2, err := testQueries.UpdateAccount(context.Background(), arg)
    require.NoError(t, err)
    require.NotEmpty(t, account2)// 比较 account2 和 account1, 除了 Balance,其他的字段都应该相同
    require.Equal(t, account2.ID, account1.ID)
    require.Equal(t, account2.Owner, account1.Owner)// 这里使用 arg.Balance 和 account2.Balance 比较
    require.Equal(t, account2.Balance, arg.Balance)
    require.Equal(t, account2.Currency, account1.Currency)
    require.WithinDuration(t, account1.CreatedAt, account2.CreatedAt, time.Second)}
再次运行这个函数的单元测试,可以看到,也测试通过了!
TestDeleteAccount
也可以类似的实现:
funcTestDeleteAccount(t *testing.T){
    account1 :=createRandomAccount(t)
    err := testQueries.DeleteAccount(context.Background(), account1.ID)
    require.NoError(t, err)// 为了验证账户确实被删除了,再查找一次
    account2, err := testQueries.GetAccount(context.Background(), account1.ID)// 因为已经删除掉了,这里必须有错误
    require.Error(t, err)// 更准确的说,错误应该是 sql.ErrNoRows
    require.EqualError(t, err, sql.ErrNoRows.Error())// account2 也应该是空的
    require.Empty(t, account2)}
运行这个函数的单元测试
run test
,测试通过!
最后一个,测试
ListAccounts
, 因为这是个列表,所以,我们多创建几个账户。
funcTestListAccounts(t *testing.T){for i :=0; i <10; i++{createRandomAccount(t)}

    arg := ListAccountsParams{
        Limit:5,
        Offset:5,}

    accounts, err := testQueries.ListAccounts(context.Background(), arg)
    require.NoError(t, err)// accounts 切片的长度为 5
    require.Len(t, accounts,5)// 变量 accounts, 其中的每个 account 都不能为空for_, account :=range accounts {
        require.NotEmpty(t, account)}}
运行这个函数的单元测试
run test
,passed!
运行
run package tests

所有的单元测试都通过了,让我们再打开
account.sql.go
,里面的函数都被单元测试覆盖了,变成了绿色背景。
完成的
account_test.go
:
package db

import("context""database/sql""simplebank/util""testing""time""github.com/stretchr/testify/require")funccreateRandomAccount(t *testing.T) Account {
    arg := CreateAccountParams{
        Owner:    util.RandomOwner(),
        Balance:  util.RandomMoney(),
        Currency: util.RandomCurrency(),}

    account, err := testQueries.CreateAccount(context.Background(), arg)// err 必须为 nil
    require.NoError(t, err)// account 不能为空对象
    require.NotEmpty(t, account)// 账户的所有者、余额和币种是否与输入的一致
    require.Equal(t, arg.Owner, account.Owner)
    require.Equal(t, arg.Balance, account.Balance)
    require.Equal(t, arg.Currency, account.Currency)// 检查ID是否自动生成的,必须不为0
    require.NotZero(t, account.ID)

    require.NotZero(t, account.CreatedAt)return account
}funcTestCreateAccount(t *testing.T){createRandomAccount(t)}funcTestGetAccount(t *testing.T){
    account1 :=createRandomAccount(t)// 查询 account, 参数为 account1 的 id,把结果给 account2
    account2, err := testQueries.GetAccount(context.Background(), account1.ID)// 这里应该没错误
    require.NoError(t, err)// account2 也必须不是空的
    require.NotEmpty(t, account2)// account2 的所有字段的值应该和 account1 所有字段的值相同
    require.Equal(t, account2.ID, account1.ID)
    require.Equal(t, account2.Owner, account1.Owner)
    require.Equal(t, account2.Balance, account1.Balance)
    require.Equal(t, account2.Currency, account1.Currency)
    require.WithinDuration(t, account1.CreatedAt, account2.CreatedAt, time.Second)}funcTestUpdateAccount(t *testing.T){
    account1 :=createRandomAccount(t)

    arg := UpdateAccountParams{
        ID:      account1.ID,
        Balance: util.RandomMoney(),}

    account2, err := testQueries.UpdateAccount(context.Background(), arg)
    require.NoError(t, err)
    require.NotEmpty(t, account2)// 比较 account2 和 account1, 除了 Balance,其他的字段都应该相同
    require.Equal(t, account2.ID, account1.ID)
    require.Equal(t, account2.Owner, account1.Owner)// 这里使用 arg.Balance 和 account2.Balance 比较
    require.Equal(t, account2.Balance, arg.Balance)
    require.Equal(t, account2.Currency, account1.Currency)
    require.WithinDuration(t, account1.CreatedAt, account2.CreatedAt, time.Second)}funcTestDeleteAccount(t *testing.T){
    account1 :=createRandomAccount(t)
    err := testQueries.DeleteAccount(context.Background(), account1.ID)
    require.NoError(t, err)// 为了验证账户确实被删除了,再查找一次
    account2, err := testQueries.GetAccount(context.Background(), account1.ID)// 因为已经删除掉了,这里必须有错误
    require.Error(t, err)// 更准确的说,错误应该是 sql.ErrNoRows
    require.EqualError(t, err, sql.ErrNoRows.Error())// account2 也应该是空的
    require.Empty(t, account2)}funcTestListAccounts(t *testing.T){for i :=0; i <10; i++{createRandomAccount(t)}

    arg := ListAccountsParams{
        Limit:5,
        Offset:5,}

    accounts, err := testQueries.ListAccounts(context.Background(), arg)
    require.NoError(t, err)// accounts 切片的长度为 5
    require.Len(t, accounts,5)// 变量 accounts, 其中的每个 account 都不能为空for_, account :=range accounts {
        require.NotEmpty(t, account)}}
4. 随机生成中文姓名的测试数据
前面,我们生成了英文的
Owner
,中文环境下,有中文的测试数据不是更好,这里我们编写一下这部分代码。
打开
random.go
文件,增加随机生成中文姓名的函数:
var lastNames =[]string{"李","王","张","刘","陈","杨","黄","赵","周","吴","徐","孙","朱","马","胡","郭","林","何","高","梁","郑","罗","宋","谢","唐","韩","曹","许","邓","萧","冯","曾","程","蔡","彭","潘","袁","於","董","余","苏","叶","吕","魏","蒋","田","杜","丁","沈","姜","范","江","傅","钟","卢","汪","戴","崔","任","陆","廖","姚","方","金","邱","夏","谭","韦","贾","邹","石","熊","孟","秦","阎","薛","侯","雷","白","龙","段","郝","孔","邵","史","毛","常","万","顾","赖","武","康","贺","严","尹","钱","施","牛","洪","龚"}var maleNames =[]string{"豪","言","玉","意","泽","彦","轩","景","正","程","诚","宇","澄","安","青","泽","轩","旭","恒","思","宇","嘉","宏","皓","成","宇","轩","玮","桦","宇","达","韵","磊","泽","博","昌","信","彤","逸","柏","新","劲","鸿","文","恩","远","翰","圣","哲","家","林","景","行","律","本","乐","康","昊","宇","麦","冬","景","武","茂","才","军","林","茂","飞","昊","明","明","天","伦","峰","志","辰","亦"}var femaleNames =[]string{"佳","彤","自","怡","颖","宸","雅","微","羽","馨","思","纾","欣","元","凡","晴","玥","宁","佳","蕾","桑","妍","萱","宛","欣","灵","烟","文","柏","艺","以","如","雪","璐","言","婷","青","安","昕","淑","雅","颖","云","艺","忻","梓","江","丽","梦","雪","沁","思","羽","羽","雅","访","烟","萱","忆","慧","娅","茹","嘉","幻","辰","妍","雨","蕊","欣","芸","亦"}funcRandomChineseFirstname(names []string, wordNum int64)string{
    n :=len(names)var sb strings.Builder
    for i :=1; i <int(wordNum); i++{
        sb.WriteString(names[rand.Intn(n)])}return sb.String()}/**
* 生成随机的中文姓名
 */funcRandomChineseOwner()string{
    n :=len(lastNames)
    lastname := lastNames[rand.Intn(n)]// 随机男女
    gender :=RandomInt(0,1)// 随机几个字的名,2个或3个len:=RandomInt(2,3)var firstname =""if gender ==0{
        firstname =RandomChineseFirstname(femaleNames,len)}else{
        firstname =RandomChineseFirstname(maleNames,len)}return lastname + firstname
}
之后,再把
account_test.go
文件里面的
util.RandomOwner()
,换成
util.RandomChineseOwner()
,如下:
    arg := CreateAccountParams{
        Owner:    util.RandomChineseOwner(),
        Balance:  util.RandomMoney(),
        Currency: util.RandomCurrency(),}
在项目终端里执行
make test
,完事之后,看一下数据库,测试通过没问题,并且也生成中文姓名的测试数据了。
好了,本节内容学完了。下节学习Golang操作数据库事务的方法
版权归原作者 宝码 所有, 如有侵权,请联系我们删除。