
前言:如果android studio安装和第一次跑helloworld有什么问题可以参考:(34条消息) Android Studio踩的那些坑(gradle build、unable to find tasks to···等等)_TidesWise的博客-CSDN博客
准备工作
1、在Android Studio中新建项目My Application;
2、在AndroidManifest.xml文件中加入以下两句代码,授予网络权限:
<uses-permission android:name="android.permission.INTERNET"/>
<uses-permission android:name="android.permission.ACCESS_NETWORK_STATE"/>
3、win+R输入cmd输入命令ipconfig,查看本机IPV4地址,记住它;注意IPV4地址可能会有变化!
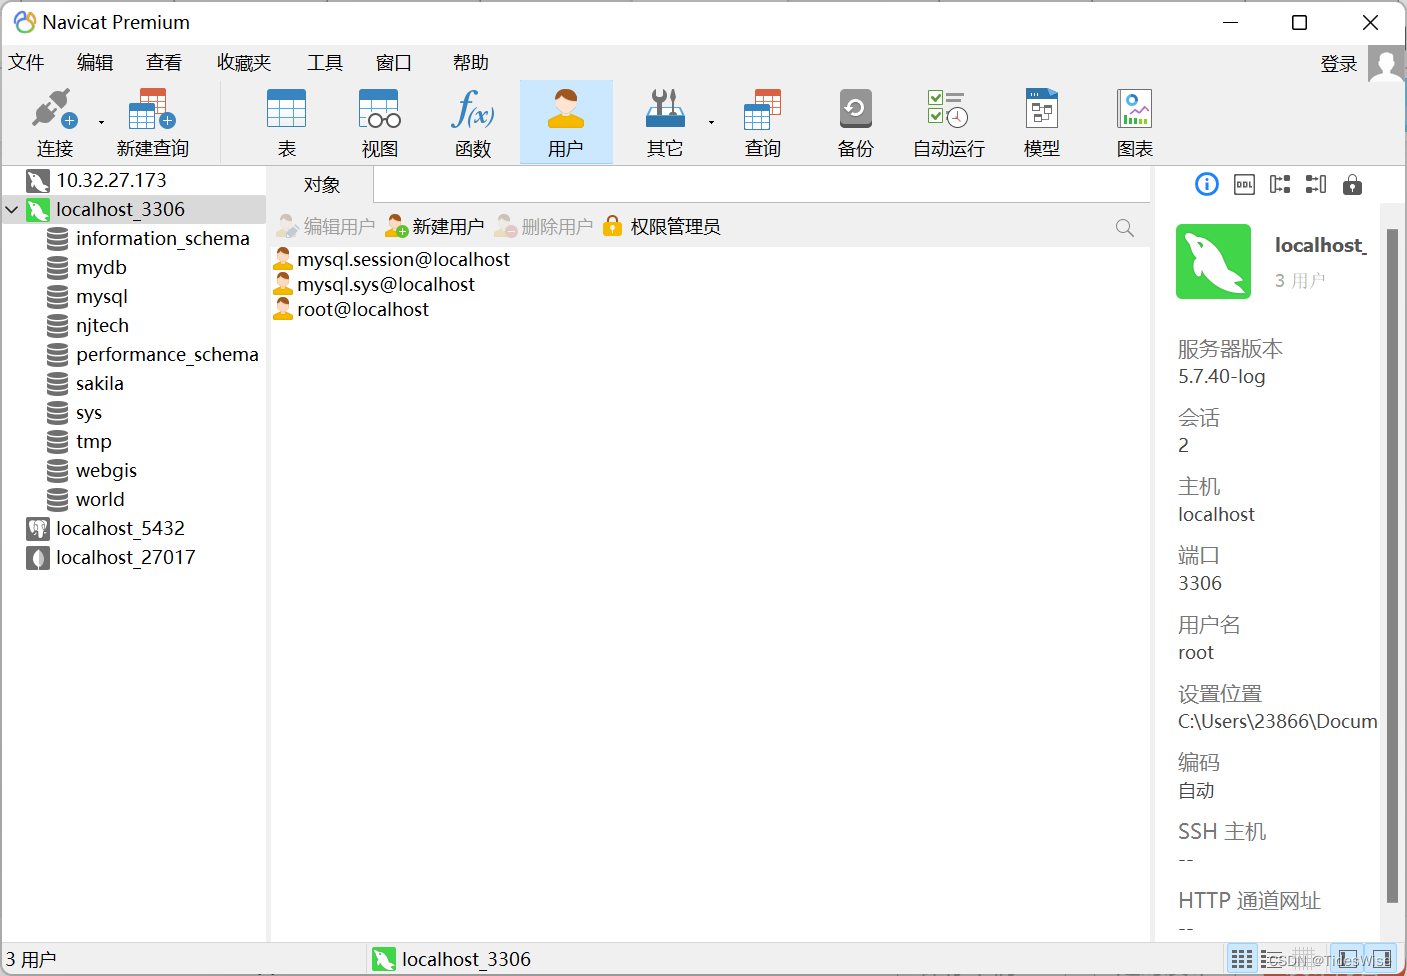
4、打开数据库管理工具,这里以Navicat为例,连接本机localhost mysql数据库,查看相应用户:
5、新建用户tides,主机输入%:

6、在开始找到并打开Mysql 5.7 Command Line:
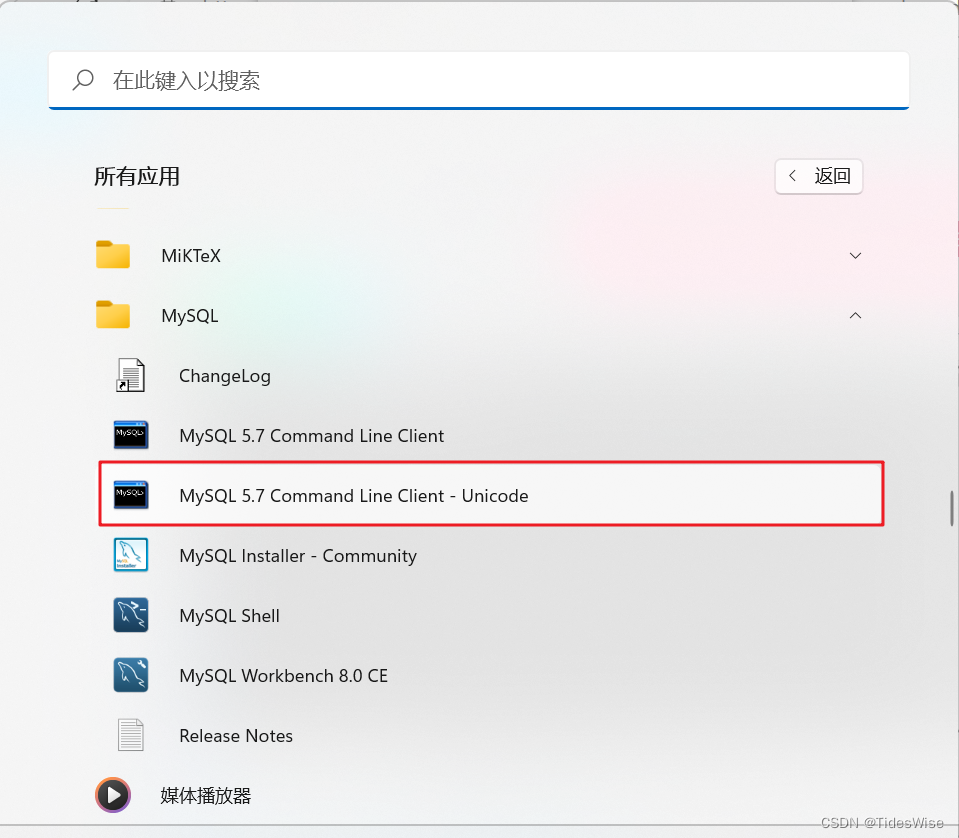
输入密码为mysql的密码,输入以下命令,结果显示Query OK, 0 rows affected, 1 warning (0.01 sec)则运行成功:
grant all privileges on *.* to '用户名'@'%' identified by '密码' with grant option;
7、新建连接,主机为先前查询的IPV4地址,测试连接,显示成功:

8、 新建MysqlHelp类:
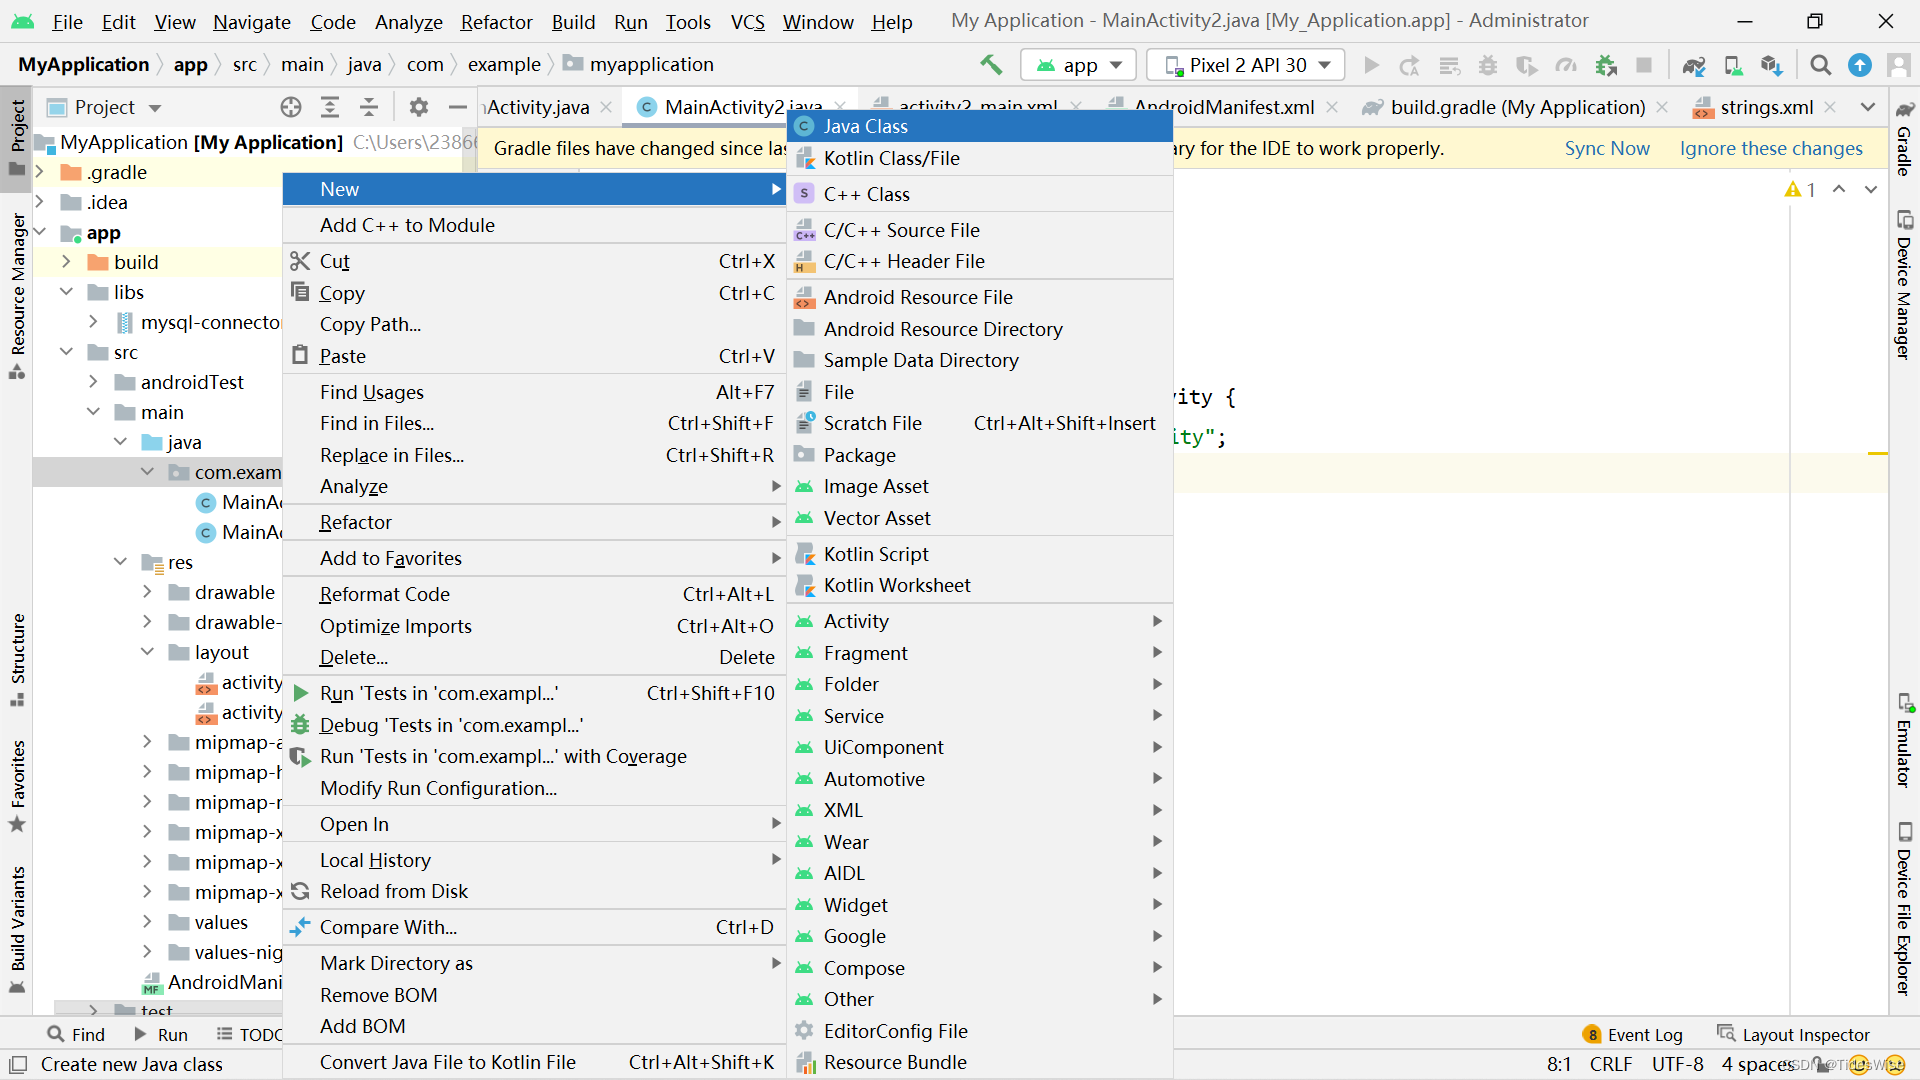
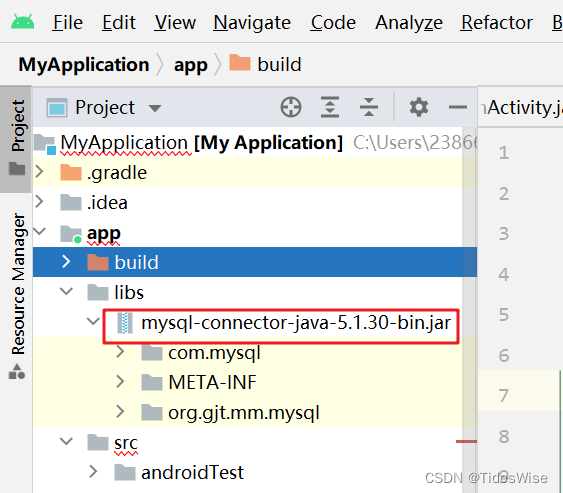
9、引入jar包,在此使用mysql-connector-java-5.1.30-jar(需要适配mysql版本),自行下载并粘贴到libs文件夹下,右键选择Add Library并重新sync:
查询学生数目demo:
在此做测试查询njtech数据库中student表用户书目为例,介绍流程:
1、新建数据库,我在此用已经创建好的数据库njtech中的student表,此部分较为简单不再赘述;
2、在com.example.myapplication文件夹下新建MySqlHelp类:
package com.example.myapplication;

/*
 * 直接连接数据库的辅助工具类
 */

import java.sql.Connection;
import java.sql.DriverManager;
import java.sql.ResultSet;
import java.sql.Statement;

public class MySqlHelp {
    // 查询用户数量的静态方法
    public static int getUserSize() {
        final String CLS = "com.mysql.jdbc.Driver"; // 引用的jar包Driver类
        final String URL = "jdbc:mysql://10.32.27.173/njtech"; //输入IPV4地址以及要查询的数据库
        final String USER = "用户名";
        final String PWD = "密码";

        int count = 0;

        try {
            Class.forName(CLS);
            Connection conn = DriverManager.getConnection(URL, USER, PWD);
            String sql = "select count(1) as sl from student";
            Statement stmt = conn.createStatement();
            ResultSet rs = stmt.executeQuery(sql);
            while (rs.next()) {
                count = rs.getInt("sl");
            }
        } catch (Exception ex) {
            ex.printStackTrace();
        }

        return count;
    }
}
3、UI样式文件:activity_main.xml:
<?xml version="1.0" encoding="utf-8"?>
<LinearLayout xmlns:android="http://schemas.android.com/apk/res/android"
    android:layout_width="match_parent"
    android:layout_height="match_parent"
    android:gravity="center"
    android:orientation="vertical">

    <Button
        android:id="@+id/btnQuery"
        android:layout_width="wrap_content"
        android:layout_height="wrap_content"
        android:text="Query" />

    <TextView
        android:id="@+id/txtQuery"
        android:layout_width="wrap_content"
        android:layout_height="wrap_content"
        android:text="查询结果为:"></TextView>

</LinearLayout>
4、书写MainActivity文件:
package com.example.myapplication;

import androidx.annotation.NonNull;
import androidx.annotation.Nullable;
import androidx.appcompat.app.AppCompatActivity;

import android.content.Intent;
import android.os.Bundle;
import android.os.Handler;
import android.os.Message;
import android.util.Log;
import android.view.View;
import android.widget.Button;
import android.widget.TextView;

public class MainActivity extends AppCompatActivity implements View.OnClickListener {
    private Button btnQuery;
    private TextView txtQuery;
    private Handler handler = new Handler() {
        @Override
        public void handleMessage(@NonNull Message msg) {
//            super.handleMessage(msg);
            if (msg.what == 0) {
                txtQuery.append("\n数据库学生数量为" + (Integer) msg.obj);
            }
        }
    };

    @Override
    protected void onCreate(@Nullable Bundle savedInstanceState) {
        super.onCreate(savedInstanceState);
        setContentView(R.layout.activity_main);

        initView();
    }

    @Override
    public void onClick(View view) {
        switch (view.getId()) {
            case R.id.btnQuery:
                doQuery();
                break;
        }
    }

    private void initView() {
        btnQuery = findViewById(R.id.btnQuery);
        txtQuery = findViewById(R.id.txtQuery);
        btnQuery.setOnClickListener(this);
    }

    private void doQuery() {
//        单纯用以下这种方法无效,需要开启线程Thread.start
//        int count = MySqlHelp.getUserSize();
//        txtQuery.append(Integer.toString(count));
        new Thread(new Runnable() {
            @Override //重写run方法
            public void run() {
                int count = MySqlHelp.getUserSize();
                Message msg = Message.obtain();
                msg.what = 0;
                msg.obj = count;
                handler.sendMessage(msg); //向主线程发送数据
            }
        }).start(); //开启线程
    }
}
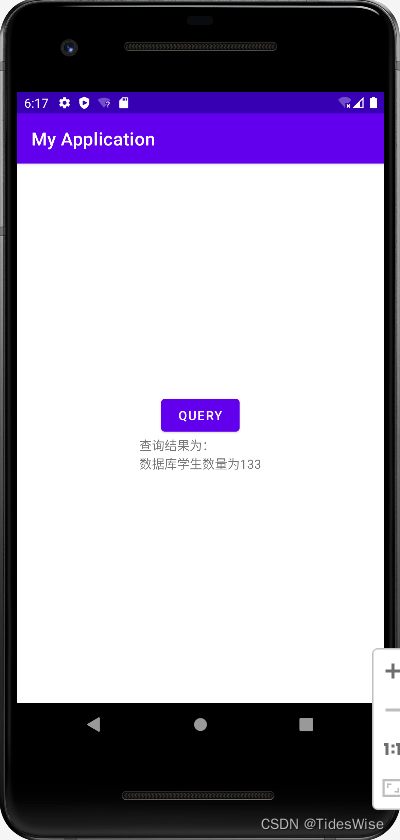
5、运行结果:
增删改查完整案例
1、在以下网站中下载三个图标png文件,add、edit、delete:iconfont-阿里巴巴矢量图标库
拷贝至项目的main→res→drawable文件夹中:

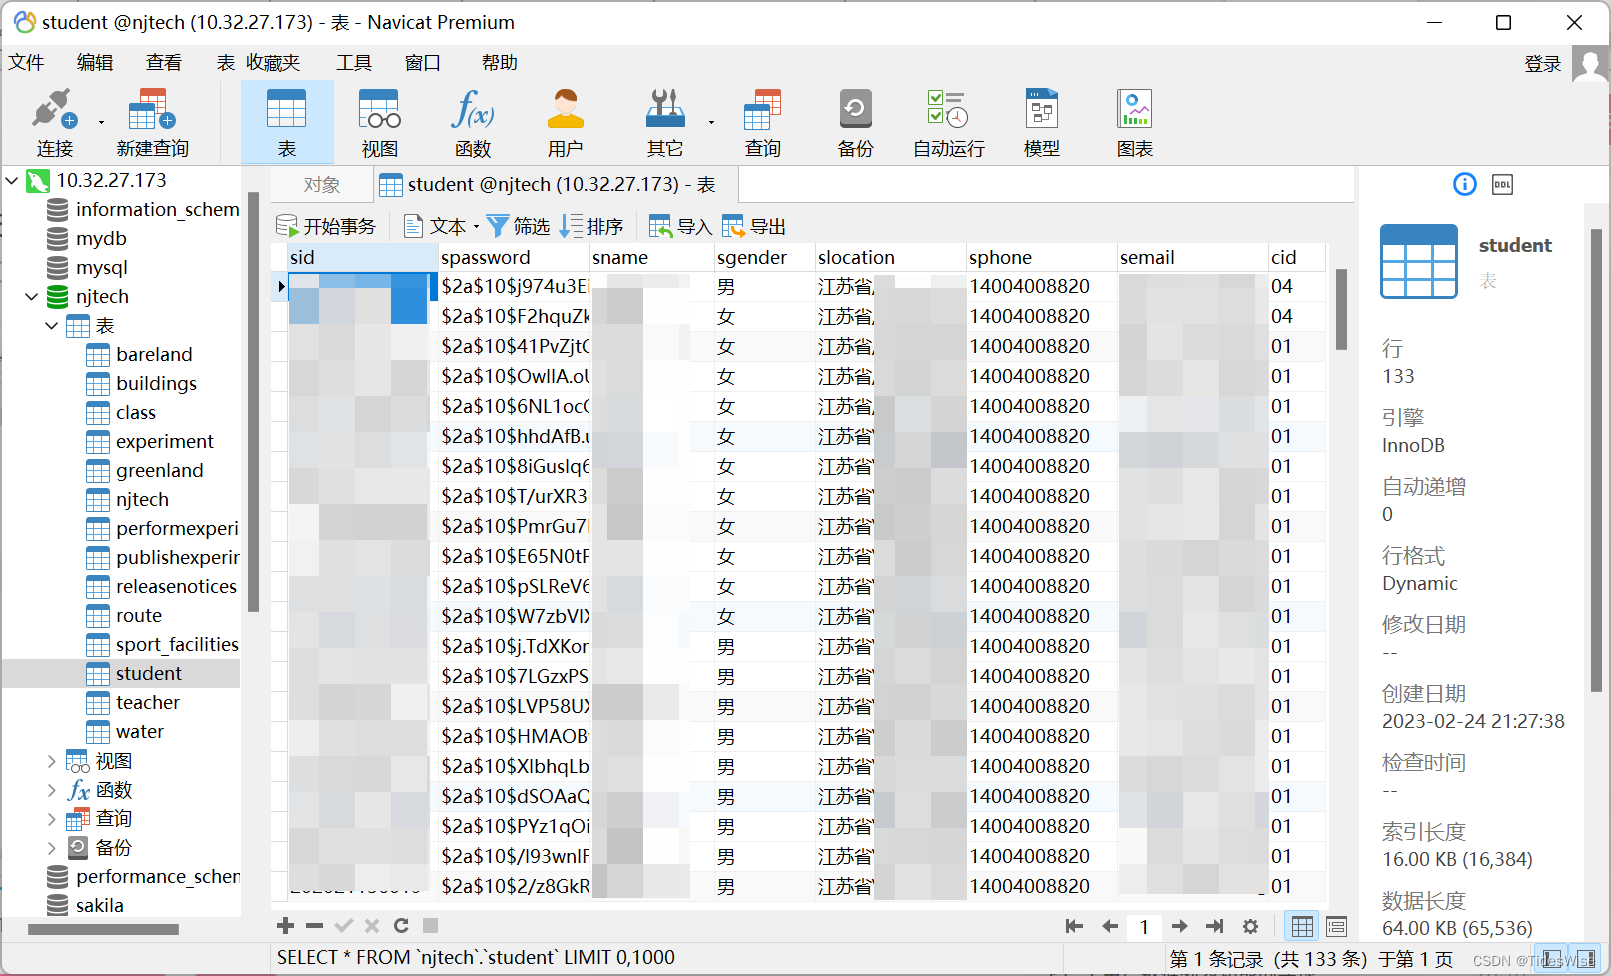
2、njtech数据库中student表结构预告:

3、在com.example.myapplication文件夹下新建DBOpenHelper.java:
package com.example.myapplication;

import java.sql.Connection;
import java.sql.DriverManager;
import java.sql.PreparedStatement;
import java.sql.ResultSet;
import java.sql.Statement;

/*
 * MySql数据库连接辅助类:
 * 1、打开数据库;
 * 2、关闭数据库
 */
public class DBOpenHelper {
    private static final String CLS = "com.mysql.jdbc.Driver"; // 引用的jar包Driver类
    private static final String URL = "jdbc:mysql://10.32.27.173/njtech"; //输入IPV4地址以及要查询的数据库
    private static final String USER = "用户";
    private static final String PWD = "密码";

    public static Connection conn; //连接对象
    public static Statement stmt; //命令集
    public static PreparedStatement pStmt; //预编译命令集
    public static ResultSet rs; //结果集

    //取得连接的方法:
    public static void getConnection() {
        try {
            Class.forName(CLS); //CLS需为静态
            conn = DriverManager.getConnection(URL, USER, PWD);
        } catch (Exception ex) {
            ex.printStackTrace();
        }
    }

    // 关闭数据库操作对象:
    public static void closeAll() {
        try {
            if (conn != null) {
                conn.close();
                conn = null;
            }
            if (stmt != null) {
                stmt.close();
                stmt = null;
            }
            if (pStmt != null) {
                pStmt.close();
                pStmt = null;
            }
            if (rs != null) {
                rs.close();
                rs = null;
            }
        } catch (Exception ex) {
            ex.printStackTrace();
        }
    }
}
4、创建学生用户实体类StudentInfo.java:
package com.example.myapplication;

import java.io.Serializable;

public class StudentInfo implements Serializable {
    private String sid;
    private String spassword;
    private String sname;
    private String sgender;
    private String slocation;
    private String sphone;
    private String semail;
    private String cid;

    public StudentInfo() {
    }

    public StudentInfo(String sid, String spassword, String sname, String sgender, String slocation, String sphone, String semail, String cid) {
        this.sid = sid;
        this.spassword = spassword;
        this.sname = sname;
        this.sgender = sgender;
        this.slocation = slocation;
        this.sphone = sphone;
        this.semail = semail;
        this.cid = cid;
    }

    public String getSid() {
        return sid;
    }

    public void setSid(String sid) {
        this.sid = sid;
    }

    public String getSpassword() {
        return spassword;
    }

    public void setSpassword(String spassword) {
        this.spassword = spassword;
    }

    public String getSname() {
        return sname;
    }

    public void setSname(String sname) {
        this.sname = sname;
    }

    public String getSgender() {
        return sgender;
    }

    public void setSgender(String sgender) {
        this.sgender = sgender;
    }

    public String getSlocation() {
        return slocation;
    }

    public void setSlocation(String slocation) {
        this.slocation = slocation;
    }

    public String getSphone() {
        return sphone;
    }

    public void setSphone(String sphone) {
        this.sphone = sphone;
    }

    public String getSemail() {
        return semail;
    }

    public void setSemail(String semail) {
        this.semail = semail;
    }

    public String getCid() {
        return cid;
    }

    public void setCid(String cid) {
        this.cid = cid;
    }
}
5、activity_main.xml:(添加了登录相关控件)
<?xml version="1.0" encoding="utf-8"?>
<LinearLayout xmlns:android="http://schemas.android.com/apk/res/android"
    android:layout_width="match_parent"
    android:layout_height="match_parent"
    android:gravity="top"
    android:orientation="vertical">

    <Button
        android:id="@+id/btnQuery"
        android:layout_width="wrap_content"
        android:layout_height="wrap_content"
        android:layout_gravity="center"
        android:text="Query" />

    <TextView
        android:id="@+id/txtQuery"
        android:layout_width="wrap_content"
        android:layout_height="wrap_content"
        android:layout_gravity="center"
        android:text="查询结果为:"></TextView>

    <LinearLayout xmlns:android="http://schemas.android.com/apk/res/android"
        android:layout_width="match_parent"
        android:layout_height="wrap_content"
        android:gravity="center"
        android:orientation="horizontal">

        <TextView
            android:id="@+id/textView"
            android:layout_width="wrap_content"
            android:layout_height="wrap_content"
            android:text="账户"
            android:textColor="#03A9F4"
            android:textSize="20sp"
            android:textStyle="bold" />

        <EditText
            android:id="@+id/txtSid"
            android:layout_width="wrap_content"
            android:layout_height="wrap_content"
            android:background="@null"
            android:ems="10"
            android:hint="请输入账户"
            android:inputType="textPersonName"
            android:text=""
            android:textSize="20sp"
            android:textStyle="bold" />
    </LinearLayout>

    <LinearLayout xmlns:android="http://schemas.android.com/apk/res/android"
        android:layout_width="match_parent"
        android:layout_height="wrap_content"
        android:gravity="center"
        android:orientation="horizontal">

        <TextView
            android:id="@+id/textView2"
            android:layout_width="wrap_content"
            android:layout_height="wrap_content"
            android:text="密码"
            android:textColor="#03A9F4"
            android:textSize="20sp"
            android:textStyle="bold" />

        <EditText
            android:id="@+id/txtSpassword"
            android:layout_width="wrap_content"
            android:layout_height="wrap_content"
            android:background="@null"
            android:ems="10"
            android:hint="请输入密码"
            android:inputType="textPassword"
            android:textSize="20sp"
            android:textStyle="bold" />
    </LinearLayout>

    <Button
        android:id="@+id/btnLogin"
        android:layout_width="wrap_content"
        android:layout_height="wrap_content"
        android:layout_gravity="center"
        android:text="Login" />

</LinearLayout>
6、创建学生用户数据操作类:StudentDao.java:
package com.example.myapplication;

import java.util.ArrayList;
import java.util.List;

public class StudentDao extends DBOpenHelper {
    //查询所有用户信息:
    public List<StudentInfo> getUserList() {
        List<StudentInfo> list = new ArrayList<>();
        try {
            getConnection();
            String sql = "select * from student";
            pStmt = conn.prepareStatement(sql);
            rs = pStmt.executeQuery();
            while (rs.next()) {
                StudentInfo item = new StudentInfo();
                item.setSid(rs.getString("sid"));
                item.setSpassword(rs.getString("spassword"));
                item.setSname(rs.getString("sname"));
                item.setSgender(rs.getString("gender"));
                item.setSlocation(rs.getString("slocation"));
                item.setSphone(rs.getString("sphone"));
                item.setSemail(rs.getString("semail"));
                item.setCid(rs.getString("cid"));
                list.add(item);
            }
        } catch (Exception ex) {
            ex.printStackTrace();
        } finally {
            closeAll();
        }
        return list;
    }

    public StudentInfo getUserByLogin(String sid, String spassword) {
        StudentInfo item = null;
        try {
            getConnection();
            String sql = "select * from student where sid=? and spassword=?";
            pStmt = conn.prepareStatement(sql);
            pStmt.setString(1, sid);
            pStmt.setString(2, spassword);
            rs = pStmt.executeQuery();
            if (rs.next()) {
                item = new StudentInfo();
                item.setSid(sid);
                item.setSpassword(spassword);
                item.setSname(rs.getString("sname"));
                item.setSgender(rs.getString("gender"));
                item.setSlocation(rs.getString("slocation"));
                item.setSphone(rs.getString("sphone"));
                item.setSemail(rs.getString("semail"));
                item.setCid(rs.getString("cid"));
            }
        } catch (Exception ex) {
            ex.printStackTrace();
        } finally {
            closeAll();
        }
        return item;
    }

    public void addStudent(StudentInfo item) {
        try {
            getConnection();
            String sql = "insert into student(sid,spassword,sname,sgender,slocation,sphone,semail,cid) values(?,?,?,?,?,?,?,?)";
            pStmt = conn.prepareStatement(sql);
            pStmt.setString(1, item.getSid());
            pStmt.setString(2, item.getSpassword());
            pStmt.setString(3, item.getSname());
            pStmt.setString(4, item.getSgender());
            pStmt.setString(5, item.getSlocation());
            pStmt.setString(6, item.getSphone());
            pStmt.setString(7, item.getSemail());
            pStmt.setString(8, item.getCid());
            pStmt.executeUpdate();
        } catch (Exception ex) {
            ex.printStackTrace();
        } finally {
            closeAll();
        }
    }

    public void editStudent(StudentInfo item) {
        try {
            getConnection();
            String sql = "update student set spassword=?,sname=?,sgender=?,slocation=?,sphone=?,semail=?,cid=? where sid=?";
            pStmt = conn.prepareStatement(sql);
            pStmt.setString(1, item.getSpassword());
            pStmt.setString(2, item.getSname());
            pStmt.setString(3, item.getSgender());
            pStmt.setString(4, item.getSlocation());
            pStmt.setString(5, item.getSphone());
            pStmt.setString(6, item.getSemail());
            pStmt.setString(7, item.getCid());
            pStmt.setString(8, item.getSid());
            pStmt.executeUpdate();
        } catch (Exception ex) {
            ex.printStackTrace();
        } finally {
            closeAll();
        }
    }

    public void delStudent(String sid) {
        try {
            getConnection();
            String sql = "delete from student where sid=?";
            pStmt = conn.prepareStatement(sql);
            pStmt.setString(1, sid);
            pStmt.executeUpdate();
        } catch (Exception ex) {
            ex.printStackTrace();
        } finally {
            closeAll();
        }
    }

}
7、创建显示长/短消息/对话框的类:CommonUtils.java:
package com.example.myapplication;

import android.app.AlertDialog;
import android.content.Context;
import android.widget.Toast;

public class CommonUtils {
    public static void showShortMsg(Context context, String msg) {
        Toast.makeText(context, msg, Toast.LENGTH_SHORT).show();
    }

    public static void showLongMsg(Context context, String msg) {
        Toast.makeText(context, msg, Toast.LENGTH_LONG).show();
    }

    public static void showDialogMsg(Context context, String msg) {
        new AlertDialog.Builder(context)
                .setTitle("提示信息")
                .setMessage(msg)
                .setPositiveButton("确定", null)
                .setNegativeButton("取消", null)
                .create().show();
    }
}
8、编写MainActivity.java:
package com.example.myapplication;

import androidx.annotation.NonNull;
import androidx.annotation.Nullable;
import androidx.appcompat.app.AppCompatActivity;

import android.content.Intent;
import android.os.Bundle;
import android.os.Handler;
import android.os.Message;
import android.text.TextUtils;
import android.util.Log;
import android.view.View;
import android.widget.Button;
import android.widget.EditText;
import android.widget.TextView;

public class MainActivity extends AppCompatActivity implements View.OnClickListener {
    private Button btnQuery;
    private TextView txtQuery;
    private Button btnLogin;
    private EditText txtSid;
    private EditText txtSpassword;
    private StudentDao dao;
    private Handler mainHandler;

    private Handler handler = new Handler() {
        @Override
        public void handleMessage(@NonNull Message msg) {
//            super.handleMessage(msg);
            if (msg.what == 0) {
                txtQuery.append("\n数据库学生数量为" + (Integer) msg.obj);
            }
        }
    };

    @Override
    protected void onCreate(@Nullable Bundle savedInstanceState) {
        super.onCreate(savedInstanceState);
        setContentView(R.layout.activity_main);

        initView();
    }

    @Override
    public void onClick(View view) {
        switch (view.getId()) {
            case R.id.btnQuery:
                doQuery();
                break;
            case R.id.btnLogin:
                doLogin();
                break;
        }
    }

    private void initView() {
        btnQuery = findViewById(R.id.btnQuery);
        txtQuery = findViewById(R.id.txtQuery);
        btnLogin = findViewById(R.id.btnLogin);
        txtSid = findViewById(R.id.txtSid);
        txtSpassword = findViewById(R.id.txtSpassword);
        btnQuery.setOnClickListener(this);
        btnLogin.setOnClickListener(this);
        mainHandler = new Handler(getMainLooper()); //获取主线程
        dao = new StudentDao();
    }

    private void doQuery() {
//        单纯用以下这种方法无效,需要开启线程Thread.start
//        int count = MySqlHelp.getUserSize();
//        txtQuery.append(Integer.toString(count));
        new Thread(new Runnable() {
            @Override //重写run方法
            public void run() {
                int count = MySqlHelp.getUserSize();
                Message msg = Message.obtain();
                msg.what = 0;
                msg.obj = count;
                handler.sendMessage(msg); //向主线程发送数据
            }
        }).start(); //开启线程
    }

    private void doLogin() {
        final String sid = txtSid.getText().toString().trim();
        final String spassword = txtSpassword.getText().toString().trim();
        if (TextUtils.isEmpty(sid)) {
            CommonUtils.showShortMsg(this, "请输入用户名");
            txtSid.requestFocus();
        } else if (TextUtils.isEmpty(spassword)) {
            CommonUtils.showShortMsg(this, "请输入密码");
            txtSpassword.requestFocus();
        } else {
            new Thread(new Runnable() {
                @Override //重写run方法
                public void run() {
                    final StudentInfo item = dao.getUserByLogin(sid, spassword);
                    mainHandler.post(new Runnable() {
                        @Override
                        public void run() {
                            if (item == null)
                                CommonUtils.showDialogMsg(MainActivity.this, "用户名或密码错误");
                            else
                                CommonUtils.showDialogMsg(MainActivity.this, "登录成功");
                        }
                    });
                }
            }).start(); //开启线程
        }
    }
}
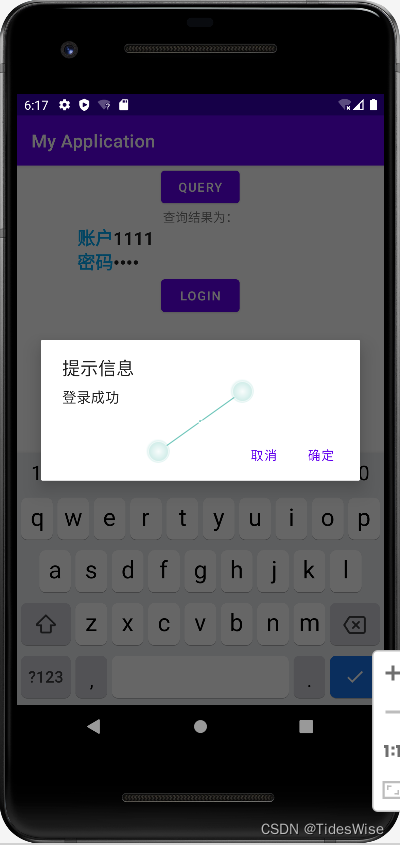
9、运行界面:
今天的分享就先到这里,下篇文章将介绍登录之后跳转新界面展示用户列表并进行详细的增删改查!
版权归原作者 TidesWise 所有, 如有侵权,请联系我们删除。