
基于token认证功能开发
引子:最近做项目时遇到了一个特殊的需求,需要写共享接口把本系统的一些业务数据共享给各地市的自建系统,为了体现公司的专业性以及考虑到程序的扩展性(通过各地市的行政区划代码做限制即把地市的所属行政区代码作为盐值),决定要把接口做的高级一些,而不是简单的传个用户名和密码对比数据库里面的,那样真的很low。于是写了基于token的认证功能,在这里分享出来供大家学习与探讨。
效果演示:
1、请求头未设置token值或者是非法token

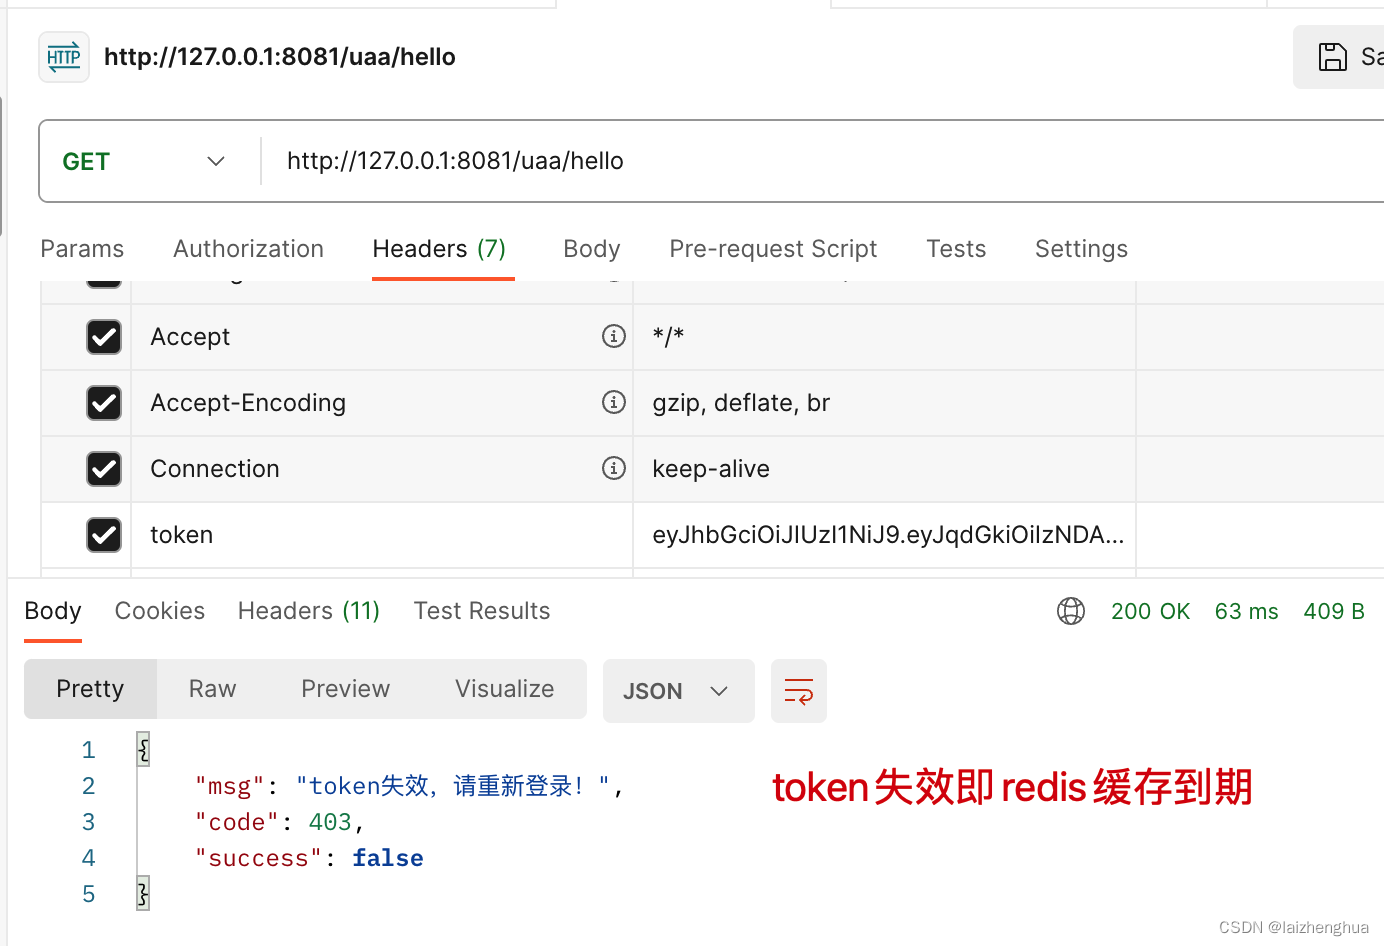
2、token失效
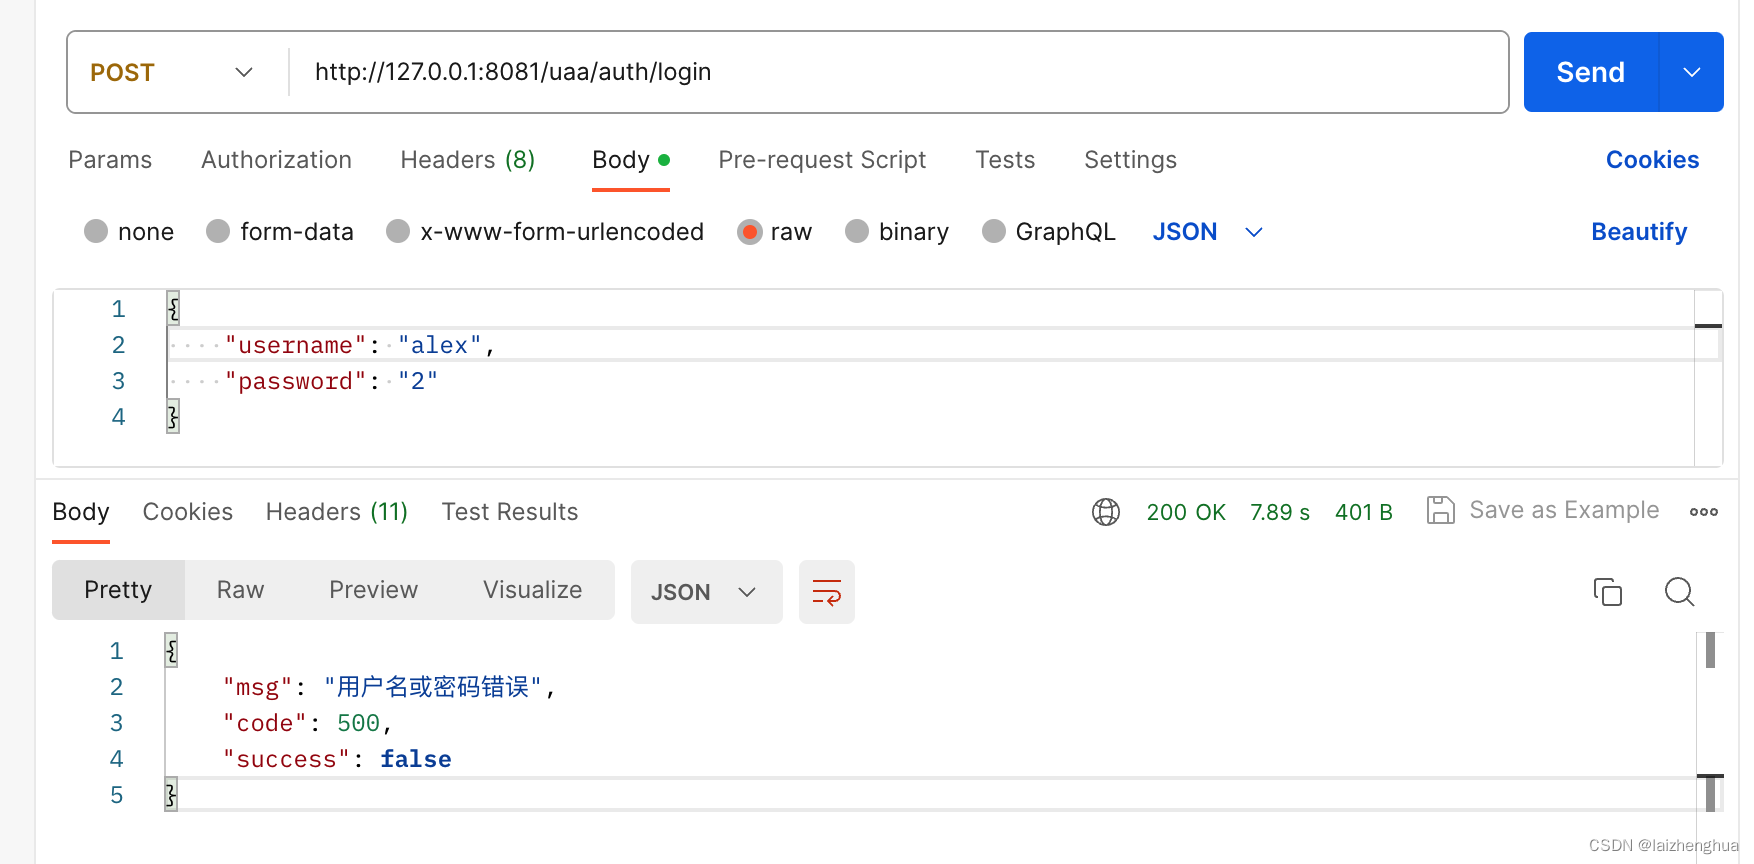
3、认证失败
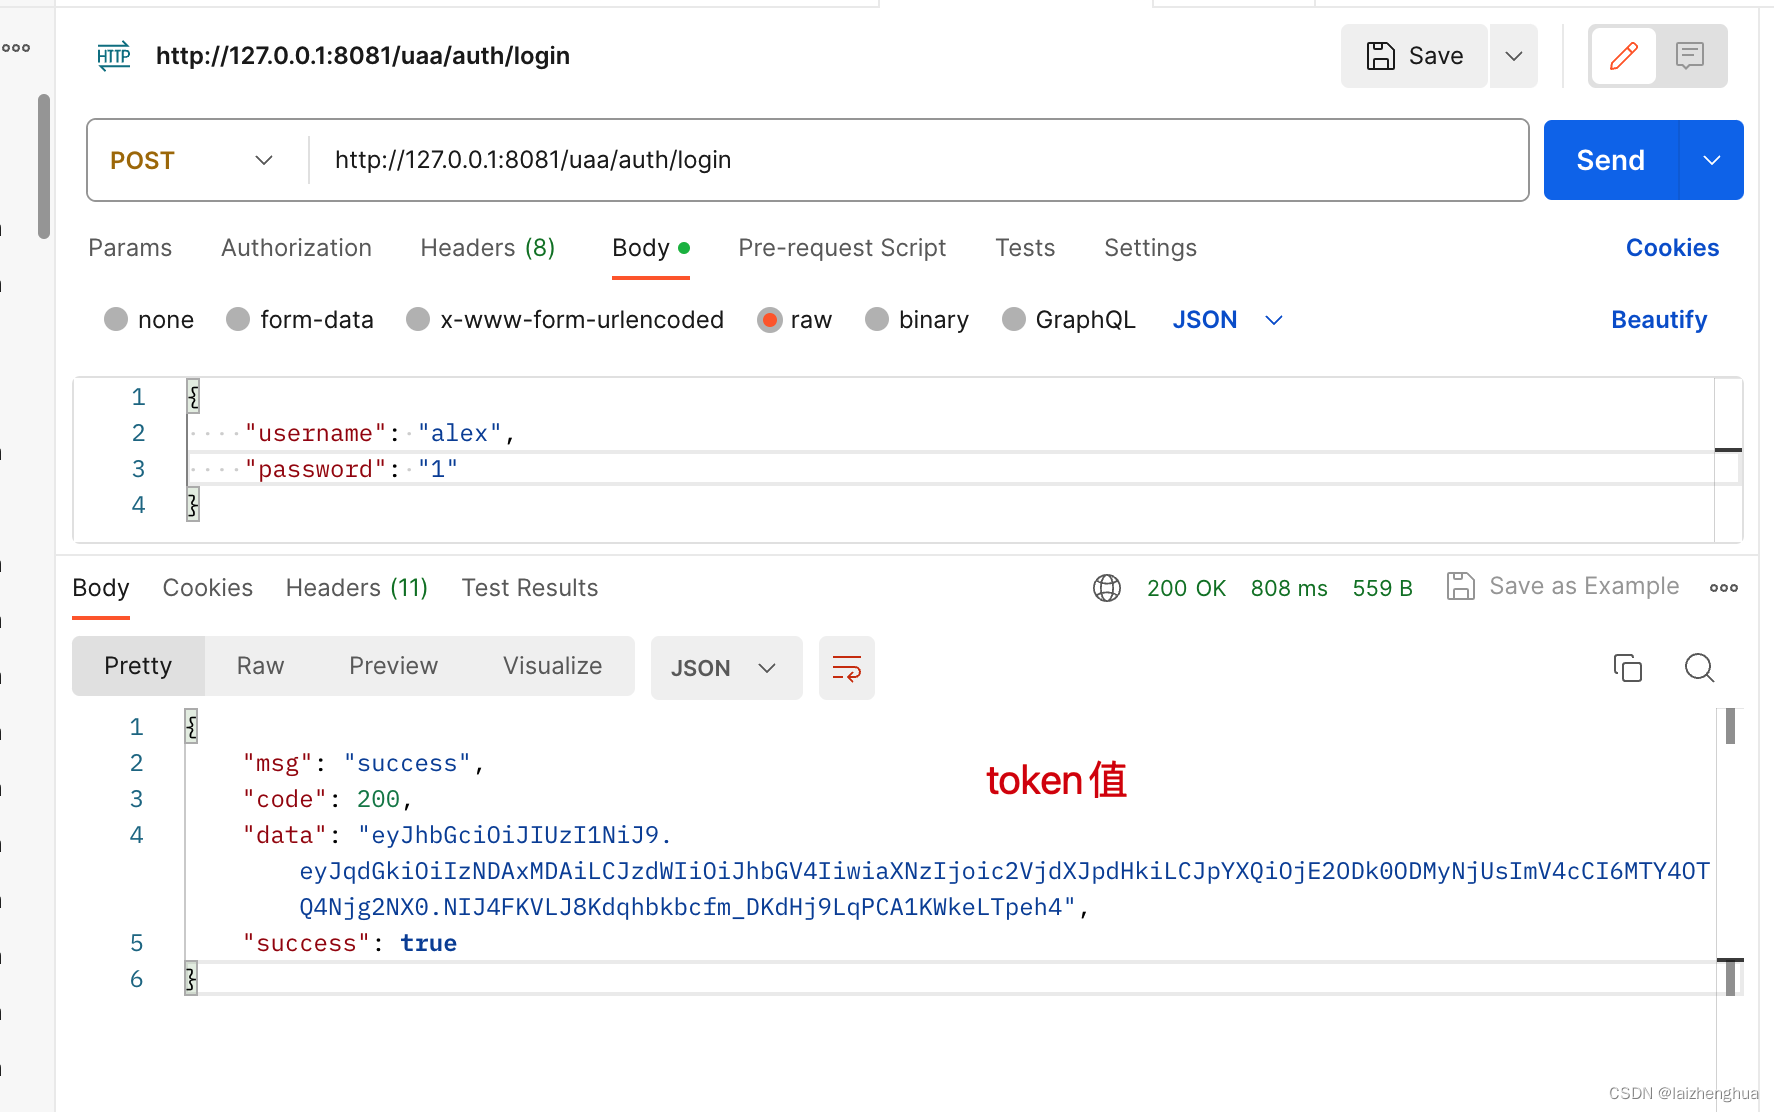
4、登录获取token(认证成功)
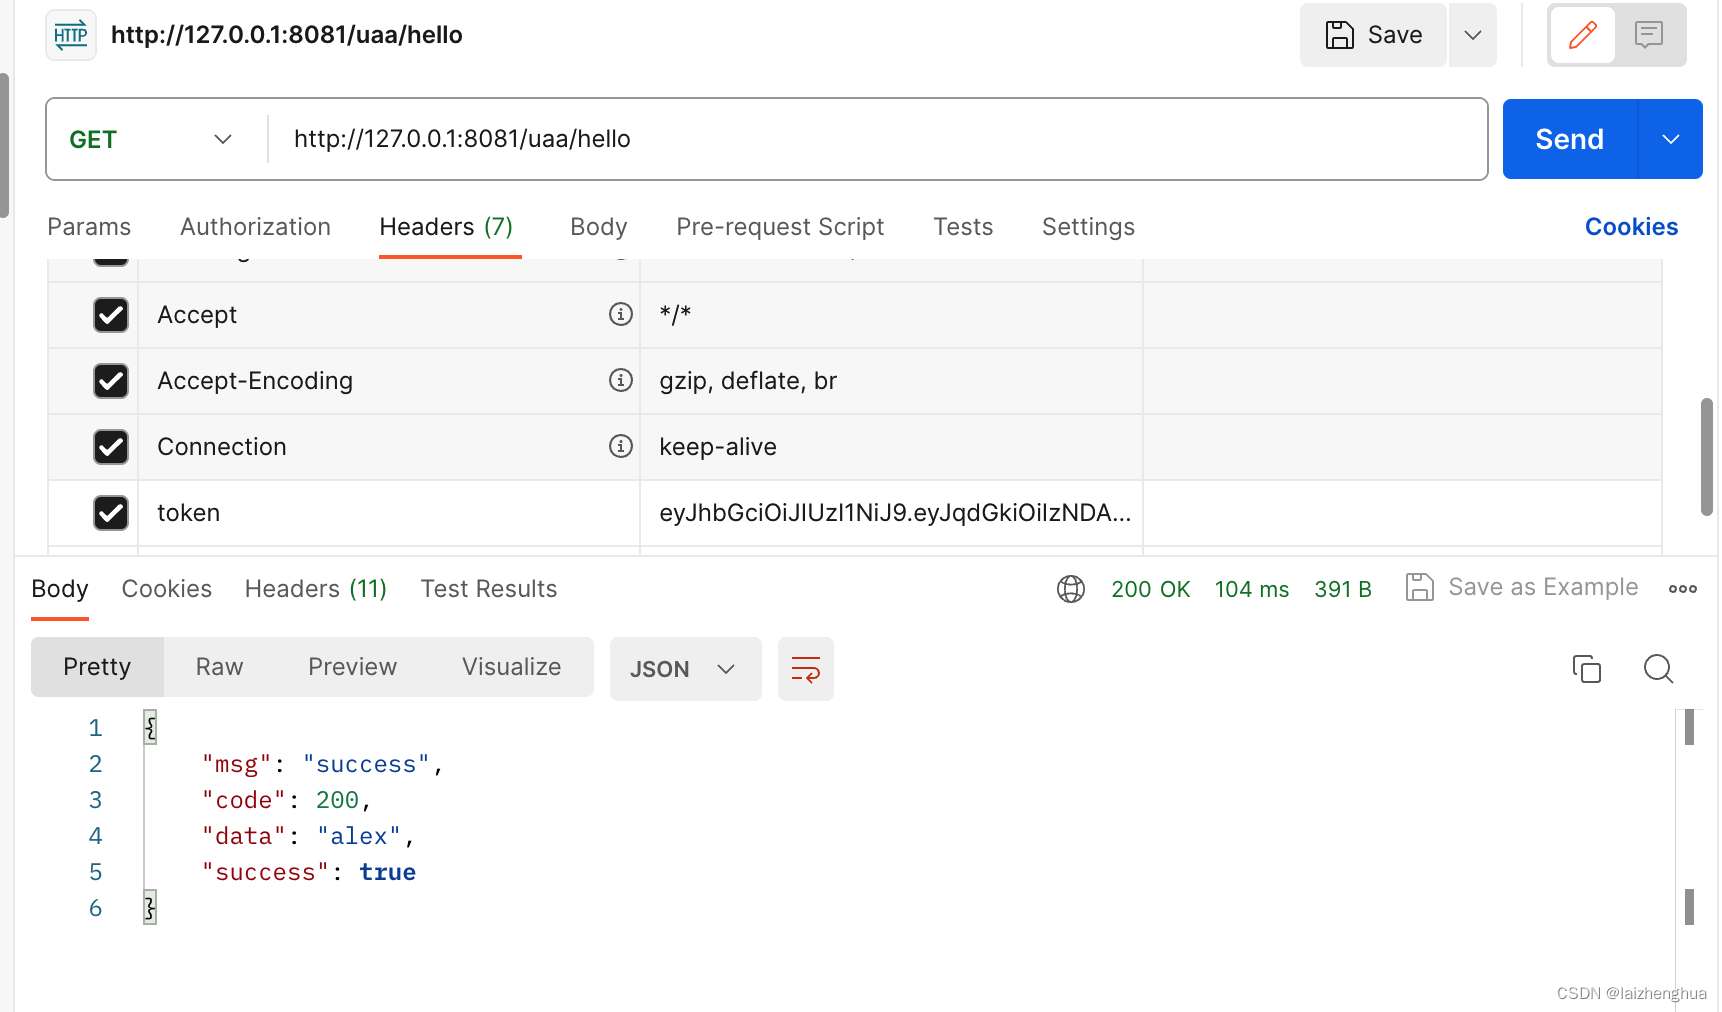
4、携带token访问API
1、项目初始化
项目的初始化很重要,我们需要事先准备好一些通用的工具类和配置类,便于后面开发。
因为新建工程比较简单,这里就不啰嗦了,看下我添加了那些
GAV
坐标即可。
注意我用的
SpringBoot
版本是
3.0
的,如果版本和我保持一致的话
pom.xml
也需要保持一致否则依赖可能下载不下来(
SpringBoot3.0
当时还没有稳定版本的)。
1、
pom.xml
<?xml version="1.0" encoding="UTF-8"?><projectxmlns="http://maven.apache.org/POM/4.0.0"xmlns:xsi="http://www.w3.org/2001/XMLSchema-instance"xsi:schemaLocation="http://maven.apache.org/POM/4.0.0 http://maven.apache.org/xsd/maven-4.0.0.xsd"><modelVersion>4.0.0</modelVersion><!-- https://mvnrepository.com/artifact/org.springframework.boot/spring-boot-starter-parent --><!-- 所有SpringBoot项目都要继承spring-boot-starter-parent --><parent><groupId>org.springframework.boot</groupId><artifactId>spring-boot-starter-parent</artifactId><version>3.0.7</version><relativePath/><!-- lookup parent from repository --></parent><groupId>com.laizhenghua</groupId><artifactId>demo</artifactId><version>1.0-SNAPSHOT</version><properties><maven.compiler.source>8</maven.compiler.source><maven.compiler.target>8</maven.compiler.target></properties><dependencies><!-- https://mvnrepository.com/artifact/org.springframework.boot/spring-boot-starter-web --><dependency><groupId>org.springframework.boot</groupId><artifactId>spring-boot-starter-web</artifactId></dependency><!-- https://mvnrepository.com/artifact/com.baomidou/mybatis-plus-boot-starter --><!-- 如果是SpringBoot3.0版本必须在3.5.3以上 --><dependency><groupId>com.baomidou</groupId><artifactId>mybatis-plus-boot-starter</artifactId><version>3.5.3</version></dependency><!-- https://mvnrepository.com/artifact/com.mysql/mysql-connector-j --><dependency><groupId>com.mysql</groupId><artifactId>mysql-connector-j</artifactId></dependency><!-- https://mvnrepository.com/artifact/org.springframework.boot/spring-boot-starter-data-redis --><dependency><groupId>org.springframework.boot</groupId><artifactId>spring-boot-starter-data-redis</artifactId></dependency><!-- https://mvnrepository.com/artifact/org.springframework.boot/spring-boot-starter-security --><dependency><groupId>org.springframework.boot</groupId><artifactId>spring-boot-starter-security</artifactId></dependency><!-- https://mvnrepository.com/artifact/io.jsonwebtoken/jjwt --><dependency><groupId>io.jsonwebtoken</groupId><artifactId>jjwt</artifactId><version>0.9.1</version></dependency><!-- https://mvnrepository.com/artifact/javax.xml.bind/jaxb-api --><!-- SpringBoot3.0属于高版本!生成jwt需要在单独指定jaxb-api版本否则会报错 --><dependency><groupId>javax.xml.bind</groupId><artifactId>jaxb-api</artifactId><version>2.3.1</version></dependency><!-- 暂时先不需要这个依赖(SpringBoot3.0还没有支持swagger3.0) --><!-- https://mvnrepository.com/artifact/io.springfox/springfox-boot-starter --><dependency><groupId>io.springfox</groupId><artifactId>springfox-boot-starter</artifactId><version>3.0.0</version></dependency><!-- https://mvnrepository.com/artifact/com.alibaba/fastjson --><dependency><groupId>com.alibaba</groupId><artifactId>fastjson</artifactId><version>1.2.83</version></dependency></dependencies><repositories><repository><id>spring-snapshots</id><url>https://repo.spring.io/snapshot</url><!-- 表示只会去仓库查找稳定版本(releases=true)不会去查找开发中的版本(snapshots=false) --><releases><enabled>true</enabled></releases><snapshots><enabled>false</enabled></snapshots></repository></repositories><pluginRepositories><pluginRepository><id>spring-snapshots</id><url>https://repo.spring.io/snapshot</url><releases><enabled>true</enabled></releases><snapshots><enabled>false</enabled></snapshots></pluginRepository></pluginRepositories><build><plugins><plugin><groupId>org.springframework.boot</groupId><artifactId>spring-boot-maven-plugin</artifactId></plugin></plugins></build></project>
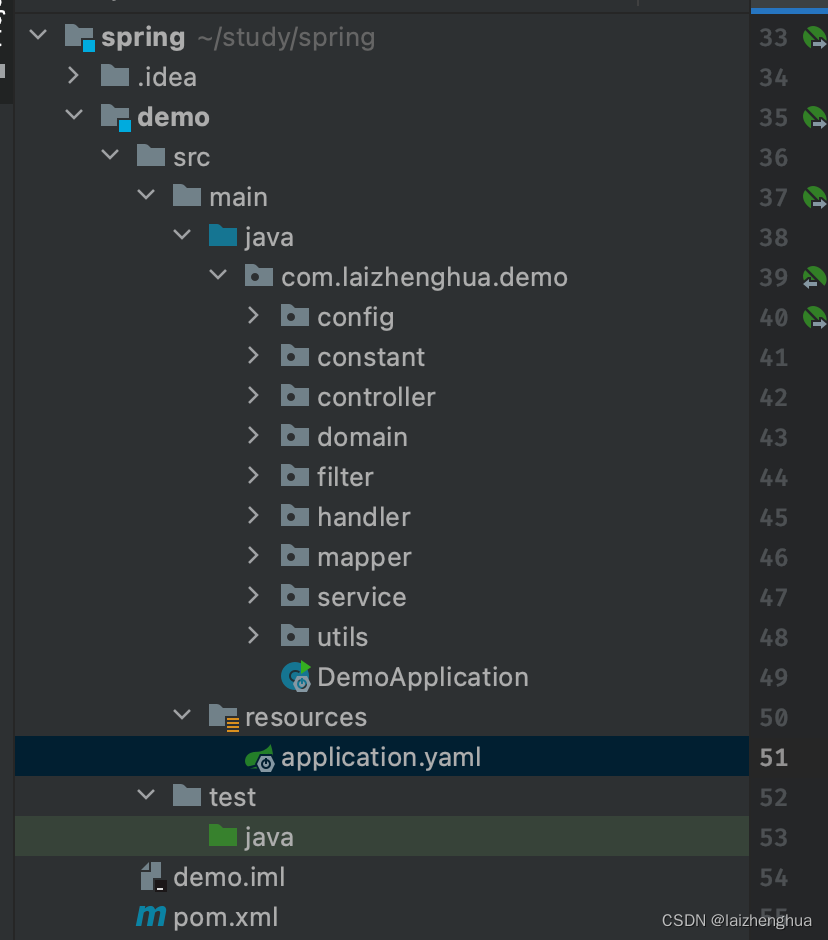
整体项目结构如下:
2、统一返回类
R
封装
为了避免
API
返回的数据混乱,我们统一使用
R
类进行返回,
R
中返回的数据结构如下
{"msg":"success",// 附加消息"code":200,// 状态码(可以自定义不一定完全与http状态码一样)"data":"alex",// 数据统一放在data方便前端拦截器直接拦截data"success":true// 成功标识(是否成功可以通过这个属性判断)}
新建
utils.R.java
(所有工具类都放在
utils
包下)
R.java
/**
 * TODO
 *
 * @Description 统一返回类封装
 * @Author laizhenghua
 * @Date 2023/2/19 20:04
 **/publicclassRextendsHashMap<String,Object>{privatestaticfinallong serialVersionUID =563554414843661955L;publicR(){put("code",0);put("msg","success");}publicstaticRerror(int code,String msg){R r =newR();
        r.put("code", code);
        r.put("msg", msg);
        r.put("success",false);return r;}publicstaticRsuccess(Object data,String msg){R r =newR();
        r.put("code",200);
        r.put("data", data);
        r.put("msg", msg);
        r.put("success",true);return r;}publicstaticRsuccess(Object data){returnsuccess(data,"success");}publicstaticRok(String msg){R r =newR();
        r.put("msg", msg);return r;}publicstaticRok(Map<String,Object> map){R r =newR();
        r.putAll(map);return r;}publicstaticRok(){returnnewR();}publicRput(String key,Object value){super.put(key, value);returnthis;}}
2、RedisTemplate序列化配置
RedisTemplate
默认采用
JDK
的序列化方式,一是不支持跨语言,最重要的是出了问题,排查起来非常不方便!因此为了保证序列化不出问题,我们需要重新配置
RedisTemplate
。
新建
config.RedisConfiguration.java
(所有配置类都放在
config
包下)
RedisConfiguration.java
/**
 * TODO
 *
 * @Description RedisTemplate 序列化配置
 * @Author laizhenghua
 * @Date 2023/6/25 21:22
 **/@ConfigurationpublicclassRedisConfiguration{@BeanpublicRedisTemplate<String,Object>redisTemplate(RedisConnectionFactory redisConnectionFactory){// 我们为了开发方便直接使用<String,Object>泛型RedisTemplate<String,Object> template =newRedisTemplate<>();
        template.setConnectionFactory(redisConnectionFactory);// 序列化配置Jackson2JsonRedisSerializer<Object> jackson2JsonRedisSerializer =newJackson2JsonRedisSerializer<Object>(Object.class);ObjectMapper om =newObjectMapper();
        om.setVisibility(PropertyAccessor.ALL,JsonAutoDetect.Visibility.ANY);
        om.activateDefaultTyping(LaissezFaireSubTypeValidator.instance,ObjectMapper.DefaultTyping.NON_FINAL);
        jackson2JsonRedisSerializer.setObjectMapper(om);// String序列化的配置StringRedisSerializer stringRedisSerializer =newStringRedisSerializer();// key采用String的序列化
        template.setKeySerializer(stringRedisSerializer);// Hash的key也采用String的序列化方式
        template.setHashKeySerializer(stringRedisSerializer);// value采用Jackson2JsonRedisSerializer的序列化方式
        template.setValueSerializer(jackson2JsonRedisSerializer);// Hash的value也采用jackson2JsonRedisSerializer的序列化方式
        template.setHashValueSerializer(jackson2JsonRedisSerializer);
        template.afterPropertiesSet();return template;}}
测试一下
redis
缓存有没有问题
/**
 * TODO
 *
 * @Description
 * @Author laizhenghua
 * @Date 2023/6/3 09:04
 **/@RestControllerpublicclassHelloController{@AutowiredprivateRedisTemplate<String,Object> redisTemplate;@GetMapping("/hello")publicRhello(){
        redisTemplate.opsForValue().set("name","alex");returnR.success(redisTemplate.opsForValue().get("name"));}}
浏览器访问这个
API
,惊奇的发现自动跳转到了登录页面需要认证后才能访问
API
。

认证方式也很简单可以输入用户名和密码进行认证,如
Username: user
Password: 启动项目控制台输出的uuid
// 如 Using generated security password: f4895be9-132b-4627-a7e6-25b9b5baeb1b// 用户名为什么user?源码如下
@ConfigurationProperties(prefix ="spring.security")publicclassSecurityProperties{...publicstaticclassUser{/**
     * Default user name.
     */// 当然也可以通过配置文件去指定private String name ="user";/**
     * Password for the default user name.
     */private String password =UUID.randomUUID().toString();...}}
3、SpringSecurity初步配置
以上除了在登录页面输入用户名和密码进行认证外,还有一种方式就是在请求头或其他地方增加token,通过解析token找到认证用户并给予认证(本文就是介绍这种方式)。
当然也可以配置这个请求不需要认证也不需要鉴权,这也是测试例子想引出的知识点,因为后面静态资源和一些特殊的请求是不需要认证的比如说
swagger
相关的。
新建
SecurityConfiguration.java
配置类
SecurityConfiguration.java
/**
 * TODO
 *
 * @Description SecurityConfiguration
 * @Author laizhenghua
 * @Date 2023/6/25 21:55
 **/@Configuration@EnableWebSecuritypublicclassSecurityConfiguration{// 1.需要注意的是SpringSecurity6.0版本不再是是继承WebSecurityConfigurerAdapter来配置HttpSecurity,而是使用SecurityFilterChain来注入// 2.SpringSecurity6.0需要添加@EnableWebSecurity来开启一些必要的组件@BeanSecurityFilterChainsecurityFilterChain(HttpSecurity http)throwsException{// 关闭csrf因为不使用session
        http.csrf().disable()// 不通过Session获取SecurityContext.sessionManagement().sessionCreationPolicy(SessionCreationPolicy.STATELESS).and().authorizeHttpRequests()// 配置不需要认证的请求.requestMatchers("/hello").permitAll()// 除了上面那些请求都需要认证.anyRequest().authenticated();return http.build();}/**
     * anyRequest          |   匹配所有请求路径
     * access              |   SpringEl表达式结果为true时可以访问
     * anonymous           |   匿名可以访问
     * denyAll             |   用户不能访问
     * fullyAuthenticated  |   用户完全认证可以访问(非remember-me下自动登录)
     * hasAnyAuthority     |   如果有参数,参数表示权限,则其中任何一个权限可以访问
     * hasAnyRole          |   如果有参数,参数表示角色,则其中任何一个角色可以访问
     * hasAuthority        |   如果有参数,参数表示权限,则其权限可以访问
     * hasIpAddress        |   如果有参数,参数表示IP地址,如果用户IP和参数匹配,则可以访问
     * hasRole             |   如果有参数,参数表示角色,则其角色可以访问
     * permitAll           |   用户可以任意访问
     * rememberMe          |   允许通过remember-me登录的用户访问
     * authenticated       |   用户登录后可访问
     */}
4、SpringBoot3.0集成Swagger3.0
目前
SpringBoot3.0
还不支持
Swagger3.0
这部分内容先不要看了,后续再更新~
集成
Swagger3.0
主要就是测试
API
比较方便,不想集成可以跳过这一步。
1、引入坐标依赖
<!-- https://mvnrepository.com/artifact/io.springfox/springfox-boot-starter --><dependency><groupId>io.springfox</groupId><artifactId>springfox-boot-starter</artifactId><version>3.0.0</version></dependency>
2、主程序添加
@EnableOpenApi
注解,这是
swagger 3.0
新增的注解。
/**
 * TODO
 *
 * @Description
 * @Author laizhenghua
 * @Date 2023/6/3 08:35
 **/@EnableOpenApi// 让SpringBoot扫描swagger配置的相关组件@SpringBootApplicationpublicclassDemoApplication{publicstaticvoidmain(String[] args){SpringApplication.run(DemoApplication.class, args);}}
3、修改
SpringMVC
默认路径匹配策略(因为
Springfox
使用的路径匹配是基于
AntPathMatcher
的,而
Spring Boot3.0
默认使用的是
PathPatternMatcher
)
源码如下
publicstaticclassPathmatch{/**
     * Choice of strategy for matching request paths against registered mappings.
     */privateMatchingStrategy matchingStrategy =MatchingStrategy.PATH_PATTERN_PARSER;}
application.yaml
server:port:8081spring:datasource:url: jdbc:mysql://192.168.200.9:3608/pr?useUnicode=true&characterEncoding=UTF-8&useSSL=false&serverTimezone=Asia/Shanghaiusername: pr
    password: pr@Dist123
    driver-class-name: com.mysql.cj.jdbc.Driver
  data:redis:host: 192.168.6.74
      port:6856password: gh668##MMNmvc:# swagger3pathmatch:matching-strategy: ant_path_matcher # 主要修改这里
4、编写配置类,配置
swagger
SwaggerConfiguration.java
/**
 * TODO
 *
 * @Description
 * @Author laizhenghua
 * @Date 2023/6/26 21:51
 **/@ConfigurationpublicclassSwaggerConfiguration{@BeanpublicDocketdocket(){returnnewDocket(DocumentationType.OAS_30).select().apis(RequestHandlerSelectors.basePackage("com.laizhenghua.demo.controller")).paths(PathSelectors.any()).build().apiInfo(setApiInfo()).globalRequestParameters(setRequestParameter());}// swagger默认是不可以直接添加请求头的需要单独配置privateList<RequestParameter>setRequestParameter(){RequestParameter parameter =newRequestParameterBuilder().name("token").description("token").in(ParameterType.HEADER).required(true).build();returnCollections.singletonList(parameter);}privateApiInfosetApiInfo(){Contact contact =newContact("laizhenghua","https://blog.csdn.net/m0_46357847","[email protected]");returnnewApiInfo("SpringSecurity基于token的认证功能","通过token认证API完整实现","v1.0","https://blog.csdn.net/m0_46357847", contact,"Apache 2.0","",newArrayList<VendorExtension>());}@BeanpublicstaticBeanPostProcessorspringfoxHandlerProviderBeanPostProcessor(){returnnewBeanPostProcessor(){@OverridepublicObjectpostProcessAfterInitialization(Object bean,String beanName)throwsBeansException{if(bean instanceofWebMvcRequestHandlerProvider|| bean instanceofWebFluxRequestHandlerProvider){customizeSpringfoxHandlerMappings(getHandlerMappings(bean));}return bean;}private<TextendsRequestMappingInfoHandlerMapping>voidcustomizeSpringfoxHandlerMappings(List<T> mappings){List<T> copy = mappings.stream().filter(mapping -> mapping.getPatternParser()==null).collect(Collectors.toList());
                mappings.clear();
                mappings.addAll(copy);}@SuppressWarnings("unchecked")privateList<RequestMappingInfoHandlerMapping>getHandlerMappings(Object bean){try{Field field =ReflectionUtils.findField(bean.getClass(),"handlerMappings");
                    field.setAccessible(true);return(List<RequestMappingInfoHandlerMapping>) field.get(bean);}catch(IllegalArgumentException|IllegalAccessException e){thrownewIllegalStateException(e);}}};}}
5、修改
SpringSecurity
的配置,配置
swagger
相关请求不需要认证。
5、SpringSecurity认证流程回顾
SpringSecurity
提供了若干个过滤器,其中核心的过滤器有
UsernamePasswordAuthenticationFilter、ExceptionTranslationFilter、FilterSecurityInterceptor
。他们能够拦截所有
Servlet
请求,并将这些请求转给认证和访问决策管理器(注册到Spring容器的各种安全组件)处理,从而增强程序的安全性。
SpringSecurity
的认证流程如下:
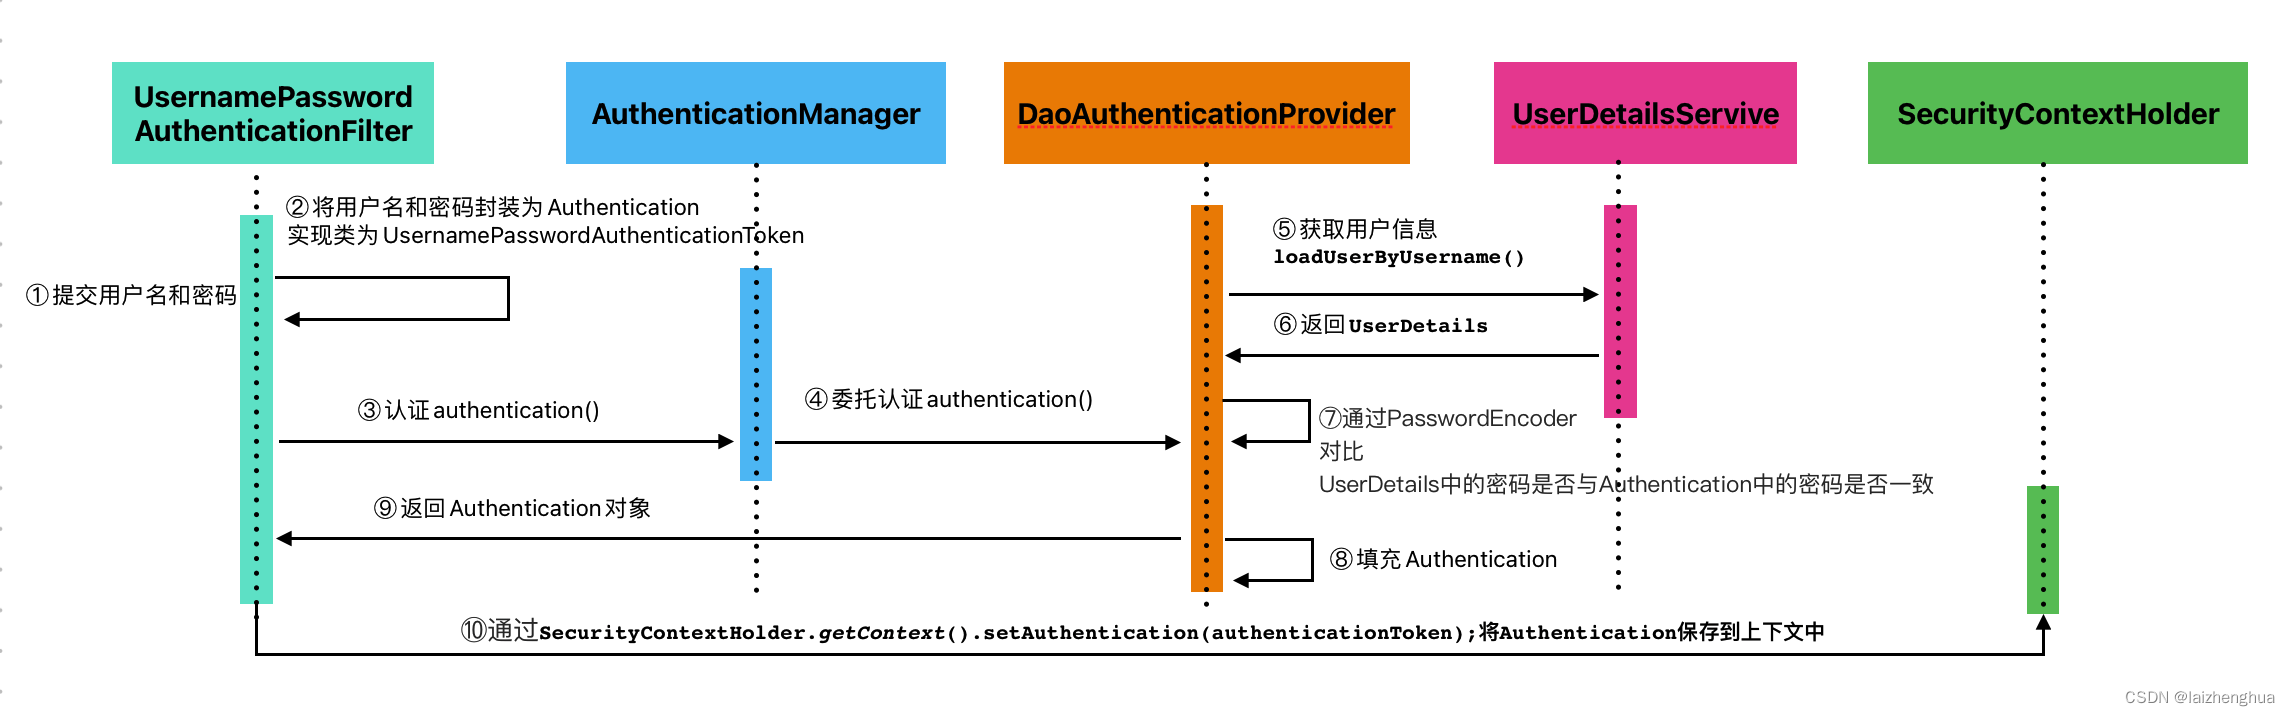
牢记这个流程,后面代码我们也会根据这个流程进行功能的开发。
6、认证管理器AuthenticationManager准备
从认证流程的第3、第4步来看将用户名和密码封装为
Authentication
后需要调用认证管理器的
authenticate()
方法进行认证,因此Spring容器中需要注入认证管理器的
bean
实例。
为了代码书写规范我们把所有关于
SpringSecurity
的组件都写在
SecurityConfiguration.java
这个配置类上,例如
SecurityConfiguration.java
@Configuration@EnableWebSecuritypublicclassSecurityConfiguration{.../**
     * 身份认证管理器,调用authenticate()方法完成认证
     */@BeanpublicAuthenticationManagerauthenticationManager(AuthenticationConfiguration authenticationConfiguration)throwsException{return authenticationConfiguration.getAuthenticationManager();}...}
源码分析
AuthenticationManager
是一个接口默认实现是
ProviderManager
。而
ProviderManager
只是最外层的认证入口,在这一层会获取所有可用的认证机制(
AuthenticationProvider
)以及异常处理等,真正的认证入口其实是
AuthenticationProvider
接口实现类下的
authenticate()
方法,详见以下代码
ProviderManager.java
publicclassProviderManagerimplementsAuthenticationManager,MessageSourceAware,InitializingBean{...// 外层认证入口核心代码@OverridepublicAuthenticationauthenticate(Authentication authentication)throwsAuthenticationException{Class<?extendsAuthentication> toTest = authentication.getClass();AuthenticationException lastException =null;AuthenticationException parentException =null;Authentication result =null;Authentication parentResult =null;int currentPosition =0;int size =this.providers.size();// 获取所有可用的认证机制(当然我们这里没有配置别的认证机制,只有一种默认的DaoAuthenticationProvider)for(AuthenticationProvider provider :getProviders()){if(!provider.supports(toTest)){continue;}if(logger.isTraceEnabled()){
                logger.trace(LogMessage.format("Authenticating request with %s (%d/%d)",
                        provider.getClass().getSimpleName(),++currentPosition, size));}try{// **** 这里才是真正的认证入口 ****
                result = provider.authenticate(authentication);if(result !=null){copyDetails(authentication, result);break;}}catch(AccountStatusException|InternalAuthenticationServiceException ex){prepareException(ex, authentication);// SEC-546: Avoid polling additional providers if auth failure is due to// invalid account statusthrow ex;}catch(AuthenticationException ex){
                lastException = ex;}}...}...}
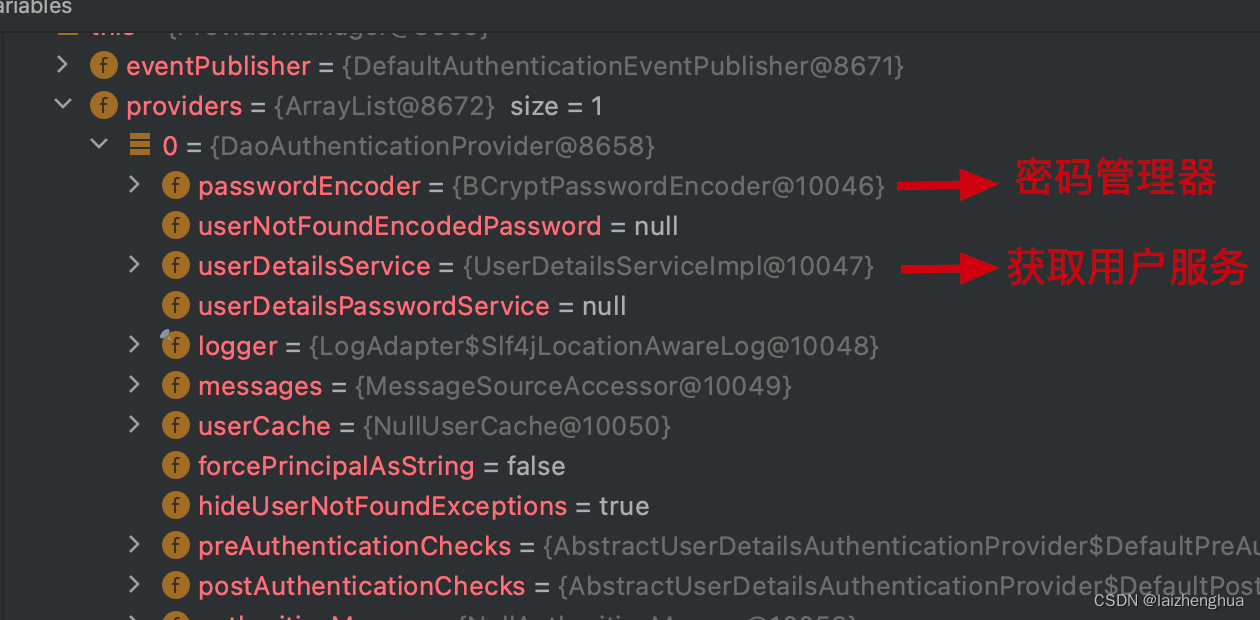
仔细看
AuthenticationProvider
的结构(依赖了
PasswordEncoder
和
UserDetailsService
两个bean实例,因此容器中也要注入这两个bean实例)
7、密码加密器PasswordEncoder准备
由
DaoAuthenticationProvider
源码得知,该结构依赖了
PasswordEncoder
实例bean,因此容器也要注入该类型的实例bean。
SecurityConfiguration.java
@Configuration@EnableWebSecuritypublicclassSecurityConfiguration{.../**
     * 密码加密器
     */@BeanpublicPasswordEncoderpasswordEncoder(){returnnewBCryptPasswordEncoder();}...}
密码加密器除非有特殊需求,自己去定义。一般开发用
BCryptPasswordEncoder
就可以了,会动态维护盐值,每次都是随机的非常不错。
源码分析(密码是怎么匹配的后面章节再分析):
注意:
DaoAuthenticationProvider
继承了
AbstractUserDetailsAuthenticationProvider
,
authenticate()
方法是写在
AbstractUserDetailsAuthenticationProvider
上的,如下代码
publicclassDaoAuthenticationProviderextendsAbstractUserDetailsAuthenticationProvider{...}
8、用户服务UserDetailsService准备
由
AuthenticationProvider
的结构得知,该结构有个属性
UserDetailsService
,所以Spring容器中需要注入
UserDetailsService
的bean实例。当然从认证流程的第5、第6步来看,我们需要在
UserDetailsService
实例bean中重写
loadUserByUsername()
抽象方法,来实现用户的查找逻辑。
UserDetailsServiceImpl.java
@ServicepublicclassUserDetailsServiceImplimplementsUserDetailsService{@AutowiredprivateUserService userService;@OverridepublicUserDetailsloadUserByUsername(String username)throwsUsernameNotFoundException{UserEntity user = userService.getUserByName(username);if(null== user){thrownewRuntimeException(String.format("not found [%s]", username));}returnnewSecurityUser(user);}}
注意:
为了代码规范我们把用户相关的操作,都放到了
UserService
上,因为用户操作不只是查询,还有新增等。新增时密码都是用密码加密器加密后存储的(后面分析为什么要存储密码加密器加密后的密文密码)。
另外
loadUserByUsername()
方法返回的类型为
UserDetails
,
UserDetails
是SpringSecurity内置的结构,没有我们自定义的信息(如电话号码、用户真实姓名、用户的头像地址、用户所属的行政区区划、用户其他信息等等)因此我们还需要自定义
UserDetails
的扩展结构,
loadUserByUsername()
方法返回的也是这个扩展结构,例如:
/**
 * TODO
 *
 * @Description
 * @Author laizhenghua
 * @Date 2023/6/29 22:49
 **/publicclassSecurityUserimplementsUserDetails{// 这是我们扩展的用户信息privateUserEntity userEntity;publicSecurityUser(UserEntity userEntity){this.userEntity = userEntity;}publicUserEntitygetUserEntity(){return userEntity;}publicvoidsetUserEntity(UserEntity userEntity){this.userEntity = userEntity;}@OverridepublicCollection<?extendsGrantedAuthority>getAuthorities(){returnnull;}@OverridepublicStringgetPassword(){return userEntity.getPassword();}@OverridepublicStringgetUsername(){return userEntity.getUsername();}@OverridepublicbooleanisAccountNonExpired(){// false 用户帐号已过期returntrue;}@OverridepublicbooleanisAccountNonLocked(){// false 用户帐号已被锁定returntrue;}@OverridepublicbooleanisCredentialsNonExpired(){// false 用户凭证已过期returntrue;}@OverridepublicbooleanisEnabled(){// false 用户已失效returntrue;}}
9、MP集成与UserService准备
1、准备一张用户表
CREATETABLE PR.`PR_USER`(`ID`BIGINT(10)UNSIGNEDAUTO_INCREMENTPRIMARYKEYCOMMENT'主键',`REGION_CODE` NVARCHAR(6)COMMENT'行政区代码',`PHONE` NVARCHAR(11)COMMENT'手机号',`CREATE_TIME`TIMESTAMPCOMMENT'创建时间',`USERNAME` NVARCHAR(100)COMMENT'用户名',`PASSWORD` NVARCHAR(100)COMMENT'密码')ENGINE=INNODBCHARSET=utf8 COLLATE=utf8_general_ci;
2、用户表对应的实体
/**
 * TODO
 *
 * @Description
 * @Author laizhenghua
 * @Date 2023/7/2 16:30
 **/@TableName(value ="PR_USER", schema ="PR")publicclassUserEntityimplementsSerializable{@TableId(type =IdType.AUTO)privateLong id;@TableField(value ="REGION_CODE")privateString regionCode;privateString phone;privateDate createTime;privateString username;privateString password;publicLonggetId(){return id;}publicvoidsetId(Long id){this.id = id;}publicStringgetRegionCode(){return regionCode;}publicvoidsetRegionCode(String regionCode){this.regionCode = regionCode;}publicStringgetPhone(){return phone;}publicvoidsetPhone(String phone){this.phone = phone;}publicDategetCreateTime(){return createTime;}publicvoidsetCreateTime(Date createTime){this.createTime = createTime;}publicStringgetUsername(){return username;}publicvoidsetUsername(String username){this.username = username;}publicStringgetPassword(){return password;}publicvoidsetPassword(String password){this.password = password;}}
3、用户表对应的
Mapper
/**
 * TODO
 *
 * @Description
 * @Author laizhenghua
 * @Date 2023/7/2 17:14
 **/@MapperpublicinterfaceUserMapperextendsBaseMapper<UserEntity>{}
4、操作用户表的servie核心代码
/**
 * TODO
 *
 * @Description
 * @Author laizhenghua
 * @Date 2023/7/2 17:00
 **/@ServicepublicclassUserServiceImplextendsServiceImpl<UserMapper,UserEntity>implementsUserService{@AutowiredprivatePasswordEncoder passwordEncoder;@OverridepublicUserEntitygetUserByName(String username){QueryWrapper<UserEntity> wrapper =newQueryWrapper<>();
        wrapper.eq("username", username);returnthis.getOne(wrapper);}@OverridepublicUserEntitysaveUser(UserEntity entity){if(null== entity.getCreateTime()){
            entity.setCreateTime(newDate());}
        entity.setPassword(passwordEncoder.encode(entity.getPassword()));UserEntity user =this.getUserByName(entity.getUsername());if(null== user){this.save(entity);
            user = entity;}else{Long id = user.getId();BeanUtils.copyProperties(entity, user);
            user.setId(id);this.updateById(user);}return user;}}
10、DaoAuthenticationProvider认证源码分析
准备好必要的组件后,我们再来看SpringSecurity的
DaoAuthenticationProvider
组件是如何进行认证的,前面也说了
DaoAuthenticationProvider
继承了
AbstractUserDetailsAuthenticationProvider
。所以看源码时两个要一起看。
AbstractUserDetailsAuthenticationProvider.java
(注意看我注释的地方)
publicabstractclassAbstractUserDetailsAuthenticationProviderimplementsAuthenticationProvider,InitializingBean,MessageSourceAware{...// 认证核心代码@OverridepublicAuthenticationauthenticate(Authentication authentication)throwsAuthenticationException{Assert.isInstanceOf(UsernamePasswordAuthenticationToken.class, authentication,()->this.messages.getMessage("AbstractUserDetailsAuthenticationProvider.onlySupports","Only UsernamePasswordAuthenticationToken is supported"));String username =determineUsername(authentication);boolean cacheWasUsed =true;UserDetails user =this.userCache.getUserFromCache(username);if(user ==null){
            cacheWasUsed =false;try{// retrieveUser() 这个方法主要获取UserDetails// 调用 UserDetailsService 的 loadUserByUsername() 方法也就是上面我们重写的方法// 这个方法的实现不在当前类上而是在DaoAuthenticationProvider子类上// 所以具体实现逻辑应该去子类上看
                user =retrieveUser(username,(UsernamePasswordAuthenticationToken) authentication);}catch(UsernameNotFoundException ex){this.logger.debug("Failed to find user '"+ username +"'");if(!this.hideUserNotFoundExceptions){throw ex;}thrownewBadCredentialsException(this.messages
                        .getMessage("AbstractUserDetailsAuthenticationProvider.badCredentials","Bad credentials"));}Assert.notNull(user,"retrieveUser returned null - a violation of the interface contract");}try{this.preAuthenticationChecks.check(user);// additionalAuthenticationChecks() 这个方法主要是通过密码加密器对比UserDetails中的密码是否与Authentication中的密码是否一致// 这个方法的实现不在当前类上也是是在DaoAuthenticationProvider子类上// 所以具体实现逻辑应该去子类上看additionalAuthenticationChecks(user,(UsernamePasswordAuthenticationToken) authentication);}catch(AuthenticationException ex){if(!cacheWasUsed){throw ex;}// There was a problem, so try again after checking// we're using latest data (i.e. not from the cache)
            cacheWasUsed =false;
            user =retrieveUser(username,(UsernamePasswordAuthenticationToken) authentication);this.preAuthenticationChecks.check(user);additionalAuthenticationChecks(user,(UsernamePasswordAuthenticationToken) authentication);}this.postAuthenticationChecks.check(user);if(!cacheWasUsed){this.userCache.putUserInCache(user);}Object principalToReturn = user;if(this.forcePrincipalAsString){
            principalToReturn = user.getUsername();}returncreateSuccessAuthentication(principalToReturn, authentication, user);}...}
子类
DaoAuthenticationProvider.java
publicclassDaoAuthenticationProviderextendsAbstractUserDetailsAuthenticationProvider{...// 获取UserDetails核心代码@OverrideprotectedfinalUserDetailsretrieveUser(String username,UsernamePasswordAuthenticationToken authentication)throwsAuthenticationException{prepareTimingAttackProtection();try{// 注意看这里// 调用 UserDetailsService 的 loadUserByUsername() 方法也就是上面我们重写的方法UserDetails loadedUser =this.getUserDetailsService().loadUserByUsername(username);if(loadedUser ==null){thrownewInternalAuthenticationServiceException("UserDetailsService returned null, which is an interface contract violation");}return loadedUser;}catch(UsernameNotFoundException ex){mitigateAgainstTimingAttack(authentication);throw ex;}catch(InternalAuthenticationServiceException ex){throw ex;}catch(Exception ex){thrownewInternalAuthenticationServiceException(ex.getMessage(), ex);}}...// 传入密码对比UserDetails中的密码是否一致核心代码@Override@SuppressWarnings("deprecation")protectedvoidadditionalAuthenticationChecks(UserDetails userDetails,UsernamePasswordAuthenticationToken authentication)throwsAuthenticationException{if(authentication.getCredentials()==null){this.logger.debug("Failed to authenticate since no credentials provided");thrownewBadCredentialsException(this.messages
                    .getMessage("AbstractUserDetailsAuthenticationProvider.badCredentials","Bad credentials"));}// 获取Authenticate中的密码也就是接口参数传入的密码// 注意这里获取到的密码是明文的String presentedPassword = authentication.getCredentials().toString();// this.passwordEncoder就是注入spring容器的密码加密器// 对比规则由密码加密器实现(所以对比逻辑我们应该去密码加密器看)if(!this.passwordEncoder.matches(presentedPassword, userDetails.getPassword())){this.logger.debug("Failed to authenticate since password does not match stored value");thrownewBadCredentialsException(this.messages
                    .getMessage("AbstractUserDetailsAuthenticationProvider.badCredentials","Bad credentials"));}}...}
11、密码加密器的匹配源码分析
由上面分析得知匹配密码是否一致会调用密码加密器的
matches()
方法,传入
Authenticate
中的密码和
UserDetails
中的密码。
publicinterfacePasswordEncoder{Stringencode(CharSequence rawPassword);// 实际上我们自己也可以写匹配规则只需实现PasswordEncoder接口// 重写matches()抽象方法// 注册到spring容器中即可// 我们公司就是自己定义的匹配规则booleanmatches(CharSequence rawPassword,String encodedPassword);defaultbooleanupgradeEncoding(String encodedPassword){returnfalse;}}
BCryptPasswordEncoder
的
matches()
源码
// rawPassword Authenticate中的密码(明文)// encodedPassword UserDetails中的密码(密文)// 我们不用关系他是怎么实现的// 只要知道Authenticate中的密码它会先进行encode然后再对比publicbooleanmatches(CharSequence rawPassword,String encodedPassword){if(rawPassword ==null){thrownewIllegalArgumentException("rawPassword cannot be null");}elseif(encodedPassword !=null&& encodedPassword.length()!=0){if(!this.BCRYPT_PATTERN.matcher(encodedPassword).matches()){this.logger.warn("Encoded password does not look like BCrypt");returnfalse;}else{returnBCrypt.checkpw(rawPassword.toString(), encodedPassword);}}else{this.logger.warn("Empty encoded password");returnfalse;}}publicstaticbooleancheckpw(String plaintext,String hashed){// 将Authenticate中的密码转成 byte 数组然后进行对比byte[] passwordb = plaintext.getBytes(StandardCharsets.UTF_8);returnequalsNoEarlyReturn(hashed,hashpwforcheck(passwordb, hashed));}
因此在数据库中我们存储的密码也是密文的,一定是经过同一个密码加密器
encode()
后的字符串才能匹配成功。
@ServicepublicclassUserServiceImplextendsServiceImpl<UserMapper,UserEntity>implementsUserService{@AutowiredprivatePasswordEncoder passwordEncoder;...@OverridepublicUserEntitysaveUser(UserEntity entity){if(null== entity.getCreateTime()){
            entity.setCreateTime(newDate());}// 通过密码加密器加密
        entity.setPassword(passwordEncoder.encode(entity.getPassword()));UserEntity user =this.getUserByName(entity.getUsername());if(null== user){this.save(entity);
            user = entity;}else{Long id = user.getId();BeanUtils.copyProperties(entity, user);
            user.setId(id);this.updateById(user);}return user;}}
12、创建和解析JWT Token工具类封装
JWT全称是
JSON Web Token
,官网地址
https://jwt.io
是一款出色的分布式身份校验方案。可以生成token,也可以解析检验token,这里就不多说了,感兴趣的可以自行学习。
JwtUtil.java
/**
 * TODO
 *
 * @Description
 * @Author laizhenghua
 * @Date 2023/4/3 14:03
 **/publicclassJwtUtil{/**
     * 需要拦截的请求头信息
     */publicstaticfinalStringTOKEN_HEADER="token";/**
     * 有效期
     */publicstaticfinalLongJWT_EXPIRE_TIME=60*60*1000L;// 1h/**
     * 加密算法
     */publicstaticfinalStringSIGN_ALGORITHMS="AES";/**
     * jwt key
     */publicstaticfinalStringJWT_KEY="security";/**
     * 获取token
     * @param id 唯一标识(盐值)
     * @param subject
     * @param expire
     * @return
     */publicstaticStringcreateToken(String id,String subject,Long expire){JwtBuilder builder =getJwtBuilder(subject, expire, id);return builder.compact();}/**
     * 解析token
     * @param token
     * @return
     */publicstaticClaimsparseToken(String token){SecretKey secretKey =generalKey();Claims body =Jwts.parser().setSigningKey(secretKey).parseClaimsJws(token).getBody();return body;}privatestaticJwtBuildergetJwtBuilder(String subject,Long expire,String uuid){SignatureAlgorithm signatureAlgorithm =SignatureAlgorithm.HS256;SecretKey secretKey =generalKey();Date date =newDate();if(expire ==null){
            expire =JWT_EXPIRE_TIME;}if(uuid ==null){
            uuid =getUUID();}Long expireTime = date.getTime()+ expire;Date expireDate =newDate(expireTime);JwtBuilder builder =Jwts.builder().setId(uuid)// 唯一标识.setSubject(subject)// 签名数据/主题.setIssuer(JWT_KEY)// 签发者.setIssuedAt(date)// 签发时间.signWith(signatureAlgorithm, secretKey)// 签名算法 + 秘钥.setExpiration(expireDate);// 过期时间return builder;}publicstaticStringgetUUID(){returnUUID.randomUUID().toString();}// 生成秘钥publicstaticSecretKeygeneralKey(){byte[] encodeKey =Base64.getDecoder().decode(JWT_KEY);SecretKey secretKey =newSecretKeySpec(encodeKey,0, encodeKey.length,SIGN_ALGORITHMS);return secretKey;}}
13、登录获取token接口开发
我们规定客户端需要传入
username
和
password
参数进行认证。认证成功后使用
Redis
缓存用户信息,并根据用户信息封装成
token
返回给客户端。
AuthController.java
/**
 * TODO
 *
 * @Description 认证API
 * @Author laizhenghua
 * @Date 2023/6/28 23:02
 **/@RestController@RequestMapping("/auth")publicclassAuthController{@AutowiredprivateAuthService authService;@PostMapping("/login")publicRlogin(@RequestBodyJSONObject params){// 对于用户名/密码等敏感参数一律使用POST请求String username = params.getString("username");String password = params.getString("password");if(!StringUtils.hasText(username)||!StringUtils.hasText(password)){returnR.error(500,"用户名或密码为空!");}String token = authService.login(username, password);returnR.success(token);}}
AuthServiceImpl.java
/**
 * TODO
 *
 * @Description
 * @Author laizhenghua
 * @Date 2023/6/29 22:07
 **/@ServicepublicclassAuthServiceImplimplementsAuthService{Logger log =LoggerFactory.getLogger(getClass());@AutowiredprivateRedisTemplate<String,Object> redisTemplate;@AutowiredprivateAuthenticationManager authenticationManager;@AutowiredprivateUserService userService;@OverridepublicStringlogin(String username,String password){UsernamePasswordAuthenticationToken authenticationToken =newUsernamePasswordAuthenticationToken(username, password);Authentication authenticate = authenticationManager.authenticate(authenticationToken);if(authenticate ==null){
            log.error("{username: {}, password: {}} 认证失败!", username, password);returnnull;}SecurityUser user =(SecurityUser) authenticate.getPrincipal();// userEntityUserEntity userEntity = user.getUserEntity();// 以用户表的行政区划代码作为盐值(这里主要是为了程序更好扩展实际开发中盐值可以是一些特殊或唯一的标识)String token =JwtUtil.createToken(userEntity.getRegionCode(), username,null);
        redisTemplate.opsForValue().set(String.format(RedisKey.AUTH_TOKEN_KEY, username),JSON.toJSONString(user),JwtUtil.JWT_EXPIRE_TIME,TimeUnit.MILLISECONDS);return token;}}
关于
Authentication
接口的扩展知识
/*
getAuthorities() 权限信息列表,默认是GrantedAuthority接口的一些实现类,通常是代表权限信息的一系列字符串。
getCredentials() 密码信息,用户输入的密码字符串,在认证过后通常会被移除,用于保障安全。
getDetails() 细节信息,web应用中的实现接口通常为 WebAuthenticationDetails,它记录了访问者的ip地址和sessionId的值。
getPrincipal() 最重要的身份信息,大部分情况下返回的是UserDetails接口的实现类,也是框架中的常用接口之一。
*/
14、拦截token的过滤器开发
过滤器的开发也是非常重要的一步,
token
的解析与在
SecurityContextHolder
中设置认证信息就是在过滤器中完成。
TokenFilter.java
/**
 * TODO
 *
 * @Description
 * @Author laizhenghua
 * @Date 2023/7/2 19:51
 **/@ComponentpublicclassTokenFilterextendsOncePerRequestFilter{privateLogger log =LoggerFactory.getLogger(getClass());privateAntPathMatcher pathMatcher =newAntPathMatcher();@AutowiredprivateRedisTemplate<String,Object> redisTemplate;@AutowiredprivateDemoConfiguration.Security security;@OverrideprotectedvoiddoFilterInternal(HttpServletRequest request,HttpServletResponse response,FilterChain filterChain)throwsServletException,IOException{String token = request.getHeader(JwtUtil.TOKEN_HEADER);
        log.info("intercept "+ request.getRequestURI());// token=1用于swagger页面调用API/*if (!StringUtils.hasText(token) || "1".equals(token)) {
            filterChain.doFilter(request, response);
            return;
        }*/// 判断是否是放行请求if(isFilterRequest(request)){
            filterChain.doFilter(request, response);return;}Claims claims =null;try{
            claims =JwtUtil.parseToken(token);}catch(Exception e){
            log.error(e.getMessage());fallback("token解析失败(非法token)!", response);return;}String username = claims.getSubject();String cache =(String) redisTemplate.opsForValue().get(String.format(RedisKey.AUTH_TOKEN_KEY, username));if(cache ==null){fallback("token失效,请重新登录!", response);return;}SecurityUser user =JSON.parseObject(cache,SecurityUser.class);
        log.info(JSON.toJSONString(user,true));UsernamePasswordAuthenticationToken authenticationToken =newUsernamePasswordAuthenticationToken(user,null,null);SecurityContextHolder.getContext().setAuthentication(authenticationToken);// 放行
        filterChain.doFilter(request, response);}privatevoidfallback(String message,HttpServletResponse response){
        response.setCharacterEncoding("UTF-8");
        response.setContentType(MediaType.APPLICATION_JSON_VALUE);PrintWriter writer =null;try{if(message ==null){
                message ="403 Forbidden";}R res =R.error(403, message);
            writer = response.getWriter();
            writer.append(JSON.toJSONString(res));}catch(IOException e){
            log.error(e.getMessage());}finally{if(writer !=null){
                writer.close();}}}privatebooleanisFilterRequest(HttpServletRequest request){String contextPath = request.getContextPath();String filterPath = request.getRequestURI();List<String> permitAllPathList = security.getPermitAllPath();if(CollectionUtils.isEmpty(permitAllPathList)){returnfalse;}for(String path : permitAllPathList){String pattern = contextPath + path;
            pattern = pattern.replaceAll("/+","/");if(pathMatcher.match(pattern, filterPath)){returntrue;}}returnfalse;}}
15、完整SpringSecurity的配置
/**
 * TODO
 *
 * @Description SecurityConfiguration
 * @Author laizhenghua
 * @Date 2023/6/25 21:55
 **/@Configuration@EnableWebSecuritypublicclassSecurityConfiguration{@AutowiredprivateAuthenticationExceptionHandler authenticationExceptionHandler;@AutowiredprivateTokenFilter tokenFilter;@Autowired// 这个是当前项目Security模块的配置类(详见完整项目代码)privateDemoConfiguration.Security security;@BeanpublicSecurityFilterChainsecurityFilterChain(HttpSecurity http)throwsException{List<String> permitAllPaths = security.getPermitAllPath();// 配置不需要认证的请求(这里所有的路径可以写在配置文件上修改时就不用改代码)if(!CollectionUtils.isEmpty(permitAllPaths)){
            permitAllPaths.forEach(path ->{try{
                    http.authorizeHttpRequests().requestMatchers(path).permitAll();}catch(Exception e){
                    e.printStackTrace();}});}// 关闭csrf因为不使用session
        http.csrf().disable()// 不通过Session获取SecurityContext.sessionManagement().sessionCreationPolicy(SessionCreationPolicy.STATELESS).and().authorizeHttpRequests()// 除了上面那些请求都需要认证.anyRequest().authenticated().and()// 配置异常处理// 如果是认证过程中出现的异常会被封装成AuthenticationException然后调用AuthenticationEntryPoint对象的方法去进行异常处理。// 如果是授权过程中出现的异常会被封装成AccessDeniedException然后调用AccessDeniedHandler对象的方法去进行异常处理。.exceptionHandling().authenticationEntryPoint(authenticationExceptionHandler);// 配置token拦截过滤器
        http.addFilterBefore(tokenFilter,UsernamePasswordAuthenticationFilter.class);return http.build();}/**
     * 身份认证管理器,调用authenticate()方法完成认证
     */@BeanpublicAuthenticationManagerauthenticationManager(AuthenticationConfiguration authenticationConfiguration)throwsException{return authenticationConfiguration.getAuthenticationManager();}/**
     * 密码加密器
     */@BeanpublicPasswordEncoderpasswordEncoder(){returnnewBCryptPasswordEncoder();}}
16、完整项目gitee地址
https://gitee.com/laizhenghua/spring-security

END
版权归原作者 laizhenghua 所有, 如有侵权,请联系我们删除。