
一、前提准备
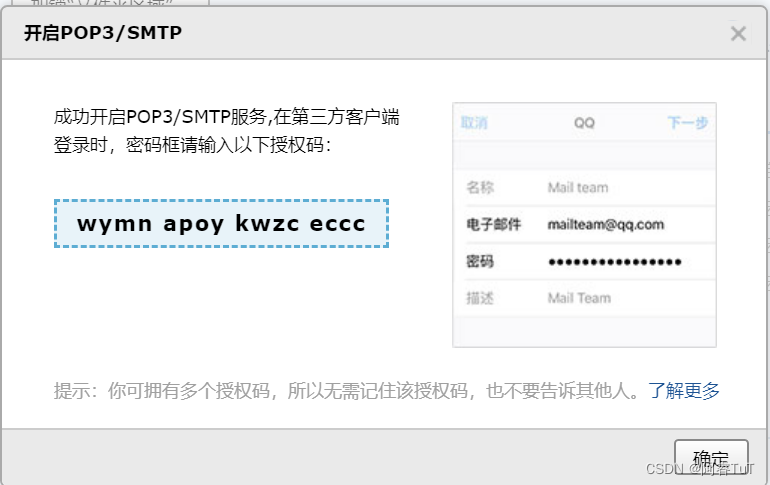
1、在qq邮箱中打开POP3/SMTP服务
步骤:点击qq邮箱--->设置--->账户--->向下滑找到POP3/SMTP服务--->开启并用手机发送验证码
--->发送后请记住你的授权码(后续在配置中会写入)


2、创建数据库
创建一个名为mvc的库和一个名为user的表,其中id字段为主键并自动增长

二、创建Maven工程
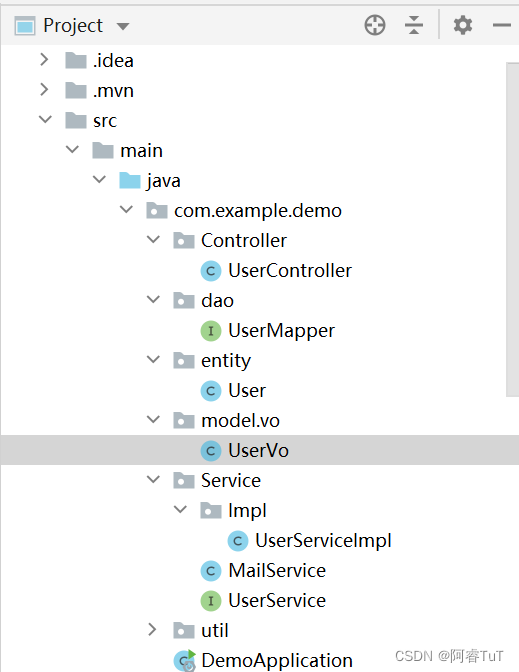
1、项目目录结构
2、依赖和配置
pom.xml:
<dependencies>
        <dependency>
            <groupId>org.springframework.boot</groupId>
            <artifactId>spring-boot-starter-thymeleaf</artifactId>
        </dependency>
        <dependency>
            <groupId>mysql</groupId>
            <artifactId>mysql-connector-java</artifactId>
            <scope>8.0.21</scope>
        </dependency>
        <dependency>
            <groupId>org.springframework.boot</groupId>
            <artifactId>spring-boot-starter-web</artifactId>
        </dependency>
        <dependency>
            <groupId>org.projectlombok</groupId>
            <artifactId>lombok</artifactId>
            <optional>true</optional>
        </dependency>
        <dependency>
            <groupId>org.springframework.boot</groupId>
            <artifactId>spring-boot-starter-test</artifactId>
            <scope>test</scope>
        </dependency>
        <dependency>
            <groupId>com.baomidou</groupId>
            <artifactId>mybatis-plus-boot-starter</artifactId>
            <version>3.4.1</version>
        </dependency>
        <dependency>
            <groupId>mysql</groupId>
            <artifactId>mysql-connector-java</artifactId>
            <scope>8.0.21</scope>
        </dependency>
        <dependency>
            <groupId>org.springframework.boot</groupId>
            <artifactId>spring-boot-starter-mail</artifactId>
        </dependency>
    </dependencies>
注:数据库导入自己的版本,spring-boot-starter-mail如果导入失败可以加入版本号
<version>2.1.1.RELEASE</version>
application.properties:
server.port=8080
spring.datasource.url=jdbc:mysql://127.0.0.1/mvc?useSSL=false&serverTimezone=UTC&characterEncoding=utf-8
spring.datasource.username=root
spring.datasource.password=123456
spring.datasource.driver-class-name=com.mysql.cj.jdbc.Driver

#与数据库交流日志
logging.level.com.example.demo.dao=debug
#邮箱配置
#平台地址,这里用的是qq邮箱,使用其他邮箱请更换
spring.mail.host = smtp.qq.com
#改成自己的邮箱
spring.mail.username = [email protected]
#发送短信后它给你的授权码 填写到这里
spring.mail.password = 123
#这东西不用改
spring.mail.properties.mail.smtp.ssl.enable=true
##编码格式
spring.mail.default-encoding=UTF-8
3、完整代码
1、UserController
@Controller
public class UserController {

    @Autowired
    private MailService mailService;

    @PostMapping("/sendEmail")
    @ResponseBody
    public String sendEmail(String email, HttpSession httpSession){
        mailService.sendMimeMail(email, httpSession);
        return "sucess";
    }

    @PostMapping("/regist")
    @ResponseBody
    public String regist(UserVo userVo, HttpSession session){
        System.out.println(mailService.registered(userVo, session));
        return "sucess";
    }

    @PostMapping("/login")
    @ResponseBody
    public String login(String email, String password){
        mailService.loginIn(email,password);
        return "sucess";
    }

    @RequestMapping("/se")
    public String se(){
        return "sendEmail";
    }
    @RequestMapping("/rg")
    public String rg(){
        return "regist";
    }
    @RequestMapping("/LG")
    public String lg(){
        return "lg";
    }
}
2、UserMapper
@Mapper
public interface UserMapper extends BaseMapper<User> {

}
3、User
@Data
@TableName("user")
public class User {
    @TableId(type = IdType.AUTO)
    private Integer id;
    private String username;
    private String password;
    private String email;

}
4、UserVo
@Data
public class UserVo {
    private String username;

    private String password;

    private String email;

    private String code;

 }
5、UserServiceImpl
@Service
public class UserServiceImpl extends ServiceImpl<UserMapper, User>
        implements UserService {

}
6、MailService
@Service
public class MailService {
    @Autowired
    private JavaMailSender mailSender;

    @Autowired
    private UserService userService;

    //application.properties中已配置的值
    @Value("${spring.mail.username}")
    private String from;

    public boolean sendMimeMail( String email, HttpSession session) {
        try {
            SimpleMailMessage mailMessage = new SimpleMailMessage();

            mailMessage.setSubject("验证码邮件");

            String code = randomCode();

            session.setAttribute("email",email);
            session.setAttribute("code",code);

            mailMessage.setText("您收到的验证码是:"+code);

            mailMessage.setTo(email);

            mailMessage.setFrom(from);

            mailSender.send(mailMessage);
            return  true;
        }catch (Exception e){
            e.printStackTrace();
            return false;
        }
    }

    public String randomCode(){
        StringBuilder str = new StringBuilder();
        Random random = new Random();
        for (int i = 0; i < 6; i++) {
            str.append(random.nextInt(10));
        }
        return str.toString();
    }

    public boolean registered(UserVo userVo, HttpSession session){

        String email = (String) session.getAttribute("email");
        String code = (String) session.getAttribute("code");

        String voCode = userVo.getCode();

        if (email == null || email.isEmpty()){
            return false;
        }else if (!code.equals(voCode)){
            return false;
        }
        User user=new User();
        user.setUsername(userVo.getUsername());
        user.setPassword(userVo.getPassword());
        user.setEmail(userVo.getEmail());
        userService.save(user);
        return true;
    }

    public boolean loginIn(String email, String password){

        QueryWrapper<User> queryWrapper=new QueryWrapper<>();
        queryWrapper.eq("email",email);
        User user=userService.getOne(queryWrapper);
        if(user==null){
            return false;
        }

        if(!user.getPassword().equals(password)){
            return false;
        }
        System.out.println("登录成功:数据库密码是:"+user.getPassword());
        return true;
    }
}
7、UserService
public interface UserService extends IService<User> {

}
8、regist.html
<!DOCTYPE html>
<html>
<head>
    <meta charset="utf-8">
    <title></title>
</head>
<body>
<form action="/regist" method="post">
    <tr>
        <td>username: <input type="text" name="username"><br></td>

    </tr>
    <tr><td>
        password: <input type="text" name="password">
    </td></tr>
    <tr><td>
        email: <input type="text" name="email">
    </td></tr>
    <tr>
        <td>code: <input type="text" name="code"></td>
    </tr>
    </td></tr>
    <tr>
        <td><input type="submit" value="Submit"></td>
    </tr>

</form>
</body>
</html>
9、sendEmail
<!DOCTYPE html>
<html>
<head>
    <meta charset="utf-8">
    <title></title>
</head>
<body>
<form action="http://localhost:8080/sendEmail" method="post">
    <input type="text" name="email" >
    <input type="submit" value="Submit">
</form>
</body>
</html>
10、lg.html
<!DOCTYPE html>
<html>
<head>
    <meta charset="utf-8">
    <title></title>
</head>
<body>
<form action="/login" method="post">
    <tr><td>
        email: <input type="text" name="email">
    </td></tr>
    <tr><td>
        password: <input type="text" name="password">
    </td></tr>
    <tr>
        <td><input type="submit" value="Submit"></td>
    </tr>

</form>
</body>
</html>
三、测试
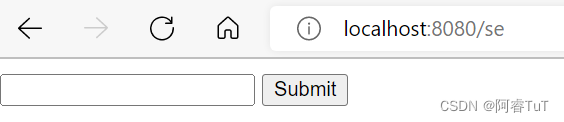
1、 发送邮件功能
输入自己的邮箱并提交,得到邮箱验证信息
2、注册
输入刚得到的验证码并填写信息,成功后数据库中便新增信息

3、登录
输入数据库的邮箱和密码,正确即登录成功
注:不能重复注册同一账号多次,不然会登录失败

标签:
spring boot
maven
本文转载自: https://blog.csdn.net/m0_62565122/article/details/125229797
版权归原作者 阿睿TuT 所有, 如有侵权,请联系我们删除。
版权归原作者 阿睿TuT 所有, 如有侵权,请联系我们删除。