
消息可靠性
消息从生产者发送到exchange,再到queue,再到消费者,可能导致消息丢失的情况:
1.发送时丢失:
- 生产者发送的消息未送达exchange
- 消息到达exchange后未到达queue
2.MQ宕机,queue将消息丢失
3.消费者接收到消息后未消费就宕机
生产者消息确认
RabbitMQ提供了publisher confirm机制来避免消息发送到MQ过程中丢失。消息发送到MQ以后,会返回一个结果给发送者,表示消息是否处理成功。结果有两种请求:
1.publisher-confirm,发送者确认
- 消息成功投递到交换机,返回ack
- 消息未投递到交换机,返回nack
2.publisher-return,发送者回执
- 消息投递到交换机了,但是没有路由到队列。返回ACK,及路由失败原因。
注:确认机制发送消息时,需要给每个消息设置一个全局唯一id,以区分不同消息,避免ack冲突
实现生产者确认步骤:
1.导依赖,写配置
spring:
  rabbitmq:
    host: 192.168.80.131 # rabbitMQ的ip地址
    port: 5672 # 端口
    username: root
    password: 147979
    virtual-host: /
    publisher-confirm-type: correlated #开启发送者确认模式
    publisher-returns: true #开启发送者回执功能
    template:
      mandatory: true #开启失败后的回值。false:消息发送失败则直接丢弃
配置说明:
publish-confirm-type:开启publisher-confirm,这里支持两种类型:
- simple:同步等待confirm结果,直到超时
- correlated:异步回调,定义Confirmcallback,MQ返回结果时会回调这个Confirmcallback
publish-returns:开启publish-return功能,同样是基于callback机制,不过是定义Returncallback
template.mandatory:定义消息路由失败时的策略。ptrue,则调用ReturnCallback; false:则直接丢弃消息
2.编写publisher-return回调函数:
每个RabbitTemplate只能配置一个ReturnCallback,因此需要在项目启动过程中配置
import lombok.extern.slf4j.Slf4j;
import org.springframework.amqp.core.Message;
import org.springframework.amqp.rabbit.core.RabbitTemplate;
import org.springframework.beans.BeansException;
import org.springframework.context.ApplicationContext;
import org.springframework.context.ApplicationContextAware;
import org.springframework.context.annotation.Configuration;

@Slf4j
@Configuration
public class CommonConfig implements ApplicationContextAware {

    @Override
    public void setApplicationContext(ApplicationContext applicationContext) throws BeansException {
        //获取RabbitTemplate对象
        RabbitTemplate rabbitTemplate = applicationContext.getBean(RabbitTemplate.class);
        //配置ReturnCallback
        rabbitTemplate.setReturnCallback(new RabbitTemplate.ReturnCallback() {
            @Override
            public void returnedMessage(Message message, int replycode, String replyText, String exchange, String routingKey) {
                //记录日志
                log.error("消息发送到队列失败,消息:{},响应码:{},原因:{},交换机:{},key:{}"
                        , message.toString(), replycode, replyText, exchange, routingKey);
                //重发消息
                rabbitTemplate.convertAndSend(exchange,routingKey,message.getBody());
            }
        });
    }
}
3.编写publisher-confirm发送消息时的业务处理,指定消息ID、消息ConfirmCallback
没有要求只能有唯一的ConfirmCallback,因此每次发送消息都可以编写业务处理方案
例:
@Test
    public void testSendMessage2SimpleQueue2() throws InterruptedException {
        //准备消息
        Message message = MessageBuilder.withBody("hello, spring amqp!".getBytes(StandardCharsets.UTF_8))//消息体,编码格式
                .setDeliveryMode(MessageDeliveryMode.PERSISTENT)//消息持久化
                .build();
        //准备CorrelationData,给每条消息的不重复id
        CorrelationData correlationData = new CorrelationData(UUID.randomUUID().toString());
        correlationData.getFuture().addCallback(new SuccessCallback<CorrelationData.Confirm>() {
            @Override
            public void onSuccess(CorrelationData.Confirm confirm) {
                if (confirm.isAck()) {
                    log.debug("消息发送交换机成功,消息ID:{}",correlationData.getId());
                } else {
                    log.error("消息发送交换机失败,消息ID:{}",correlationData.getId());
                    //重发消息
                }
            }
        }, new FailureCallback() {
            @Override
            public void onFailure(Throwable throwable) {
                log.error("消息发送失败,原因:{}",throwable);
                //重发消息
            }
        });
        rabbitTemplate.convertAndSend("test.topic","test.news",message,correlationData);
    }
结果:
发送到交换机 失败

发送到队列失败

消息持久化
MQ默认是内存存储消息,开启持久化功能可以确保缓存在MQ中的消息不丢失。
如果是使用spring AMQP 框架的话交换机,队列,消息都是持久化的
自定义交换机是否持久化
@Bean
    public DirectExchange simpleExchange() {
        // 三个参数:1.交换机名称2.false:不开启持久化3.false:当没有queue与其绑定时不自动删除
        return new DirectExchange("simple.Exchange",false,false);
    }
自定义消息是否持久化
Message message = MessageBuilder.withBody("hello, spring amqp!".getBytes(StandardCharsets.UTF_8))//消息体,编码格式
                .setDeliveryMode(MessageDeliveryMode.NON_PERSISTENT)//消息不持久化
                .build();
消费者消息确认
RabbitMQ支持消费者确认机制,即:消费者处理消息后可以向MQ发送ack回执,MQ收到ack回执后才会删除该消息。当消费者处理时出现了异常便返回nack,MQ收到nack回执后会重新把消息投递给消费者。当消费者在处理中突然宕机没有返回值,MQ会等待消费者重新启动,然后在将消息投递给消费者。
SpringAMQP则允许配置三种确认模式:
- manual:手动ack,需要在业务代码结束后,调用api发送ack。
- auto:自动ack,由spring监测listener代码是否出现异常,没有异常则返回ack;抛出异常则返nack
- none:关闭ack,MQ假定消费者获取消息后会成功处理,因此消息投递后立即被删除
spring:
  rabbitmq:
    host: 192.168.80.131 # rabbitMQ的ip地址
    port: 5672 # 端口
    username: root
    password: 147979
    virtual-host: /
    listener:
      simple:
        prefetch: 1
         #开启消费者确认模式,auto:自动ack,manual:手动ack,none:关闭ack
        acknowledge-mode: auto
消费者失败重试
当消费者出现异常后,消息会不断requeue(重新入队)到队列,再重新发送给消费者,然后再次异常,再次requeue,无限循环,导致mq的消息处理飙升,带来不必要的压力
我们可以利用Spring的retry机制,在消费者出现异常时利用本地重试,而不是无限制的requeue到mq队列。
当失败次数达到上限后,spring默认会将该消息丢弃
spring:
  rabbitmq:
    listener:
      simple:
        prefetch: 1
        acknowledge-mode: auto #开启消费者确认模式
        retry:
          enabled: true #开启消费者失败重试
          initial-interval: 1000 #初始的失败等待时长(毫秒)
          multiplier: 3 #下次失败的等待时长倍数
          max-attempts: 5 #最大重试次数
          stateless: true #true无状态,false有状态,业务中包含事务,这里改为false,默认true
例:监听了一个队列,并模拟业务异常
@RabbitListener(bindings = @QueueBinding(
            value = @Queue("topicQueue1"),
            exchange = @Exchange(value = "test.topic",type = ExchangeTypes.TOPIC),
            key = "China.#"
    ))
    public void listenSimpleQueue(String msg) {
        System.out.println(LocalDateTime.now()+":消费者接收到simple.queue的消息:【" + msg + "】");
        int i = 1/0;
        log.debug("消息接收成功");
    }

消费者失败消息处理策略
为了解决当失败次数达到上限后,spring会将该消息丢弃,则需要有MessageRecoverer接口来处理,它包含三种不同的实现:
- RejectAndDontRequeueRecoverer:重试耗尽后,直接reject,丢弃消息。默认就是这种方式
- ImmediateRequeueMessageRecoverer:重试耗尽后,返回nack,消息重新入队
- RepublishMessageRecoverer:重试耗尽后,将失败消息投递到指定的交换机
RepublishMessageRecoverer:

RepublishMessageRecoverer处理模式:
1.首先,定义接收失败消息的交换机、队列及其绑定关系
 @Bean
    public DirectExchange errorDirect() {
        return new DirectExchange("error.direct");
    }
    @Bean
    public Queue errorqueue() {
        return QueueBuilder.durable("error.queue").build();
    }
    @Bean
    public Binding errorBinding() {
        return BindingBuilder
                .bind(errorqueue())
                .to(errorDirect())
                .with("error");//交换机与队列的Routing key
    }
然后,定义RepublishMessageRecoverer
@Bean
    public MessageRecoverer republishMessageRecoverer(RabbitTemplate rabbitTemplate) {
        return new RepublishMessageRecoverer(rabbitTemplate,"error.direct","error");
    }
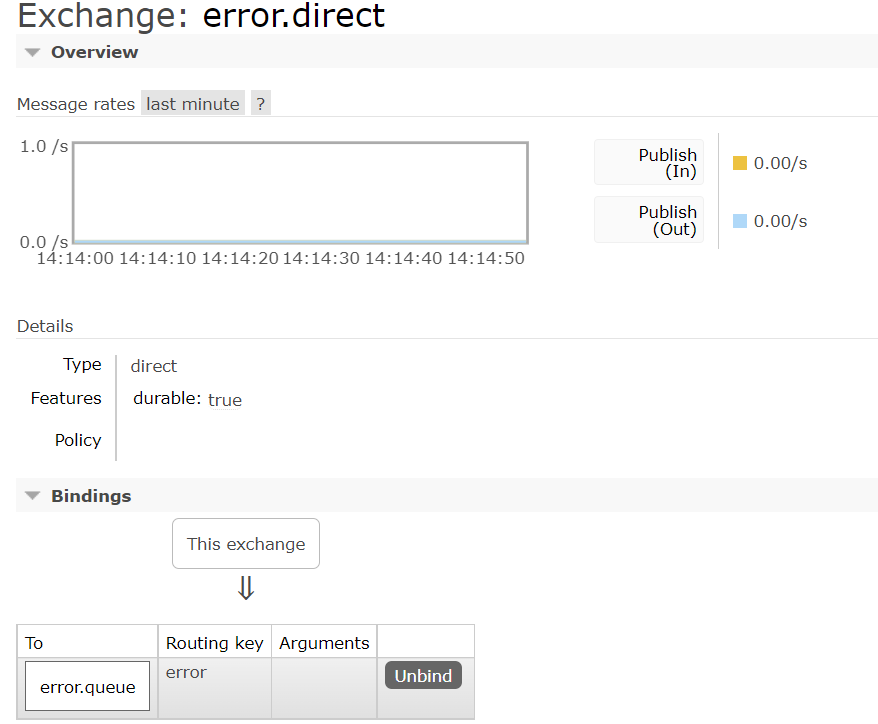
当失败次数耗尽后就会发送到指定的队列


死信交换机
什么是死信
当一个队列中的消息满足下列情况之一时,可以成为死信(dead letter) :
- 消费者使用basic.reject或 basic.nack声明消费失败,并且消息的requeue参数设置为false
- 消息是一个过期消息,超时无人消费
- 要投递的队列消息堆积满了,最早的消息可能成为死信
如果该队列配置了dead-letter-exchange属性,指定了一个交换机,那么队列中的死信就会投递到这个交换机中,而这个交换机称为死信交换机(Dead Letter Exchange,简称DLX)。
队列绑定死信交换机的配置:
- 给队列设置dead-letter-exchange属性,指定一个交换机
- 给队列设置dead-letter-routing-key属性,设置死信交换机与死信队列的RoutingKey

TTL
TTL,也就是Time-To-Live。如果一个队列中的消息TTL结束仍未消费,则会变为死信,ttl超时分为两种情况:
- 消息所在的队列设置了存活时间
- 消息本身设置了存活时间
当队列设置了存活时间且消息本身也设置了存活时间,那么就以的存活时间短的为准
** 实现死信交换机步骤:**
1.首先,定义交换机、队列及其绑定关系
@RabbitListener(bindings = @QueueBinding(
            value = @Queue(value = "dl.queue",declare = "true"),//declare:持久化,AMQP默认持久化,可不写
            exchange = @Exchange(value = "dl.direct",type = ExchangeTypes.DIRECT),
            key = "dl"
    ))
    public void ListenerDlQueue(String msg) {
        log.info("{}死信消息:{}",LocalDateTime.now(),msg);
    }
2.定义交换机、队列(设置超时时间,并指定死信交换机和队列)及其绑定关系
import org.springframework.amqp.core.*;
import org.springframework.context.annotation.Bean;
import org.springframework.context.annotation.Configuration;

@Configuration
public class TTLmessageConfig {
    @Bean
    public DirectExchange ttldirect() {
        return new DirectExchange("ttl.direct");
    }
    @Bean
    public Queue ttlqueue() {
        return QueueBuilder
                .durable("ttl.queue")
                .ttl(10000)//设置队列的超时时间
                .deadLetterExchange("dl.direct")//设置dl.direct为该队列的死信交换机
                .deadLetterRoutingKey("dl")//指定死信Routing key
                .build();
    }
    @Bean
    public Binding ttlBinding() {
        return BindingBuilder
                .bind(ttlqueue())
                .to(ttldirect())
                .with("ttl");//交换机与队列的Routing key
    }
}
给tll队列发送消息:不去消费它
@Test
    public void testSendMessage2ttlueue() throws InterruptedException {
        String exchange = "ttl.direct";
        String routingKey = "ttl";
        //准备消息
        Message message = MessageBuilder.withBody("hello,ttl spring amqp!".getBytes(StandardCharsets.UTF_8))
                .setDeliveryMode(MessageDeliveryMode.PERSISTENT)
                .setExpiration("5000")//设置消息超时时间
                .build();
        rabbitTemplate.convertAndSend(exchange,routingKey,message);
        log.error("{}消息发送成功", LocalDateTime.now());
    }
就可以看到:

延迟队列
利用TTL结合死信交换机,我们实现了消息发出后,消费者延迟收到消息的效果。这种消息模式就称为延迟队列(Delay Queue)模式。
延迟队列插件
因为延迟队列的需求非常多,所以RabbitMQ的官方也推出了一个插件,原生支持延迟队列效果。
DelayExchange插件官方的安装指南地址为:Scheduling Messages with RabbitMQ | RabbitMQ - Blog
DelayExchange插件的原理是对官方原生的Exchange做了功能的升级:
- 将DelayExchange接受到的消息暂存在内存中(官方的Exchange是无法存储消息的)
- 在DelayExchange中计时,超时后才投递消息到队列中

** 设置延迟时间并不是在交换机中设置而是在发消息时指定的**
spirng AMQP使用延迟插件
DelayExchange的本质还是官方的三种交换机,只是添加了延迟功能。因此使用时只需要声明一个交换机,交换机的类型可以是任意类型,然后设定delayed属性为true即可。
代码方式例:
@Configuration
public class CommonConfig {
    @Bean
    public DirectExchange delayDirect() {
        return ExchangeBuilder
                .directExchange("")
                .delayed()//设置delayed属性,添加了延迟功能
                .build();
    }
    @Bean
    public Queue delayqueue() {
        return QueueBuilder.durable("delay.queue").build();
    }
    @Bean
    public Binding errorBinding() {
        return BindingBuilder
                .bind(delayqueue())
                .to(delayDirect()).with("delay");
    }
}
注解方式例:
@RabbitListener(bindings = @QueueBinding(
            value = @Queue("delay.queue"),
            //设置delayed属性,添加了延迟功能
            exchange = @Exchange(value = "Delay.direct",type = ExchangeTypes.DIRECT,delayed = "true"),
            key = "delay"
    ))
    public void ListenerDelayExchange(String msg) {
        log.info("{}消费者收到了delay.queue的延迟消息:{}",LocalDateTime.now(),msg);
    }
然后我们向这个delay为true的交换机中发送消息,一定要给消息添加一个header: x-delay,值为延迟的时间,单位为毫秒
例:
@Test
    public void testSendMessage2delayueue() throws InterruptedException {
        String exchange = "Delay.direct";
        String routingKey = "delay";
        //准备消息
        Message message = MessageBuilder.withBody("hello,delay spring amqp!".getBytes(StandardCharsets.UTF_8))
                .setDeliveryMode(MessageDeliveryMode.PERSISTENT)
                .setHeader("x-delay",5000)//设置延迟时间为5000毫秒
                .build();
        //准备CorrelationData,给每条消息的不重复id
        CorrelationData correlationData = new CorrelationData(UUID.randomUUID().toString());
        rabbitTemplate.convertAndSend(exchange,routingKey,message,correlationData);
        log.error("{}消息发送成功", LocalDateTime.now());
    }
然后修改我们的publisher-confirm的业务处理,因为是延时发送队列未能立马收到消息会提示发送失败
import lombok.extern.slf4j.Slf4j;
import org.springframework.amqp.core.Message;
import org.springframework.amqp.rabbit.core.RabbitTemplate;
import org.springframework.beans.BeansException;
import org.springframework.context.ApplicationContext;
import org.springframework.context.ApplicationContextAware;
import org.springframework.context.annotation.Configuration;

@Slf4j
@Configuration
public class CommonConfig implements ApplicationContextAware {

    @Override
    public void setApplicationContext(ApplicationContext applicationContext) throws BeansException {
        //获取RabbitTemplate对象
        RabbitTemplate rabbitTemplate = applicationContext.getBean(RabbitTemplate.class);
        //配置ReturnCallback
        rabbitTemplate.setReturnCallback((message, replycode, replyText, exchange, routingKey) -> {
            //获取延迟的值
            Integer receivedDelay = message.getMessageProperties().getReceivedDelay();
            //如果有值就不处理它,如果没有值就说明不是延时消息
            if (receivedDelay == null) {
                //记录日志
                log.error("消息发送到队列失败,响应码:{},原因:{},交换机:{},key:{},消息:{}"
                        , replycode,replyText,exchange,routingKey,message.toString());
                //重发消息
                rabbitTemplate.convertAndSend(exchange,routingKey,message.getBody());
            }
        });
    }
}

确实延时了五秒
消息堆积问题
当生产者发送消息的速度超过了消费者处理消息的速度,就会导致队列中的消息堆积,直到队列存储消息达到上限。最早接收到的消息,可能就会成为死信,会被丢弃,这就是消息堆积问题。
解决消息堆积有三种种思路:
- 增加更多消费者,提高消费速度
- 在消费者内开启线程池加快消息处理速度
- 扩大队列容积,提高堆积上限
惰性队列
从RabbitMQ的3.6.0版本开始,就增加了Lazy Queues的概念,也就是惰性队列。
mq会设置内存的预警值,默认为百分之四十,当消息堆积达到预警值时mq对处于暂停状态阻止发送者投递消息到mq,然后刷出堆积的数据到磁盘,因此会导致mq的性能不稳定
惰性队列的特征如下:
- 接收到消息后直接存入磁盘而非内存
- 消费者要消费消息时才会从磁盘中读取并加载到内存
- 支持数百万条的消息存储
用SpringAMQP声明惰性队列分两种方式:
@Bean方式:
@Bean
    public Queue lazyQueue() {
        return QueueBuilder
                .durable("lazy.Queue")
                .lazy()//开启惰性队列,x-queue-mode为lazy
                .build();
    }
注解方式:
@RabbitListener(queuesToDeclare = @Queue(
            name = "lazy.Queue",//队列名
            declare = "true",//持久化
            arguments = @Argument(name = "x-queue-mode",value = "lazy")//开启惰性队列,x-queue-mode为laz
    ))
    public void ListenerlazyQueue(String msg) {
        log.error("{}消费者收到了lazy.Queue的消息:{}",LocalDateTime.now(),msg);
    }
消息没有存入内存中了

版权归原作者 sgmwgntw 所有, 如有侵权,请联系我们删除。