
🧑💻作者名称:DaenCode
🎤作者简介:啥技术都喜欢捣鼓捣鼓,喜欢分享技术、经验、生活。
😎人生感悟:尝尽人生百味,方知世间冷暖。
📖所属专栏:SpringBoot实战
系列文章目录
标题一文带你学会使用SpringBoot+Avue实现短信通知功能(含重要文件代码)一张思维导图带你学会Springboot创建全局异常、自定义异常一张思维导图带你打通SpringBoot自定义拦截器的思路28个SpringBoot项目中常用注解,日常开发、求职面试不再懵圈一张思维导图带你学会SpringBoot、Vue前后端分离项目线上部署一张流程图带你学会SpringBoot结合JWT实现登录功能一张思维导图带你学会使用SpringBoot中的Schedule定时发送邮件一张思维导图带你学会使用SpringBoot异步任务实现下单校验库存一张思维导图带你学会SpringBoot使用AOP实现日志管理功能一张图带你学会入门级别的SpringBoot实现文件上传、下载功能一张思维导图带你学会SpringBoot自定义Filter一张思维导图带你学会SpringBoot整合Redis

文章目录
🌟前言
在一次搭建Redis哨兵模式时,在最后验证是否搭建成功时节点信息是错误的,经过排查,最后因为是配置文件出错导致的。
于是,我就想有没有一种办法可以通过可视化的方式去配置Redis配置文件,这样可以避免直接修改配置文件时,因视觉问题而造成配置文件出错,也可能是我视力差。
最后,我想到了使用
SpringBoot整合Freemaker并结合Vue实现自动生成配置文件
来减少错误率的发生。
🌟SpringBoot整合Freemaker
pom依赖引入
<dependency>
        <groupId>org.springframework.boot</groupId>
        <artifactId>spring-boot-starter-freemarker</artifactId>
</dependency>
修改配置文件
server.port=8081#整合freeemaker#模板所在路径
spring.freemarker.template-loader-path= classpath:/templates
#模板后缀名spring.freemarker.suffix= .ftl
spring.freemarker.settings.classic_compatible=true
配置参数实体类
创建配置参数实体类,这里省略了getter、setter方法。
/**
 * 配置参数实体类
 */publicclassConfigParams{/**
     * 指定服务器监听的ip地址
     */privateString bind;/**
     * 端口号
     */privateString port;/**
     * 是否开启守护进程
     */privateboolean isDamonize;/**
     * 访问redis密码
     */privateString requirepass;/**
     * 日志文件的路径
     */privateString logPath;/**
     * 持久化文件名称
     */privateString dbFileName;/**
     * 持久化文件存储路径
     */privateString dirPath;/**
     * rdb持久化策略配置
     */privateString rdbPolicy;/**
     * 是否开启aof
     */privateboolean isAof;/**
     * 主节点访问密码
     */privateString masterauth;/**
     * 指定从哪个主节点复制
     */privateString replicaof;
Controller类
@RestController@RequestMapping("/api/v1/redis")publicclassRedisConfigController{@PostMapping("generate")publicJsonDatagenerateConfig(@RequestBodyConfigParams configParams)throwsIOException,TemplateException{//自动生成配置文件的工具类GenetateConfigUtil.generateConfigFile(configParams,"E:\\IdeaWorkspace\\config-tools\\redis.conf");returnJsonData.buildSuccess();}}
自动生成文件工具类
通过整合Freemaker配置,自动生成Redis配置文件。
逻辑流程:
- 创建Freemaker配置。
- 从路径中读取Redis模板文件。
- 加载模板文件。
- 构造模板数据,将前端传入的数据存放到模板中。
- 生成最终的配置文件内容。
publicclassGenetateConfigUtil{publicstaticvoidgenerateConfigFile(ConfigParams configParams,String generateFilePath)throwsIOException,TemplateException{//创建freemarker配置Configuration configuration=newConfiguration(Configuration.VERSION_2_3_31);
        configuration.setDirectoryForTemplateLoading(newFile("E:\\IdeaWorkspace\\config-tools\\src\\main\\"+"resources\\templates\\"));// 加载模板文件Template template = configuration.getTemplate("redis-config-template.ftl");boolean daemonizeFlag=false;if(configParams.isDamonize()==true){
            daemonizeFlag=true;}// 构造模板数据Map<String,Object> data =newHashMap<>();
        data.put("bindIp", configParams.getBind());
        data.put("port", configParams.getPort());
        data.put("daemonize",daemonizeFlag);
        data.put("requirepass",configParams.getRequirepass());
        data.put("logfilepath",configParams.getLogPath());
        data.put("dbfilename",configParams.getDbFileName());
        data.put("rdbpolicy",configParams.getRdbPolicy());
        data.put("dirPath",configParams.getDirPath());
        data.put("masterauth",configParams.getMasterauth());
        data.put("replicaof",configParams.getReplicaof());// 生成最终的配置文件内容FileWriter writer =newFileWriter(generateFilePath);
        template.process(data, writer);
        writer.flush();
        writer.close();}}
Redis配置模板文件
在templates下创建模板文件redis-config-template.ftl。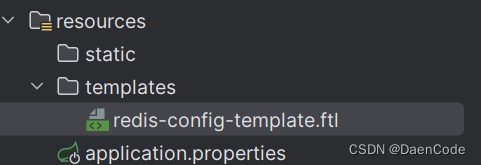
模板代码
#任何IP都可以访问
<#ifbindIp?has_content>
bind ${bindIp}
</#if>
#端口号
<#ifport?has_content>
port ${port}
</#if>
#守护进程
<#ifdaemonize?has_content>
daemonize ${daemonize?string('yes','no')}
</#if>
#密码
<#ifrequirepass?has_content>
requirepass "${requirepass}"
</#if>
#日志文件
<#iflogfilepath?has_content>
logfile "${logfilepath}"
</#if>
# 持久化文件名称
<#ifdbfilename?has_content>
dbfilename "${dbfilename}"
</#if>
#持久化文件存储路径
<#ifdirPath?has_content>
dir "${dirPath}"
</#if>
#持久化策略
<#ifrdbpolicy?has_content>
save ${rdbpolicy}
</#if>
#访问主节点的密码
<#ifmasterauth?has_content>
masterauth "${masterauth}"
</#if>
#指定从哪个节点复制
<#ifreplicaof?has_content>
replicaof "${replicaof}"
</#if>
🌟Vue代码
关于创建步骤就不具体介绍了,下边直接给出页面代码。
<template><divclass="redisConfig"><h2align="center">Redis配置文件生成</h2><divclass="redisForm"><el-row:gutter="15"><el-formref="elForm":model="formData":rules="rules"size="mini"label-width="105px"label-position="right"><el-col:span="24"><el-form-itemlabel="服务器监听IP"prop="bind"><el-inputv-model="formData.bind"placeholder="请输入服务器监听IP"clearable:style="{width: '100%'}"></el-input></el-form-item></el-col><el-col:span="24"><el-form-itemlabel="端口号"prop="port"><el-inputv-model="formData.port"placeholder="请输入端口号"clearable:style="{width: '100%'}"></el-input></el-form-item></el-col><el-col:span="1"><el-form-itemlabel="是否开启守护进程"prop="isDamonize"><el-switchv-model="formData.isDamonize"></el-switch></el-form-item></el-col><el-col:span="24"><el-form-itemlabel="Redis密码"prop="requirepass"><el-inputv-model="formData.requirepass"placeholder="请输入Redis密码"clearableshow-password:style="{width: '100%'}"></el-input></el-form-item></el-col><el-col:span="24"><el-form-itemlabel="日志文件路径"prop="logPath"><el-inputv-model="formData.logPath"placeholder="/path/xxx.log"clearable:style="{width: '100%'}"></el-input></el-form-item></el-col><el-col:span="24"><el-form-itemlabel="持久化文件名"prop="dbFileName"><el-inputv-model="formData.dbFileName"placeholder="请输入持久化文件名"clearable:style="{width: '100%'}"></el-input></el-form-item></el-col><el-col:span="24"><el-form-itemlabel="持久化文件路径"prop="dirPath"><el-inputv-model="formData.dirPath"placeholder="/path/data"clearable:style="{width: '100%'}"></el-input></el-form-item></el-col><el-col:span="24"><el-form-itemlabel="RDB持久化策略配置"prop="rdbPolicy"><el-inputv-model="formData.rdbPolicy"placeholder="save <minute> <changes>"clearable:style="{width: '100%'}"></el-input></el-form-item></el-col><el-col:span="1"><el-form-itemlabel="是否开启AOF持久化"prop="isAof"><el-switchv-model="formData.isAof"></el-switch></el-form-item></el-col><el-col:span="24"><el-form-itemlabel="主节点访问密码"prop="masterauth"><el-inputv-model="formData.masterauth"placeholder="请输入主节点访问密码"clearableshow-password:style="{width: '100%'}"></el-input></el-form-item></el-col><el-col:span="24"><el-form-itemlabel="指定复制主节点"prop="replicaof"><el-inputv-model="formData.replicaof"placeholder="请输入指定复制主节点IP"clearable:style="{width: '100%'}"></el-input></el-form-item></el-col><el-col:span="24"><el-form-itemsize="large"><el-buttontype="primary"@click="submitForm">提交</el-button><el-button@click="resetForm">重置</el-button></el-form-item></el-col></el-form></el-row></div></div></template><script>exportdefault{components:{},props:[],data(){return{formData:{bind:"",port:undefined,isDamonize:false,requirepass:undefined,logPath:undefined,dbFileName:undefined,dirPath:"",rdbPolicy:undefined,isAof:undefined,masterauth:undefined,replicaof:undefined,},rules:{bind:[{required:true,message:'请输入服务器监听IP',trigger:'blur'}],port:[{required:true,message:'请输入端口号',trigger:'blur'}],requirepass:[],logPath:[],dbFileName:[],dirPath:[],rdbPolicy:[],masterauth:[],replicaofIp:[],replicaofPort:[],},}},computed:{},watch:{},created(){},mounted(){},methods:{submitForm(){this.$refs['elForm'].validate(valid=>{if(valid){this.request.post("/api/v1/redis/generate",this.formData).then(res=>{if(res.code ==='0'){this.$message.success("生成成功")}else{this.$message.error(res.msg)}})}})},resetForm(){this.$refs['elForm'].resetFields()},}}</script><style>.redisConfig{position: fixed;width: 100%;height: 100vh;/* 可以根据需要设置高度 */}.redisForm{position: absolute;top: 45%;left: 50%;transform:translate(-50%, -50%);/* 平移至中心位置 *//* 根据需要设置内容样式 */}</style>
页面效果图
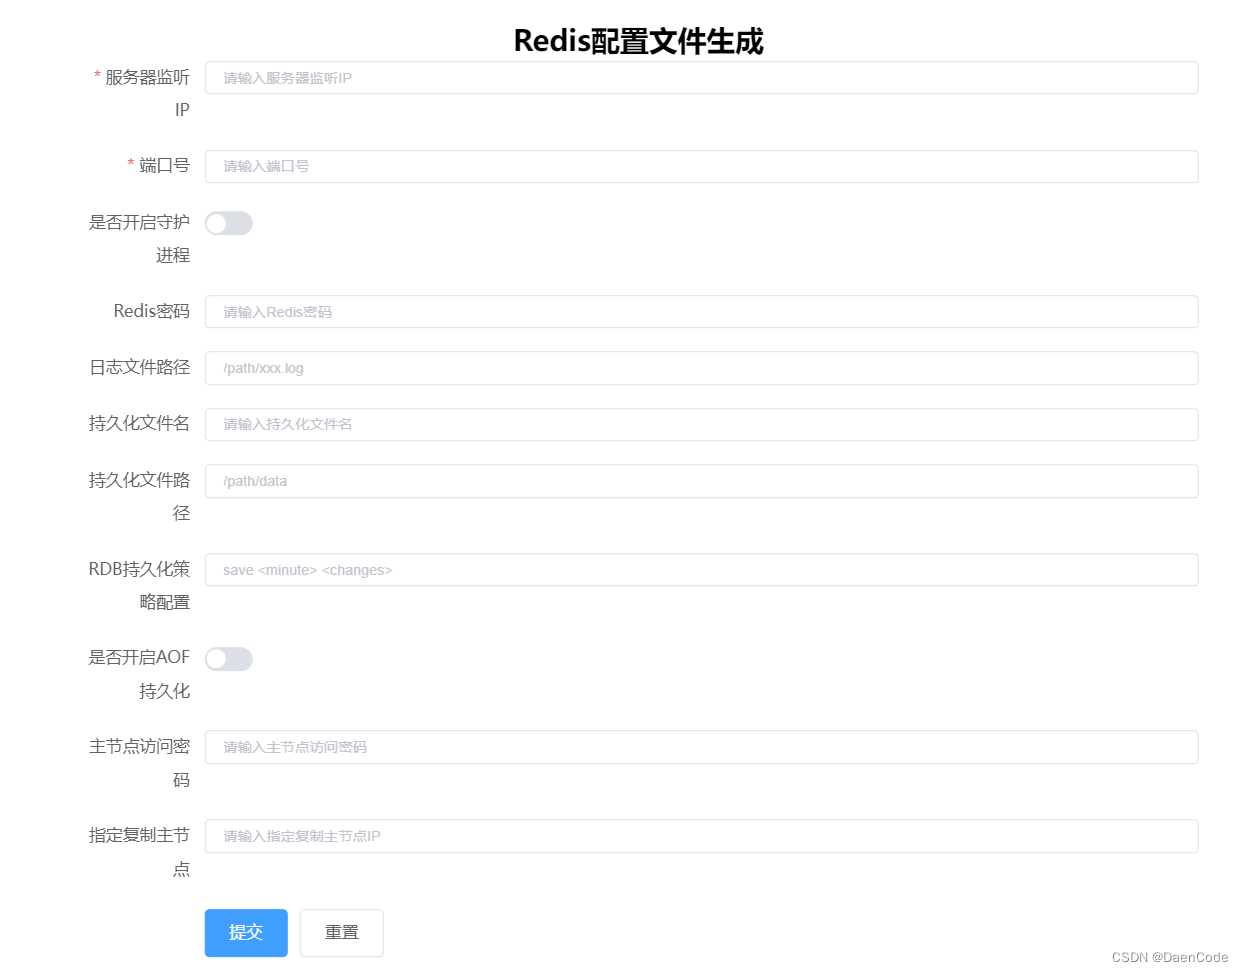
🌟效果测试
在页面填写完相关信息提交后,将会在指定路径下生成配置文件。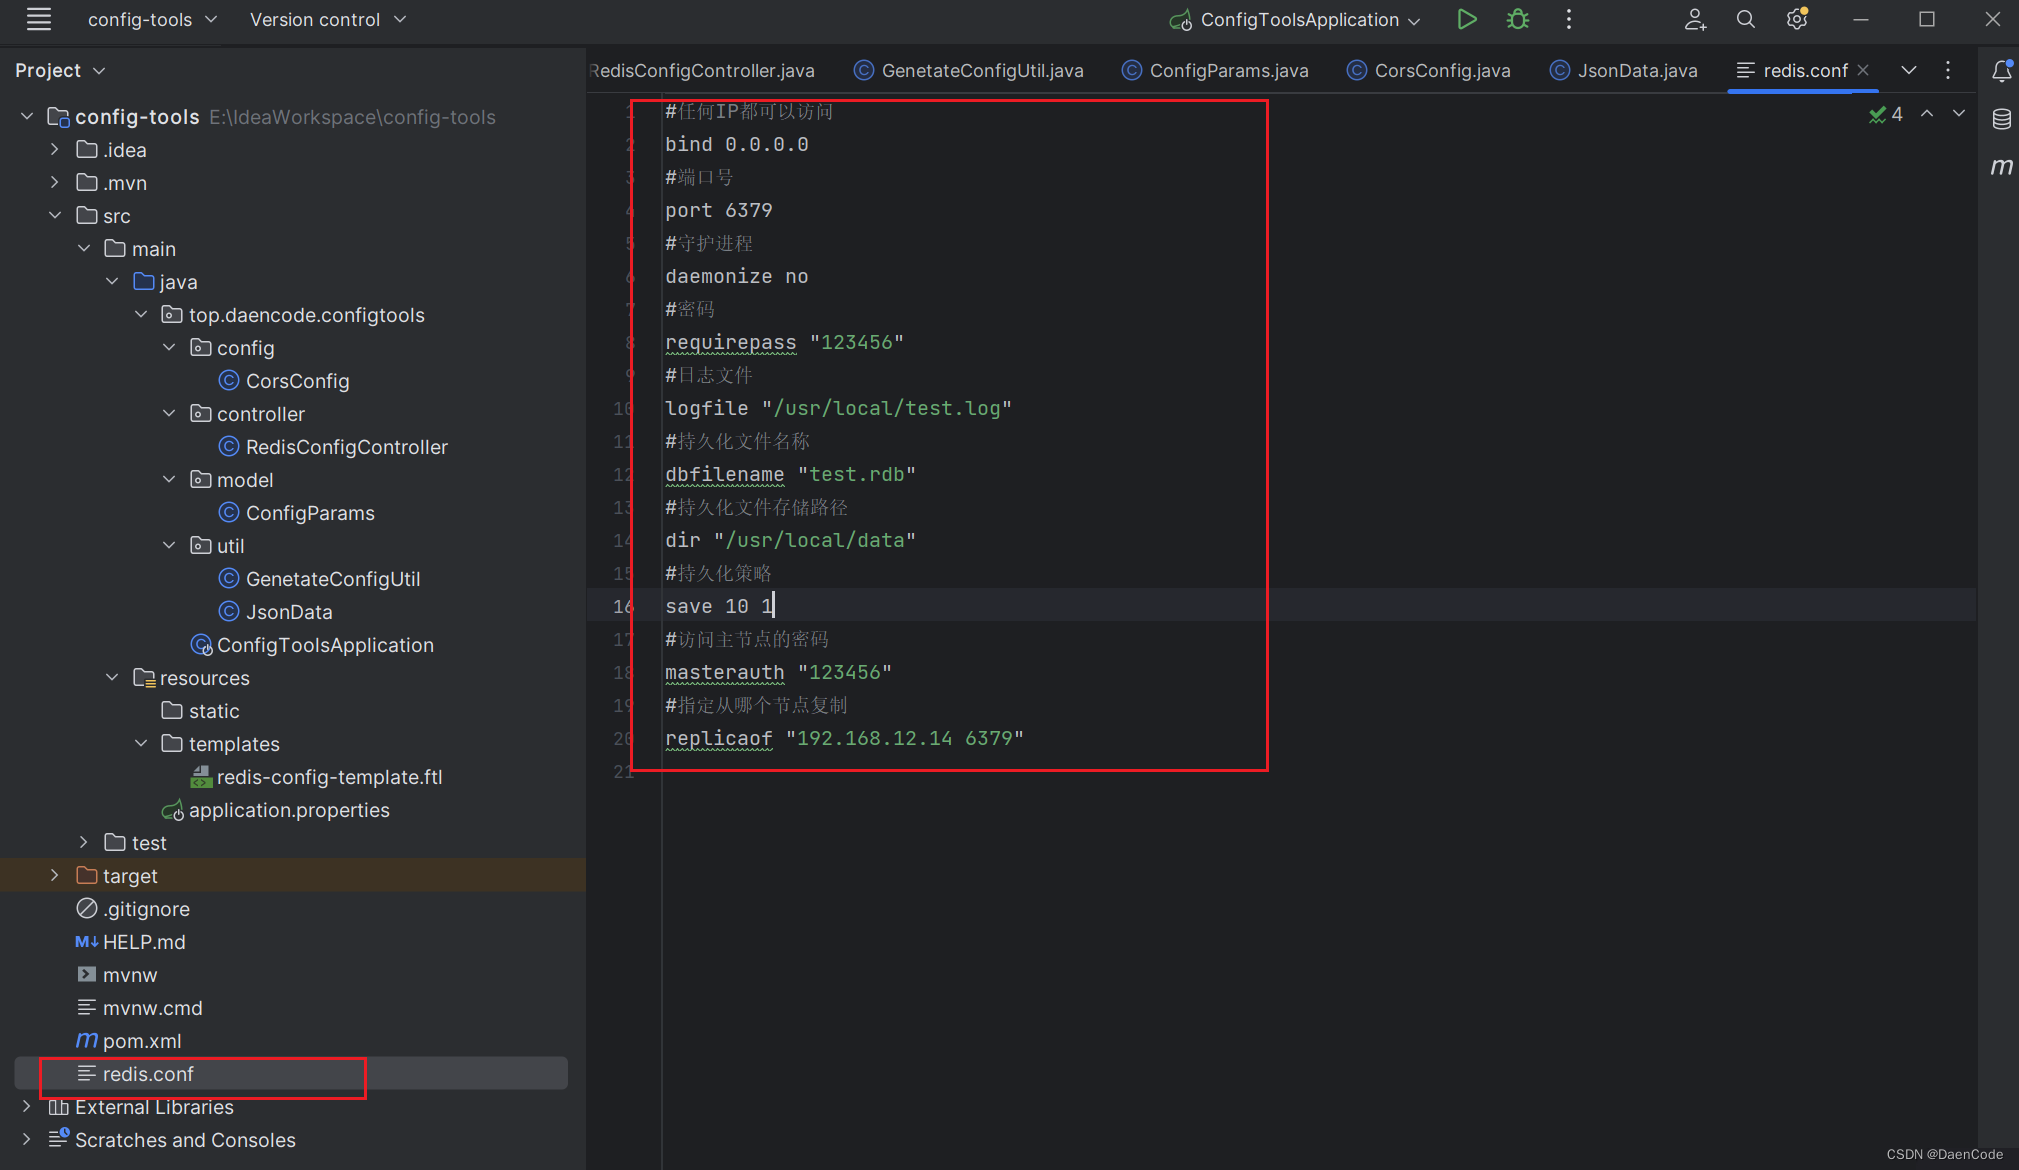
🌟写在最后
有关于SpringBoot整合Freemaker结合Vue实现页面填写一键自动生成Redis的配置文件到此就结束了。
感谢大家的阅读,希望大家在评论区对此部分内容散发讨论,便于学到更多的知识。

本文转载自: https://blog.csdn.net/2302_79094329/article/details/132611577
版权归原作者 DaenCode 所有, 如有侵权,请联系我们删除。
版权归原作者 DaenCode 所有, 如有侵权,请联系我们删除。