
SpringBoot概念
SpringBoot提供了一种快速使用Spring的方式,基于约定大于配置的思想,可以让开发人员不必在配置与逻辑业务之间进行思维的切换,全身心的投入到逻辑业务的diam编写中,从而大大提高了开发的效率,一定程度上缩短了项目周期,2014年4月,SpringBoot1.0.0发布。Spring的顶级项目之一(spring官网)。

spring的缺点
1、配置繁琐
虽然Spring的组件代码是轻量级的 ,但他的配置确实重量级的。一开始,Spring用xml配置,而且是很多xml配置,Spring2.5一引入了基于注解的组件扫描,这消除了大量针对应用程序自身组件的显示xml配置。Spring3.0引入基于java的配置,这是一种类型安全的可重构配置方式,可以代替xml。
所有这些配置都代表了开发时的损耗,因为在思考Spring特性配置和解决业务问题之间需要进行思维切换,所以编写可配置挤占看编写应用程序逻辑的时间。
2、依赖繁琐
项目的依赖管理也是一键耗时耗力的事情,在环境待见时,需要分析要导入哪些库的坐标,而且还要分析导入预支有依赖关系的其他库的坐标,一旦选错了依赖的版本,随之而来的不兼容会严重阻碍项目进度
SpringBoot功能
1、自动配置
SpringBoot的自动配置是一个运行时(准确的说是应用启动时)的过程,这个过程是SpringBoot自动完成的
2、起步依赖
起步依赖本质上是一个Maven项目模型(project Object Model,pom),定义了对其他库的传递依赖,这些东西加载一起及支持某项功能,简单的说,起步依赖就是将局别某种功能的坐标打包到一起,并提供一些默认的功能
3、辅助功能
提供了一些大型项目中常见的非功能特性,如嵌入式服务器(如内嵌tomcat,只需运行一个main即可)、安全等
Spring Boot 并不是对Spring功能上的增强,而是提供一种快速使用Sspring的方式
SpringBoot快速入门
需求说明:
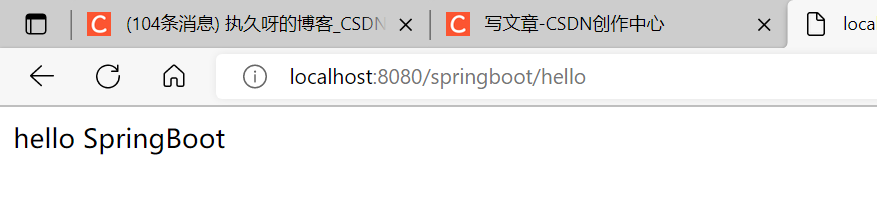
搭建SpringBoot工程,定义BootController.hello()方法,返回Hello SpringBoot
步骤说明:
①创建一个空项目
②选择Spring Initializr勾选默认
③定义Controller
④编写引导类
⑤启动测试
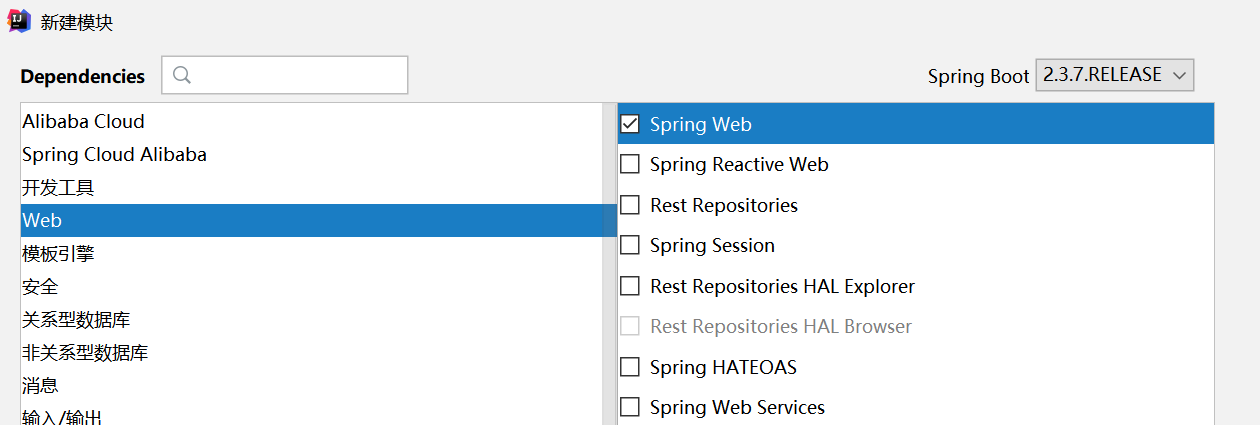
创建一个模块,按照这写法 ,支持java 8
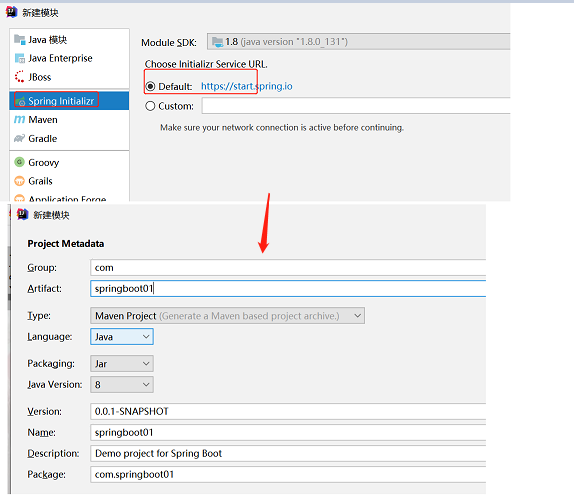
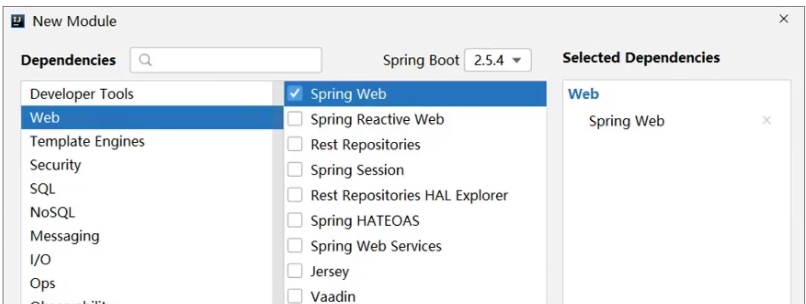
我们开发一个web,springmvc的所以勾选web下的springweb
创建完成之后,基本都给你实现好了
pom.xml下
<!--    创建一个父工程-->
    <parent>
        <groupId>org.springframework.boot</groupId>
        <artifactId>spring-boot-starter-parent</artifactId>
        <version>2.7.3</version>
        <relativePath/> <!-- lookup parent from repository -->
    </parent>

    <properties>
        <java.version>1.8</java.version>
    </properties>
<!--    导入依赖-->
    <dependencies>
        <dependency>
            <groupId>org.springframework.boot</groupId>
            <artifactId>spring-boot-starter-web</artifactId>
        </dependency>

        <dependency>
            <groupId>org.springframework.boot</groupId>
            <artifactId>spring-boot-starter-test</artifactId>
        </dependency>
    </dependencies>
启动类也是创建好的
import org.springframework.boot.SpringApplication;
import org.springframework.boot.autoconfigure.SpringBootApplication;
//启动类
@SpringBootApplication
public class Springboot01Application {

    public static void main(String[] args) {
        SpringApplication.run(Springboot01Application.class, args);
    }

}
手动创建一个controller包,创建一个BootController类
package com.springboot01.controller;

import org.springframework.web.bind.annotation.RequestMapping;
import org.springframework.web.bind.annotation.RestController;

@RestController
@RequestMapping("/springboot")
public class BootController {

    @RequestMapping("/hello")
    public String HelloBoot(){
        System.out.println("spring boot  running... ");
        return "hello SpringBoot";
    }
}
运行Application启动类
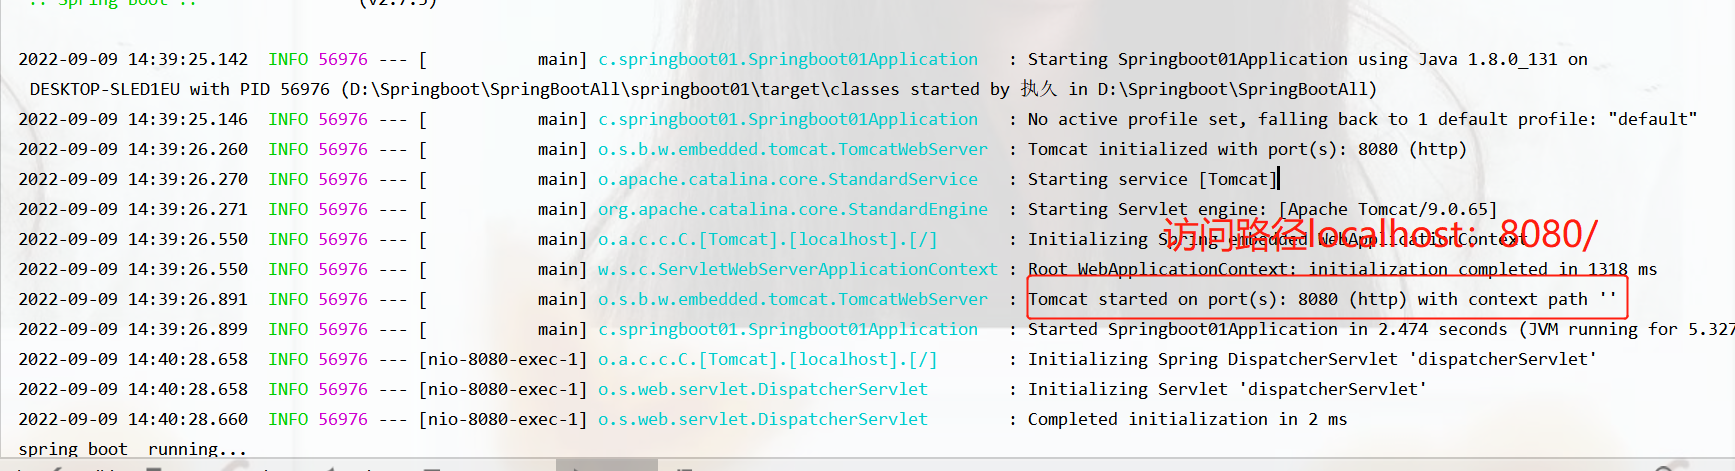
手动输入localhost:8080/类访问路径/方法访问路径
springboot所需要的最基本的
pom.xml 和Application类(启动类)
Spring程序与SpringBoot程序对比
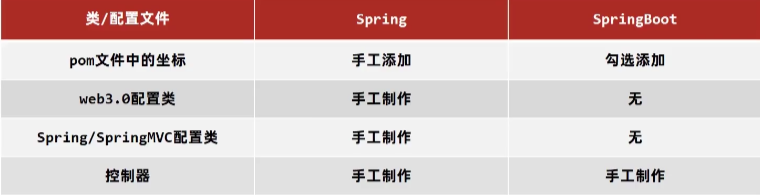
基于idea开发Spirngboot程序需要确保联网且能加载到程序框架结构
小结:
1、开发SpringBoot程序可以根据向导进行联网快速制作
2、SpringBoot程序需要基本JDK8进行制作
3、spring Boot程序中需要使用何种功能通过勾选技术
4、运行SpringBoot程序通过远行Application程序入口进行
基于Springboot官网创建项目
地址:springboot官网创建项目
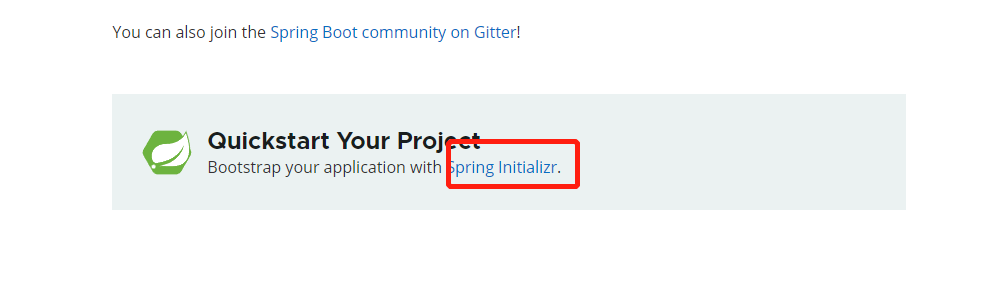
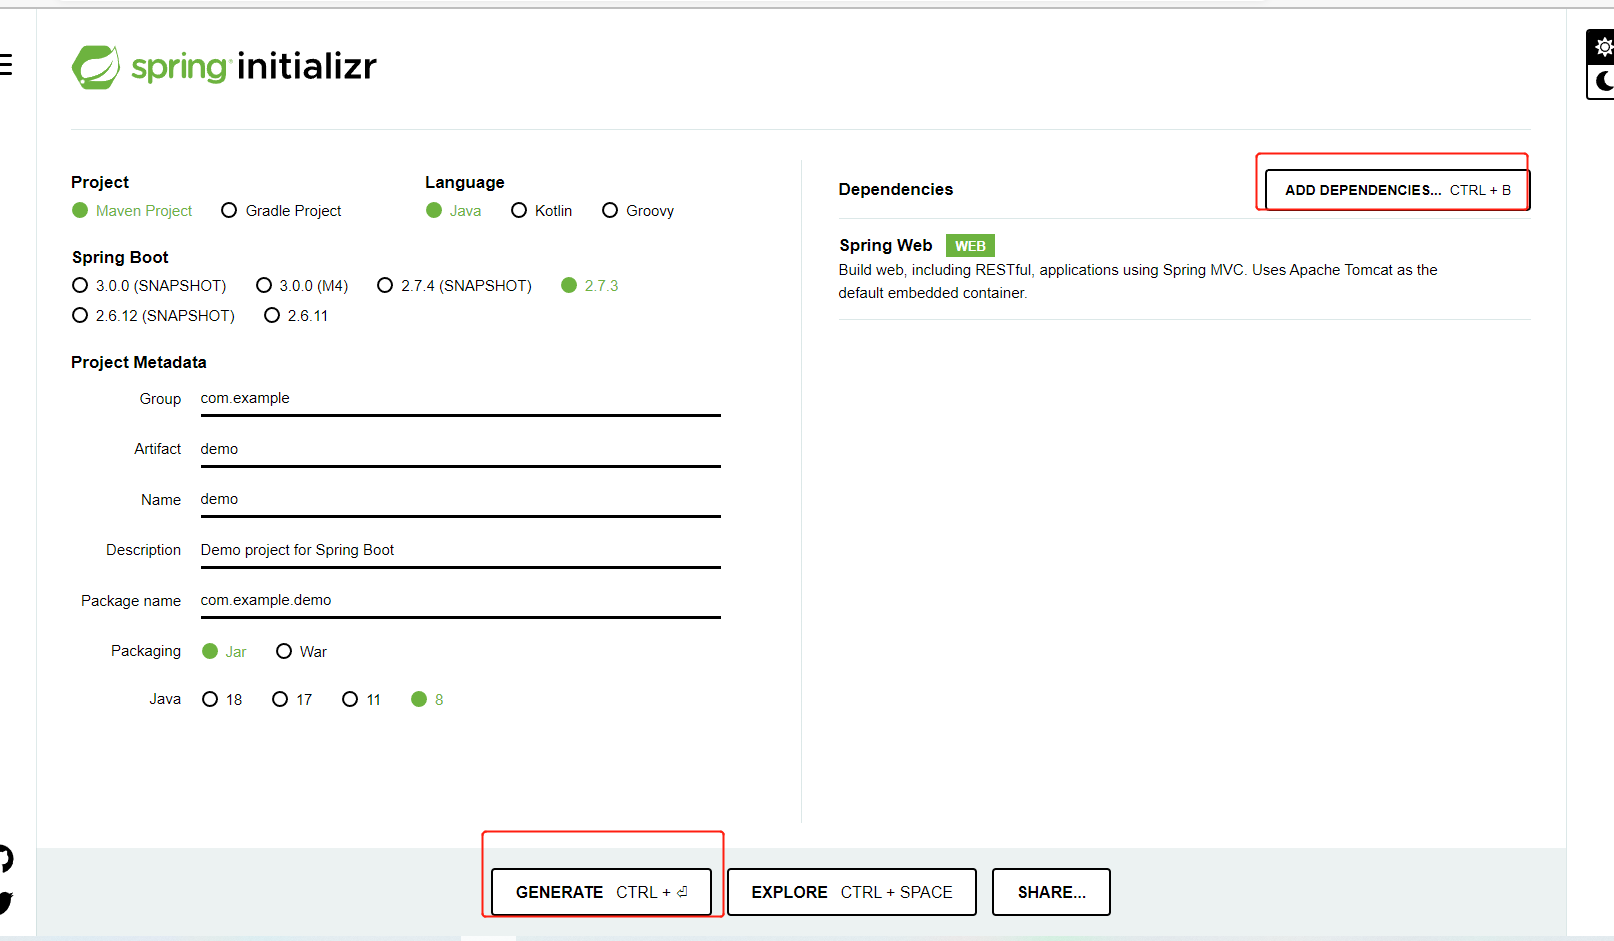
完成之后点击创建就会生成一个zip包解压缩,导入idea中即可
使用阿里云创建springboot项目
国内速度更快

注意事项:
阿里云提供的坐标版本较低,如果需要使用高版本,进入工程后,在pom.xml中修改
阿里云提供的工程模版与Spring官网提供的略有不同
手动创建maven成springboot项目
需要导入pom.xml和创建Application类
    <dependencies>
        <dependency>
            <groupId>org.springframework.boot</groupId>
            <artifactId>spring-boot-starter-web</artifactId>
        </dependency>


    </dependencies>

<!--直接导入,相当于parent-->
    <dependencyManagement>
        <dependencies>
            <dependency>
                <groupId>org.springframework.boot</groupId>
                <artifactId>spring-boot-dependencies</artifactId>
                <version>${spring-boot.version}</version>
                <type>pom</type>
                <scope>import</scope>
            </dependency>
        </dependencies>
    </dependencyManagement>
创建启动类
import org.springframework.boot.SpringApplication;
import org.springframework.boot.autoconfigure.SpringBootApplication;
@SpringBootApplication
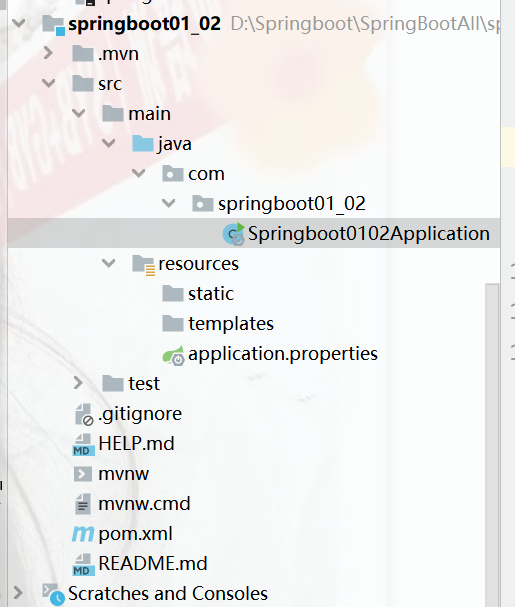
public class Springboot0102Application {
public static void main(String[] args) {
SpringApplication.run(Springboot0102Application.class, args);
}
}
隐藏指定文件/文件夹
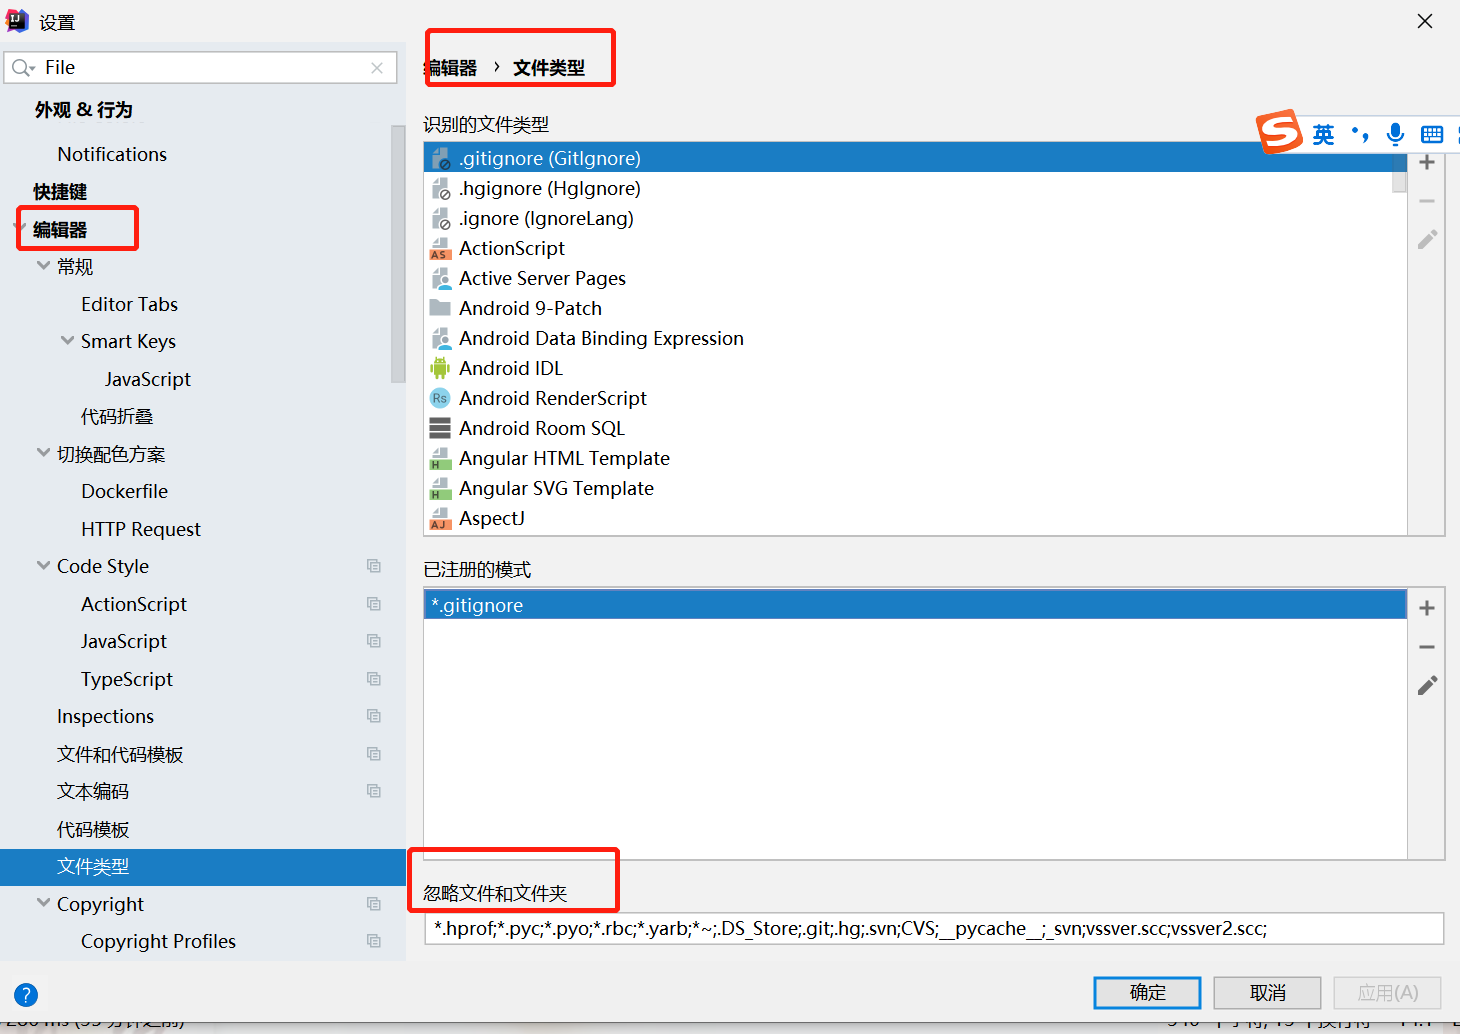
Idea中隐藏指定文件或指定类型文件
点setting,搜File Type 即可
在下方栏目输入之后要输入;结尾点击应用即可生效
属性说明
parent

1、开发SpringBoot程序要继承spring-boot-starter-parent
2、spring-boot-starter-parent中定义了若干个依赖管理
3、继承parent模块可以避免多个依赖使用相同技术时出现依赖版本冲突
4、继承parent的形式,或者使用引入依赖的形式实现效果
继承的形式
<!--    创建一个父工程-->
    <parent>
        <groupId>org.springframework.boot</groupId>
        <artifactId>spring-boot-starter-parent</artifactId>
        <version>2.7.3</version>
        <relativePath/> <!-- lookup parent from repository -->
    </parent>

导入依赖

<!--直接导入,相当于parent-->
    <dependencyManagement>
        <dependencies>
            <dependency>
                <groupId>org.springframework.boot</groupId>
                <artifactId>spring-boot-dependencies</artifactId>
                <version>${spring-boot.version}</version>
                <type>pom</type>
                <scope>import</scope>
            </dependency>
        </dependencies>
    </dependencyManagement>
starter
starter是springboot中常见项目名称,定义了当前使用的所有依赖坐标,已达到减少依赖配置的目的(每个starter中都包含了许多依赖)
<dependency>
            <groupId>org.springframework.boot</groupId>
            <artifactId>spring-boot-starter-web</artifactId>
        </dependency>
  |

   <dependency>
      <groupId>org.springframework.boot</groupId>
      <artifactId>spring-boot-starter</artifactId>
      <version>2.3.7.RELEASE</version>
      <scope>compile</scope>
    </dependency>

|

<modelVersion>4.0.0</modelVersion>
  <groupId>org.springframework.boot</groupId>
  <artifactId>spring-boot-starter</artifactId>
  <version>2.3.7.RELEASE</version>
  <name>spring-boot-starter</name>
  <description>Core starter, including auto-configuration support, logging and YAML</description>
  <url>https://spring.io/projects/spring-boot</url>
- parent所有springboot项目要继承的项目,定义了若干个坐标版本号(依赖管理,而非依赖),已达到减少依赖冲突的目的。(给下面的依赖使用的)
- spring-boot-starter-parent各版本间存着诸多坐标版本不同
实际开发
使用任意坐标时,仅书写GAV(groupId、artifactId、version)中的G和A,v由springboot提供,除非springboot没有提供版本号,就写上版本号信息。
小结:
1、开发springboot程序需要带入坐标时通常都让对应的starter
2、每个不同的starter根据功能不同,通常包含多个依赖坐标
3、使用starter可以实现快速配置的效果,达到简化配置的目的
引导类
启动方式
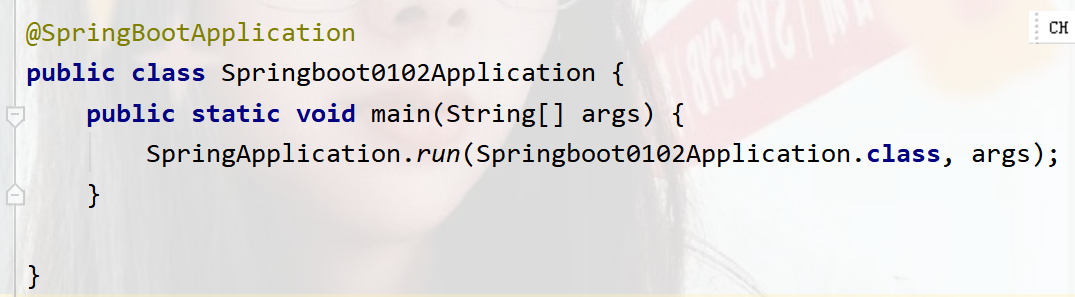
这个@SpringBootApplication 注解包含了许多,包括创建spring容器。
springboot 的引导类是boot工程的执行入口,运行main方式就可以启动项目
Springboot工程运行后初始化spring容器,扫描引导类所在包加载bean
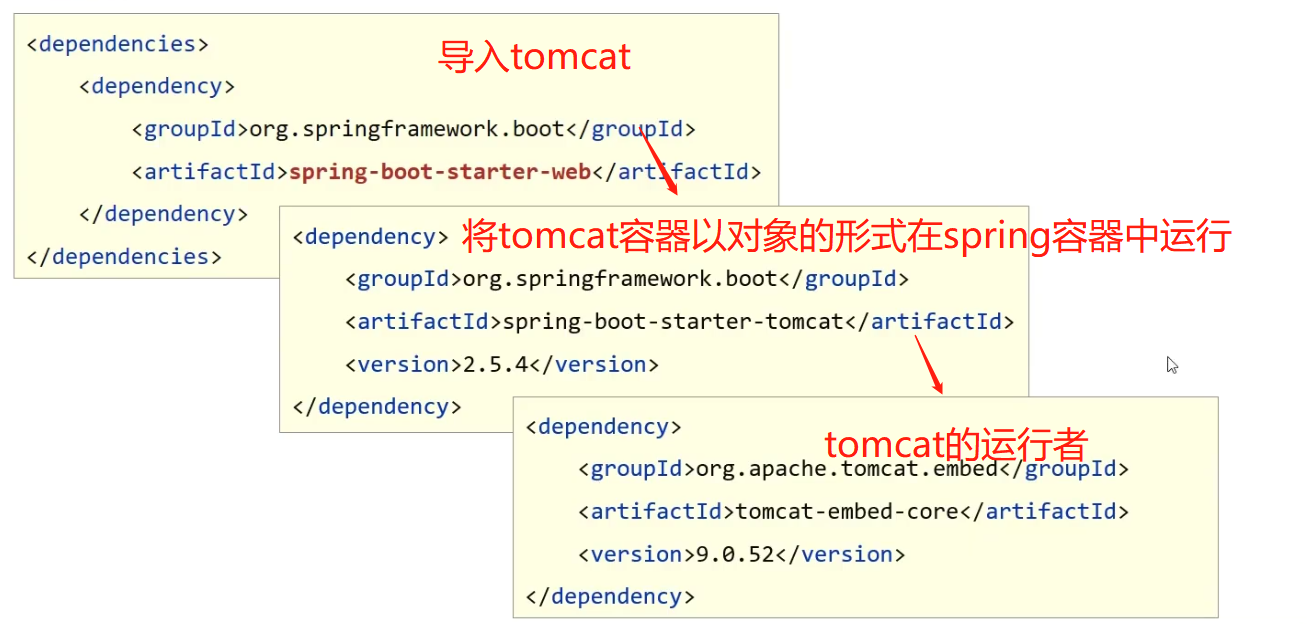
内嵌tomcat
   <dependency>
            <groupId>org.springframework.boot</groupId>
            <artifactId>spring-boot-starter-web</artifactId>
        </dependency>
在中spring-boot-starter-web中,ctrl+b跟进
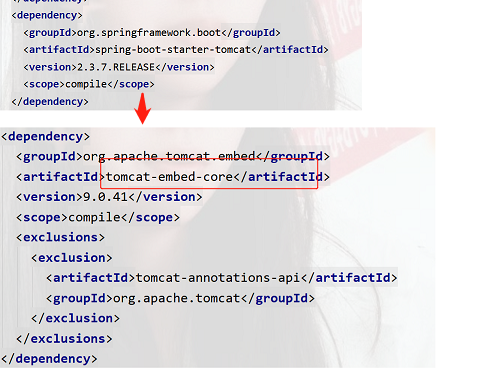
tomcat中是由很多jar包组成的,jar包是由java语言写的,java靠对象运行,把这对象交给spring管理。把tomcat的执行过程抽取出来变成一个对象,交给spring容器去管理。
去除tomcat
   <dependency>
            <groupId>org.springframework.boot</groupId>
            <artifactId>spring-boot-starter-web</artifactId>
            <exclusions>
                <exclusion>
                    <groupId>org.springframework.boot</groupId>
                    <artifactId>spring-boot-starter-tomcat</artifactId>
                </exclusion>
            </exclusions>
        </dependency>
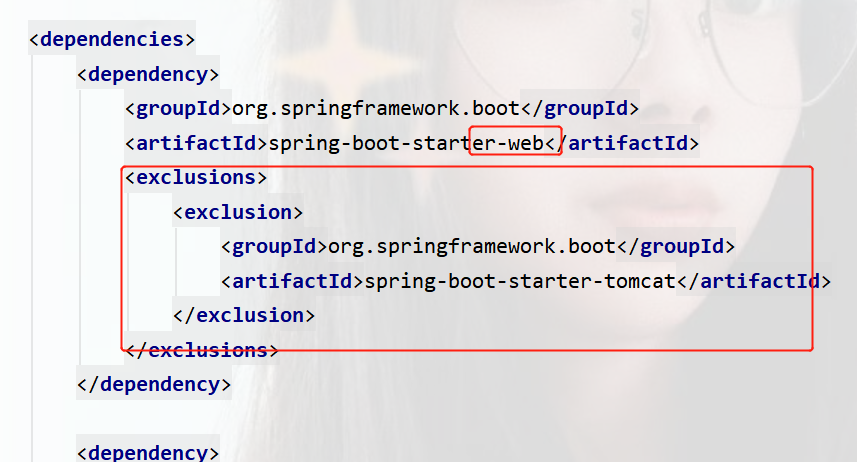
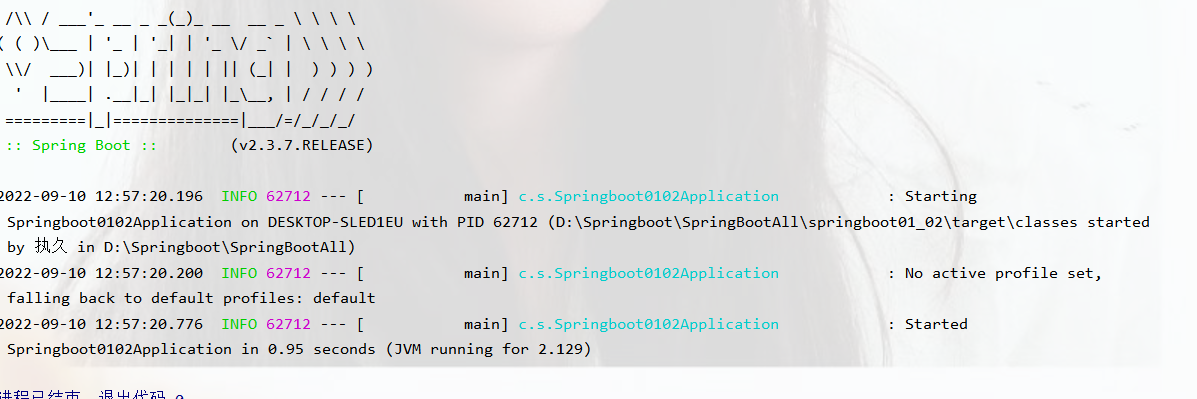
运行之后就没有显示了网站相关的了
使用jetty服务器也可以
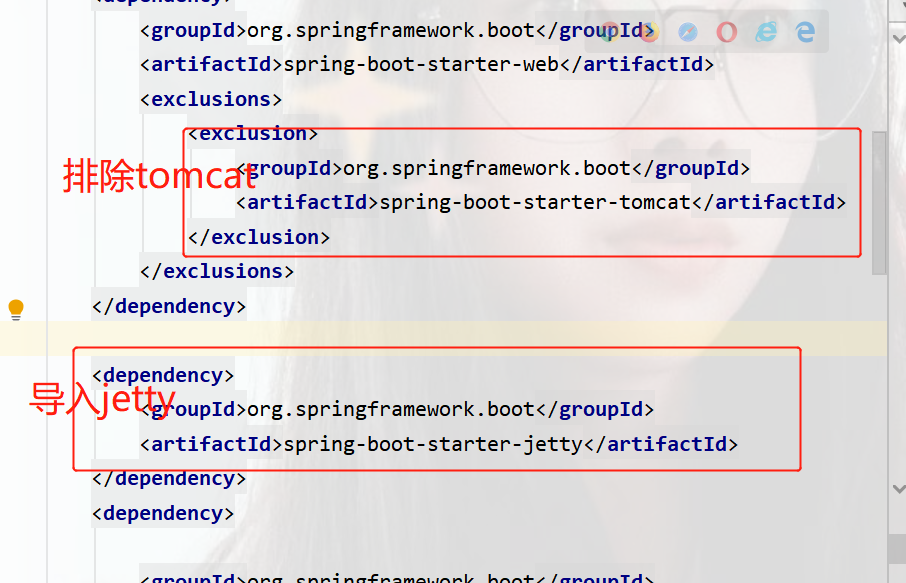
运行jetty服务器
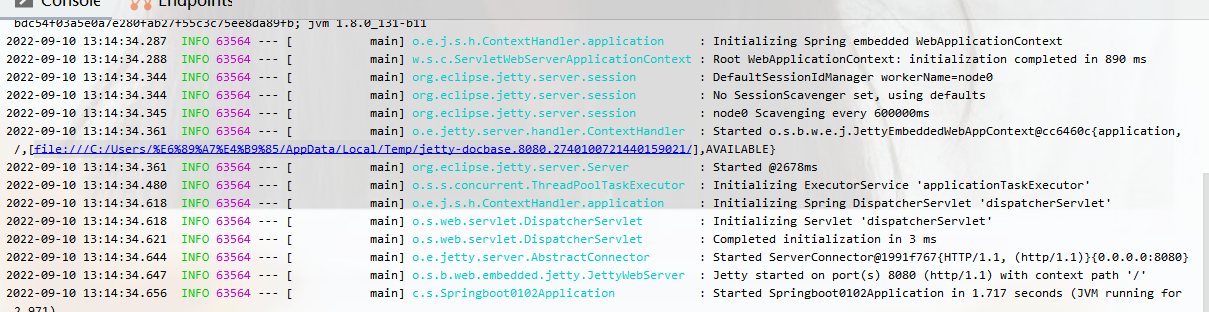
Jetty比tomcat更轻量,可扩展性更强(相对于tomcat),谷歌应用引擎(GAE)已经全面切换为jetty
springboot内置三种服务器
tomcat(默认) apache公司,应用面广负载了若干较重的组件
jetty 更轻量级,负载性能远不及tomcat
undertow 负载性能勉强略高tomcat
REST开发
REST简介
REST(Representational State Transfer),表现形式转换
传统风格资源描述形式
http://localhost/user/getById?id=1 (查找id=1)
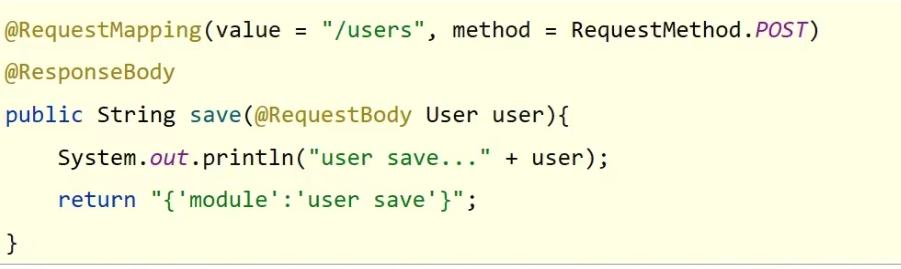
http:localhost/user/saveUser (增加)
REST风格描述
http://localhost/user/1(查找id=1)
REST优点
- 隐藏资源的访问行为,无法通过地址的得知资源时是何种操作
- 简化书写
按照TESt风格访问资源时使用行为动作区分对资源进行了何种操作
REST风格描述
访问路径访问描述请求方式对应的操作http://localhost/users查询全部用户信息GET(查询)http://localhost/users/1查询指定用户信息GET(查询)http://localhost/users添加用户信息POST(新增/保存)http://localhost/users修改用户信息PUT(修改/更新)http://localhost/users/1删除用户信息DELETE(删除)
根据REST风格对资源进行访问称为RESTful
注意:上述行为是约定方式,约定不是规范,可以打破,所以称为REST风格,而不是REST规范描述模块的名称通常使用复数,也就是加s的格式描,表示此类资源,而不是单个资源,例如keys,users,books...
RESTful风格案例
package com.springboot01.controller;
import com.springboot01.User;
import org.junit.jupiter.api.Test;
import org.springframework.web.bind.annotation.PathVariable;
import org.springframework.web.bind.annotation.RequestMapping;
import org.springframework.web.bind.annotation.RequestMethod;
import org.springframework.web.bind.annotation.RestController;
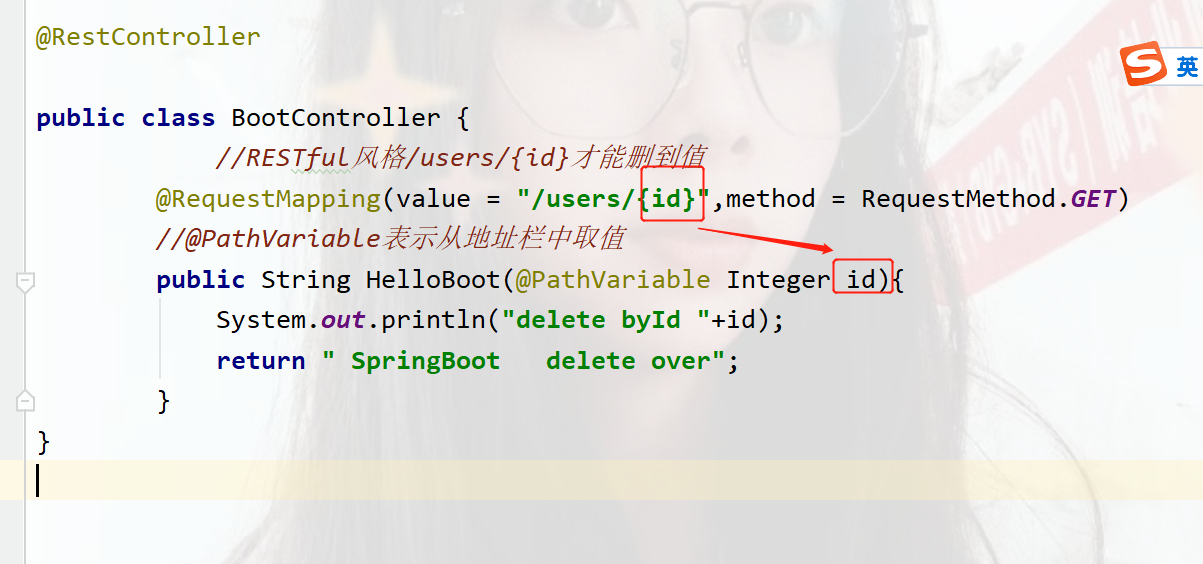
@RestController
public class BootController {
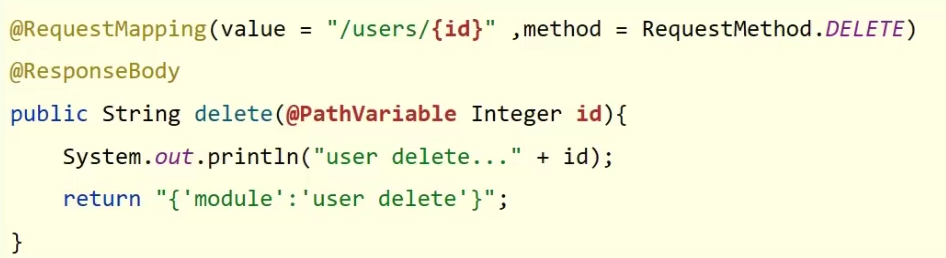
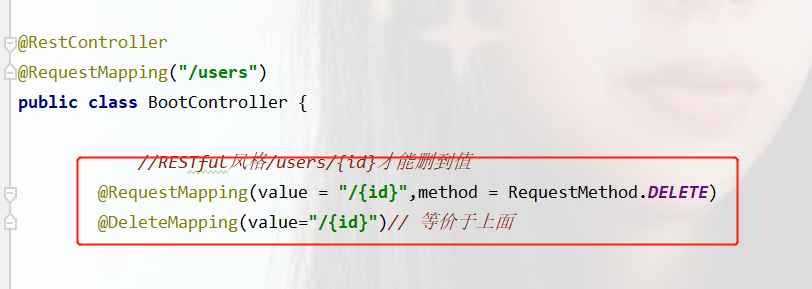
//RESTful风格/users/{id}才能删到值
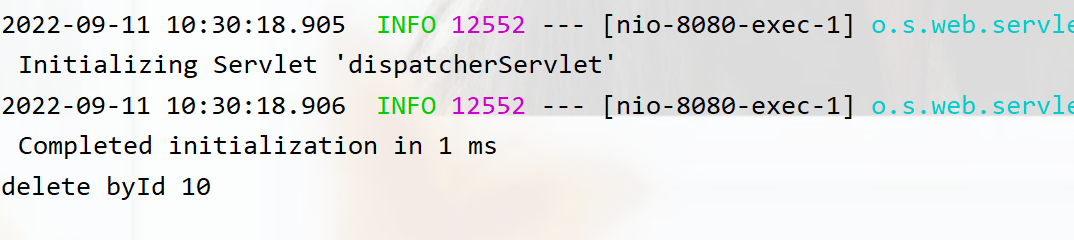
@RequestMapping(value = "/users/{id}",method = RequestMethod.DELETE)
//@PathVariable表示从地址栏中取值
public String HelloBoot(@PathVariable Integer id){
System.out.println("delete byId "+id);
return " SpringBoot delete over";
}
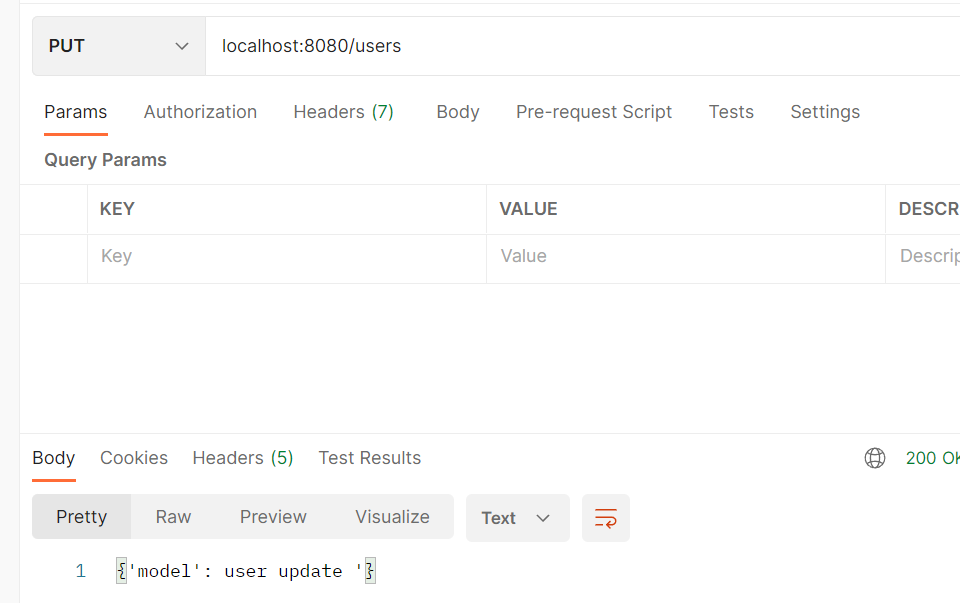
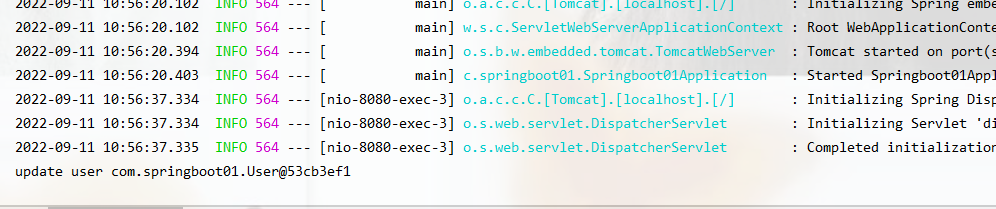
@RequestMapping(value = "/users",method = RequestMethod.PUT)
public String UpdateBy( User user){
System.out.println("update user "+user);
return "{'model': user update '} ";
}
}
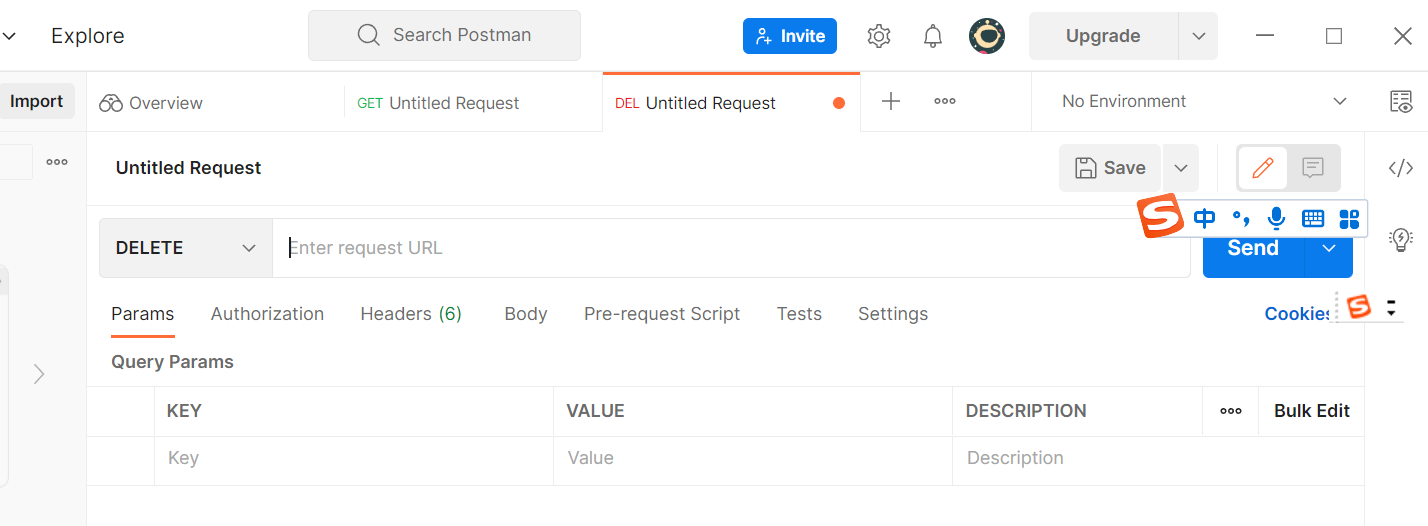
无奈的是,通过地址栏访问的是get请求,无法访问到其他请求,所以下载一个postman官网下载
运行之后启动访问localhost:8080/user/10
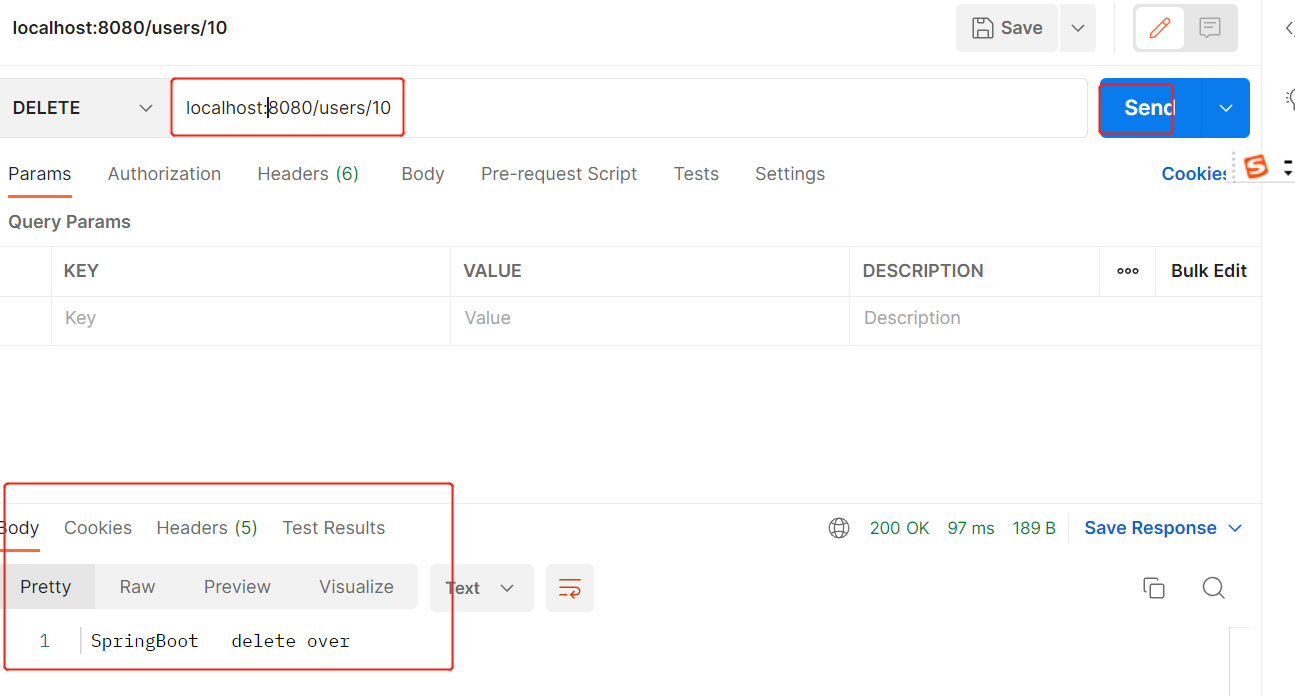
控制台中输出
入门案例小结:
名称:RequestMapping
类型:方法注解
位置:SpringMVC控制方式定义上方
作用:设置当前控制器方法请求访问路径
范例:
属性
value(默认):请求访问路径
method:http请求动作,标准动作(GET/POST/PUT/DELETE)常用
名称:@PathVariable
类型:形参注解
位置:SpringMVC控制器方法形参定义前面
作用:板顶路径参数与处理器方法形参关系间的关系,要求路径参数与形参名一一对应
范例:
@RequstBody @RequestParam @PathVariable
区别
- @RequestParam用于接收url地址传参或表单传参
- @RequestBody用于接收json数据
- @PathVariable用于接收路径参数,使用{参数名称}描述路径参数
应用
- 后期开发中,发送请求参数超过1个时,以json格式为主,@RequestBody应用较广
- 如果发送非json格式数据,选用@RequestParam接收请求参数
- 采用RESTful进行开发,当参数数量较少时,例如1个,可以采用@PathVariable接收请求路径变量,通常用于传递id值
RESTful快速开发
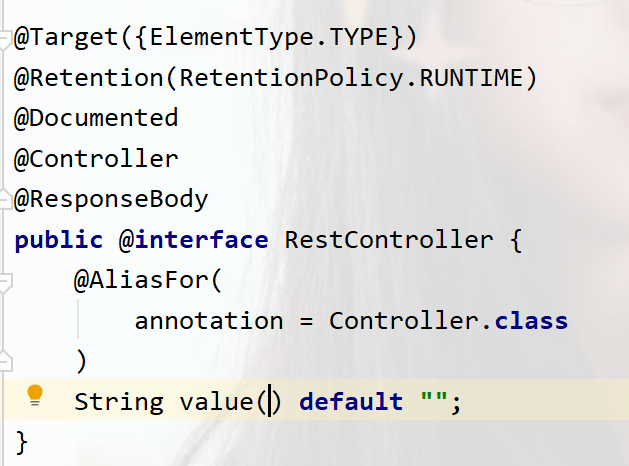
名称:@RestController
类型:类注解
位置:基于SpringMVC的TESTful开发控制器类定义上方
作用:设置当前控制器类为TESTful风格,等同于@Controller+@ResponseBody两个注解组合功能
ctrl+b查看内部代码
名称:@GetMapping @PostMapping @PutMapping @DeleteMapping
类型:方法注解
位置:基于SpringMVC的RESTful开发控制器方法定义上方
作用:设置当前控制器方法请求方法路径与请求动作,每种对应一个请求动作,例如@GetMapping对应get请求
基础配置
属性配置
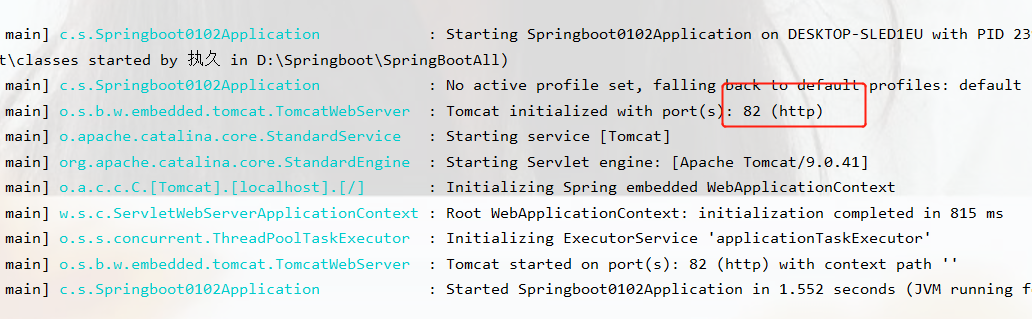
修改服务器端口
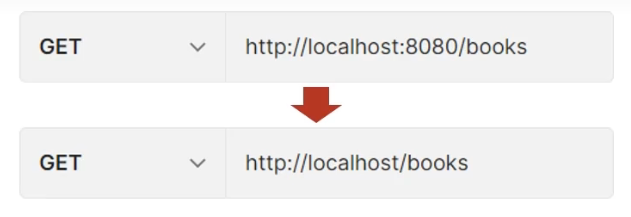
只需要在Application.properties中书写
# 应用服务 WEB 访问端口
server.port=80
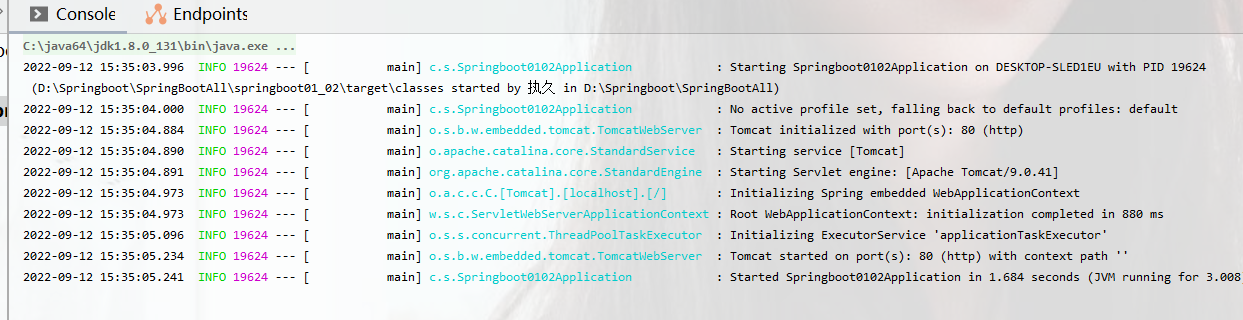
运行之后

访问
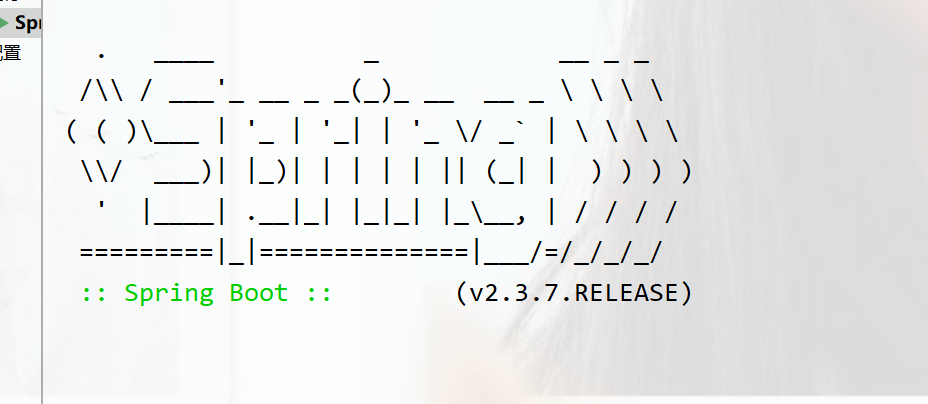
修改输出banner(logo)
默认的是这个
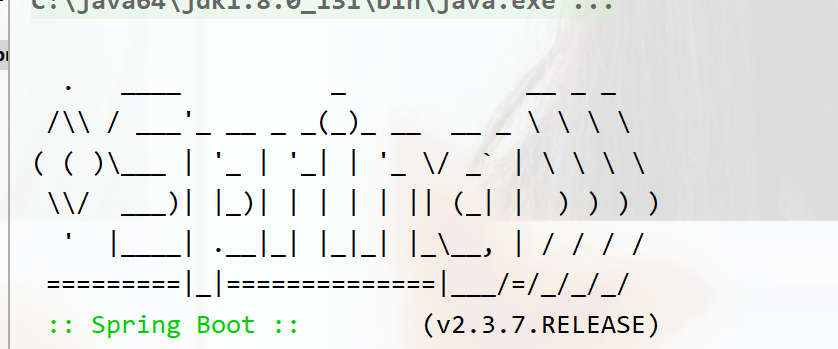
可以关闭生成这个
#关闭banner
spring.main.banner-mode=off
运行之后就没有出现了
我们可以在配置文件中导入自己想要的文字或图片,springboot会自动帮我们生成,导入之后放在resource下即可
#修改logo
spring.banner.image.location=图片或文件位置
我这导入了图片。

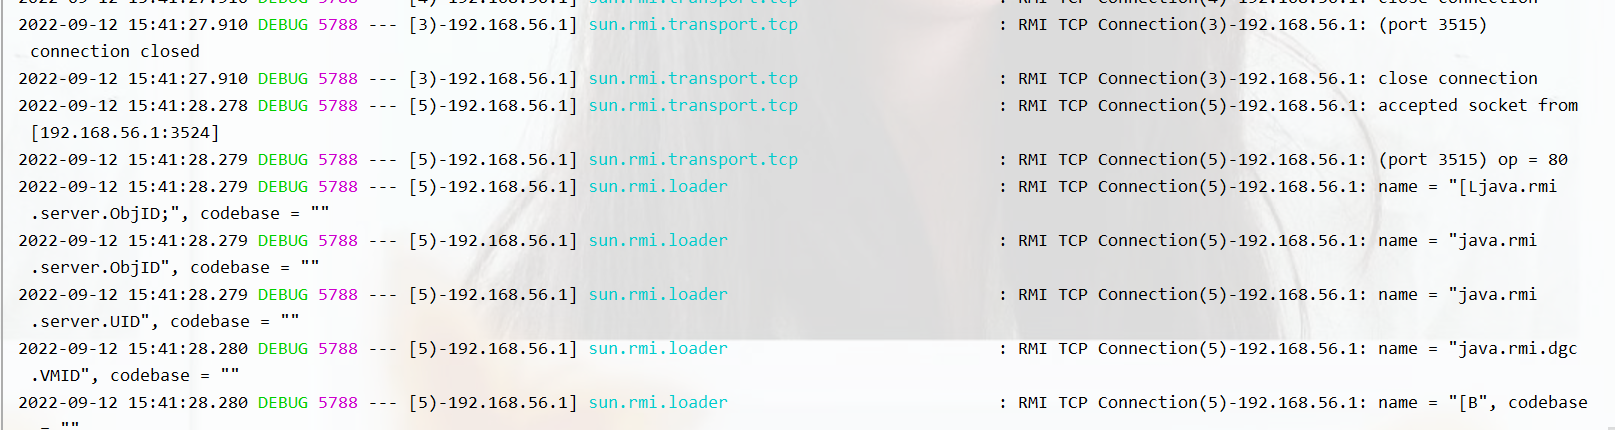
设置日志
#日志
logging.level.root=debug
设置为debug级别,非常的多,从初始化到构建成功打印出的。一般调错才会使用
正常的日志是info(默认的)
#日志
logging.level.root=info

error级别,即出错才会有日志。
#日志
logging.level.root=error
查看所有的配置springbooot官网中配置
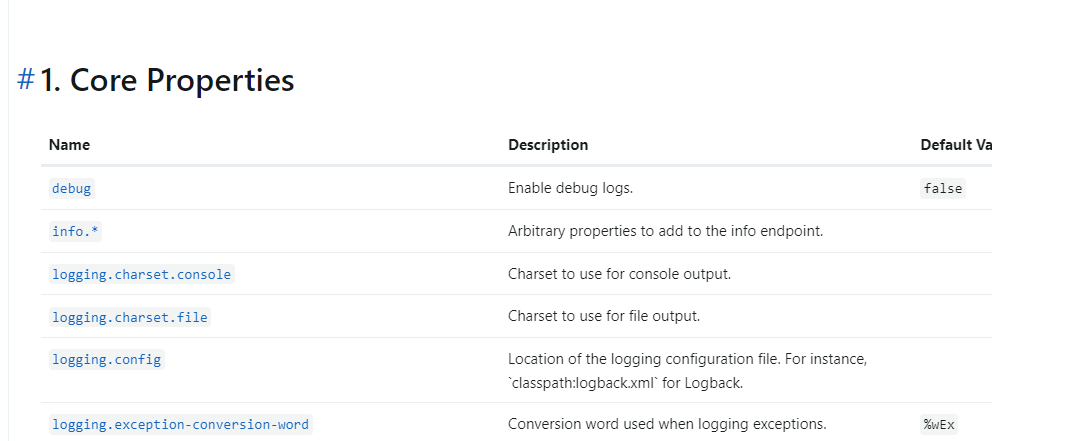
ctrl+f搜索相关的配置,可以模糊查询
小结:
每一个配置对应一种技术
SpringBoot中导入对应starter后,提供对应配置属性
书写SpringBoot配置采用关键字+提示形式书写
三种配置文件类型
application.yml(主流)
server:
  port: 81

application.yaml
server:
  port: 82
application.properties
server.port=80
当三种配置文件共存时

他们之间的优先级是
properties>yml>yaml
不同配置文件中的相同配置的按照优先级高的,不同的配置都会保留
如a文件有1,b文件有2,c文件有3,那最终就是123。
属性消失解决方案
在yml和yaml配置中,输入属性没有提示出来,提示方案是idea中提供的,而不是springboot提供的,idea中没有提供提示,是因为idea认为这个不是配置文件
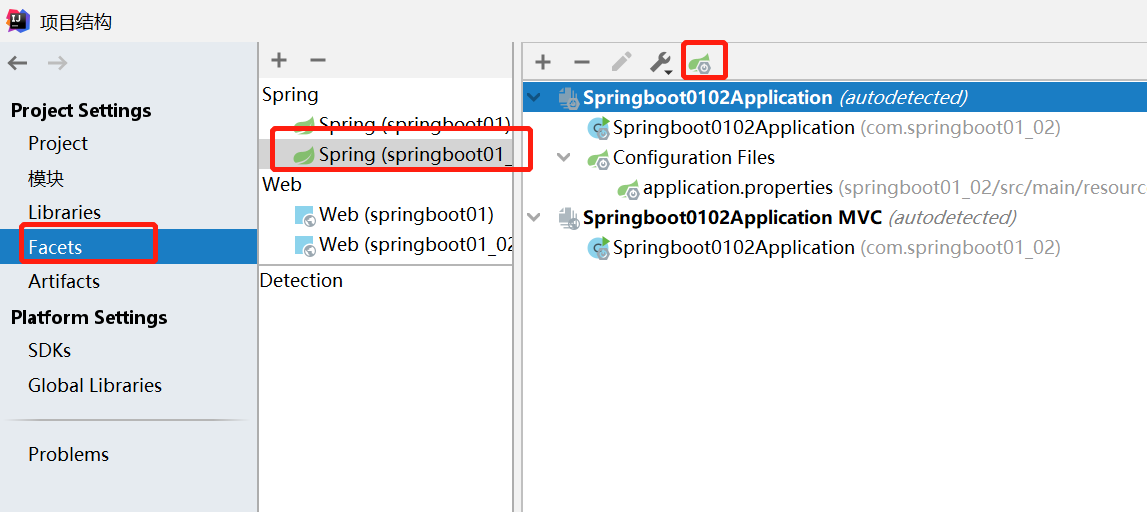
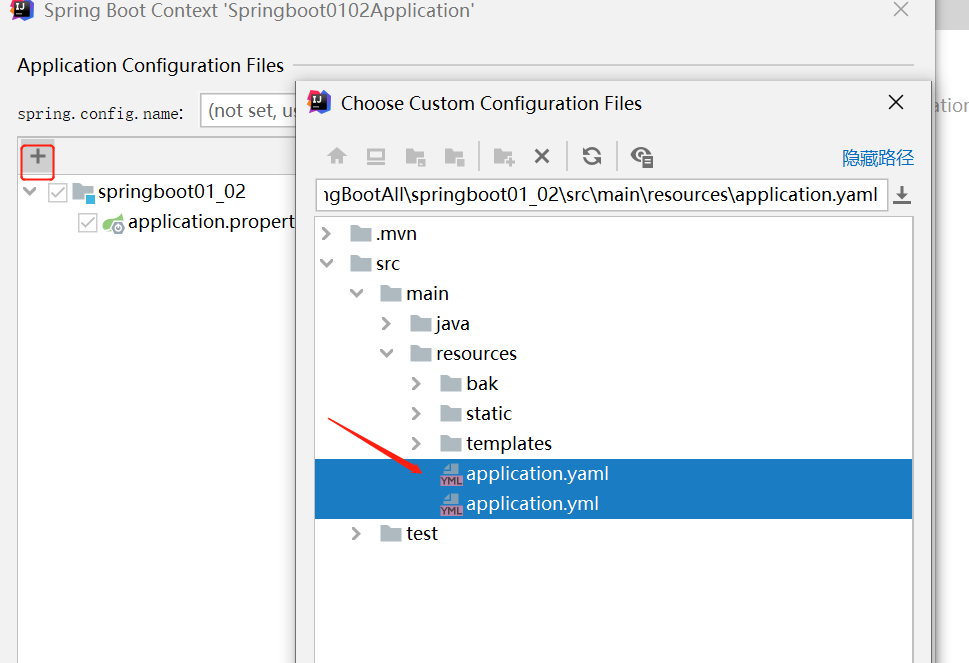
当弄完之后
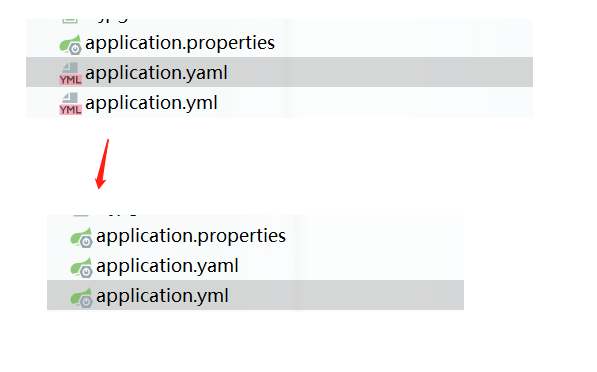
这样就告诉idea都是配置文件,就都有提示信息了
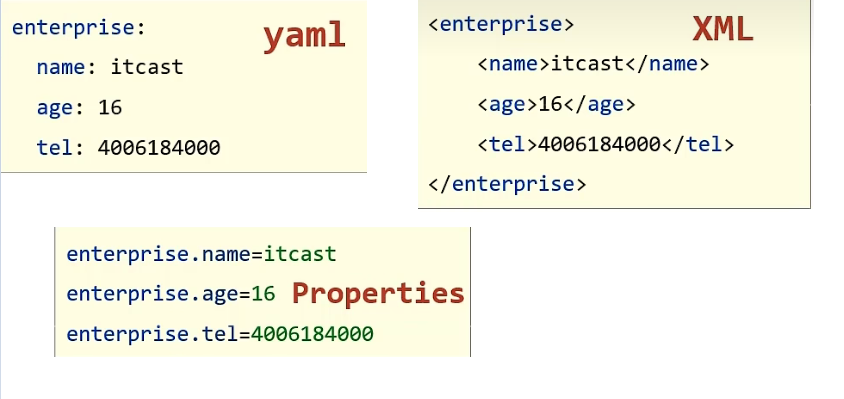
yaml介绍
YAML(YAML Ain't Markup Language),一种数据序列化格式
优点:
- 容易阅读
- 容易与脚本语言交互
- 以数据为核心,重数据轻格式
YANL文件扩展名
- .yml(主流)
- .yaml
几种数据格式比较
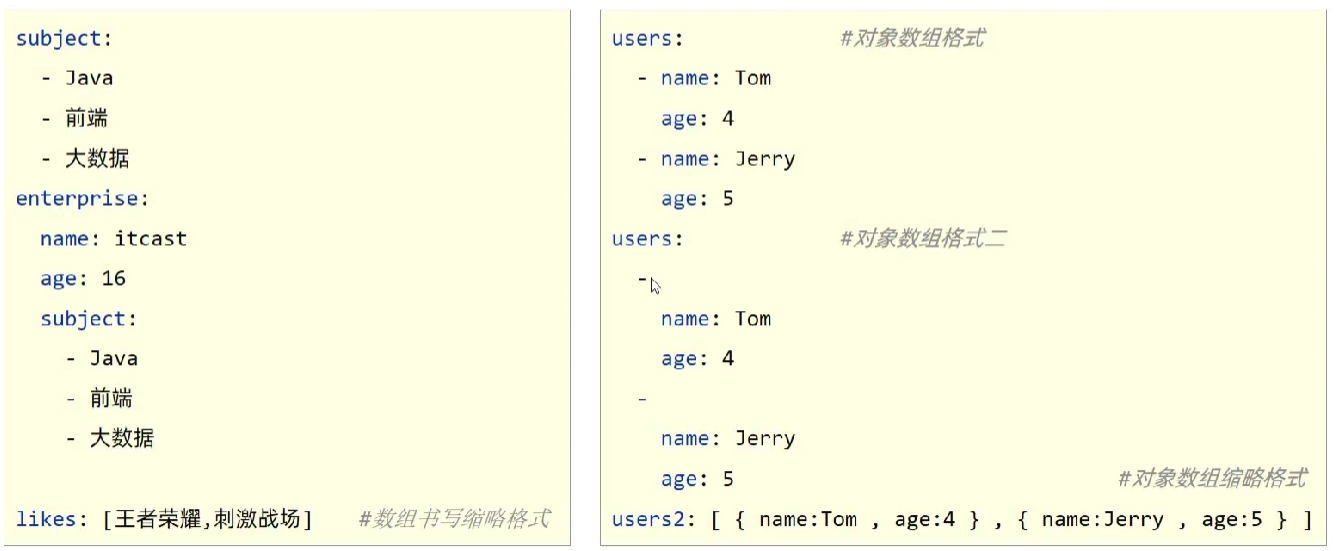
yaml语法规则
- 大小写敏感
- 属性层级关系使用多行描述,每行结尾使用冒号结束
- 使用缩进表示层级关系,同层级左侧对齐,只允许使用空格(不允许使用Tab键)
- 属性值前面添加空格(属性名与属性值之间使用冒号+空格作为分隔)
- #表示注释
示例:
user:
  name: zhangsan
  age: 12

users:
  -
    name: lisi
    age: 13
  -
    name: wangwu
    age: 18

likes: [game,play,having]
users1: [{name:zhangsan,age:12},{name:lisi,age:12}]
字面值表示方式
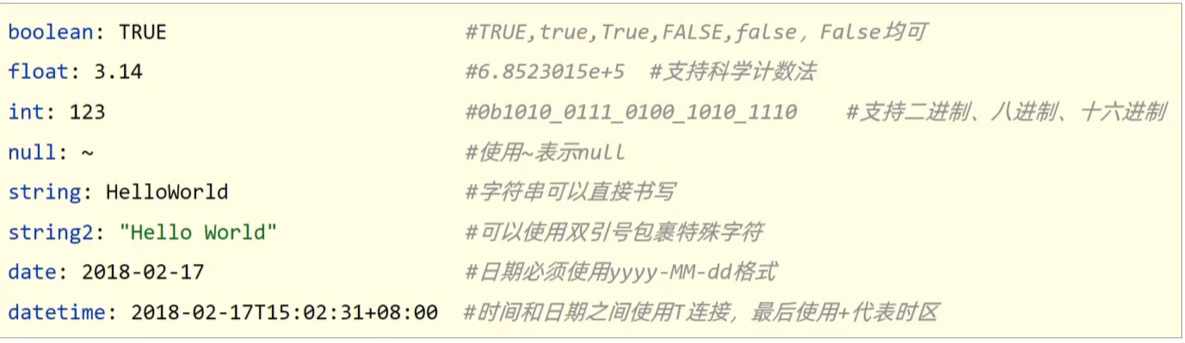
数组表示方式:在属性名书写位置的下方使用减号作为数据开始符号,每行书写一个数据,减号与数据键空格分隔
yaml数据读取
使用@Value读取单个数据,属性名引用方式:${一级属性名.二级属性名}

controller下
package com.springboot01_02.controller;
import org.springframework.beans.factory.annotation.Value;
import org.springframework.web.bind.annotation.RequestMapping;
import org.springframework.web.bind.annotation.RestController;
@RestController
@RequestMapping("/SpringBoot")
public class TestController {
@Value("${user.name1}")
private String username1;
@Value("${users[0].age}")
private String userage2;
@Value("${person.hobby[0]}")
private String personHobbyEat;
@Value("${person.hobby[1]}")
private String personHobbyPlay;
@Value("${users1[0].age}")
private String usersAge;
@RequestMapping("/test")
public String Test(){
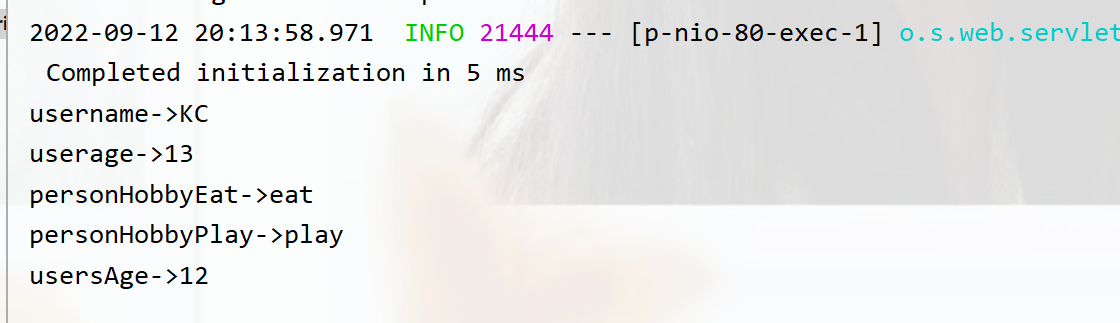
System.out.println("username->"+username1);
System.out.println("userage->"+userage2);
System.out.println("personHobbyEat->"+personHobbyEat);
System.out.println("personHobbyPlay->"+personHobbyPlay);
System.out.println("usersAge->"+usersAge);
return "springboot is good";
}
}
yml配置文件
user:
  name1: KC
  age: 12

users:
  -
    name: lisi
    age: 13
  -
    name: wangwu
    age: 18

person:
  name: ZH
  age: 19
  tel: 152161
  hobby:
    - eat
    - play
    - run

users1: [{name: zhangsan,age: 12},{name: lisi,age: 12}]

likes: [game,play,having]
运行结果:
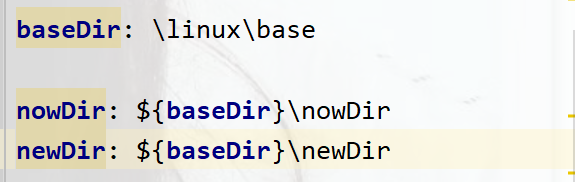
yaml数据读取
在配置文件中可以使用属性名引用方式引用属性
在配置文件中
package com.springboot01_02.controller;
import org.springframework.beans.factory.annotation.Value;
import org.springframework.web.bind.annotation.RequestMapping;
import org.springframework.web.bind.annotation.RestController;
@RestController
@RequestMapping("/SpringBoot")
public class TestController {
@Value("${nowDir}")
private String nowDir1;
@Value("${tewDir}")
private String tewDir1;
@RequestMapping("/test")
public String Test(){
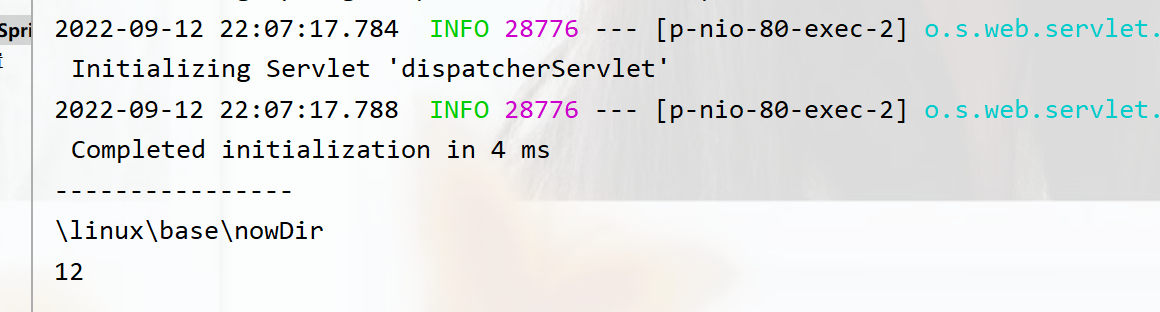
System.out.println("nowDir->"+nowDir1);
System.out.println("towDir->"+tewDir1);
return "springboot is good";
}
}
运行结果:
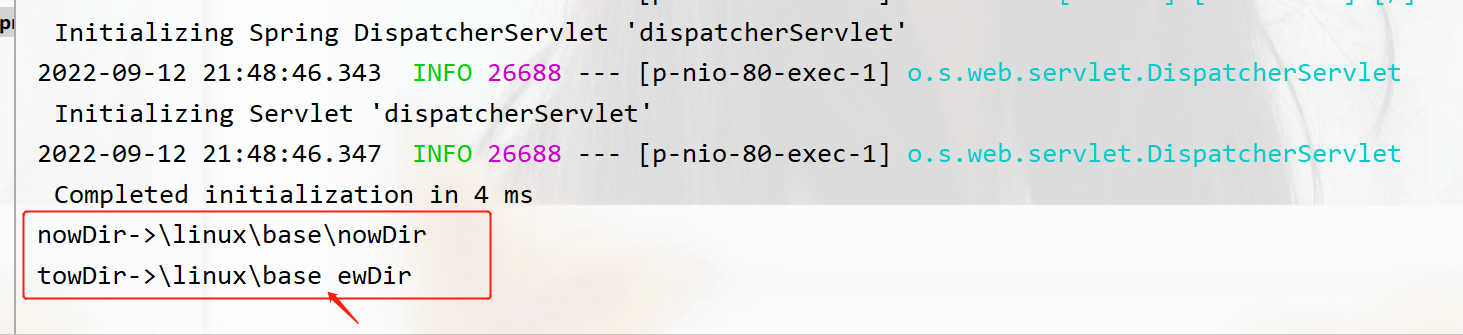
** 可以发现,要想让转义字符生效,就得加上双引号不然还是以字符串的形式打印出**
Environment读取yaml全部属性数据
package com.springboot01_02.controller;

import org.springframework.beans.factory.annotation.Autowired;
import org.springframework.beans.factory.annotation.Value;
import org.springframework.core.env.Environment;
import org.springframework.web.bind.annotation.RequestMapping;
import org.springframework.web.bind.annotation.RestController;

@RestController
@RequestMapping("/SpringBoot")
public class TestController {

//使用自动装配将所有数据封装到一个Environment中
    @Autowired
    private Environment evn;

    @RequestMapping("/test")
    public String Test(){

        System.out.println("----------------");
        System.out.println(evn.getProperty("nowDir"));
        System.out.println(evn.getProperty("users1[0].age"));

        return "springboot is good";
    }
}
运行结果:
小结:
使用Environment对象封装全部配置信息
使用@Autowired自动装配数据到Environment对象中
自定义对象封装指定数据
application.yaml配置文件中的信息
#创建类,用于封装下面的数据
#有spring带我们去加载数据到对象中,且告诉spring加载这组信息
#使用时从spring中直接获取信息使用

datasource:
  driver: com.mysql.jdbc.Driver
  url: jdbc:mysql://localhost/love
  username: kongchao
  password: zenghui
自定义一个类
package com.springboot01_02.datesource;

import lombok.Data;
import org.springframework.boot.context.properties.ConfigurationProperties;
import org.springframework.stereotype.Component;

//1、定义数据类型模型封装yaml文件中对应的数据
//2、定义为spring管控的bean
@Component
//3、指定加载的数据
@ConfigurationProperties("datasource")
//4、设置getSet方法等
@Data

public class MyDateSource {

    private  String driver;
    private  String url;
    private  String username;
    private  String password;
}
使用了@Date,在pom.xml中导入lombok
        <dependency>
            <groupId>org.projectlombok</groupId>
            <artifactId>lombok</artifactId>
            <version>1.16.10</version>
        </dependency>
测试类下
package com.springboot01_02.controller;

import com.springboot01_02.datesource.MyDateSource;
import org.springframework.beans.factory.annotation.Autowired;
import org.springframework.web.bind.annotation.RequestMapping;
import org.springframework.web.bind.annotation.RestController;

@RestController
@RequestMapping("/SpringBoot")
public class TestController {

@Autowired
    private MyDateSource dateSource;
    @RequestMapping("/test")
    public String Test(){

        System.out.println(dateSource);
        return "springboot is good";
    }
}
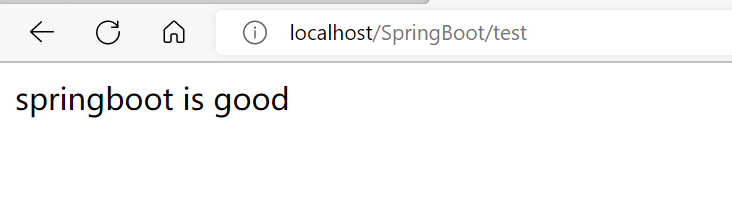
运行访问localhost/SpringBoot/test即可得到:

小结:
使用@ConfigurationProperties注解绑定配置信息到封装类中
封装类需要定义为Spring管理的bean(使用注解@Component),否则无法进行属性注入
SpringBoot整合第三方技术
1、整合Junit
创建一个Dao包下的UserDao
package com.Dao;

public interface UserDao {
    void save();
}
创建实现类
package com.Dao.Impl;

import com.Dao.UserDao;
import org.springframework.stereotype.Repository;

//要使能被spring管理,加上注解@Component(spring管理的通用注解)或@Repository(更合适)
@Repository
public class UserDaoImpl implements UserDao {
    @Override
    public void save() {
        System.out.println("userDao is running...");
    }
}
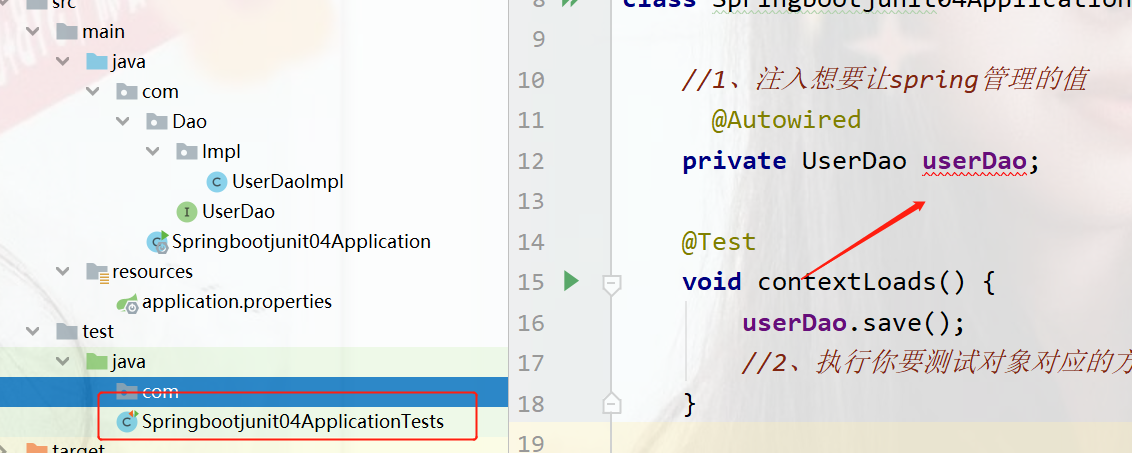
在测试下
package com.springbootjunit04;
import com.Dao.UserDao;
import org.junit.jupiter.api.Test;
import org.springframework.beans.factory.annotation.Autowired;
import org.springframework.boot.test.context.SpringBootTest;
@SpringBootTest
class Springbootjunit04ApplicationTests {
//1、注入想要让spring管理的值
@Autowired
private UserDao userDao;
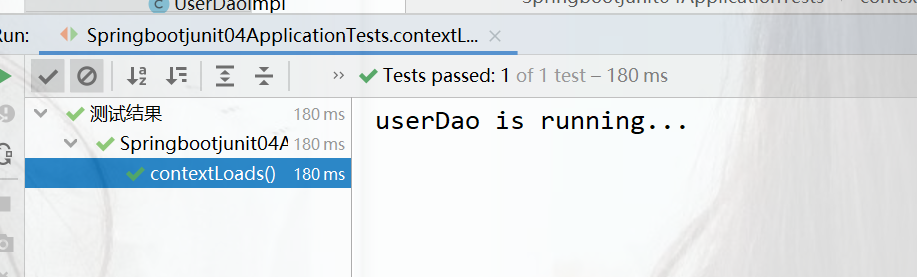
@Test
void contextLoads() {
//2、执行你要测试对象对应的方法
userDao.save();
}
}
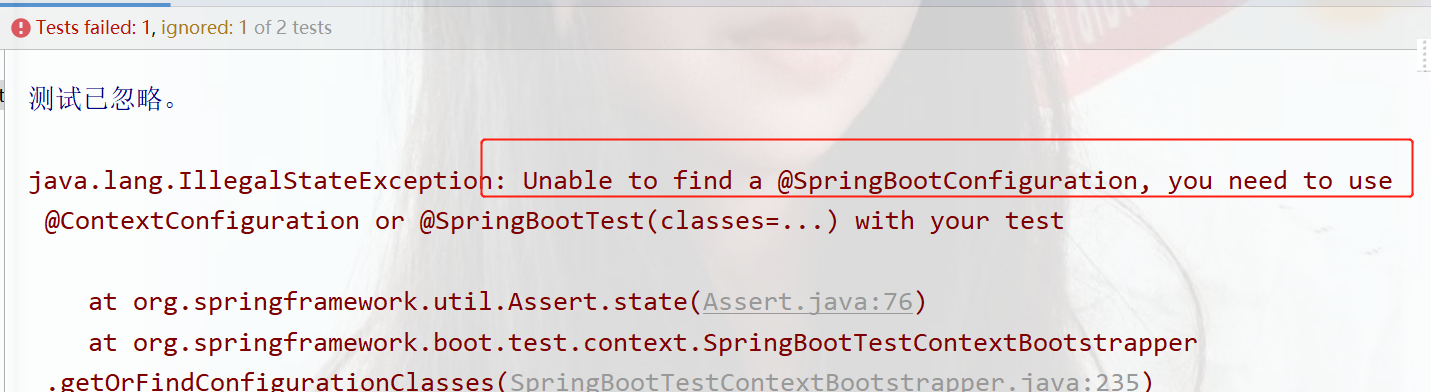
运行结果
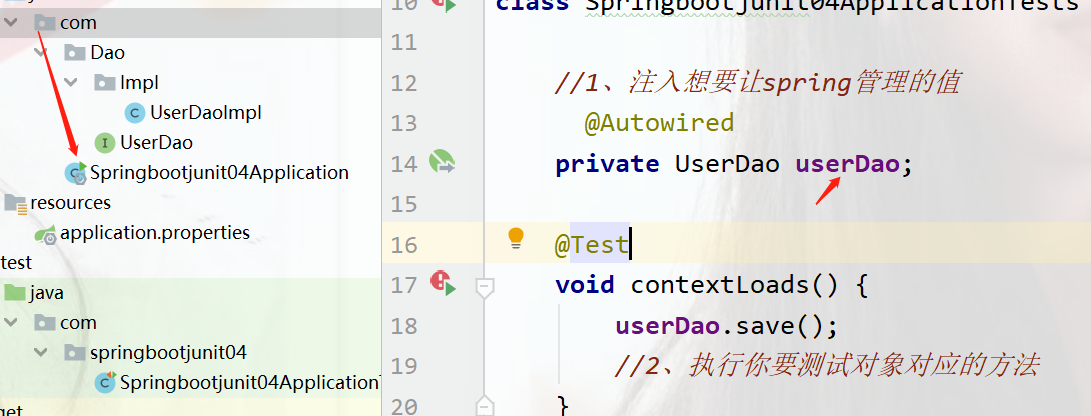
@Autowired出现找不到注入对象的原因
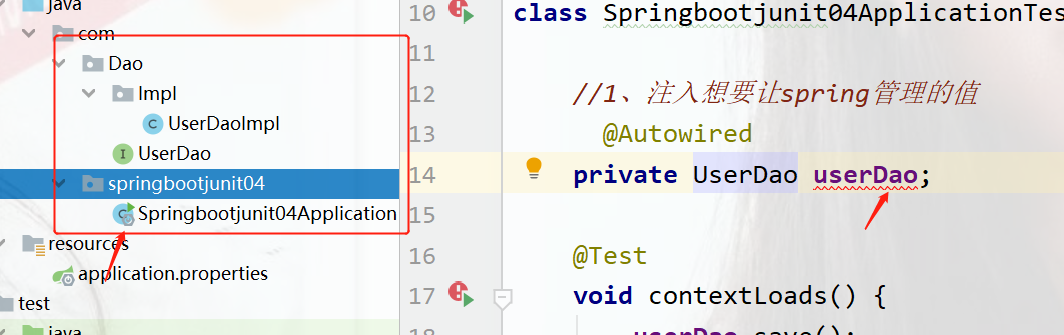
出现这种错误是因为springboot默认扫描这个启动类所在的包及其子包,所以就无法识别了,只需要将启动类移动到编写的Dao包之上即可重新被识别。
核心:@SpringBootTest
名称:@SpringBootTest
类型:测试类定义上方
作用:设置Junit加载的SpringBoot启动类
@SpringBootTest
class Springbootjunit04ApplicationTests {}
整合Junit步骤:
1、导入测试对应的starter(springboot已经在pom.xml完成)
2、测试类使用SpringBootTest注解(SpringBoot完成了)
3、使用自动装配的形式添加要测试的对象
classes属性
相关属性:设置SpringBoot启动类
我们一开始设置在com包下的Test类,移出去启动后就会报错,原因是一开始在com包,springboot就会去同名上的com包下去找,如果这个test类在引导类的包下及其子包下则不会报错。报错的原因是test类找不到引导类(启动类)
所有只需要使用classes标签
@SpringBootTest(classes = Springbootjunit04Application.class)

如果测试类在SpringBoot启动类的包或子包中,可以省略启动类的设置,也就是省略classes的设定
2、整合MyBatis
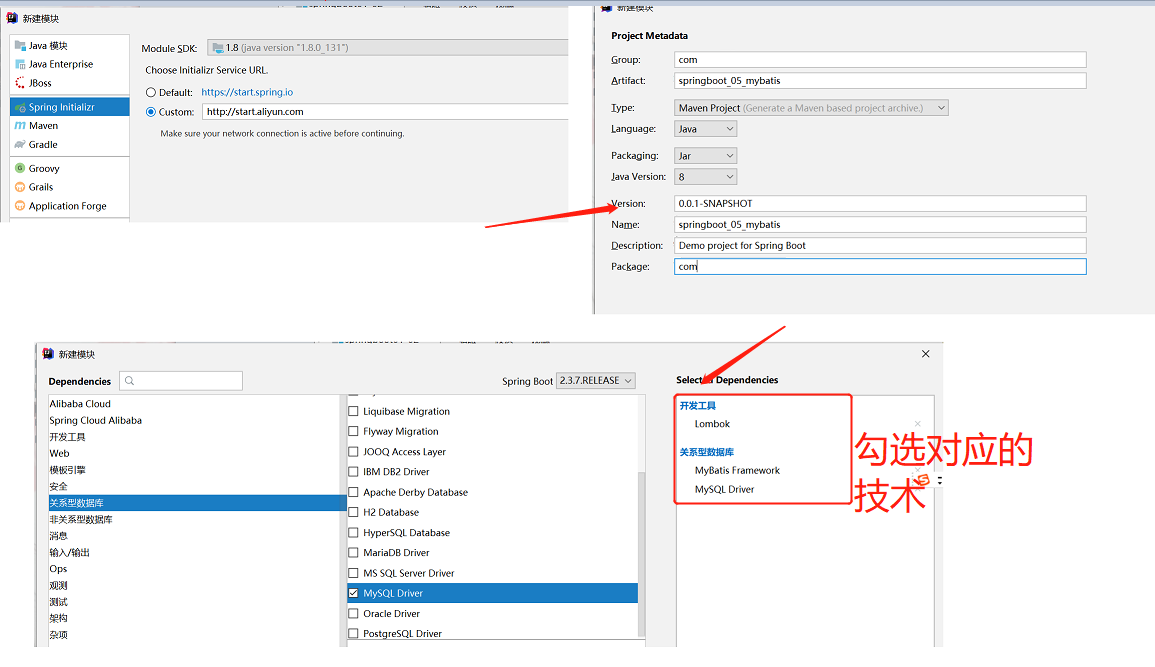
创建一个新的模块
配置文件中:配置数据库相关信息application.yml中
#配置相关信息
spring:
  datasource:
    driver-class-name: com.mysql.cj.jdbc.Driver
    url: jdbc:mysql://localhost:3306/mybatis?serverTimezone=UTC
    username: root
    password: 123456
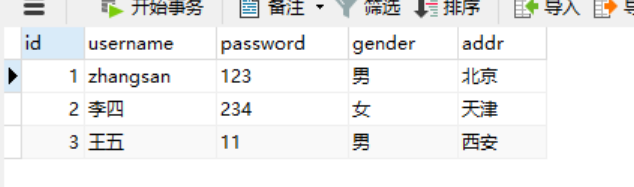
数据库中的表
创建一个pojo包下的Person类
package com.pojo;

import lombok.Data;

@Data
public class Person {
private Integer id;
private String username;
private String password;
private String gender;
private String addr;

}
创建一个dao包下的PersonDao接口
package com.dao;

        import com.pojo.Person;
        import org.apache.ibatis.annotations.Mapper;
        import org.apache.ibatis.annotations.Select;
        import org.springframework.stereotype.Component;

        import java.util.List;
@Component//交给spring容器管理
@Mapper//使用注解配置映射
public interface PersonDao {
    @Select("select *from tb_user")
    List<Person> personList();
}
在测试类下
package com;
import com.dao.PersonDao;
import org.junit.jupiter.api.Test;
import org.springframework.beans.factory.annotation.Autowired;
import org.springframework.boot.test.context.SpringBootTest;
@SpringBootTest
class Springboot05MybatisApplicationTests {
//测试,先注入dao对象
@Autowired
private PersonDao personDao;
@Test
void contextLoads() {
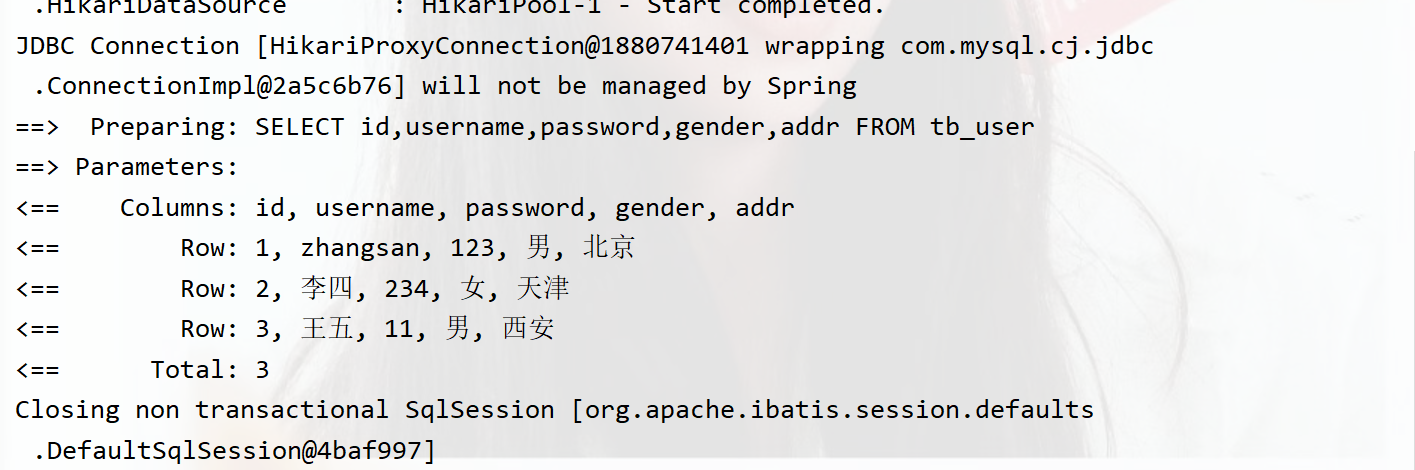
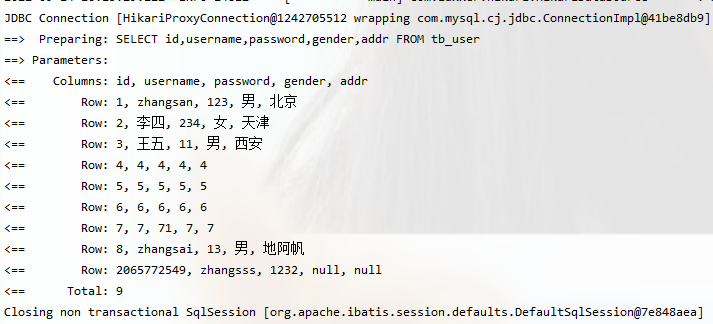
System.out.println(personDao.personList());
}
}
运行结果:

小结:
1、勾选Mybatis技术,也就是导入mybatis对应的starter
2、数据库连接相关信息转换成配置
3、数据库sql映射需要添加@Mapper被容器识别到
**@Mapper注释用来表示该接口类的实现类对象交给mybatis底层创建,然后交由Spring框架管理**
mysql8遇到时区错误

mysql8以上的版本的加上时区?serverTimezone=UTC不然会报错
url: jdbc:mysql://localhost:3306/mybatis?serverTimezone=UTC
小结:
1\mysql8以上的版本驱动有前置要求设置时区
- 修改url,添加sercerTimezone设定
- 修改mysql数据库配置(永久设置)
2、驱动类过时,提醒更换为com.mysql.cj.jdbc.Driver
3、整合Mybatis-plus
使用aliyun创建springboot,或者导入Mybatisplus坐标
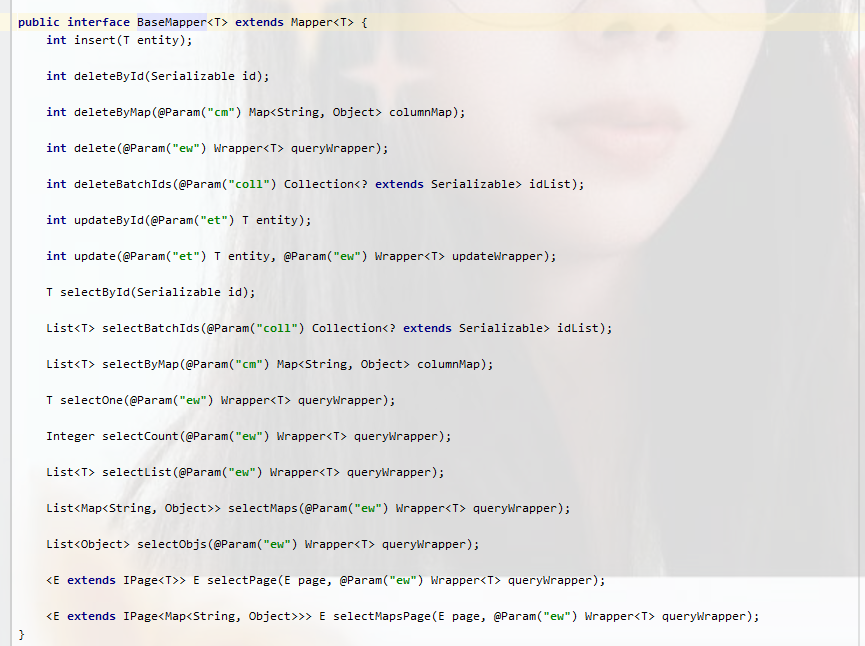
dao层的变为,不用写任何方法,点ctrl+鼠标点击进去BaseMapper中可以看到提供了很多方法。
@Data
@TableName("tb_user")//告诉是哪张表
public class Person {
private Integer id;
private String username;
private String password;
private String gender;
private String addr;

}
这需要在pojo对象中加上,告诉mp是哪张表。**@TableName("tb_user")**
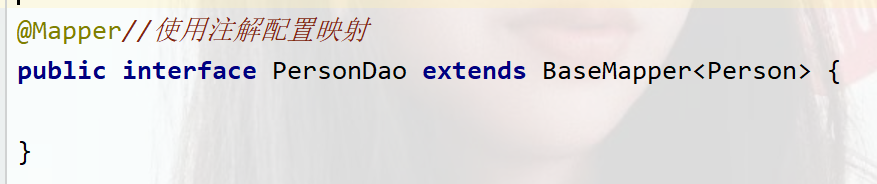
package com.dao;

import com.baomidou.mybatisplus.core.mapper.BaseMapper;
import com.pojo.Person;
import org.apache.ibatis.annotations.Mapper;

@Mapper//使用注解配置映射
public interface PersonDao extends BaseMapper<Person> {

}
测试类中
package com;
import com.dao.PersonDao;
import com.pojo.Person;
import org.junit.jupiter.api.Test;
import org.springframework.boot.test.context.SpringBootTest;
import org.springframework.stereotype.Repository;
import javax.annotation.Resource;
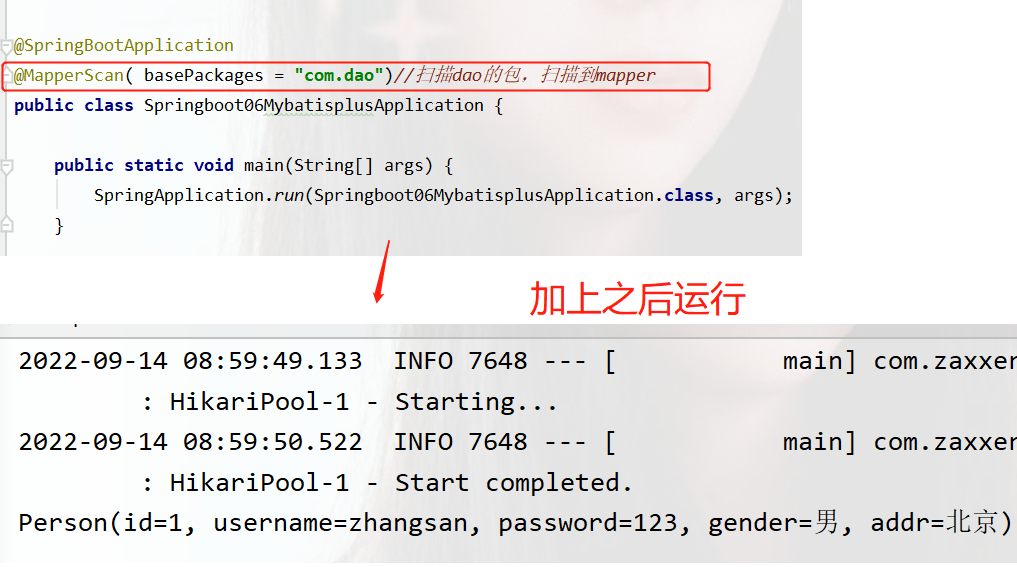
@SpringBootTest
@MapperScan("com.dao")//扫描dao的包,扫描到mapper
class Springboot06MybatisplusApplicationTests {
@Resource
private PersonDao personDao;
@Test
void contextLoads() {
System.out.println(personDao.selectById(1));
}
}
运行结果

Springboot整合mybatis-plus
①手动添加添加springboot整合mp的坐标,可以通过mvnrepository获取
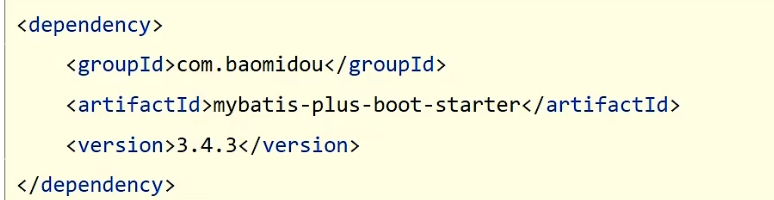
注:由于springboot没有收录mp的坐标版本,需要指定对应的version
②定义数据层接口与映射配置,继承BaseMapper
测试类中注入dao接口,使用即可。
注:需要使用的第三方技术无法创建时勾选时,就手工添加
出现No qualifying bean of type 'com.dao.PersonDao' available错误

这个本质就是springboot找不到dao,只需要在启动类中加入@MapperScan("com.dao")就可以正常访问了
MyBatisPlus常用功能
1、 给Mp开启日志
在配置文件中写入
#打印日志
mybatis-plus:
  configuration:
    #标准输出
    log-impl: org.apache.ibatis.logging.stdout.StdOutImpl
运行一个查看所有的方法,控制台输出如下
2、 MP的分页功能
定义一个类做拦截器
package com.config;

import com.baomidou.mybatisplus.extension.plugins.MybatisPlusInterceptor;
import com.baomidou.mybatisplus.extension.plugins.inner.PaginationInnerInterceptor;
import org.springframework.context.annotation.Bean;
import org.springframework.context.annotation.Configuration;

//分页相关
@Configuration//是一个配置
public class MPConfig {
    @Bean//给spring管理
    public MybatisPlusInterceptor mybatisPlusInterceptor(){
//定义Mybatis拦截器
        MybatisPlusInterceptor interceptor=new MybatisPlusInterceptor();
//添加具体的拦截器
        interceptor.addInnerInterceptor(new PaginationInnerInterceptor());

        return  interceptor;

    }

}
测试类下
package com;
@SpringBootTest
class Springboot06MybatisplusApplicationTests {
@Autowired(required = true)
private PersonDao personDao;
// 分页相关
@Test
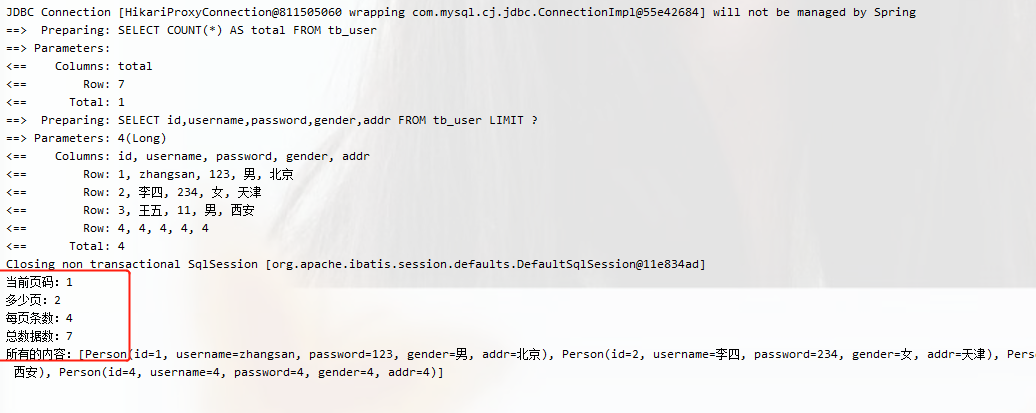
void GetPage(){
Page page = new Page(0, 4);
personDao.selectPage(page, null);
System.out.println("当前页码:"+page.getCurrent());
System.out.println("多少页:"+page.getPages());
System.out.println("每页条数:"+page.getSize());
System.out.println("总数据数:"+page.getTotal());
System.out.println("所有的内容:"+page.getRecords());
}
}
分页操作时在MyBatisPlus的常规操作基础上增强得到的,内部是动态的拼写sql语句,因此需要增强对应的功能,使用MyBatisPlus拦截器实现
3、 MP条件查询功能
package com;
import javax.annotation.Resource;
@SpringBootTest
class Springboot06MybatisplusApplicationTests {
@Autowired(required = true)
private PersonDao personDao;
@Test
//法1
public void testBy(){
String name="z";
LambdaQueryWrapper<Person> lqw=new LambdaQueryWrapper<>();
lqw.like(name!=null,Person::getUsername,name);
personDao.selectList(lqw);
}
@Test
//法2
public void testBy1(){
String name="z";
QueryWrapper<Person> qw=new QueryWrapper<>();
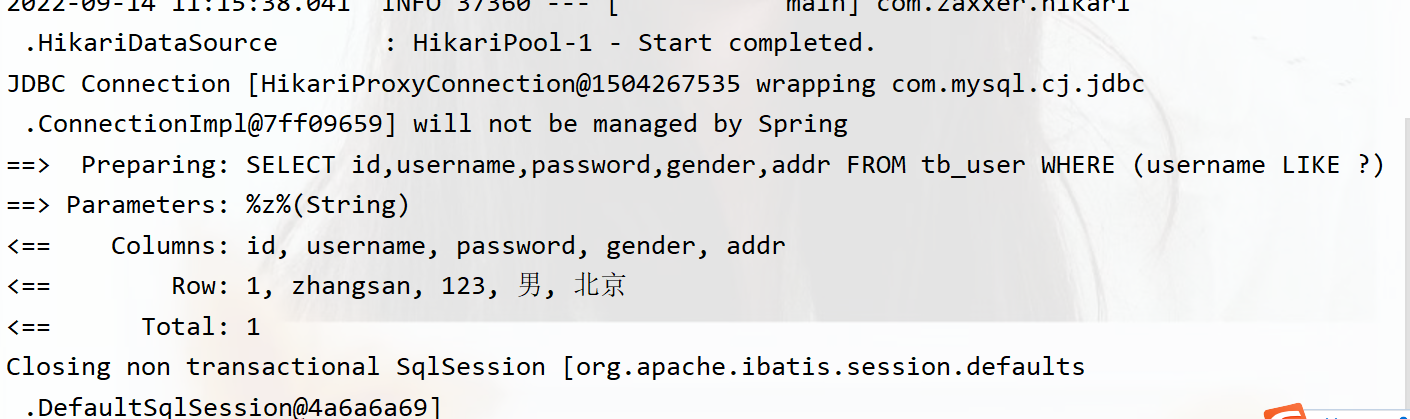
qw.like(name!=null, "username", "zhan");
personDao.selectList(qw);
}
}
法1比法2好,因为中间的字段不会写错,而法2没有提示,则容易出错。
运行结果:
Service又称为业务层,dao层又称为数据层
4、Mp的业务层快速开发
快速开发方案
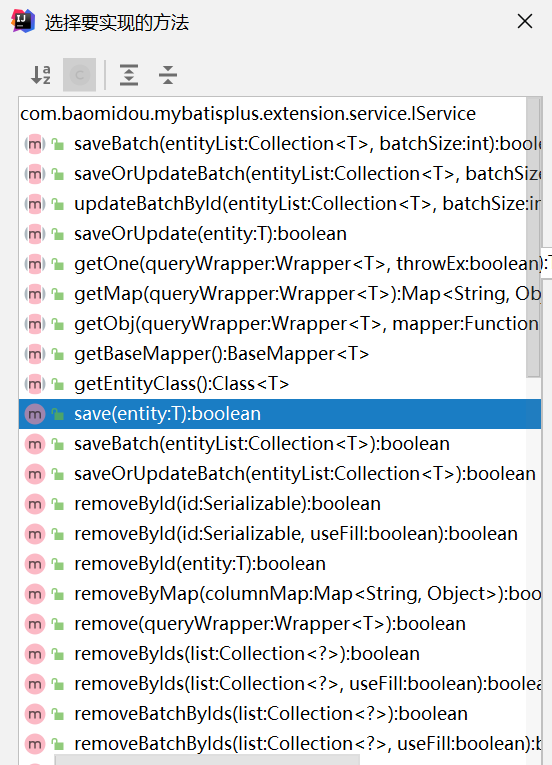
- 使用MyBatisPlus提供有业务层通用接口(IService<T>)与业务层通用实现类(ServiceImpl<M,T>)(M为dao层对应的接口,T为实体类)
- 在通用类基础上功能重载或功能追加
- 注意重载时不要覆盖原始操作,避免原始提供的功能丢失
接口下
package com.service;

import com.baomidou.mybatisplus.extension.service.IService;
import com.pojo.Person;

public interface PersonService extends IService<Person> {
}
实现类
package com.service.impl;

import com.baomidou.mybatisplus.extension.service.impl.ServiceImpl;
import com.dao.PersonDao;
import com.pojo.Person;
import com.service.PersonService;
import org.springframework.stereotype.Component;
import org.springframework.stereotype.Service;

@Service
public class PersonServiceImpl extends ServiceImpl<PersonDao, Person> implements PersonService {
}
测试下
@SpringBootTest
public class PersonServiceTest {
    @Autowired
    private PersonService personService;

@Test
    void  deleteByID(){
        personService.removeById(1);
    }

    @Test
    void  testAll(){
        personService.list();
    }

}
运行结果
接口下定义
实现类下定义:

小结:
1、使用通用接口(IService<T>)快速开发Service
2、使用通用实现类(ServiceImpl<M,T>)快速开发ServiceImpl
3、可以在通用接口基础上做功能重载或功能追加
4、注意重载时不要覆盖原方法,避免原始提供功能丢失
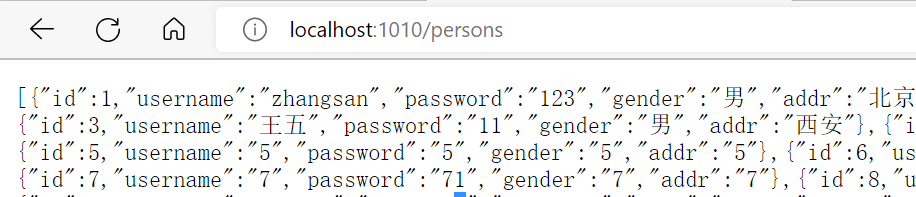
表现层controller标准开发
package com.controller;
import com.pojo.Person;
import com.service.PersonService;
import org.springframework.beans.factory.annotation.Autowired;
import org.springframework.web.bind.annotation.GetMapping;
import org.springframework.web.bind.annotation.RequestMapping;
import org.springframework.web.bind.annotation.RestController;
import java.util.List;
@RestController
@RequestMapping("/persons")
public class PersonController {
@Autowired
private PersonService personService;
@GetMapping
public List<Person> TestAll(){
return personService.list();
}
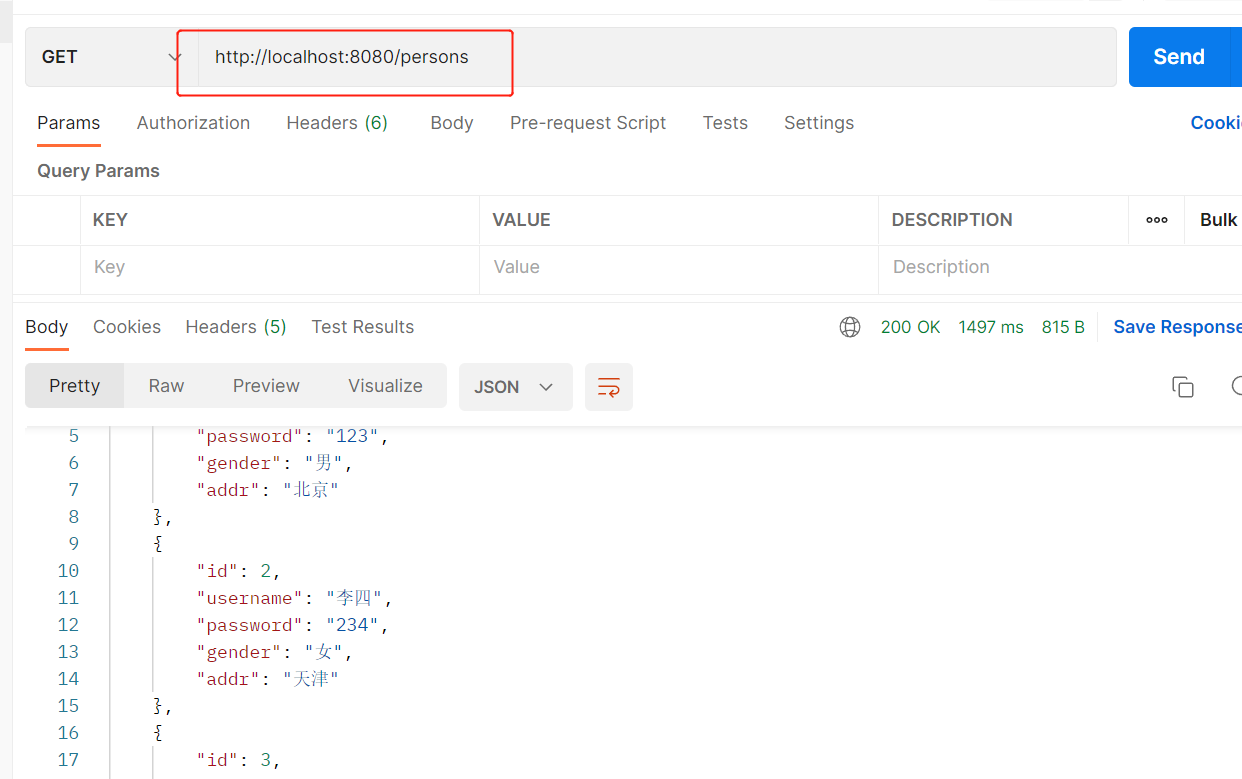
}
运行之后访问

springboot运维实用篇
程序的打包与运行
打包的作用是为了让其他人也可以使用,在自己的电脑也可以测试。
打包的过程,选择要打包的项目
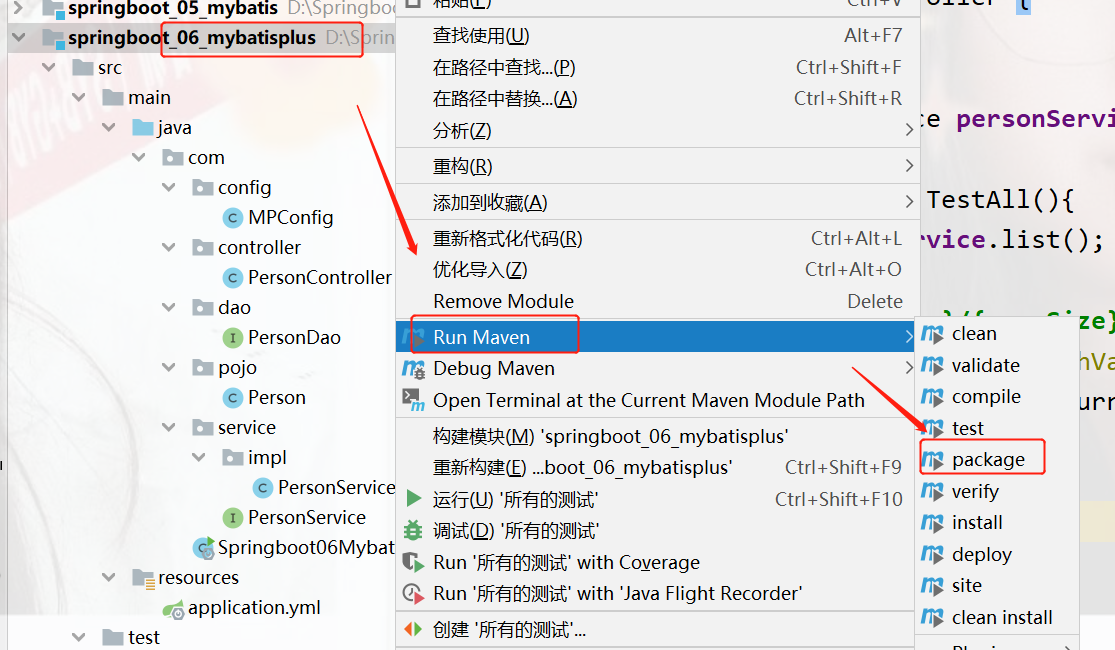
完成之后,就可得到一个jar包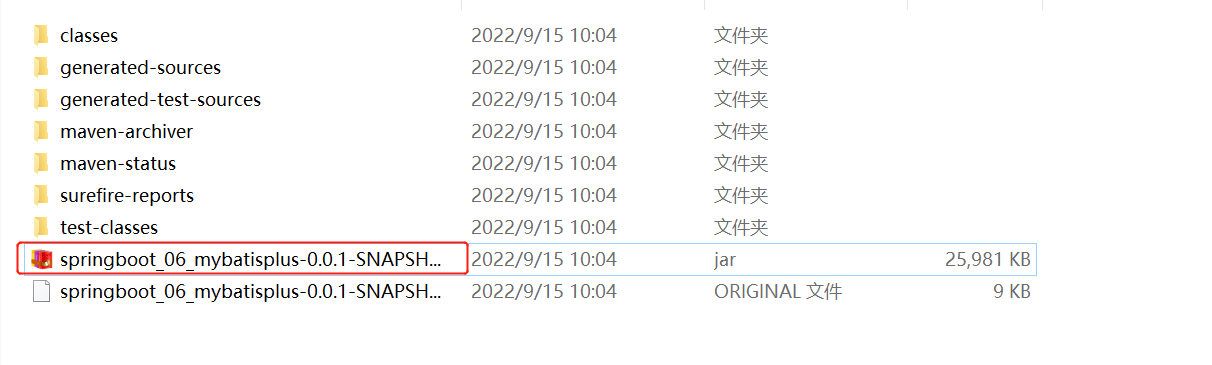
在这输入cmd可以快速打开命令行窗口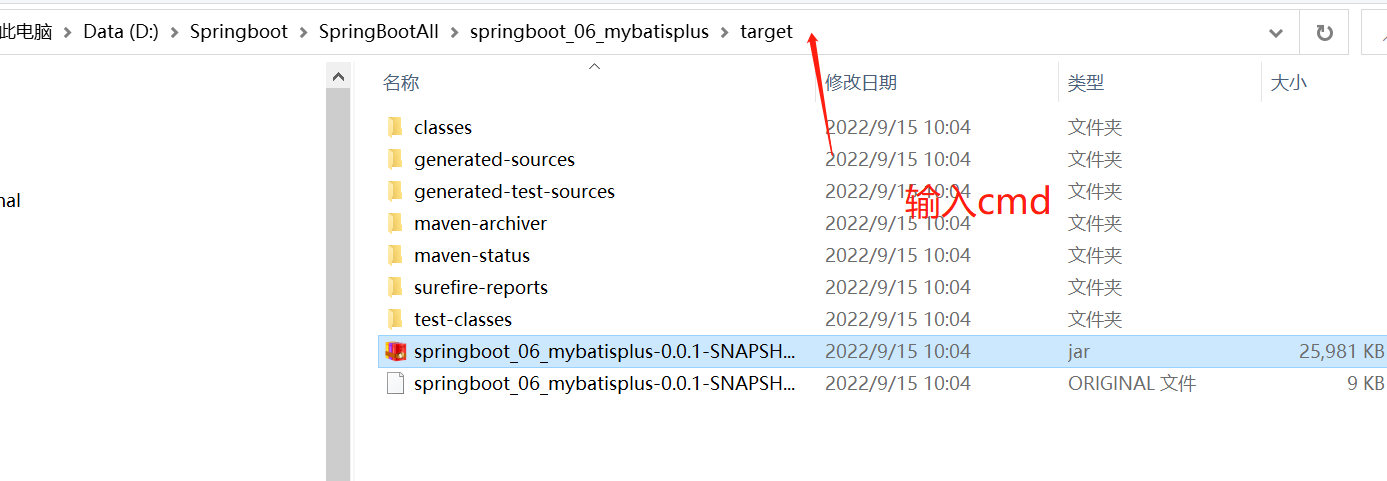
输入java -jar 打包的jar名 (输入首字符按tab即可)
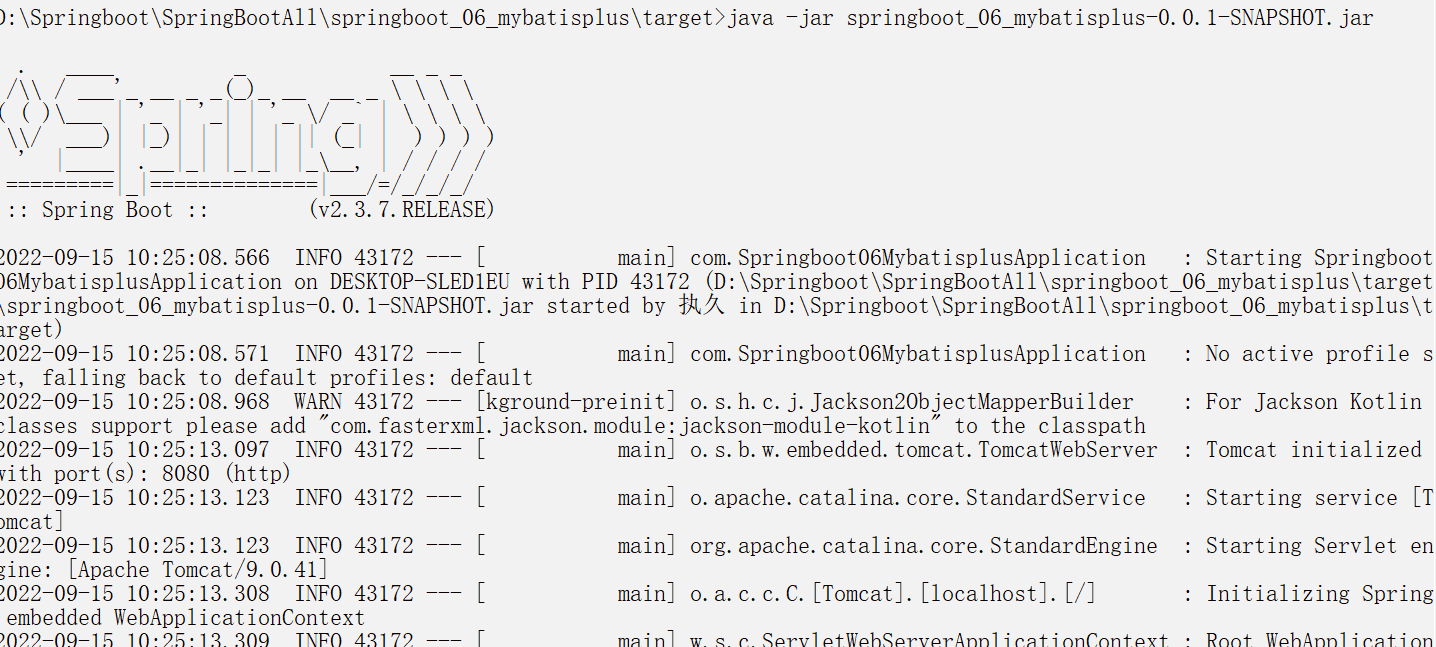
使用postman访问,就可以访问到啦,(也可以在浏览器访问)。
步骤:
①对springboot项目打包(执行maven构建指令package)
nvn package
②运行项目(执行启动指令)
java -jar springboot.jar
jar支持命令行启动,需要依赖maven插件支持,得确认打包时是否具有springboot对应的maven插件

SpringBoot工程可以基于java环境独立进行jar文件启动服务
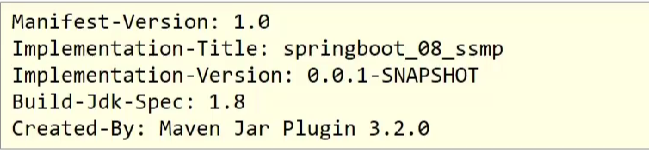
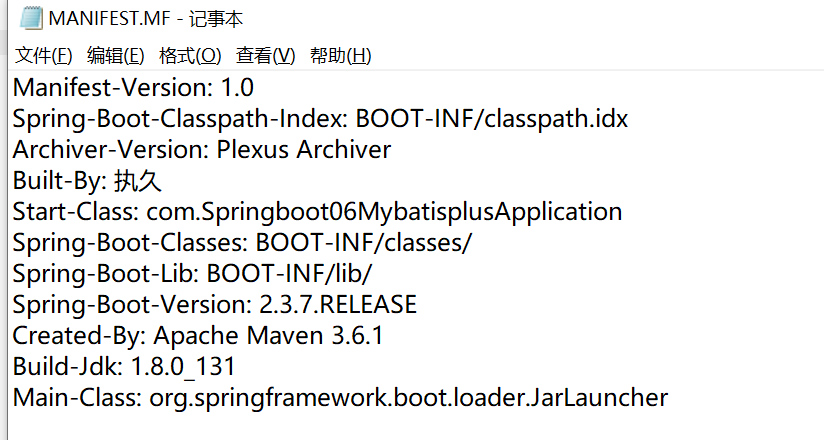
jar包描述文件(MANIFEST.MF)
普通工程(没有使用springboot打包)
是基于springboot-maven-plugin打包的工程
命令行启动常见问题以及解决方案
windows端口被占用

临时属性设置
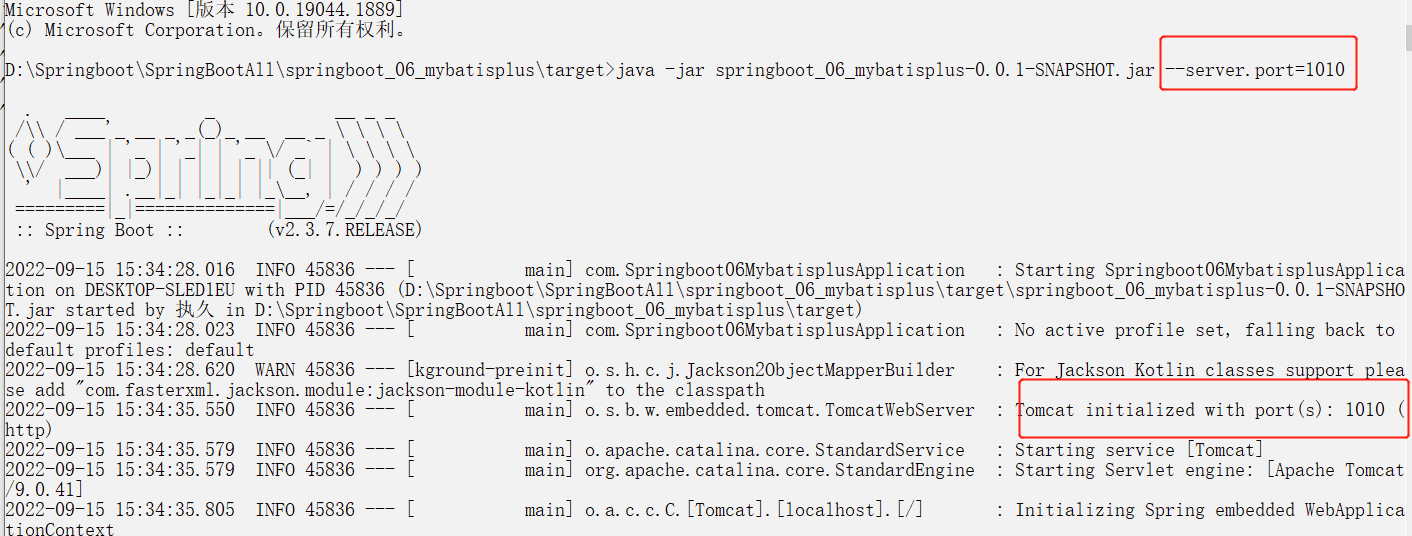
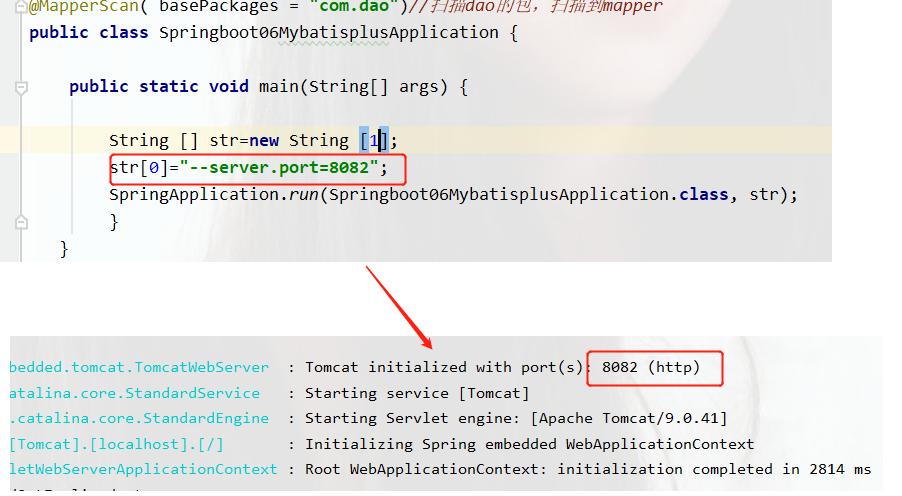
带属性数启动SpringBoot
java -jar springboot项目jar --server.port=80
携带多个属性启动SpringBoot,属性间使用空格分隔
访问得出
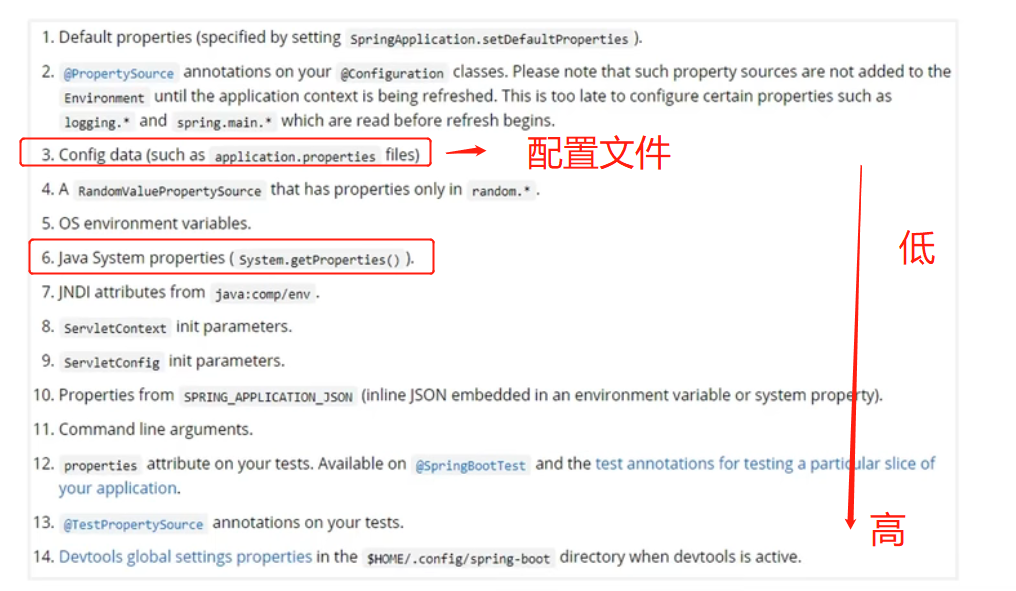
属性加载优先级

** 小结:**
1、使用jar命令启动SpringBoot工程可以使用临时舒心替换配置文件中的属性
2、临时属性的添加方式:java -jar 工程名.jar --属性名=值
3、多个临时属性之间使用空格分隔
4、临时属性必须是当前boot工程支持的属性,否则设置无效
临时属性(开发环境下)
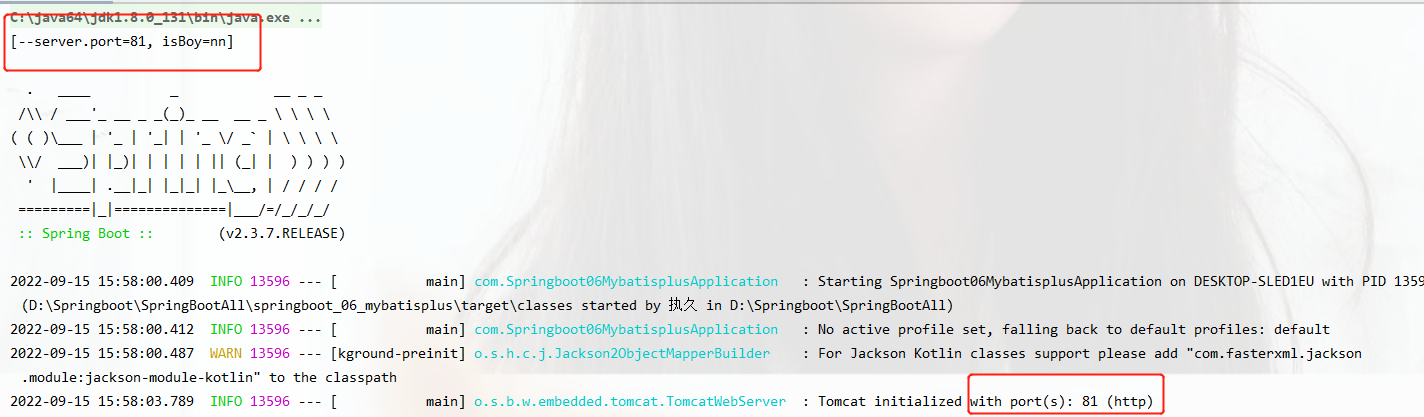
在idea中也可以在编辑中设置参数

这个参数最终会在我们的启动类args下
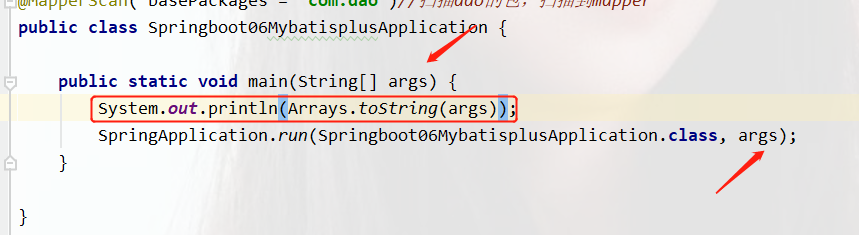
运行测得
既然是传入的参数,那也可以在程序中自定义参数
所以为了程序的安全,一般会关闭启动类的参数接收,这样可以阻止用户修改参数从而保证程序的安全性
SpringApplication.run(Springboot06MybatisplusApplication.class);
配置文件的四级分类
配置文件分类:
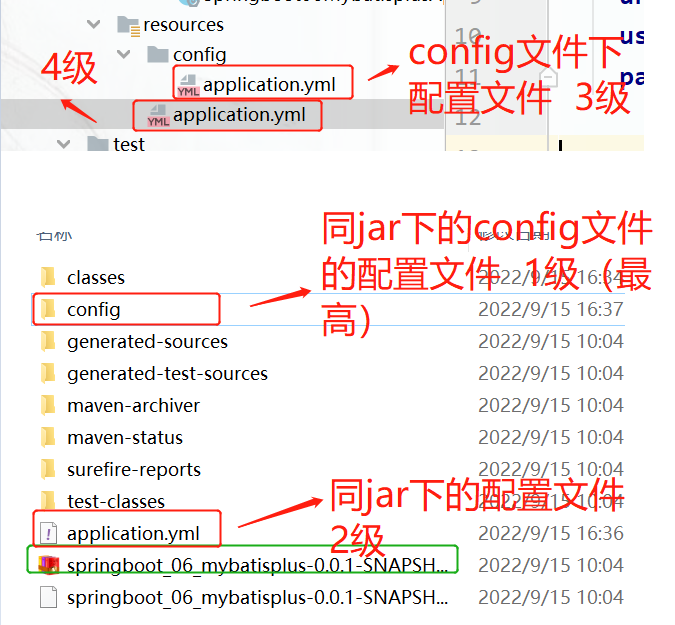
1、SpringBoot中的4级配置文件
1级:file:config/application.yml**[最高]**
2级:file:application.yml
3级:classpath:config/application.yml
4级:classpath:application.yml**[最低]**
2、作用:
1级与2级刘做系统打包后设置通用属性,1级常用于运维经理进行向上整体项目部署方案调控
3级与四级用于系统开发阶段设置通用属性,3级常用于项目经理进行整体项目属性调控
小结:
配置文件分为4种
项目类路径配置文件:服务于开发人员本机开发与测试
项目路径config目录中配置文件:服务于项目经理整体调控
工程路径配置文件:服务于运维人员配置涉密现实环境
工程路径config目录中配置文件:服务于运维经理整体调控
不同层级配置文件之间,相同部分为高层级的配置主导,不同配置都存在。
自定义配置文件
通过启动参数加载配置文件(不用书写配置文件扩展名)
启动类中得加上参数args
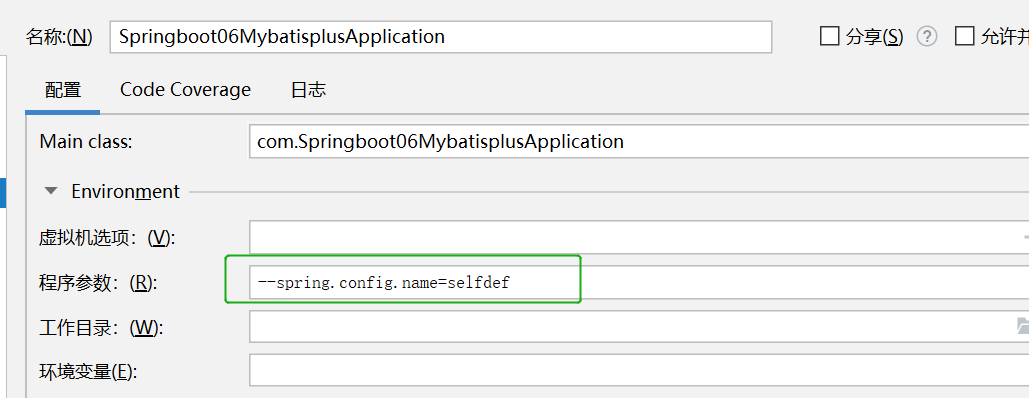
运行之后
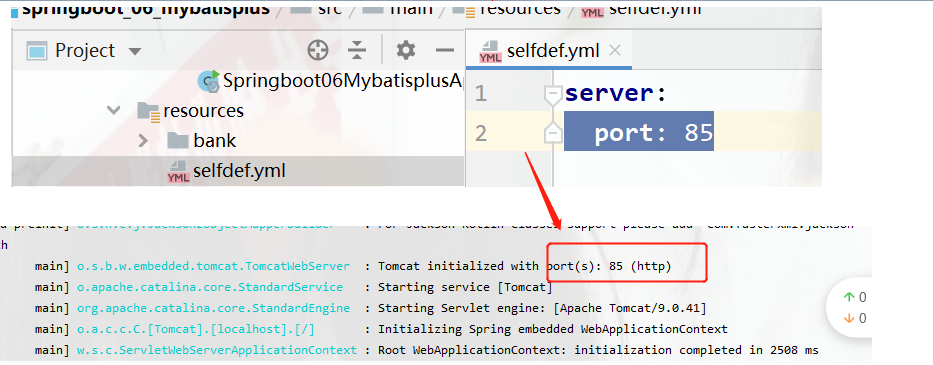
也可以使用路径:--spring.config.location=classpath:selfdel.yml
通过启动参数加载指定文件路径下的配置文件时可以加载多个配置。
自定义配置文件重要说明
单服务器项目:使用自定义配置文件需求较低
多服务器项目:使用自定义配置文件需求较高
基于SpringCloud技术,所有的服务器将不在设置配置文件,卫视通过中心进行设置,动态加载配置信息。
多环境开发(yaml版)
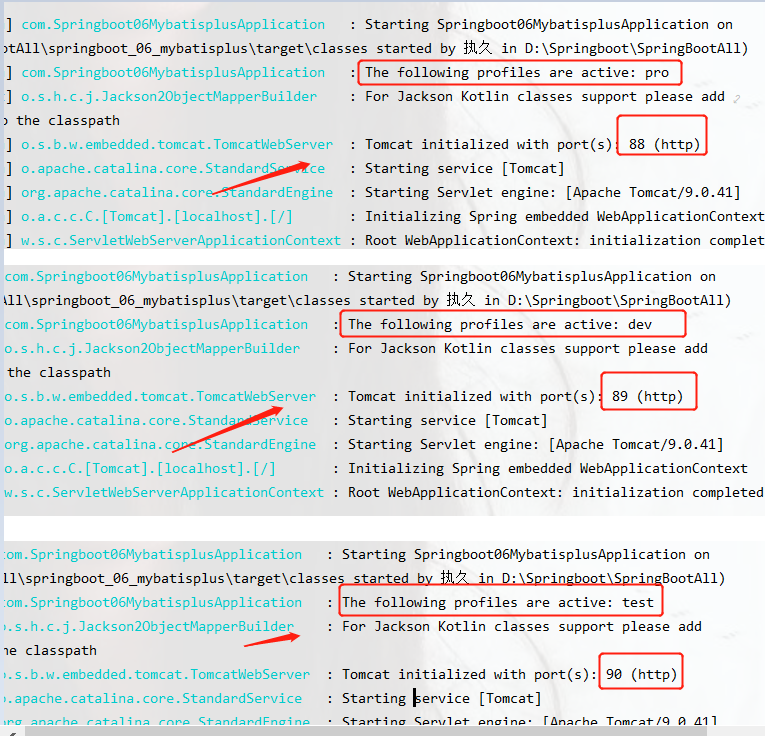
yml配置文件中
#启动指定环境
spring:
  profiles:
    active: dev

---
#设置生产环境
spring:
  profiles: pro

server:
  port: 88
---
#设置开发环境
spring:
  profiles: dev

server:
  port: 89
---
#设置测试环境
spring:
  profiles: test

server:
  port: 90
测试运行
小结
1、多环境开发需要设置多种常用环境,比如开发、生产、测试环境
2、yaml格式中设置多环境使用---区分环境设置边界
3、每种环境的区别再与加载的配置属性不同
4、启用某种环境是需要指定启动时使用该环境
多环境开发(yaml版)多配置文件格式
分成四个单独的yml配置文件
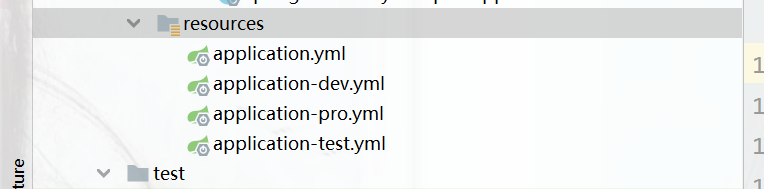
1、主启动配置文件application.yml
spring:
  profiles:
    active: dev
2、环境分类配置文件application**-pro**.yml
server:
  port: 80
3、环境分类配置文件application**-dev.**yml
server:
  port: 81
4、环境分类配置文件application**-test**.yml
server:
  port: 82
测试得

多环境开发配置文件说明:
主配置文件中设置公共配置(全局属性)
环境分类配置文件中常见于设置各自属性(局部)
独立的配置文件有利于维护更新。
多环境开发(properties版)多配置文件格式
和yml基本一致,只是把yml配置文件后缀改成properties然后按照语法格式即可
如:
server.port=9090
注:properties支持多文件的配置,不支持单一文件(即开发测试运行放在一个配置文件中的)
多环境开发独立配置文件书写技巧
多环境分组管理
根据功能对配置文件中的信息进行拆分,并制作成独立的配置文件,命名规则如下
application-devDB.yml
application-devRedis.yml
application-devMVC.yml
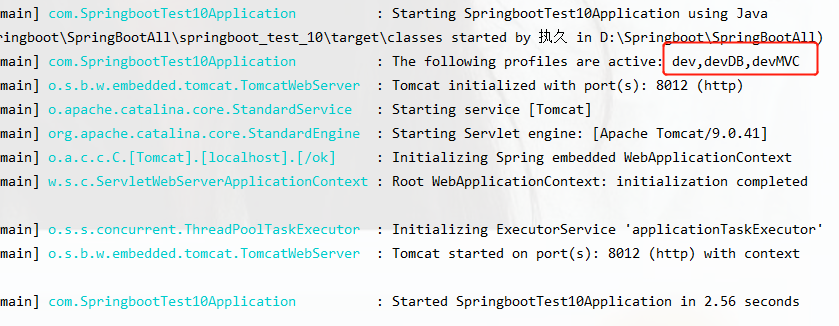
include属性
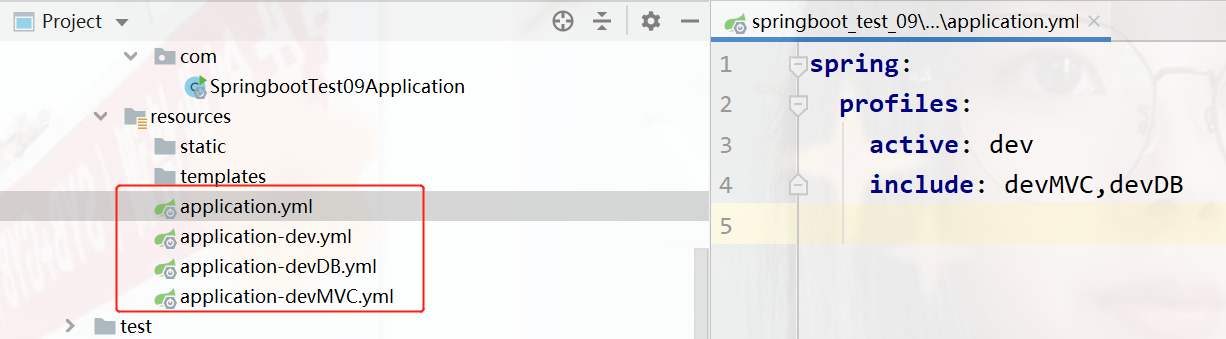
dev中
server:
  port: 8010
devDB
server:
  port: 8011
devMVC中
server:
  port: 8012
  servlet:
    context-path: /ok
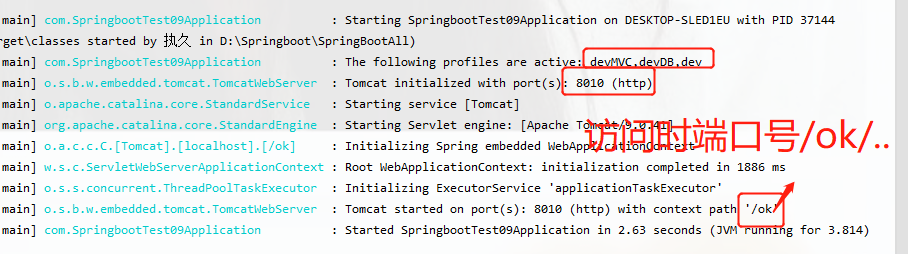
在include中, active是主配置,内容最后加载,后加载的相同属性会覆盖前面加载的,加载顺序也是从左到右。
group属性
在SpringBoot2.4之后支持group属性,开始使用group属性替代include属性,降低了配置书写量
使用group属性定义多种主环境与子环境的包含关系。
spring:
  profiles:
    active: dev
    group:
      "dev": devDB,devMVC
      "pro": proDB,proMVC
运行结果:
** 加载的顺序是主配置先加载其余配置按从左到右,所以有相同的部分看最右边的值**
maven中控制
 <profiles>
        <profile>
            <id>env_dev</id>
            <properties>
                <profile.active>dev</profile.active>
            </properties>
            <activation>
                <!--  <activeByDefault>true</activeByDefault>-->
            </activation>
        </profile>

        <profile>
            <id>env_pro</id>
            <properties>
                <profile.active>pro</profile.active>
            </properties>
            <activation>
<!--                默认开启-->
                <activeByDefault>true</activeByDefault>
            </activation>
        </profile>

    </profiles>
application.yml
spring:
  profiles:
    active: @profile.active@
    group:
      "dev": devDB,devMVC
      "pro": proDB
当maven与SpringBoot同时对多环境进行控制时,以Maven为主
SpringBoot使用@..@占位符读取Maven对应的配置属性值
基于SpringBoot读取Maven配置属性的前提下,如果在Idea测试工程师pom.xml每次更新需要手动compile方可以生效
日志
日记基础操作
编程期调试代码
运营期记录信息
记录日常运营重要信息(峰值流量,平均响应时长...)
记录应用报错信息(错误堆栈)
记录运维过程数据(扩容、报警..)
创建的springboot工程中
package com.comtroller;
import org.slf4j.Logger;
import org.slf4j.LoggerFactory;
import org.springframework.web.bind.annotation.GetMapping;
import org.springframework.web.bind.annotation.RequestMapping;
import org.springframework.web.bind.annotation.RestController;
@RestController
@RequestMapping("/logs")
public class LogController {
//创建记录日志的对象
private static final Logger log= LoggerFactory.getLogger(LogController.class);
@GetMapping
public String test(){
log.info("info..");
log.debug("debug..");
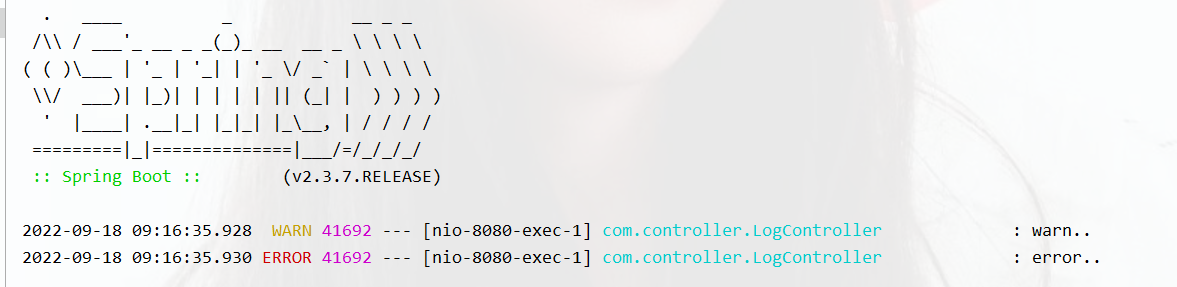
log.warn("warn..");
log.error("error..");
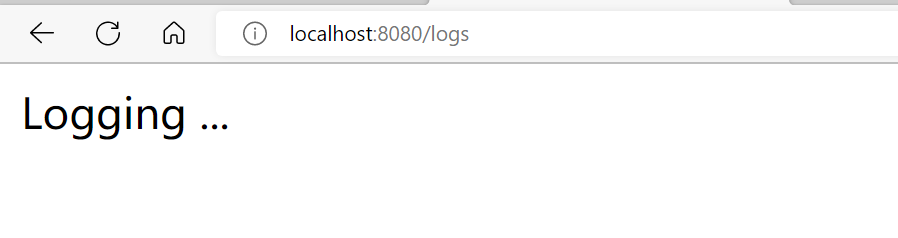
return "Logging ...";
}
运行结果
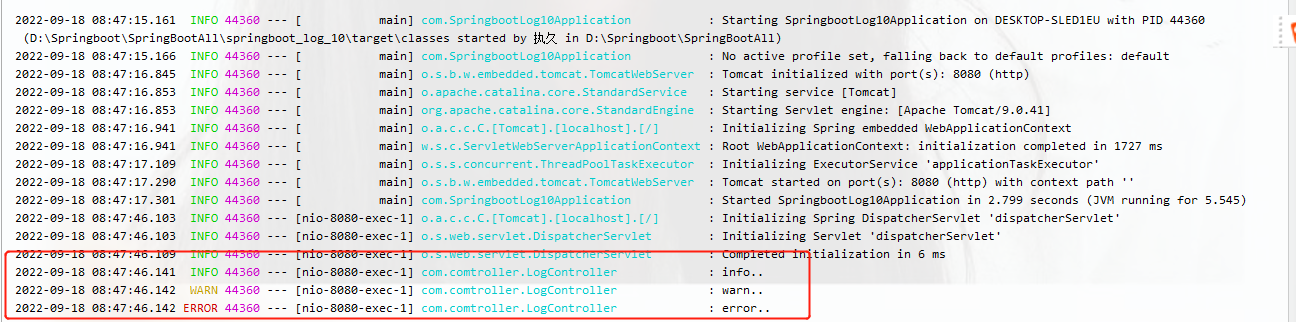
可以看出来debug级别的日志默认是关闭的
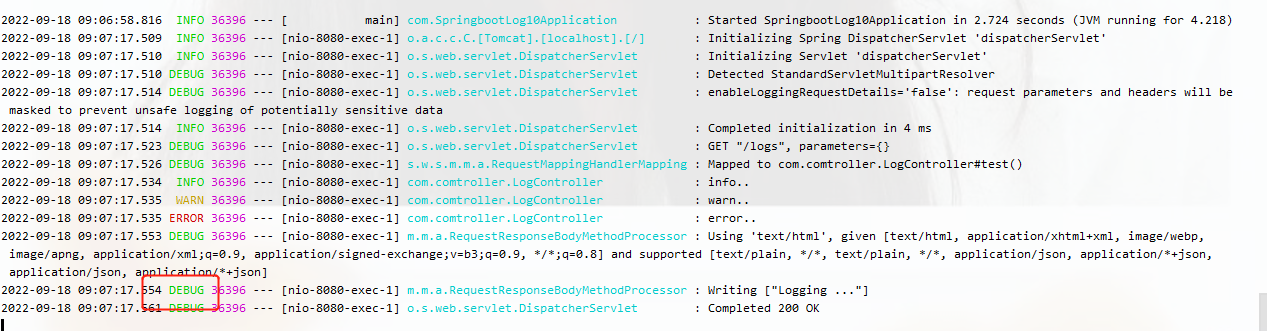
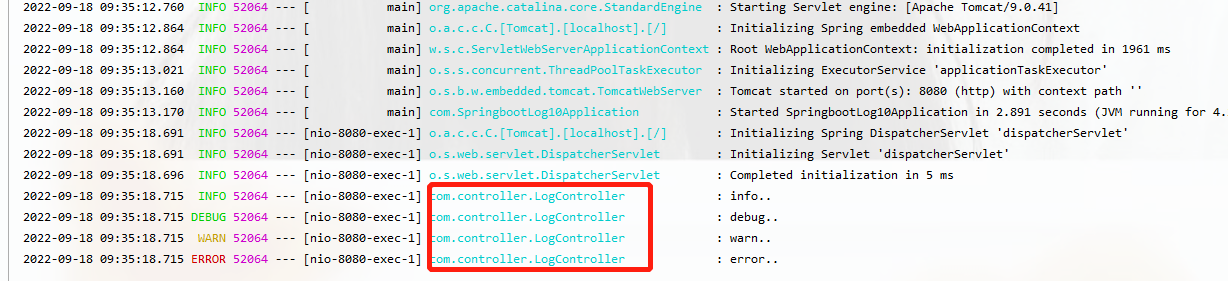
要开启debug只需要在配置文件中加入
//开启debug模式,输出调试信息,常用于检查系统运行状态
debug: true
一般这样设置
设置日志级别,root表示根节点,即整体应用日志级别
logging:
  level:
    root: debug
debug加载的信息量非常的多
logging:
  level:
    root: warn
改成warn级别,只要警告信息和报错信息
设置包的级别
logging:
  level:
#    其余的日志为info级别
    root: info
#    设置com包下的为debug
    com: debug
设置日志分组
设置日志组,控制指定包对应的日志输出级别,也可以直接控指定包对应的日志输出级别
logging:
  group:
#    自定义组名,设置当前组中所包含的包
    kc_g1: com
#    设置日志级别
  level:
    root: warn
    kc_g1: debug

可以使用继承的方式,将配置的抽取出来,放到一个类中,这就不用书写
将这个放到一个类中所用的类去继承
    //创建记录日志的对象
    private static  final Logger log= LoggerFactory.getLogger(LogController.class);
使用lombok中@Slf4j简化日志输出
pom.xml中引入lombok
<!--        lombok简化日志输出-->
        <dependency>
            <groupId>org.projectlombok</groupId>
            <artifactId>lombok</artifactId>
        </dependency>
import lombok.extern.slf4j.Slf4j;

import org.springframework.web.bind.annotation.GetMapping;
import org.springframework.web.bind.annotation.RequestMapping;
import org.springframework.web.bind.annotation.RestController;

//lombok简化日志
@Slf4j
@RestController
@RequestMapping("/logs")
public class LogController {
    @GetMapping
    public String test(){

       log.info("info..");
       log.debug("debug..");
       log.warn("warn..");
       log.error("error..");

        return "Logging ...";

    }

}
运行之后

日志输出格式控制

** PID:**进程id,用于表明当前操作所处的进程,当多服务同时记录日志时,这个值可以用来协助调试程序
所属类/接口:当前显示信息为SpringBoot重写后的信息,名称过长是,简化包名书写为首字母,甚至直接删除。
设置日志输出格式
logging:
  pattern:
    console: "%d %clr(%p) --- [%16t] %clr(%-40.40c){red} : %m %n"
%d:日期
%m:消息
%n:换行
%p: 进程号
%clr:设置颜色
%t:进程名
-40:左对齐40位

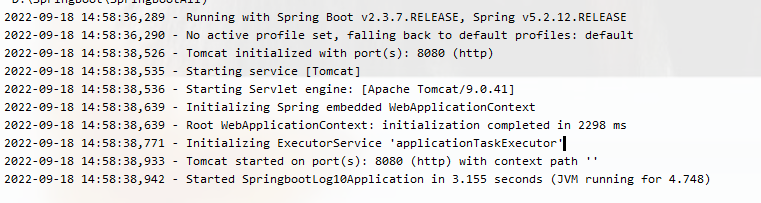
logging
  pattern:
    console: "%d - %m%n"
文件记录日志
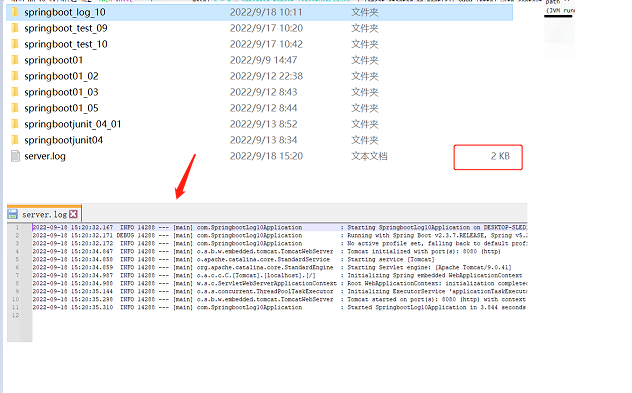
设置日志文件
logging:
  file:
    name: server.log
一启动服务器就会生成一个你指定名字的文件,但是服务器没关是没有内容的,还在缓冲区里
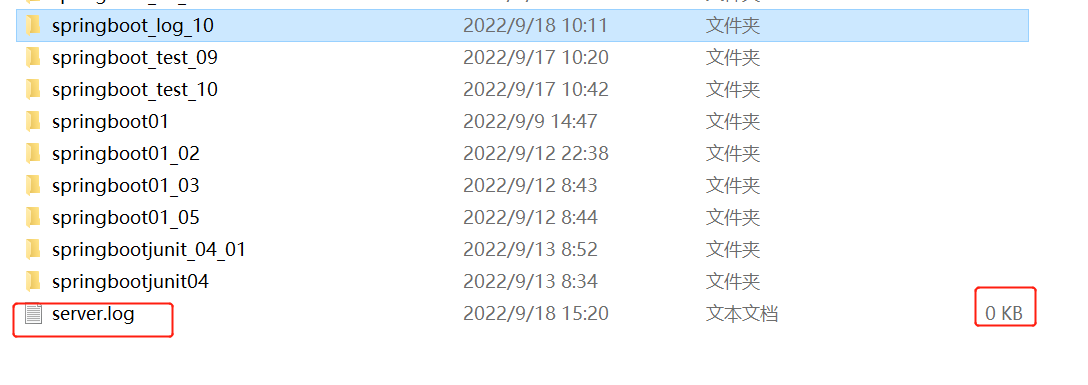
关闭服务器得到
日志文件详细配置
logging:
  file:
    name: server.log
  logback:
    rollingpolicy:
      max-file-size: 2KB
      file-name-pattern: server.%d{yyyy-MM-dd}.%i.log
自动生成对应的
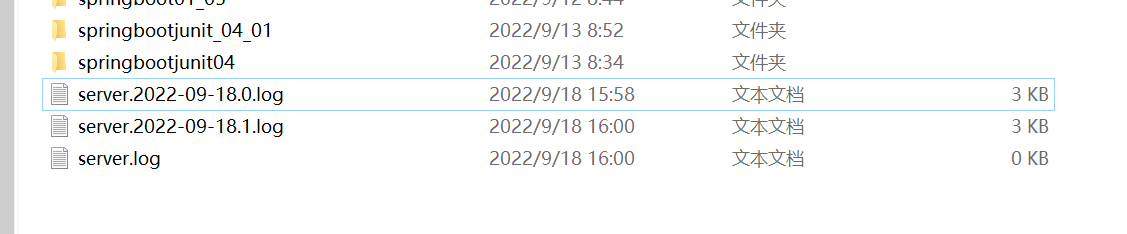
注:SpringBoot2.4之后才能使用,否则无效果
开发实用篇
热部署
手动设置热部署
导入maven坐标
   <!--热部署依赖-->
        <dependency>
            <groupId>org.springframework.boot</groupId>
            <artifactId>spring-boot-devtools</artifactId>
        </dependency>
每次修改点击构建项目
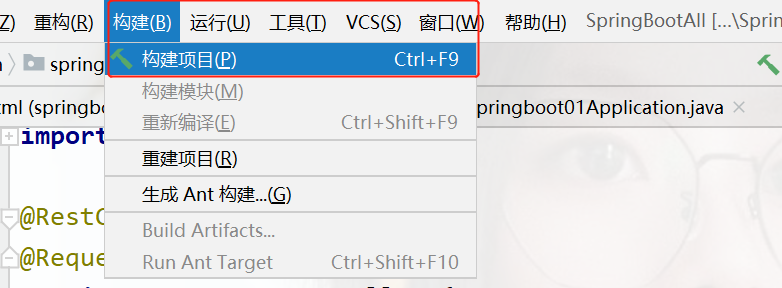
这个还是的手动点击(ctrl+F9),复杂度和直接点重新部署一致。
关于热部署
- 重启(Restart):自定义开发diam,包含类、页面、配置文件等,加载位置restart类加载器(热部署使用的)
- 重载(Reload):jar包,加载位置base类加载器
热部署仅仅加载开发者自定义的资源,不加载jar资源
自动启动热部署
1、导入热部署依赖
      <!--热部署依赖-->
        <dependency>
            <groupId>org.springframework.boot</groupId>
            <artifactId>spring-boot-devtools</artifactId>
        </dependency>
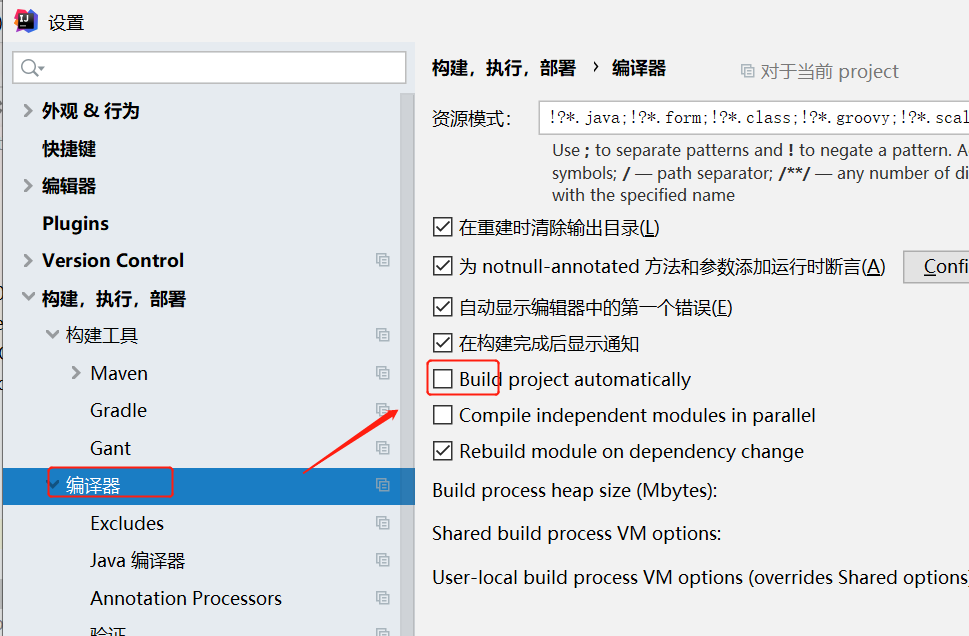
2、打开设置找到编译,找到下图选项勾选
3、 按住ctrl+shift+alt+/出现下图,点击注册找到下图勾选即可。

4、 之后,每当idea内容有变化且失去焦点3秒之后,会自动帮你构建项目。
热部署配置范围
默认不触发重启的目录列表
- /META-INF/maven
- /META-INF/resource
- /resource
- /static
- /public
- /templates
自定义不参与热部署。
spring:
  devtools:
    restart:
#      设置不参与热部署的文件或文件夹public/**表示public文件夹下的所有
      exclude: public/**,config/application.yml
禁用热部署
设置
spring:
  devtools:
    restart:
      enabled: false
#false表示关闭
这样就可以关闭热部署了,但是在配置文件中设置的容易别其他高层级的配置文件相互覆盖,所以我们
属性加载优先级
设置高优先级禁用热部署
//启动类
@SpringBootApplication
public class Springboot01Application {
public static void main(String[] args) {
System.setProperty("spring.devtools.restart.enabled","false" );
SpringApplication.run(Springboot01Application.class, args);
}
}
第三方bean绑定
自定义bean绑定
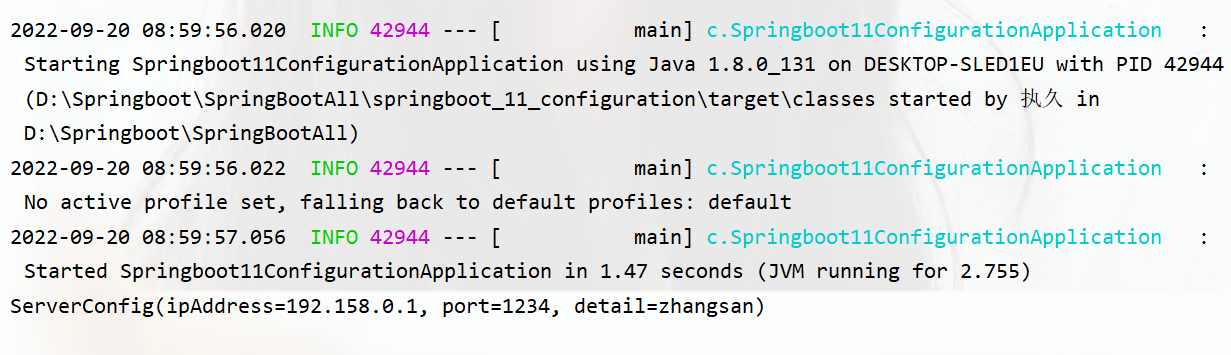
在配置文件中写入
servers:
 ipAddress: 192.158.0.1
 port: 1234
 detail: zhangsan
定义一个实体类对象去接受这些属性
import lombok.Data;
import org.springframework.boot.context.properties.ConfigurationProperties;
import org.springframework.stereotype.Component;

@Data  //lombok省去get/set/toString
@Component //交给spring容器管理
@ConfigurationProperties(prefix = "servers") //配置文件的位置,对应的属性注入
public class ServerConfig {
    private String ipAddress;
    private int port;
    private String detail;
}
启动类下的
import com.pojo.ServerConfig;
        import org.springframework.boot.SpringApplication;
        import org.springframework.boot.autoconfigure.SpringBootApplication;
        import org.springframework.context.ConfigurableApplicationContext;

@SpringBootApplication
public class Springboot11ConfigurationApplication {

    public static void main(String[] args) {
        ConfigurableApplicationContext run = SpringApplication.run(Springboot11ConfigurationApplication.class, args);
        ServerConfig bean = run.getBean(ServerConfig.class);
        System.out.println(bean);
    }

}
导入第三方bean
注入方式有许多,可以导入在写一个配置类, 然后加上@Bean即可,启动类中的@SpringBootApplication本身就是一个配置类。所以直接在这写也可以。
导入druid坐标
      <dependency>
            <groupId>com.alibaba</groupId>
            <artifactId>druid</artifactId>
            <version>1.2.12</version>
        </dependency>
启动类
@SpringBootApplication
public class Springboot11ConfigurationApplication {
@Bean//注入
public DruidDataSource druidDataSource(){
DruidDataSource ds=new DruidDataSource();
return ds;
}
public static void main(String[] args) {
ConfigurableApplicationContext run = SpringApplication.run(Springboot11ConfigurationApplication.class, args);
ServerConfig bean = run.getBean(ServerConfig.class);
System.out.println(bean);
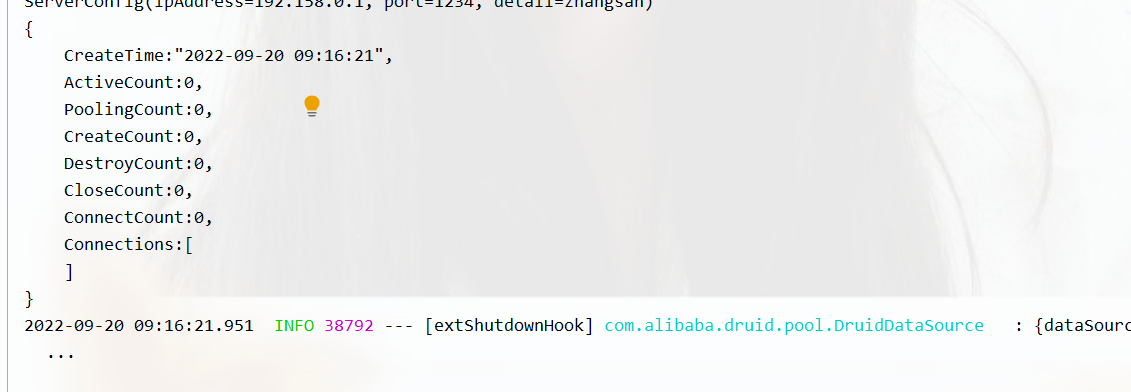
DruidDataSource dds = run.getBean(DruidDataSource.class);
System.out.println(dds);
}
}
运行出来什么也没
第三方bean通过配置文件注参数
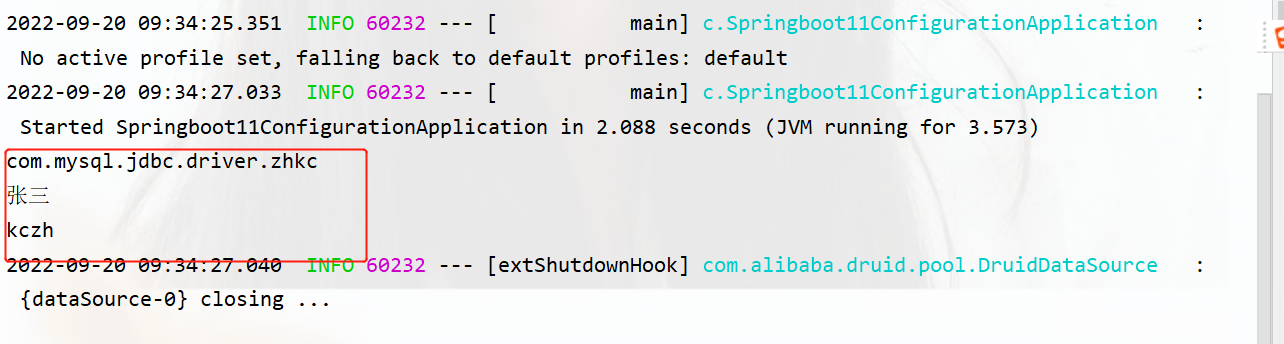
application.yml下
datasource:
 driverClassName: "com.mysql.jdbc.driver.zhkc"
 username: "张三"
 password: kczh
启动类下
package com;

import com.alibaba.druid.pool.DruidDataSource;
import com.pojo.ServerConfig;
        import org.springframework.boot.SpringApplication;
        import org.springframework.boot.autoconfigure.SpringBootApplication;
import org.springframework.boot.context.properties.ConfigurationProperties;
import org.springframework.context.ConfigurableApplicationContext;
import org.springframework.context.annotation.Bean;

@SpringBootApplication
public class Springboot11ConfigurationApplication {

    @Bean
    @ConfigurationProperties(prefix = "datasource")
    public DruidDataSource druidDataSource(){
        DruidDataSource ds=new DruidDataSource();
        return ds;
    }

    public static void main(String[] args) {
        ConfigurableApplicationContext run = SpringApplication.run(Springboot11ConfigurationApplication.class, args);
//        ServerConfig bean = run.getBean(ServerConfig.class);
//        System.out.println(bean);
        DruidDataSource dds = run.getBean(DruidDataSource.class);
        System.out.println(dds.getDriverClassName());
        System.out.println(dds.getUsername());
        System.out.println(dds.getPassword());
    }

}
运行结果
出现Prefix must be in canonical form
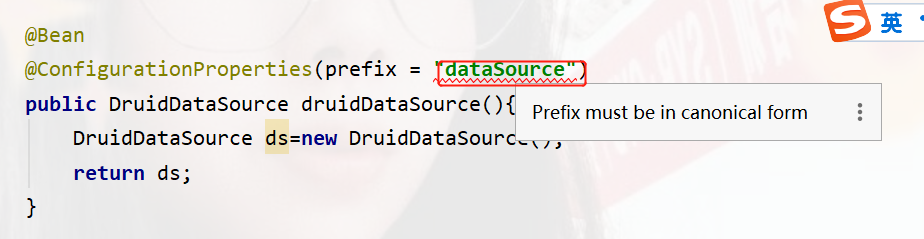
这是因为prefix属性只能用小写,不能使用驼峰命名法,改成小写即可

@EnableConfigurationProperties()和@ConfigurationProperties的区别
@EnableConfigurationProperties开启对应的属性功能,可以通过配置中的属性,让我们对应的类名来做属性注入 ,这样也可以看出有哪些类通过spring去管理
@ConfigurationProperties是做具体的属性绑定的,对应的配置文件。
当我们使用了@EnableConfigurationProperties,且又在类总使用了@Component,就会报错,如下
 这个错误是,找到两个bean,一个类对应着两个bean导致不唯一了。
原因是:@EnableConfigurationProperties(ServerConfig.class),默认会 交给spring容器去管理,而要想让spring去管理,首先得是一个bean对象,所就会把这个ServerConfig.class变成bean对象。我们在那个类中写了@Component,这个注解也是说这个是一个bean对象,这样就导致了同一个类中对应了两个bean对象,所以产生错误。这两个注解不能同时使用,一般使用@EnableConfigurationProperties更能体现出是哪个类受spring管且需要配置注入。
解除@ConfigurationProperties注解警告

原因:springboot配置的处理器并没有配置,现在不能识别这个注解
解决:那就给它加上
pom.xml加上:
     <dependency>
            <groupId>org.springframework.boot</groupId>
            <artifactId>spring-boot-configuration-processor</artifactId>
        </dependency>
这样警告就没有了。
@ConfigurationProperties可以为第三方的bean绑定属性。
@ConfigurationProperties的松散绑定
也叫宽松绑定,指的是在配置文件中的参数名任意大小写下划线或者中线,都会给你匹配出来。
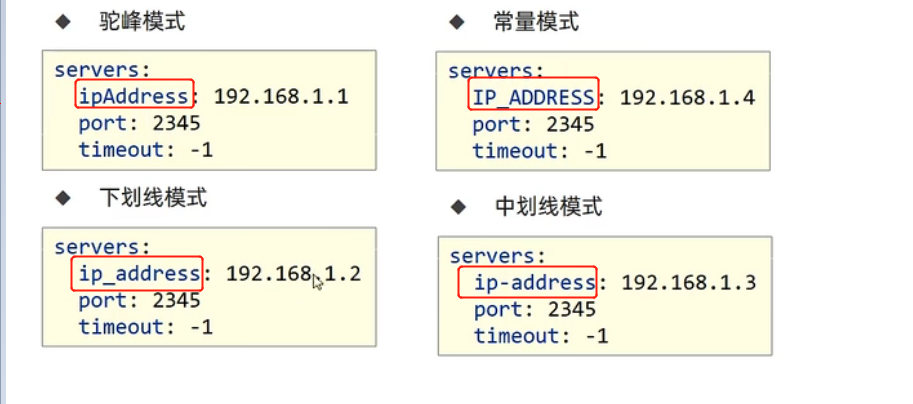
在实体类中也可以识别并正常运行。
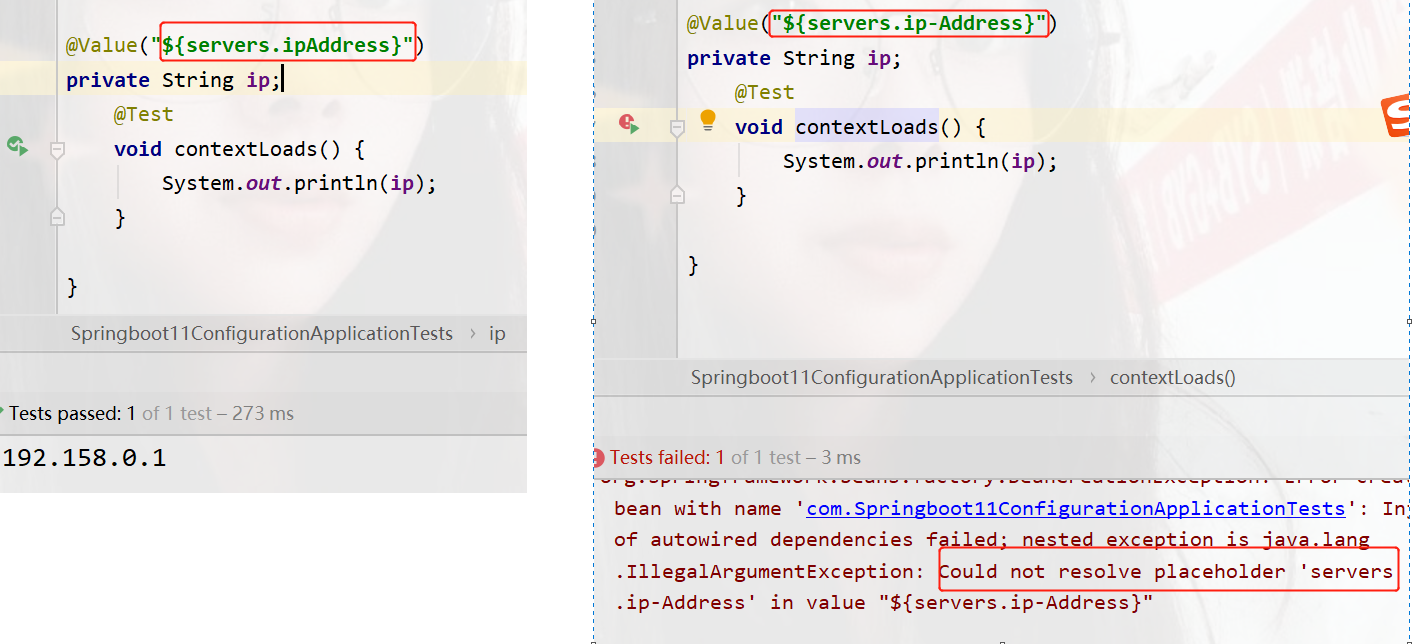
@Value不支持宽松绑定
@ConfigurationProperties绑定前缀命名规范(prefix):仅能使用纯小写字母、数字、下划线作为合法的字符(以后都使用小写更方便。)
小结:
@ConfigurationProperties绑定属性支持属性名宽松绑定
@Value注解不支持宽松绑定
绑定的前缀命名有规则
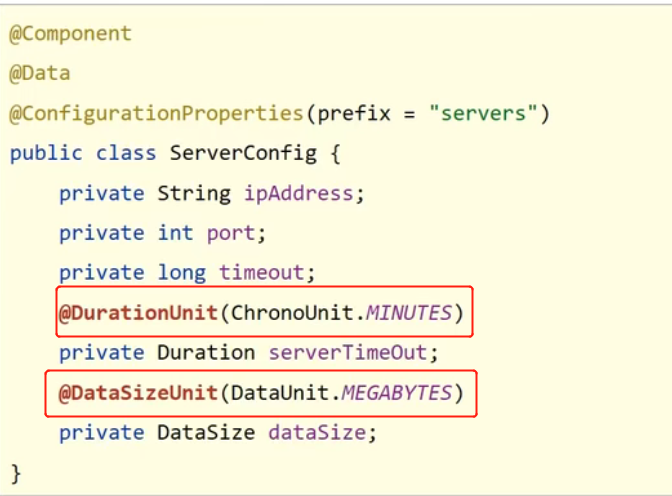
常用计量单位
SpringBoot支持JDK8提供的时间与空间计量单位
@Data  //lombok省去get/set/toString

@ConfigurationProperties(prefix = "servers") //配置文件的位置,对应的属性注入
public class ServerConfig {
    private String ipAddress;
    private int port;
    private String detail;
//时间
    private Duration serverTimeOut;
//存储空间
    private DataSize dataSize;

}
配置文件中 可以在之后直接加单位
servers:
 ipAddress: 192.158.0.1
 port: 1234
 detail: zhangsan
 serverTimeOut: 10s
 dataSize: 4MB
运行结果

或者不在配置文件加单位,在实体类中加注解
bean属性校验
开启Bean数据校验
①添加JSR303规范坐标与Hibernate校验框架对应坐标
<!--        提供规范的接口-->
        <dependency>
            <groupId>javax.validation</groupId>
            <artifactId>validation-api</artifactId>
        </dependency>

<!--        对上面接口的实现-->
        <dependency>
            <groupId>org.hibernate.validator</groupId>
            <artifactId>hibernate-validator</artifactId>
        </dependency>
②:@Validated开启校验功能
③:设置校验规则
@Data //lombok省去get/set/toString
//@Component //交给spring容器管理
@ConfigurationProperties(prefix = "servers") //配置文件的位置,对应的属性注入
//②开启校验
@Validated
public class ServerConfig {
private String ipAddress;
// ③设置校验规则
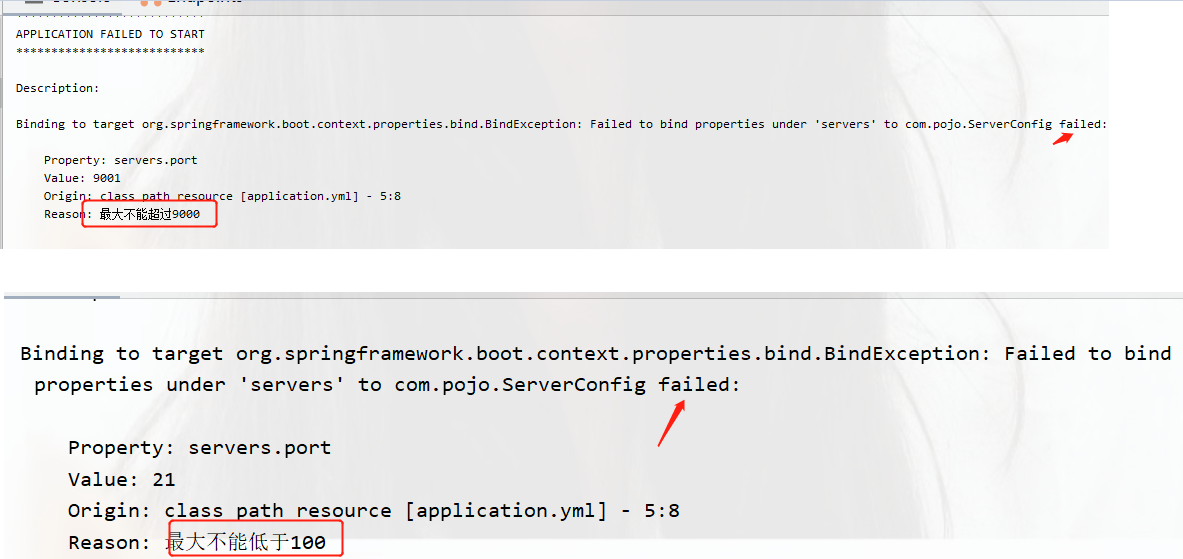
@Max(value=9000,message = "最大不能超过9000")
@Min(value=100,message = "最大不能低于100")
private int port;
private String detail;
private Duration serverTimeOut;
private DataSize dataSize;
}
运行之后,当设置的校验不在这个范围则会报错
** 小结:**
启用Bean属性校验
导入JSR303与Hibernate校验框架坐标
使用@Validated注解启用校验功能
使用具体校验规则规范数据校验格式
进制数据转换规则
配置文件中的数字存在进制转换
当以0开头,且后续为(0-7),会自动转为八进制
当以0x开头,且后续为(0-9,a-f)会自动转为十六进制
application.yml下
mysql:
 Password1: 01234
 Password2: 0x2345
 Password3: 0187
 Password4: "01234"
test类
package com;

import com.pojo.ServerConfig;
import org.junit.jupiter.api.Test;
import org.springframework.beans.factory.annotation.Value;
import org.springframework.boot.test.context.SpringBootTest;
import org.springframework.context.ApplicationContext;
import org.springframework.context.ConfigurableApplicationContext;
import org.springframework.context.support.ClassPathXmlApplicationContext;

@SpringBootTest
class Springboot11ConfigurationApplicationTests {

    @Value("${mysql.Password1}")
    private String password1;
    @Value("${mysql.Password2}")
    private String password2;
    @Value("${mysql.Password3}")
    private String password3;
    @Value("${mysql.Password4}")
    private String password4;
    @Test
    void contextLoads() {
        System.out.println(password1);
        System.out.println(password2);
        System.out.println(password3);
        System.out.println(password4);
    }

}
运行结果:
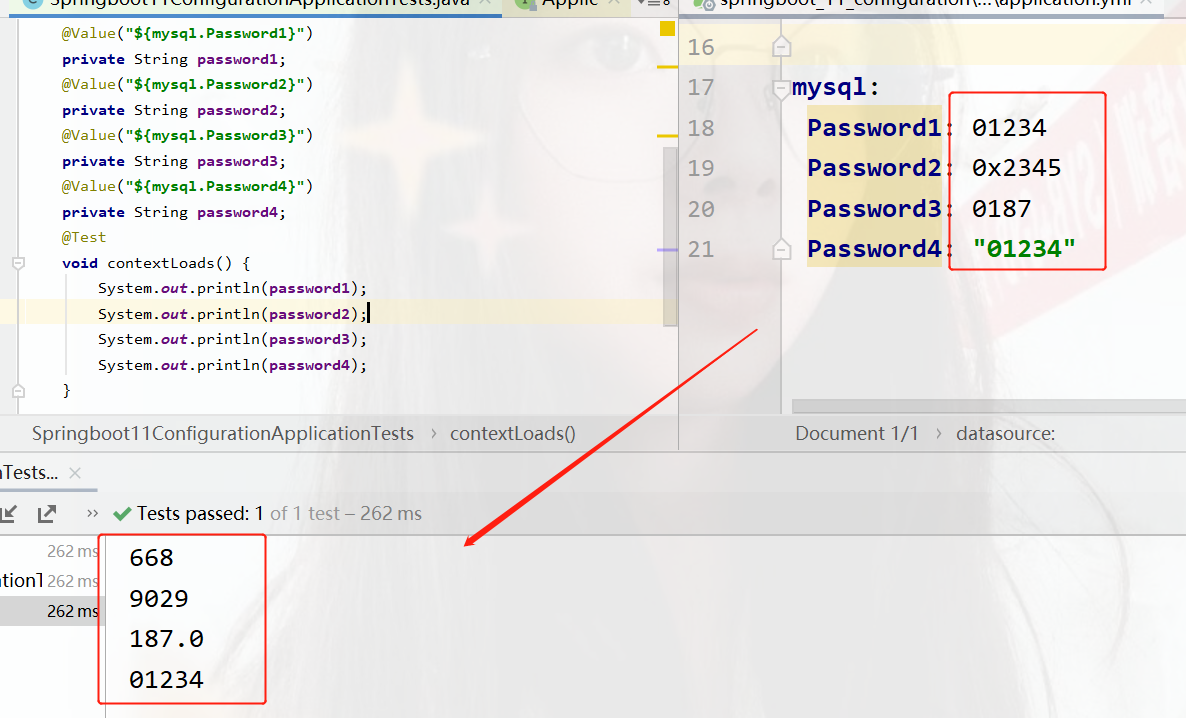
可以看出当加上双引号不会发生进制转换,所以在进行这类操作时,应当加上双引号。当十进制以0开头,会到之后
yaml字面值表达式方式

加载测试专用的属性
点开@SpringBootTest源码中查看

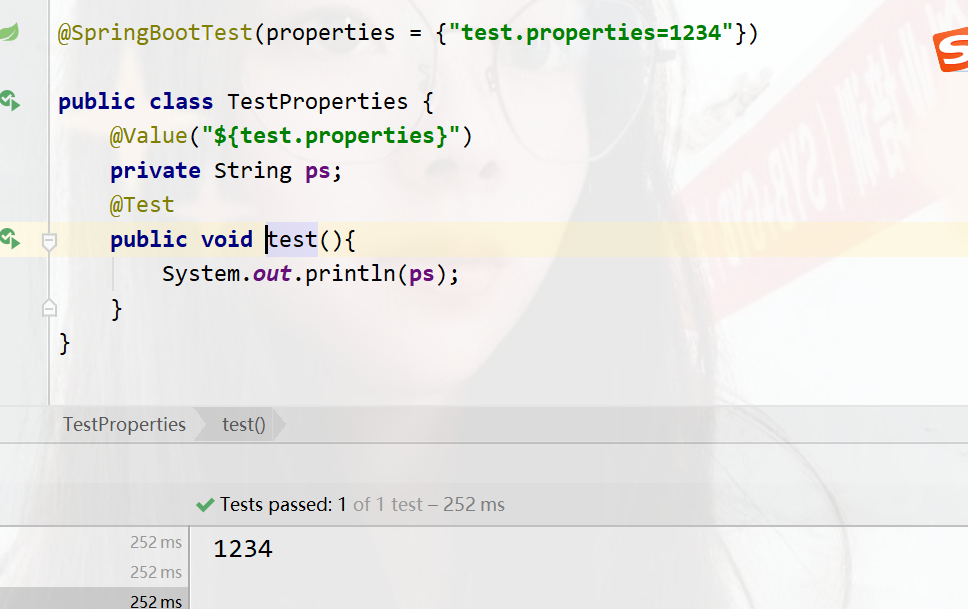
可以在之后加入临时配置, 也可以使用命令行args参数设置。 设置的测试专用参数会覆盖配置文件中的。
package com;

import org.junit.jupiter.api.Test;
import org.springframework.beans.factory.annotation.Value;
import org.springframework.boot.test.context.SpringBootTest;

@SpringBootTest(args = {properties = {"test.properties=1234"})

public class TestProperties {
    @Value("${test.properties}")
    private String ps;
    @Test
    public void test(){
        System.out.println(ps);
    }
}
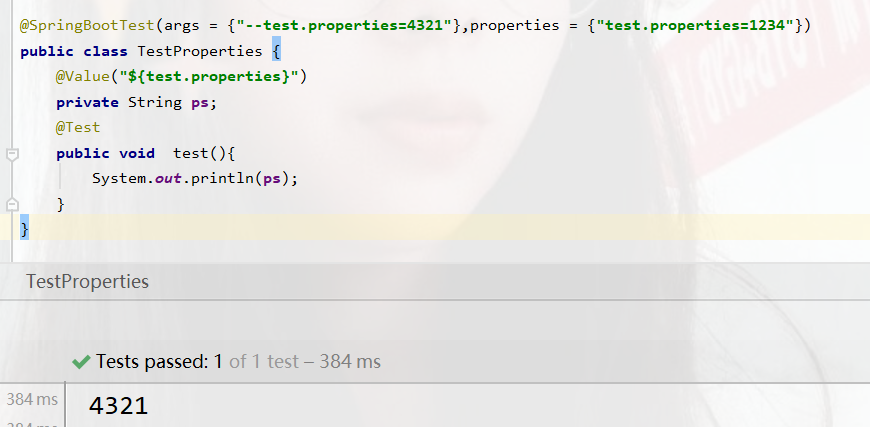
也可以使用命令行参数
args = {"--test.properties=4321"},
命令行参数的优先级比配置文件的高,所以当两者共存的时候,以命令行的为主
@SpringBootTest(args = {"--test.properties=4321"},properties = {"test.properties=1234"})
这个测试类设置的属性只对当前测试有效,影响小
使用外部bean对测试
package com.config;

import org.springframework.context.annotation.Bean;
import org.springframework.context.annotation.Configuration;

@Configuration//说明当前为配置类
public class TestBean {
    @Bean//创建bean
    public String mess(){
        return "this bean run ";
    }
}
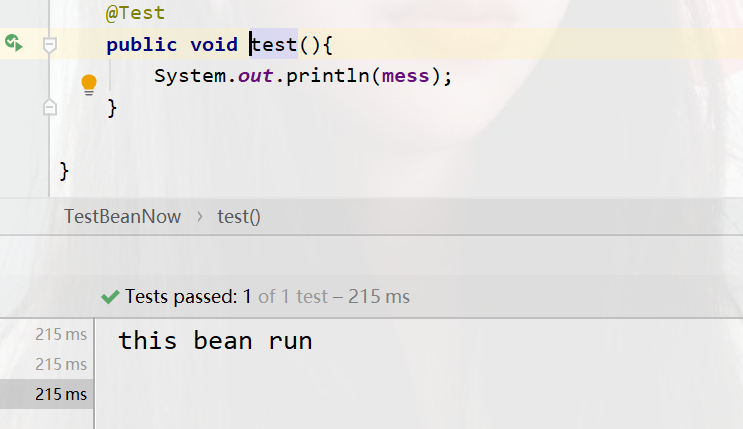
在测试类下,使用@Import注解加载当前测试配置
package com.test;

import com.config.TestBean;
import org.junit.jupiter.api.Test;
import org.springframework.beans.factory.annotation.Autowired;
import org.springframework.boot.test.context.SpringBootTest;
import org.springframework.context.annotation.Import;

@SpringBootTest
@Import({TestBean.class})
public class TestBeanNow {
    @Autowired//注入bean对象
    public String mess;

    @Test
    public void test(){
        System.out.println(mess);
    }

}
测速类启动web环境
在测试类中运行一般是不会启动服务器的,如下图。都是显示运行成功或失败的信息
我们Ctrl+b点进@SpringBootTest源码中查看,有一个关于web的
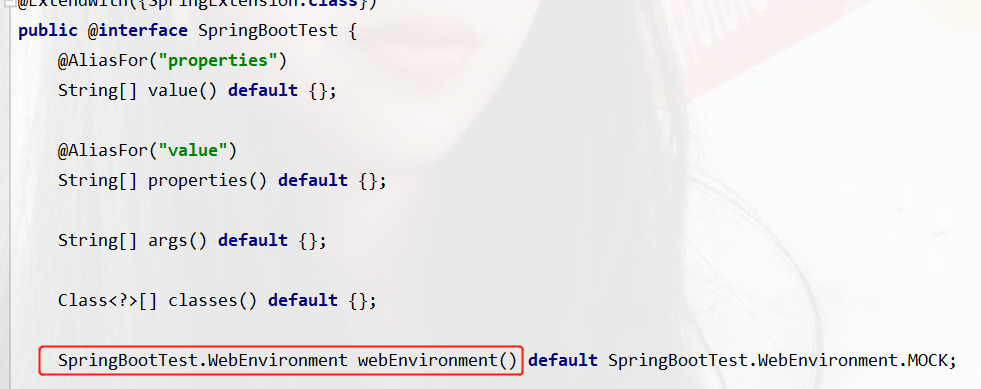
默认值是MOCK,mock:默认提供一个模拟的web环境,不会启动内嵌的服务器
我们在测试类中

第一个是以你配置文件指定的端口启动,如果没有就默认以8080启动
第二个mock:默认提供一个模拟的web环境,不会启动内嵌的服务器
第三个是不启动服务器
第四个是随机端口启动
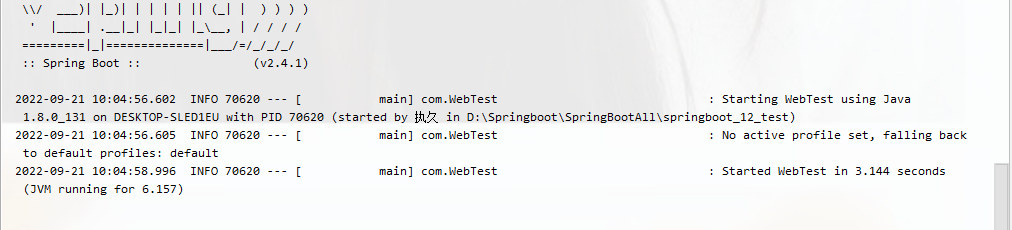
我们测试随机端口启动
package com;

import org.junit.jupiter.api.Test;
import org.springframework.boot.test.context.SpringBootTest;

@SpringBootTest(webEnvironment = SpringBootTest.WebEnvironment.RANDOM_PORT)
public class WebTest {
    @Test
    public void test(){

    }
}
运行了两次看端口结果,都是随机的

发送虚拟请求访问controller
我们在test类中虚拟访问controller,就得发送虚拟请求。
先创建一个controller
package com.controller;

import org.springframework.web.bind.annotation.GetMapping;
import org.springframework.web.bind.annotation.RequestMapping;
import org.springframework.web.bind.annotation.RestController;

@RestController
@RequestMapping("/tests")
public class TestController {
    @GetMapping
    public String test(){
        System.out.println("test is running");
        return "test is success";
    }
}
在test中 ,这个是一个get请求,所以我们调用get,如果是put,则调用put即可
package com;

import org.junit.jupiter.api.Test;
import org.springframework.beans.factory.annotation.Autowired;
import org.springframework.boot.test.autoconfigure.web.servlet.AutoConfigureMockMvc;
import org.springframework.boot.test.context.SpringBootTest;
import org.springframework.test.web.servlet.MockMvc;
import org.springframework.test.web.servlet.RequestBuilder;
import org.springframework.test.web.servlet.request.MockHttpServletRequestBuilder;
import org.springframework.test.web.servlet.request.MockMvcRequestBuilders;

@SpringBootTest(webEnvironment = SpringBootTest.WebEnvironment.RANDOM_PORT)
//开启虚拟MVC调用
@AutoConfigureMockMvc
public class WebTest {
    @Test
//    注入虚拟MVC调用对象
    public void test(@Autowired MockMvc mvc) throws Exception {
       //创建虚拟请求,当前访问/tests,MockMvcRequestBuilders是一个工具类
        MockHttpServletRequestBuilder builder= MockMvcRequestBuilders.get("/tests");
//执行请求
        mvc.perform(builder);

    }
}
访问需要用到的一个RequestBuilder,我们按ctrl+h显示出它的实现类
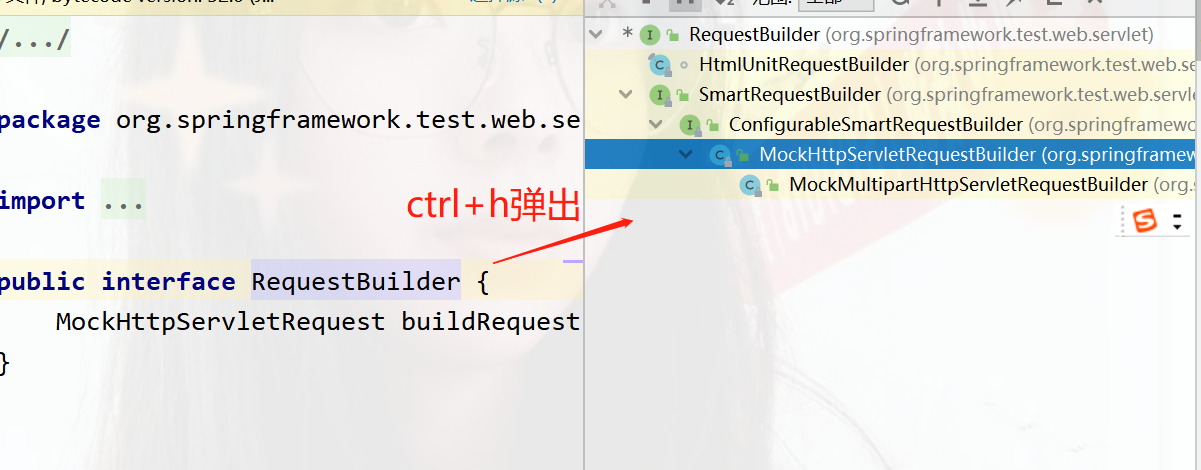
运行结果
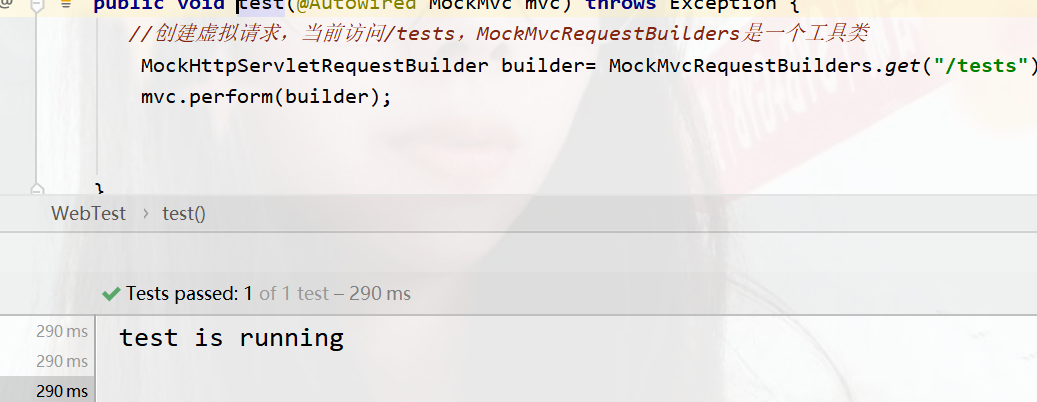
打印出了结果,说明访问成功
匹配响应执行状态
@SpringBootTest(webEnvironment = SpringBootTest.WebEnvironment.RANDOM_PORT)
//开启虚拟MVC调用
@AutoConfigureMockMvc
public class WebTest {
@Test
// 注入虚拟MVC调用对象
public void test(@Autowired MockMvc mvc) throws Exception {
//创建虚拟请求,当前访问/tests,MockMvcRequestBuilders是一个工具类
MockHttpServletRequestBuilder builder= MockMvcRequestBuilders.get("/tests");
// 执行请求
ResultActions action = mvc.perform(builder);
//设置预期值与真实值进行比较,成功则测试通过,失败则测试不通过
//定义本次调用的预期值
StatusResultMatchers status= MockMvcResultMatchers.status();
//预计本次调用成功的状态为200
ResultMatcher ok=status.isOk();
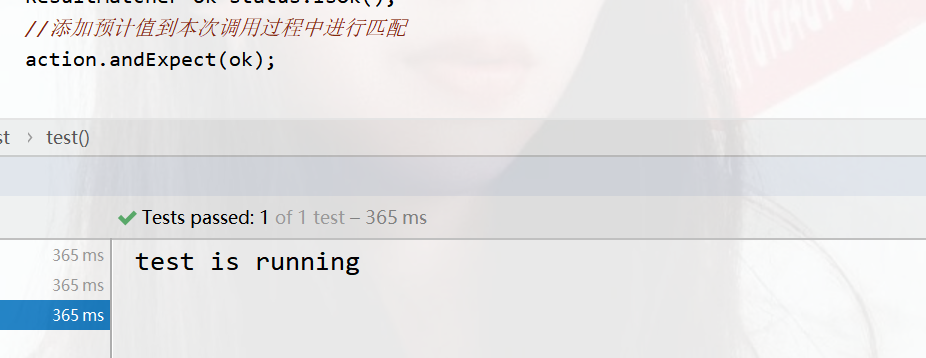
//添加预计值到本次调用过程中进行匹配
action.andExpect(ok);
}
}
运行成功不会有任何反应
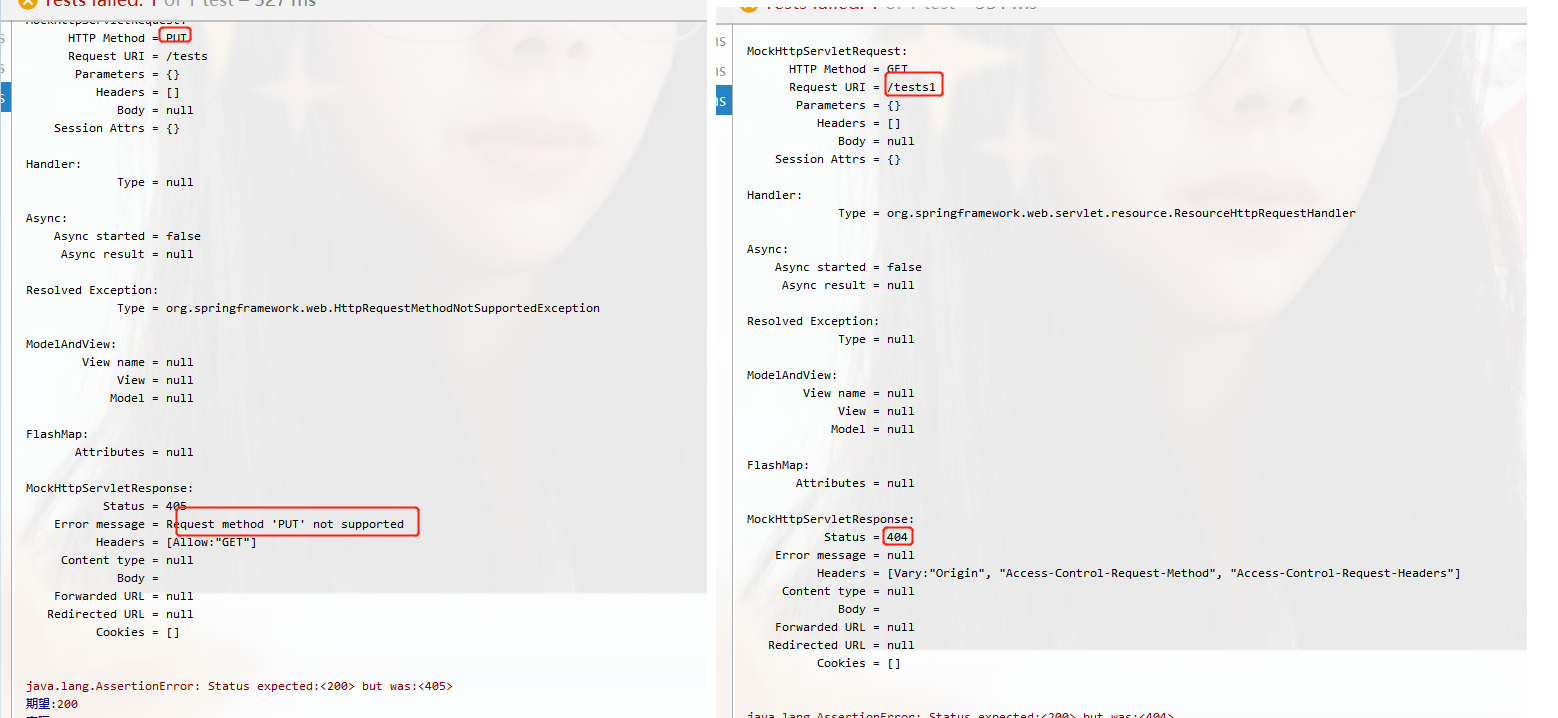
当将get改为put制造一个错误,或修改不存在的路径等其他错误,则就会报出错误信息。
匹配响应体
虚拟请求体匹配
@SpringBootTest(webEnvironment = SpringBootTest.WebEnvironment.RANDOM_PORT)
//开启虚拟MVC调用
@AutoConfigureMockMvc
public class WebTest {
@Test
// 注入虚拟MVC调用对象
public void testBody(@Autowired MockMvc mvc) throws Exception {
//创建虚拟请求,当前访问/tests,MockMvcRequestBuilders是一个工具类
MockHttpServletRequestBuilder builder= MockMvcRequestBuilders.get("/tests");
// 执行请求
ResultActions action = mvc.perform(builder);
//设置预期值与真实值进行比较,成功则测试通过,失败则测试不通过
//定义本次调用的预期值
ContentResultMatchers content = MockMvcResultMatchers.content();
//预计本次调用成功的状态为200
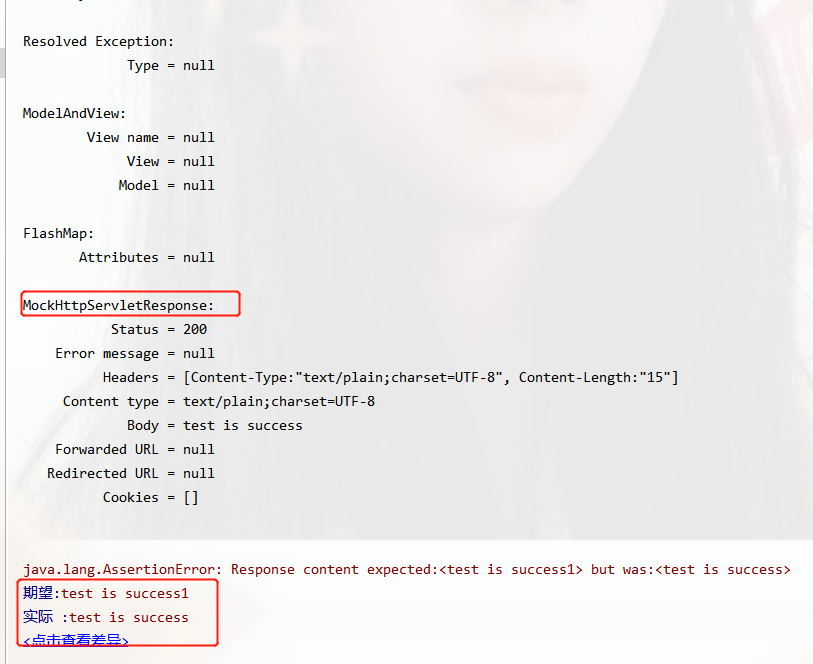
ResultMatcher result= content.string("test is success1");
//添加预计值到本次调用过程中进行匹配
action.andExpect(result);
}
}
如果一致则不会有任何错误信息出现, 若信息不一致,则会出现
匹配json格式响应体
先创建一个类pojo对象
package com.pojo;

import lombok.Data;

@Data
public class Person {
    private String  name;
    private String  age;
    private String  detail;
}
controller下
package com.controller;

import com.pojo.Person;
import org.springframework.web.bind.annotation.PutMapping;
import org.springframework.web.bind.annotation.RequestMapping;
import org.springframework.web.bind.annotation.RestController;
@RestController
@RequestMapping("/tests")
public class TestController {

    @RequestMapping("/person")
    public Person testPerson(){
        Person person = new Person();
        person.setName("zhangsan");
        person.setAge("14");
        person.setDetail("xijie");
        return person;
    }
}
启动访问得到一组json数据
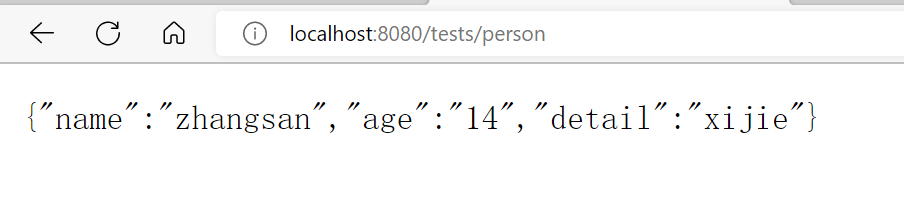
我们在测试类中修改一个,使他产生错误的信息
@SpringBootTest(webEnvironment = SpringBootTest.WebEnvironment.RANDOM_PORT)
//开启虚拟MVC调用
@AutoConfigureMockMvc
public class WebTest
@Test
// 注入虚拟MVC调用对象
public void testJson(@Autowired MockMvc mvc) throws Exception {
//创建虚拟请求,当前访问/tests,MockMvcRequestBuilders是一个工具类
MockHttpServletRequestBuilder builder= MockMvcRequestBuilders.get("/tests/person");
// 执行请求
ResultActions action = mvc.perform(builder);
ContentResultMatchers content = MockMvcResultMatchers.content();
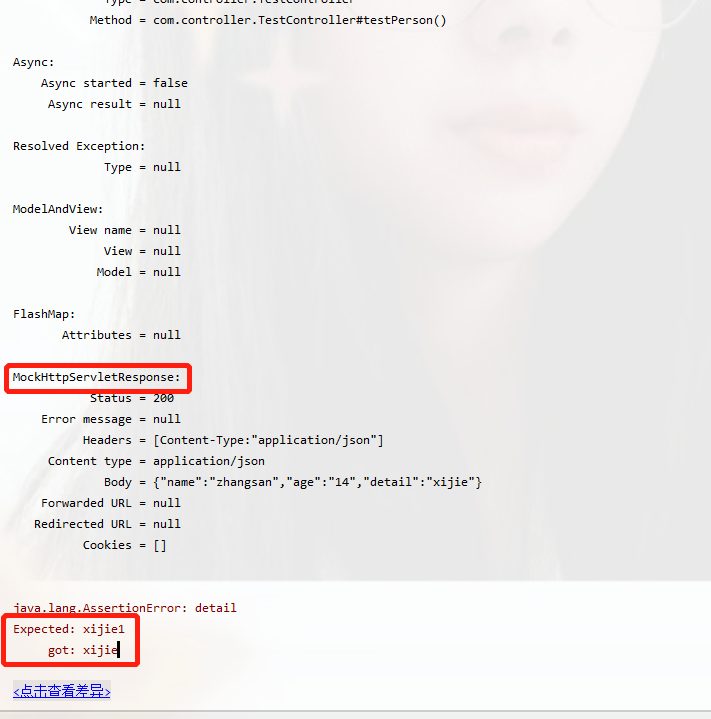
ResultMatcher result= content.json("{\"name\":\"zhangsan\",\"age\":\"14\",\"detail\":\"xijie1\"}");
//添加预计值到本次调用过程中进行匹配
action.andExpect(result);
}
}
运行结果
匹配响应头
@Test
// 注入虚拟MVC调用对象
public void testHeader(@Autowired MockMvc mvc) throws Exception {
MockHttpServletRequestBuilder builder= MockMvcRequestBuilders.get("/tests");
ResultActions action = mvc.perform(builder);
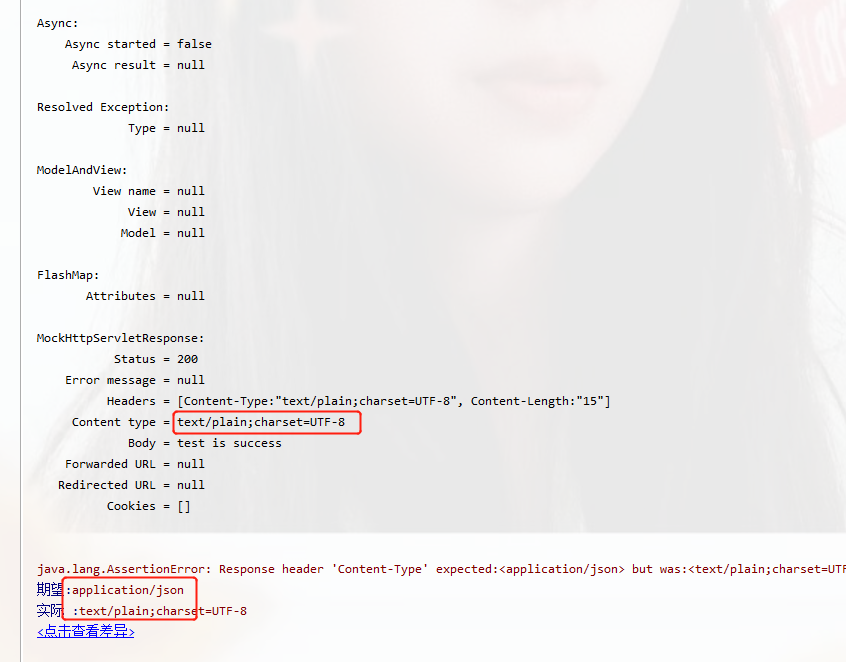
HeaderResultMatchers header = MockMvcResultMatchers.header();
ResultMatcher result = header.string("Content-Type", "application/json");
//添加预计值到本次调用过程中进行匹配
action.andExpect(result);
}
匹配了一个/tests,返回字符串的方法。,就可以看出它的差别了
@RestController
@RequestMapping("/tests")
public class TestController {
    @GetMapping
    public String test(){
        System.out.println("test is running");
        return "test is success";
    }
}
一般的做法都是将这些写在同一方法。
数据层测试事务回滚
pom.xml导入对应的一些坐标,mysql,Mp,等
<dependency>

            <groupId>com.baomidou</groupId>
            <artifactId>mybatis-plus-boot-starter</artifactId>
            <version>3.5.2</version>
        </dependency>
        <dependency>
            <groupId>org.projectlombok</groupId>
            <artifactId>lombok</artifactId>
            <optional>true</optional>
        </dependency>

        <dependency>
            <groupId>mysql</groupId>
            <artifactId>mysql-connector-java</artifactId>
            <scope>runtime</scope>
        </dependency>
dao下
import com.baomidou.mybatisplus.core.mapper.BaseMapper;
import com.pojo.Person;
import org.apache.ibatis.annotations.Mapper;
import org.mybatis.spring.annotation.MapperScan;
import org.springframework.stereotype.Component;
import org.springframework.stereotype.Repository;

@Mapper//使用注解配置映射

@Component//给spring管理,方便注入
public interface PersonDao extends BaseMapper<Person> {

}
pojo对象
package com.pojo;

import com.baomidou.mybatisplus.annotation.IdType;
import com.baomidou.mybatisplus.annotation.TableId;
import com.baomidou.mybatisplus.annotation.TableName;
import lombok.Data;

@Data

@TableName("tb_user")
public class Person {

private Long id;
private String username;
private String password;
private String gender;
private String addr;

}
service
package com.service;

        import com.baomidou.mybatisplus.core.metadata.IPage;
        import com.baomidou.mybatisplus.extension.service.IService;
        import com.pojo.Person;

public interface PersonService extends IService<Person> {


}
serviceImpl
@Service
public class PersonServiceImpl extends ServiceImpl<PersonDao, Person> implements PersonService {

}
PersonServiceTest类下
package com.serviceTest;

import com.pojo.Person;
import com.service.PersonService;
import org.junit.jupiter.api.Test;
import org.springframework.beans.factory.annotation.Autowired;
import org.springframework.boot.test.context.SpringBootTest;
import org.springframework.test.annotation.Rollback;
import org.springframework.transaction.annotation.Transactional;

@SpringBootTest
@Transactional
@Rollback(false)
public class PersonServiceTest {
    @Autowired
    private PersonService personService;
    @Test
    void testAdd(){
        Person person = new Person();
        person.setUsername("测试回滚2");
        person.setPassword("1");
        person.setGender("1");
        person.setAddr("1");
        System.out.println(personService.save(person));
    }
}
加上@Transactional运行
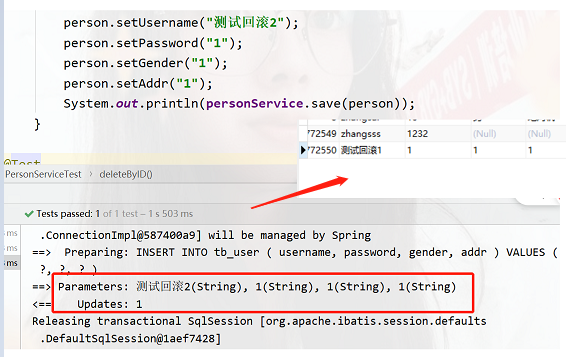
加上@Transactional和@Rollback(false)运行
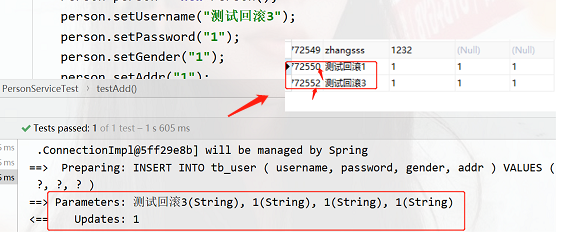
为了测试用例添加事务,加上@Transactional,SpringBoot会对测试用例对应的事务提交操作进行回滚,也就是springboot识别到这个是test,所以不会进行提交事务,但是会占用id。不会有数据显示。
如果想在测试用例中提交事务,可以通过@Rollback(false),不回滚,默认值是true,加上false就不会回滚,测试数据就能在数据库中显示出来。
测试用例数据设定
测试用例数据通常采用随机值进行测试,使用SpringBoot提供的随机数位器赋值
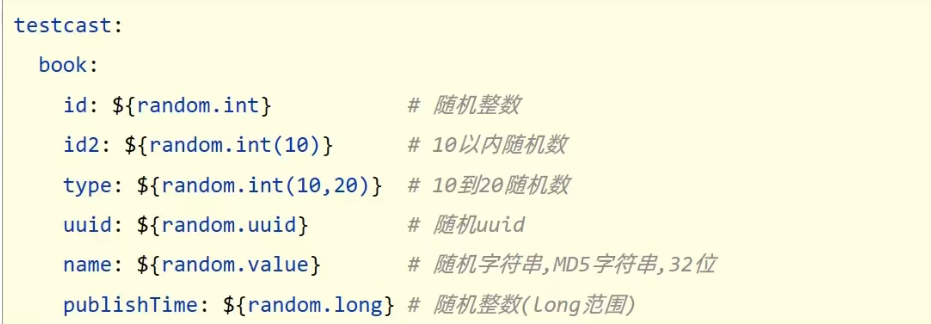
${random.int}表示随机整数
${random.int(10)}表示10以内的随机数
${random.int(10,20)}表示10到20的随机数
其中()可以是任意字符,如[ ],@@都可以。
配置文件下
personRandom:
  age: ${random.int(1,100)}
  name: ${random.value}
  detail: ${random.uuid}
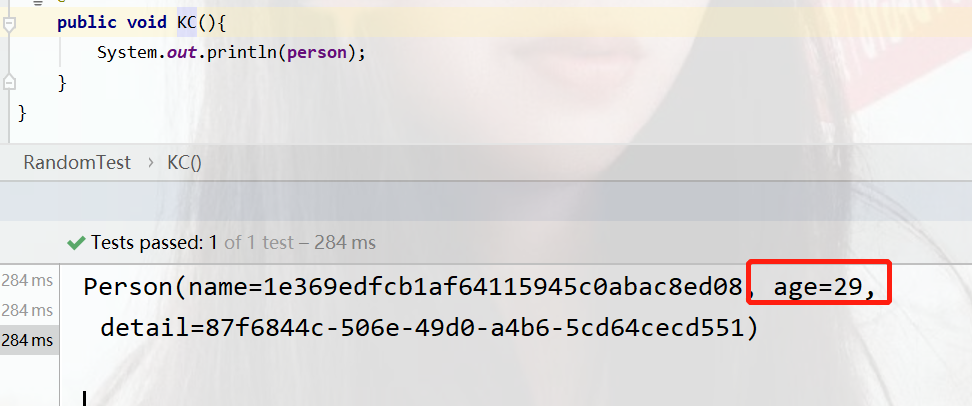
定义一个类接收
@Data
@Component//给spring管理
@ConfigurationProperties(prefix = "personrandom")
public class  Person {
    private String  name;
    private String  age;
    private String  detail;
}
测试类下
@SpringBootTest
public class RandomTest {
@Autowired
    private Person person;
    @Test
    public void KC(){
        System.out.println(person);
    }
}
运行结果
数据层解决方案
现有数据层解决方案技术
Druid+Mybatis-Plus+mysql
数据源:DruidDataSource
持久化技术:MyBatis/MP
数据库:MySQL
数据源配置格式:
方式一:
#配置相关信息
spring:
  datasource:
    driver-class-name: com.mysql.cj.jdbc.Driver
    url: jdbc:mysql://localhost:3306/mybatis?serverTimezone=UTC
    username: root
    password: 123456
    type: com.alibaba.druid.pool.DruidDataSource
方式二
#配置相关信息
spring:
  datasource:
    druid:
      driver-class-name: com.mysql.cj.jdbc.Driver
      url: jdbc:mysql://localhost:3306/mybatis?serverTimezone=UTC
      username: root
      password: 123456
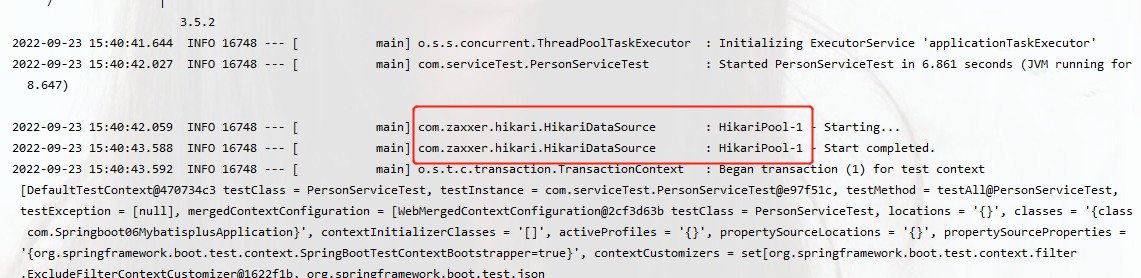
当我们没有指定数据源,导入了druid-web默认使用的是
    <dependency>
            <groupId>com.alibaba</groupId>
            <artifactId>druid-spring-boot-starter</artifactId>
            <version>1.2.6</version>
        </dependency>

当我们把这个注释掉,就会显示使用默认的数据源是Hikaripool
数据源配置
SpringBoot提供了3中内嵌的数据源对象供开发者选择
HikariCp:默认内置数据源对象
Tomcat提供DataSource:HikariCP不可用的情况下,且在web环境中,将使用tomcat服务器配置的数据源对象
Commons DBCP:Hikari不可用,tomcat数据源也不可用,将使用dbcp数据源
数据层解决方案
内置持久化解决方案—JdbcTemplate

得先导入坐标
JdbcTemplate配置

springboot内置了这个JdbcTemple,写起来比较繁琐,不如用mybatis或MP
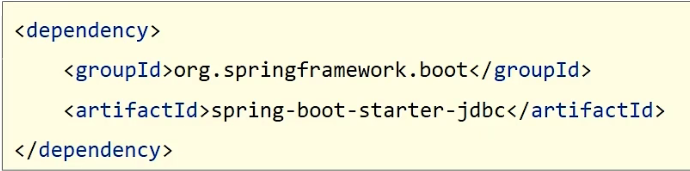
使用JdbcTemplate需要导入spring-boot-starter-jdbc
内嵌数据库
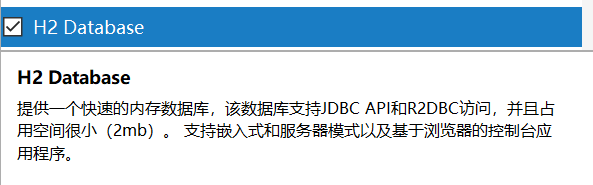
SpringBoot提供了3中内嵌数据库供选择,提高开发测试效率
- H2
- HSQL
- DerBy
H2数据库
在创建的时候勾选h2数据库
pom.xml中
        <dependency>
            <groupId>org.springframework.boot</groupId>
            <artifactId>spring-boot-starter-web</artifactId>
        </dependency>
        <dependency>
            <groupId>com.baomidou</groupId>
            <artifactId>mybatis-plus-boot-starter</artifactId>
            <version>3.4.2</version>
        </dependency>

        <dependency>
            <groupId>com.h2database</groupId>
            <artifactId>h2</artifactId>
            <scope>runtime</scope>
        </dependency>

        <dependency>
            <groupId>org.springframework.boot</groupId>
            <artifactId>spring-boot-starter-data-jpa</artifactId>
        </dependency>

        <dependency>
            <groupId>org.projectlombok</groupId>
            <artifactId>lombok</artifactId>
            <optional>true</optional>
        </dependency>
配置文件下自动会给我们写
#remote visit
spring.h2.console.settings.web-allow-others=true
#console url。Spring启动后,可以访问 http://127.0.0.1:8080/h2-console 查看数据库
spring.h2.console.path=/h2-console
#default true。咱也可以用命令行访问好数据库,感兴趣的同学点这个链接 http://www.h2database.com/html/tutorial.html?highlight=Mac&search=mac#firstFound
spring.h2.console.enabled=true
spring.h2.console.settings.trace=true

#指定数据库的种类,这里 file意思是文件型数据库
spring.datasource.url=jdbc:h2:file:~/test
#用户名密码不需要改,都是临时值
spring.datasource.username=san
spring.datasource.password=
#指定Driver,有了Driver才能访问数据库
spring.datasource.driver-class-name=org.h2.Driver
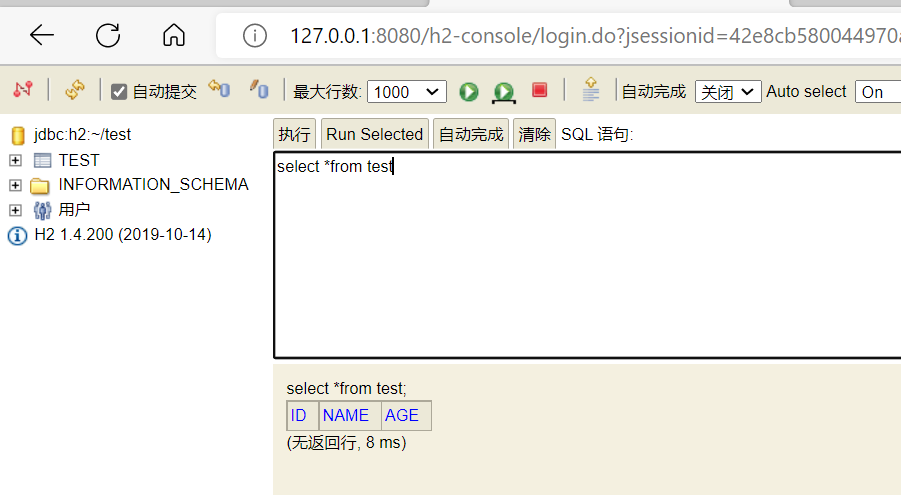
spring.h2.console.enabled=true为true就是开放这个图形界面,正式上线项目时得关闭。 http://127.0.0.1:8080/h2-console 查看数据库可以得到下图所示。
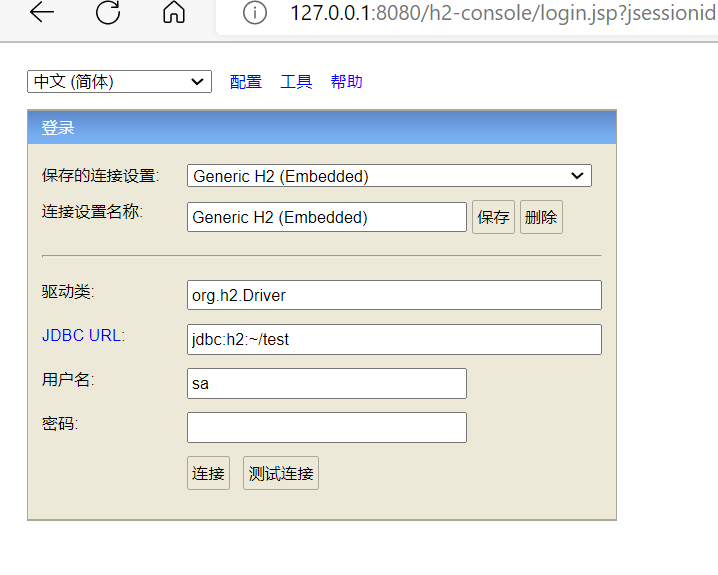
将用户名改为san直接点登录即可。
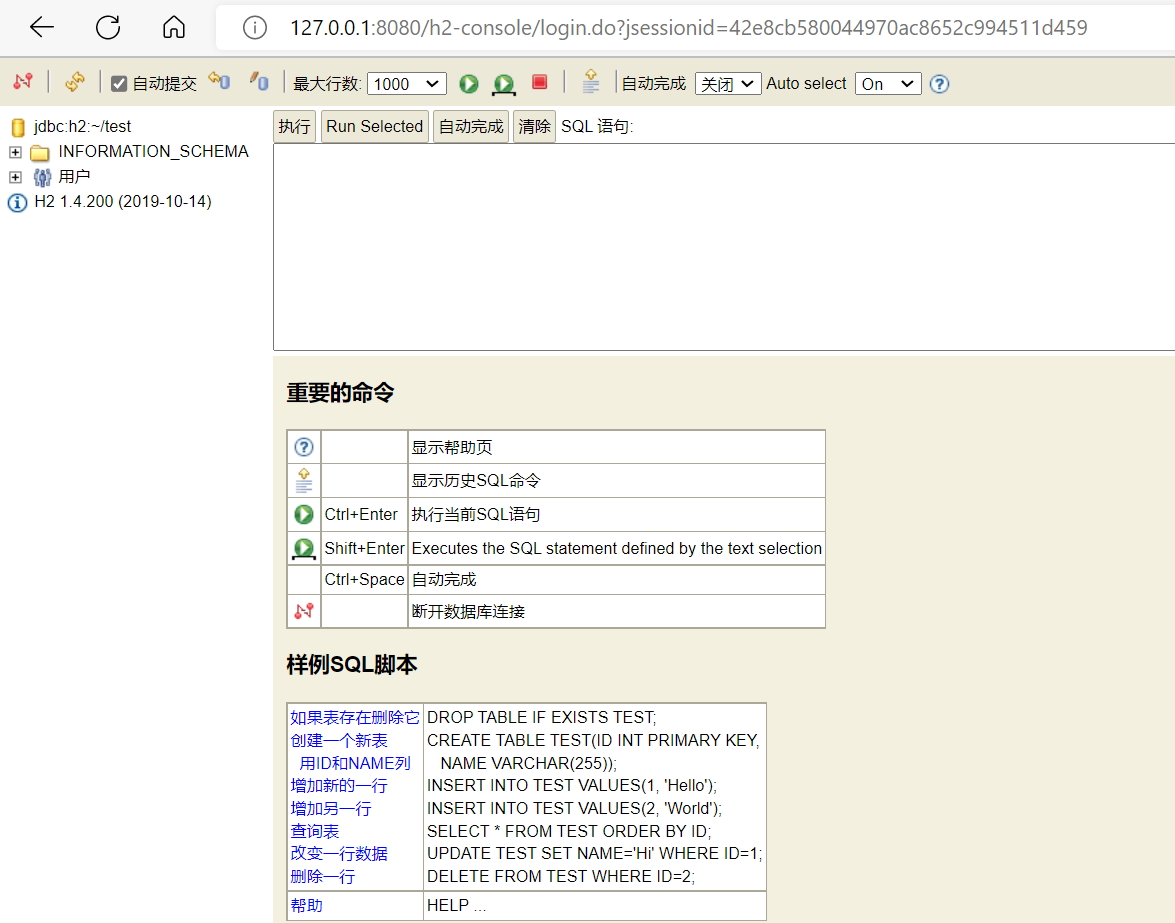
随便添加一个表
create table test(id int ,name varchar ,age int )
Redis简介
window下载地址windows版的redis下载地址
开启运行redis
redis简单使用
redis是键值对的形式,即设置一个值,就可以得到那个值,通过set和get值,若没有值则会输出nil(null)
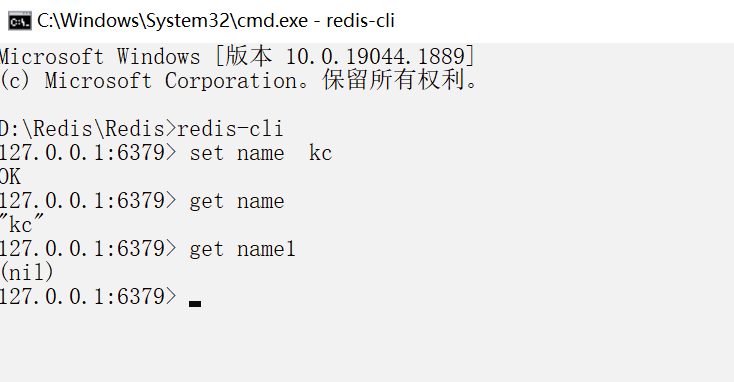

keys *查看有多少个值被设置。
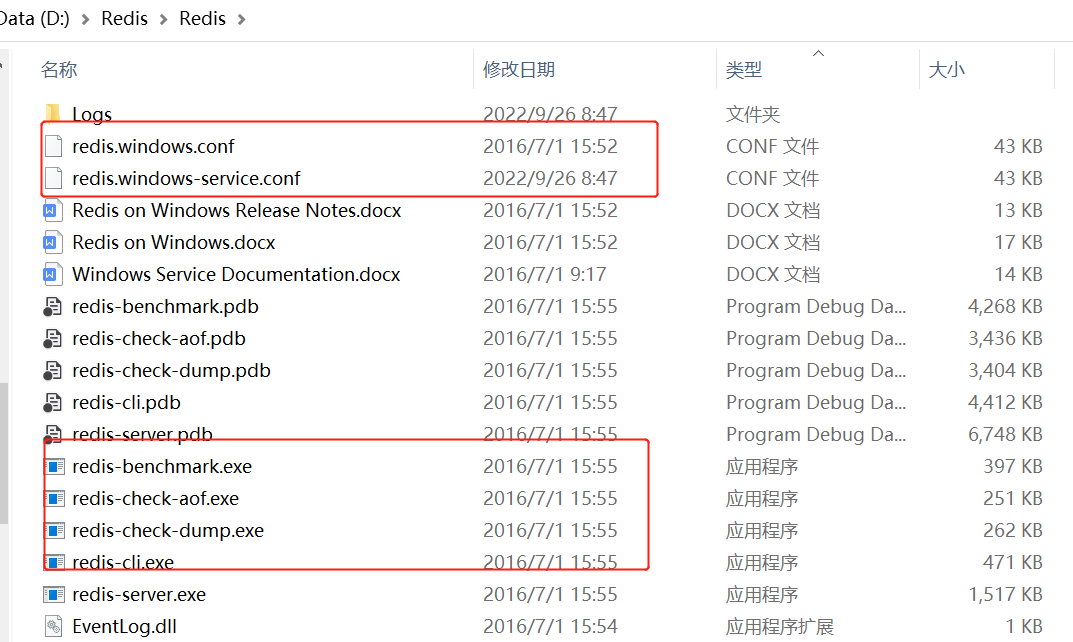
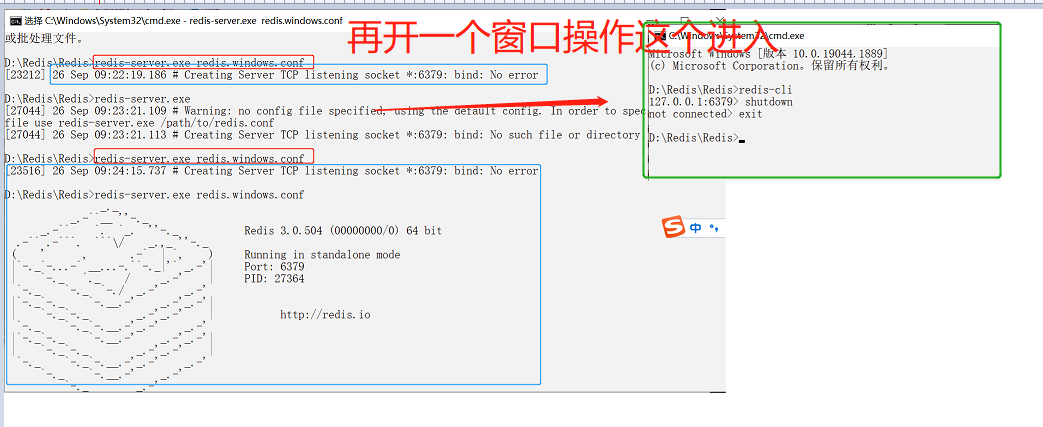
服务端启动的命令(启动redis的命令)
redis-server.exe redis.windows.conf
客户端启动命令
redis-cli.exe
springboot整合redis
导入依赖
<dependency>
            <groupId>org.springframework.boot</groupId>
            <artifactId>spring-boot-starter-data-redis</artifactId>
        </dependency>
test类下
@SpringBootTest
class SpringbootNosqlApplicationTests {
@Autowired
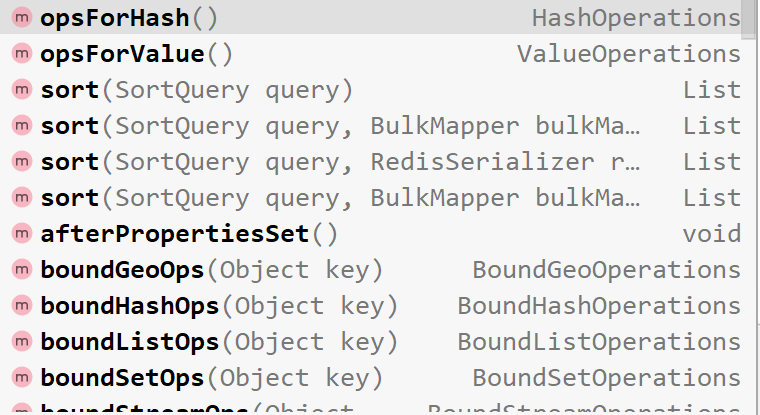
private RedisTemplate redisTemplate;
@Test
void setOne() {
ValueOperations ops = redisTemplate.opsForValue();
ops.set("name1", "zhangsan");
}
@Test
void getOne() {
ValueOperations ops = redisTemplate.opsForValue();
System.out.println(ops.get("name1"));
}
}
运行结果
测试hash数据
    @Test
    void hsetOne() {
        HashOperations ops =redisTemplate.opsForHash();
        ops.put("kc","a1","aa");
    }

    @Test
    void hgetOne() {
        HashOperations ops = redisTemplate.opsForHash();
        System.out.println(ops.get("kc","a1"));
    }
小结:
RedisTemplate提供操作各种数据存储类型的接口API
redis的存在形式
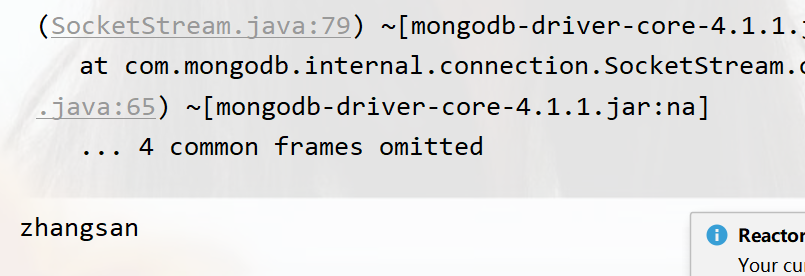
之前使用的redisTemplate

在使用RedisTemplate在库中都是以对象的形式,而在redis客服端中的操作是以字符串的形式
可以获取在客服端的操作值
@SpringBootTest
public class redisTest {

    @Autowired
    private StringRedisTemplate stringRedisTemplate;
    @Test
    public void test1(){
        ValueOperations<String, String> ops = stringRedisTemplate.opsForValue();
        System.out.println(ops.get("name"));

    }
}
运行结果
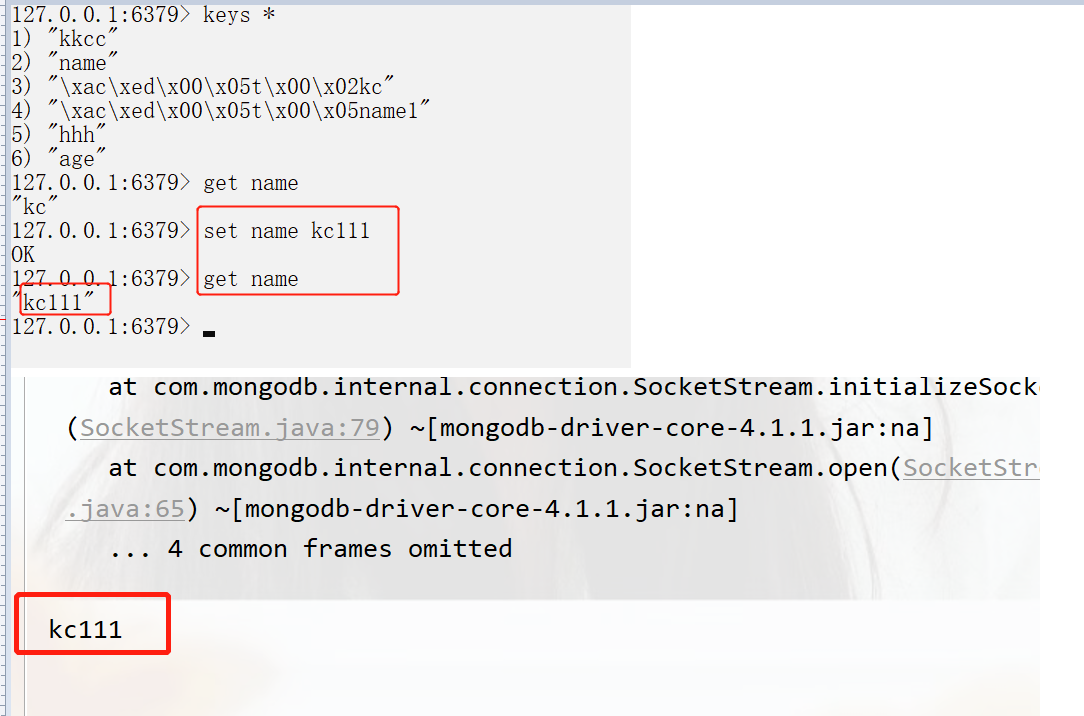
RedisTemplate一对象作为key和value,内部对数据进行序列化
StringRedisTemplate以字符串作为key和value,与Redis客服端操作等效
springboot操作redis实现技术切换
- jedis
- lettuce(默认)
客户端选择:jedis
导入
  <dependency>
            <groupId>jedis.clients</groupId>
            <artifactId>jedis</artifactId>
        </dependency>
配置客服端
spring:
  redis:
    client-type: jedis
    host: localhost
    port: 6379
lettcus(默认)与jedis区别
jedis连接Redis服务器是直连模式,当多线程模式下使用jedis会存在线程安全问题,解决方案可以通过配置连接池是每个连接专用,这样整体性能就大受影响。
lettcus基于Netty框架进行与Redis服务器连接,底层设计中采用StatefulRedisConnection。StatefulRedisConnection自身是线程安全的,可以保障并发访问安全,所以一个连接可以被多线程复用,当lettcus也支持多连接示例一起工作。
整合第三方技术
缓存

缓存是一种介于数据永久存储介质数据应用之间的数据临时存储介质
使用缓存可以有效的较少低速读取过程的次数(如磁盘的IO),提高系统性能
缓存主要作用是减少访问数据库的次数,从而高效读取到数据且降低了数据库的压力
缓存也可以存储临时数据。
简易的自定义缓存
核心的代码
serviceImpl下
@Service
public class PersonServiceImpl extends ServiceImpl<PersonDao, Person> implements PersonService {

    @Autowired
    private PersonDao personDao;

    private HashMap<Integer,Person> catchMess=new HashMap<>();
@Override
  public Person getById(Integer id){
    Person person = catchMess.get(id);
    //如果当前缓存中没有本次数据,则进行查询,否则直接返回
    if(person==null){
        System.out.println("新的查询");
        Person queryPerson = personDao.selectById(id);
        catchMess.put(id, queryPerson);
       return queryPerson;
    }
    System.out.println("已经存在,不查询");
    return person;
  }
}
controller下
@RestController
@RequestMapping("/persons")
public class PersonController {
@Autowired
private PersonService personService;
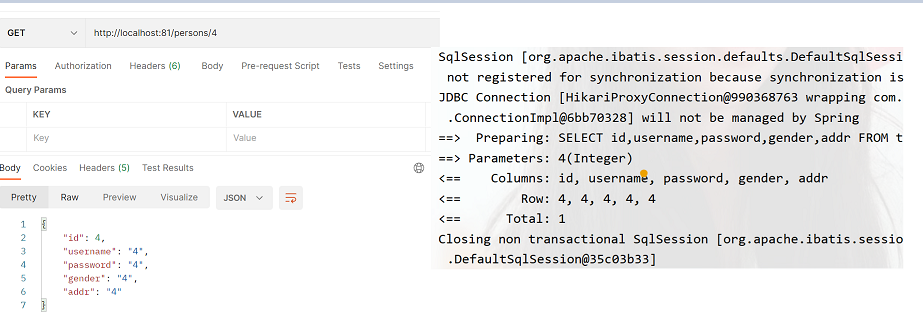
@GetMapping("/{id}")
public Person testById(@PathVariable int id){
return personService.getById(id);
}
}
Postman下

控制台中

SpringBoot中的缓存
导入依赖
<!--        导入缓存对应的starter-->
        <dependency>
            <groupId>org.springframework.boot</groupId>
            <artifactId>spring-boot-starter-cache</artifactId>
        </dependency>
启动类中开启缓存
@SpringBootApplication
@MapperScan( basePackages = "com.dao")//扫描dao的包,扫描到mapper
@EnableCaching//启用缓存
public class SpringbootCatchTestApplication {

    public static void main(String[] args) {
        SpringApplication.run(SpringbootCatchTestApplication.class, args);
    }

}
在要测试的方法中
@Override
@Cacheable(value = "cacheSpace",key = "#id")//value是起的名字,key表示以什么关键字存储
  public Person getById(Integer id){
   return personDao.selectById(id);
  }
运行之后也是可以得到一次结果
Springboot原理篇
第一种bean的加载方式-配置文件
先创建一个使用maven的spring工程
导入spring核心配置
        <dependency>
            <groupId>org.springframework</groupId>
            <artifactId>spring-context</artifactId>
            <version>5.3.9</version>
        </dependency>
创建一个类
public  class Cat {

}
public class Dog {
}
创建一个名为applicationContext.xml的配置文件
<?xml version="1.0" encoding="UTF-8"?>
<beans xmlns="http://www.springframework.org/schema/beans"
       xmlns:xsi="http://www.w3.org/2001/XMLSchema-instance"
       xsi:schemaLocation=
         "http://www.springframework.org/schema/beans
        http://www.springframework.org/schema/beans/spring-beans.xsd">

    <bean id="cat" class="com.service.Cat"/>
<bean id="dog" class="com.service.Dog"/>

</beans>
创建一个启动类
package com.app;
import com.service.Dog;
import org.springframework.context.ApplicationContext;
import org.springframework.context.support.ClassPathXmlApplicationContext;
public class App1 {
public static void main(String[] args) {
ApplicationContext app=new ClassPathXmlApplicationContext("applicationContext.xml");
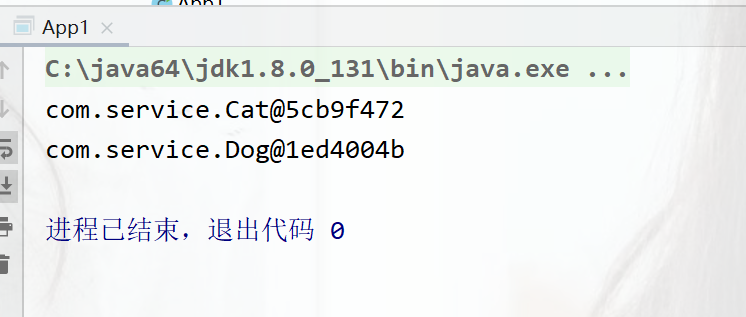
Object cat = app.getBean("cat");//根据id获取
System.out.println(cat);
Object dog = app.getBean(Dog.class);//根据类获取,当不唯一时会报错
System.out.println(dog);
}
}
运行结果,这样就可以得到bean的对象了
或者使用可以使用一次性获取所有bean
public class App1 {
public static void main(String[] args) {
ApplicationContext app=new ClassPathXmlApplicationContext("applicationContext.xml");
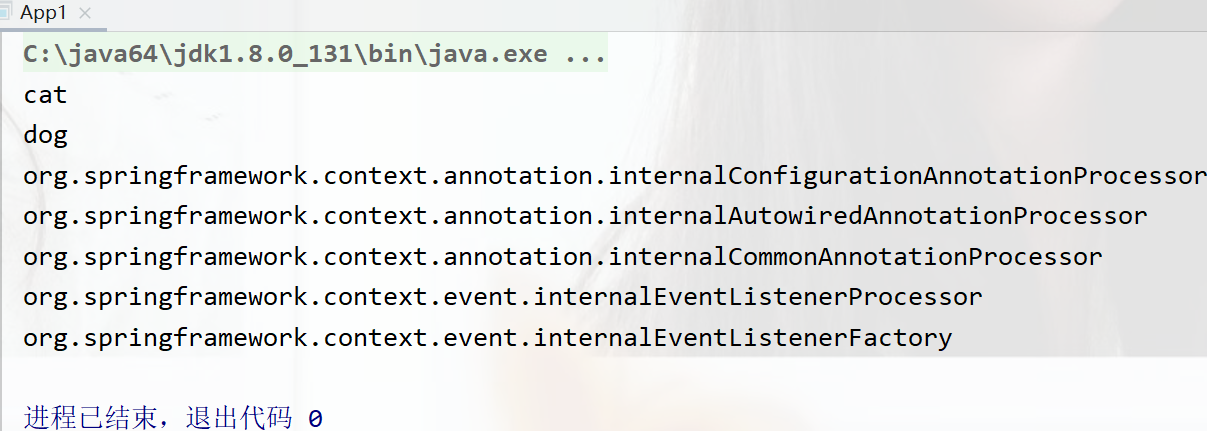
String[] names = app.getBeanDefinitionNames();
for (String name : names) {
System.out.println(name);
}
}
}
运行结果
第二种加载bean方式-注解和扫描
使用注解,注解的作用就是替代配置文件的配置,注解有@Component @Service @Repository等
替换配置文件中的<bean id= class=..>
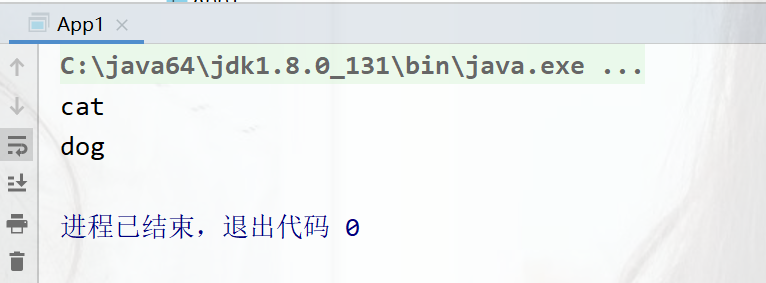
@Component("cat") //起的名
public class Cat {

}
@Component
public class Dog {
}
使用完注解还得让spring去扫描到这个注解,在配置文件中的写
<?xml version="1.0" encoding="UTF-8"?>
<beans xmlns="http://www.springframework.org/schema/beans"
       xmlns:context="http://www.springframework.org/schema/context"
       xmlns:xsi="http://www.w3.org/2001/XMLSchema-instance"
       xsi:schemaLocation=
         "http://www.springframework.org/schema/beans
        http://www.springframework.org/schema/beans/spring-beans.xsd

          http://www.springframework.org/schema/context
        http://www.springframework.org/schema/context/spring-context.xsd

">

<!--告诉spring扫描哪个包component导入context命名空间-->
    <context:component-scan base-package="com"/>


</beans>
运行结果
创建第三方的bean对象
先导入对应的坐标
               <dependency>
                    <groupId>com.alibaba</groupId>
                    <artifactId>druid</artifactId>
                    <version>1.1.24</version>
                </dependency>
创建一个类,返回你需要导入的对象即可,加入注解
package com.config;

import com.alibaba.druid.pool.DruidDataSource;
import org.springframework.context.annotation.Bean;
import org.springframework.stereotype.Component;

@Component
public class DBconfig {
    @Bean
    public DruidDataSource dataSource(){
        DruidDataSource ds =new DruidDataSource();
        return ds;
    }
}
运行结果

第三种加载bean方式-不使用配置文件
创建一个类代替配置文件
package com.config;

import org.springframework.context.annotation.ComponentScan;
import org.springframework.context.annotation.Configuration;

@Configuration//定义为配置类
@ComponentScan({"com.config","com.service"}) //注解扫描包
public class springConfig {
}
运行类也得修改
package com.app;
import com.config.springConfig;
import org.springframework.context.ApplicationContext;
import org.springframework.context.annotation.AnnotationConfigApplicationContext;
import org.springframework.context.support.ClassPathXmlApplicationContext;
public class App2 {
public static void main(String[] args) {
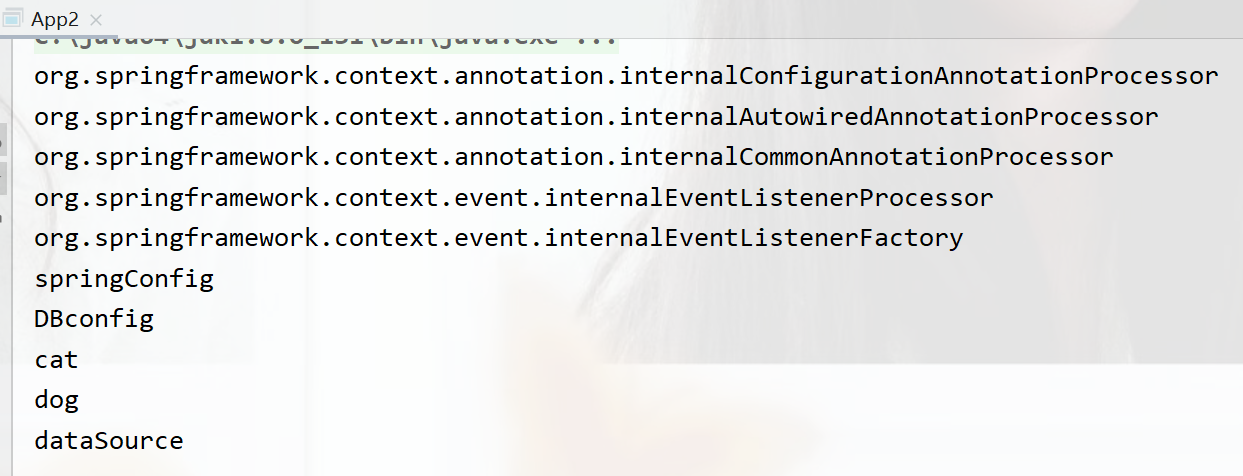
ApplicationContext app=new AnnotationConfigApplicationContext(springConfig.class);
String[] names = app.getBeanDefinitionNames();
for (String name : names) {
System.out.println(name);
}
}
}
运行结果
扩展-bean的加载方式扩展FactoryBean<>
初始化实现FactoryBean<>接口的类,实现对bean加载到容器之前的批处理操作。
实现了FactoryBean接口创建出来的对象不是本身而是里面的泛型。
创建一个类实现接口
package com.config;

import com.service.Dog;
import org.springframework.beans.factory.FactoryBean;
import org.springframework.context.annotation.Bean;

public class DogFactoryBean implements FactoryBean<Dog> {
    public Dog getObject() throws Exception {
        return new Dog();
    }
//返回对象的类型
    public Class<?> getObjectType() {

        //这里可以做一系列的初始化工作
        return Dog.class;
    }

    //是否是单例,单例则多次获取都是一个对象
    public boolean isSingleton() {
        return false;
    }
}
@Component
public class Dog {
}
启动的主类
import com.config.springConfig;
import org.springframework.context.ApplicationContext;
import org.springframework.context.annotation.AnnotationConfigApplicationContext;
import org.springframework.context.support.ClassPathXmlApplicationContext;

public class App2 {
    public static void main(String[] args) {
ApplicationContext app=new AnnotationConfigApplicationContext(springConfig.class);

        String[] names = app.getBeanDefinitionNames();
        for (String name : names) {
            System.out.println(name);
        }
        System.out.println(app.getBean("dog1"));
        System.out.println(app.getBean("dog1"));
    }
}
运行结果
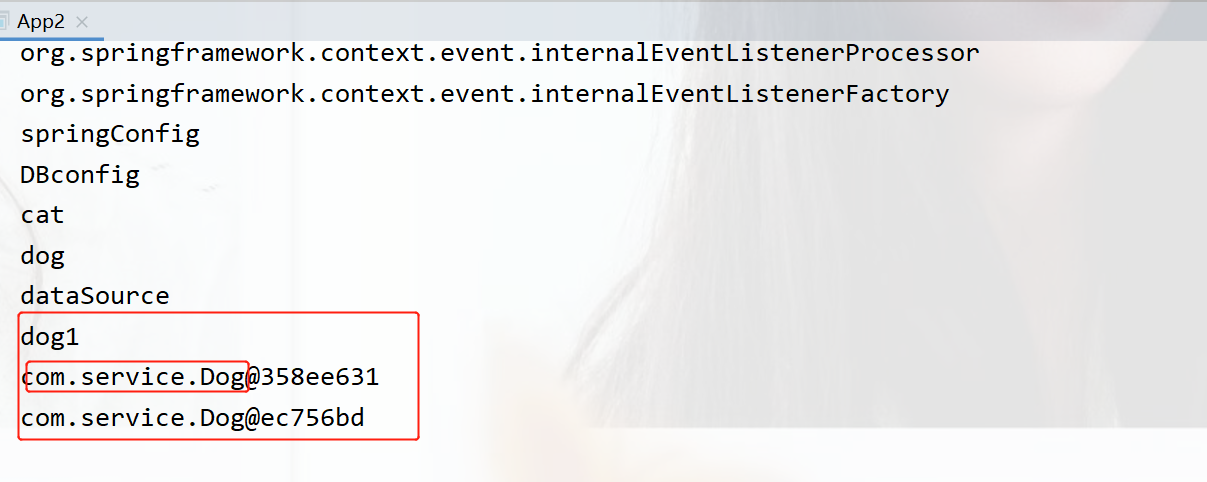
产生的是泛型的对象
扩展-@ImportResource导入配置文件
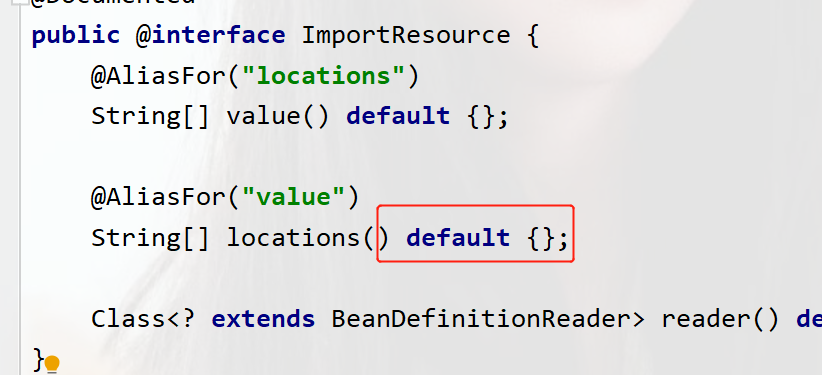
看源码可知道,可以写入多个string类型的数组,使用{}
@ImportResource({"applicationContext2.xml","applicationContext.xml"})
@Configuration
@ComponentScan("com")
@ImportResource({"applicationContext2.xml","applicationContext.xml"})
public class SpringConfig2 {
    @Bean
    public Cat cat(){
        return new Cat();
    }
}
两个配置文件中的bean,排在前面的首先加载,后面的之后加载,同的内容以之后的为主,不同的内容都加载。
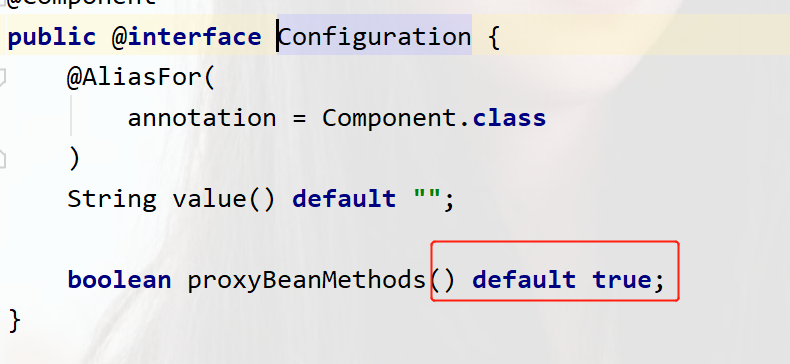
扩展-proxyBeanMethods属性-产生代理对象
@Configuration注解中有一属性proxyBeanMethod属性,默认值是true
** 值为false时**
@Configuration(proxyBeanMethods = false)
@ComponentScan("com")
@ImportResource({"applicationContext2.xml","applicationContext.xml"})
public class SpringConfig2 {
    @Bean
    public Cat cat(){
        return new Cat();
    }
}
主方法中
public class app3 {
    public static void main(String[] args) {
        ApplicationContext app=new AnnotationConfigApplicationContext(SpringConfig2.class);
        String[] names = app.getBeanDefinitionNames();
        for (String name : names) {
            System.out.println(name);
        }

        System.out.println("--------");
        System.out.println(app.getBean("springConfig2"));

        SpringConfig2 springConfig2 = app.getBean("springConfig2", SpringConfig2.class);
        System.out.println(springConfig2.cat());
        System.out.println(springConfig2.cat());
        System.out.println(springConfig2.cat());

    }
}
运行结果
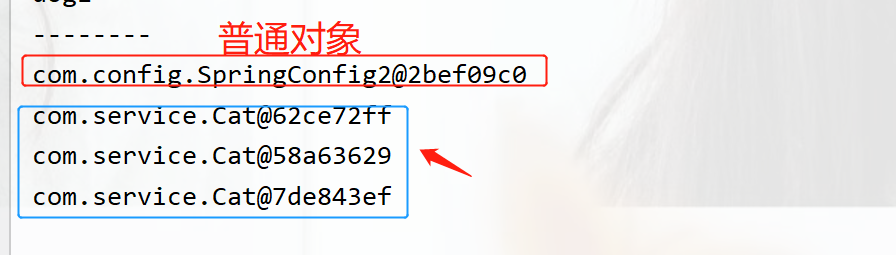
产生的是普通对象,每一次调用方法都会new一个新的对象前提是这个方法是被bean管理的对象。
** 值为true时**
不写或写true时
@Configuration(proxyBeanMethods = true)
@ComponentScan("com")
@ImportResource({"applicationContext2.xml","applicationContext.xml"})
public class SpringConfig2 {
    @Bean
    public Cat cat(){
        return new Cat();
    }
}
运行结果
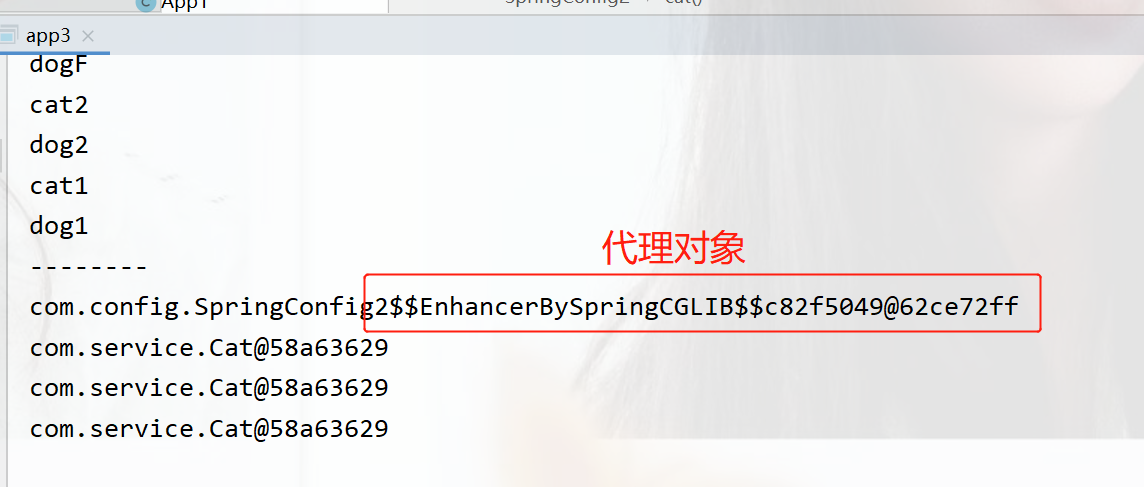
会产生一个代理对象,这个代理对象让我们每次调用方法是都是同一个,前提也是需要被bean容器管理
注:产生的bean对象没指定名称时,默认是方法名或类名首字母小写,如类名是SpringTest则产生的bean是springTest
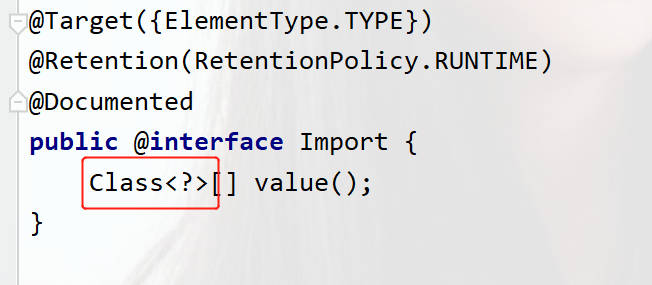
第四种加载bean方式-使用@Import
翻看@Import源码可知,需要一个类class字节码对象
在类中
import com.service.TestBean1;
import com.service.TestBean2;
import org.springframework.context.annotation.Import;

@Import({TestBean1.class, TestBean2.class})
public class springConfig4 {
}
创建测试的类
public class TestBean1 {
}
public class testBean2 {
}
主类上
public class app4 {
    public static void main(String[] args) {
        ApplicationContext app=new AnnotationConfigApplicationContext(springConfig4.class);
        String[] names = app.getBeanDefinitionNames();
        for (String name : names) {
            System.out.println(name);
        }

    }
}
运行结果
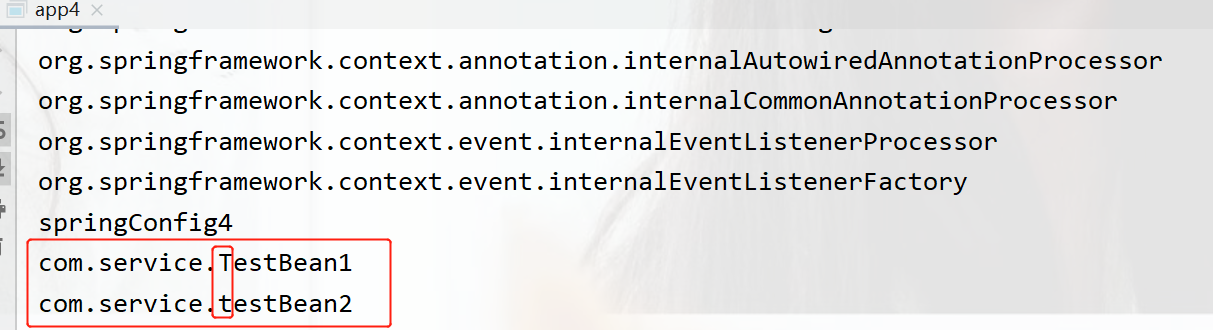
全路径名,加入的类即使没有被spring管理也可以产生bean。
第五种加载bean方式-registerBean
使用上下文对象在容器初始化后注入bean
在创建完上下文对象的时候可以加载bean
只能使用 AnnotationConfigApplicationContext获取上下文对象
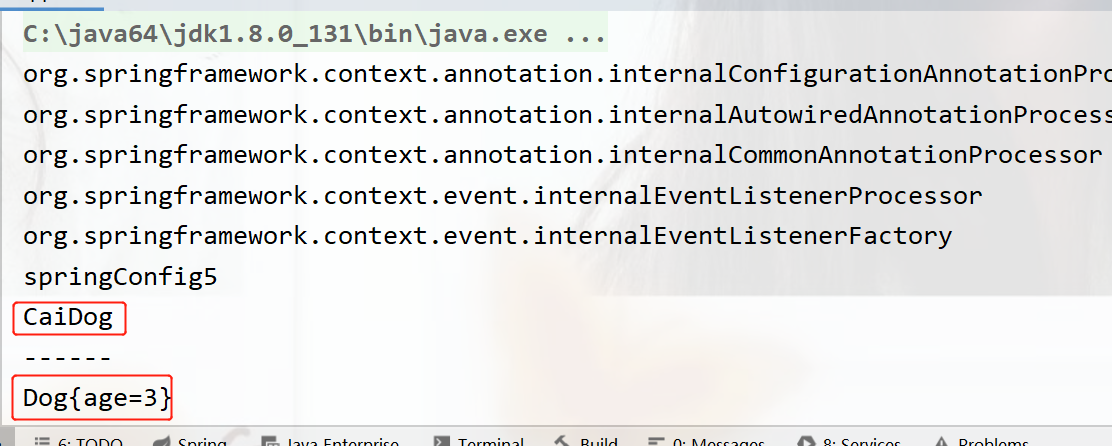
public class app5 {
    public static void main(String[] args) {
        AnnotationConfigApplicationContext app=new AnnotationConfigApplicationContext(springConfig5.class);
    //加载完成后
        app.registerBean("CaiDog", Dog.class,1 );
        app.registerBean("CaiDog", Dog.class,2);
        app.registerBean("CaiDog", Dog.class,3 );
        String[] names = app.getBeanDefinitionNames();
        for (String name : names) {
            System.out.println(name);
        }

        System.out.println("------");
        System.out.println(app.getBean(Dog.class));
    }
}
Dog类下
@Component
public class Dog {

    int age;
    public Dog(){}

    public Dog(int age){
        this.age=age;
    }

    @Override
    public String toString() {
        return "Dog{" +
                "age=" + age +
                '}';
    }
}
运行结果 ,当有多个的时候,且bean的名字一致时,以最后的为准。
或者直接使用
app.register(Cat.class);
也可以快速的加载一个bean
第六种加载bean方式-实现ImportSelector接口
这个接口有许多方法用来判定

导入实现了ImportSelector接口的类,实现对导入源的编程式处理
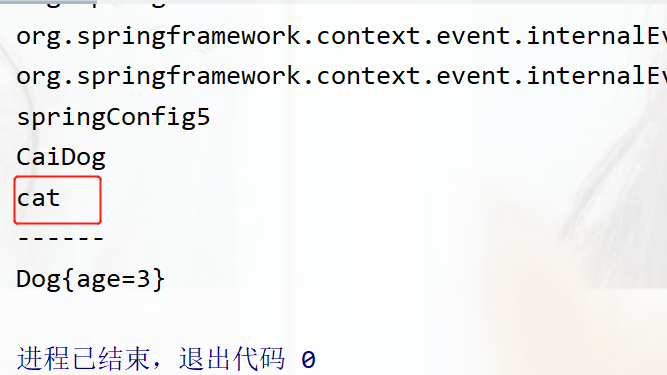
public class MyImportSelector implements ImportSelector {
    public String[] selectImports(AnnotationMetadata annotationMetadata) {//AnnotationMetadata 注解的源数据
     //  做判定条件,是否有这个注解
        boolean flag = annotationMetadata.hasAnnotation("org.springframework.context.annotation.Configuration");
        if (flag){
            return new String[]{"com.service.Dog"};
        }

        return new String[]{"com.service.Cat"};
    }
}
@Import({MyImportSelector.class})
public class SpringConfig6 {
}
public class app6 {
    public static void main(String[] args) {
        ApplicationContext app=new AnnotationConfigApplicationContext(SpringConfig6.class);
        String[] names = app.getBeanDefinitionNames();
        for (String name : names) {
            System.out.println(name);
        }

    }
}
运行结果
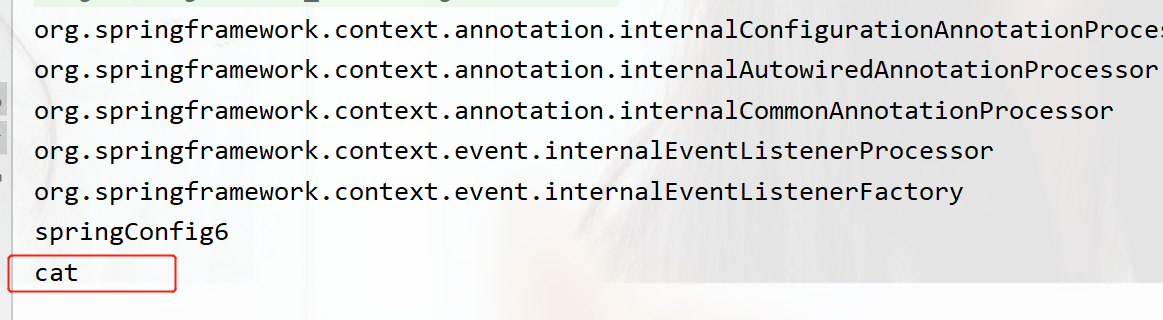
第七种加载bean方式-实现ImportBeanDefinitionRegistrar
导入实现ImportBeanDefinitionRegistrar接口的类,通过BeanDefinition的注册器注册实名bean,实现对容器中bean的决定,例如对现有的bean的覆盖,进而达到
import com.service.Dog;
import org.springframework.beans.factory.config.BeanDefinition;
import org.springframework.beans.factory.support.BeanDefinitionBuilder;
import org.springframework.beans.factory.support.BeanDefinitionRegistry;
import org.springframework.context.annotation.ImportBeanDefinitionRegistrar;
import org.springframework.core.type.AnnotationMetadata;
public class MyRegistrar implements ImportBeanDefinitionRegistrar {
    public void registerBeanDefinitions(AnnotationMetadata importingClassMetadata, BeanDefinitionRegistry registry) {
        BeanDefinition beanDefinition= BeanDefinitionBuilder.rootBeanDefinition(Dog.class).getBeanDefinition();
        registry.registerBeanDefinition("woDog", beanDefinition);
    }
}
@Import({MyRegistrar.class})
public class SpringConfig7 {
}
运行结果
第八种bean的加载方式-实现BeanDefinitionRegistryPostProcessor
导入实现了BeanDefinitionRegistryPostProcessor接口的类,通过BeanDefintion的注册器注册实名bean,实现对容器中bean的最终裁定.(以这个接口加载的bean为主)
@Component
public class DBconfig {
    @Bean
    public DruidDataSource dataSource(){
        DruidDataSource ds =new DruidDataSource();
        return ds;
    }
}
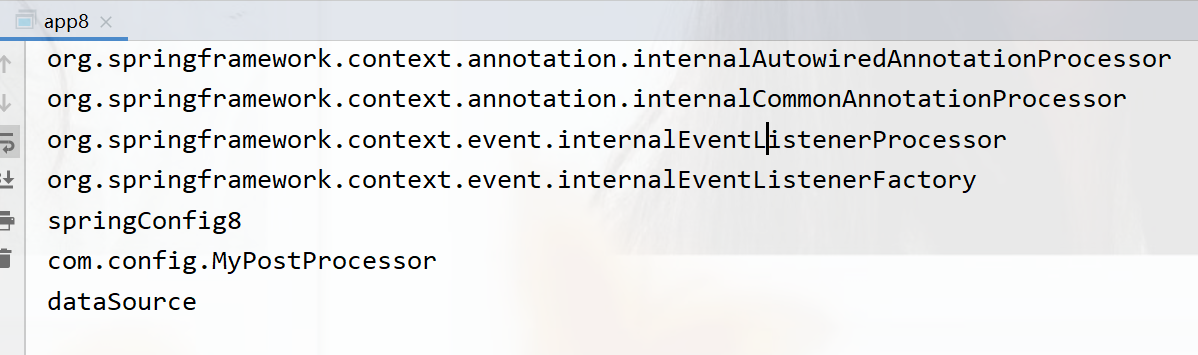
public class MyPostProcessor implements BeanDefinitionRegistryPostProcessor {
    public void postProcessBeanDefinitionRegistry(BeanDefinitionRegistry registry) throws BeansException {
 BeanDefinition beanDefinition = BeanDefinitionBuilder.rootBeanDefinition(DBconfig.class).getBeanDefinition();

    registry.registerBeanDefinition("dataSource",beanDefinition);
    }

    public void postProcessBeanFactory(ConfigurableListableBeanFactory beanFactory) throws BeansException {

    }
}
@Import({MyPostProcessor.class})
public class SpringConfig8 {
}
运行结果
实现bean的方式总结
1.xml+<bean/>
2.xml:context+注解(@Component+4个@Bean
3.配置类+扫描+注解(@Component+4个@Bean)
- @Bean定义FactoryBean接口
- @ImportResource
- @Configuration注解的proxyBeanMethods属性
4.@Import导入bean的类
- @Import导入配置类
5.AnnotationConfigApplicationContext调用register方法
6.@Import导入ImportSelector接口
7.@Import导入ImportBeanDefinitionRegistrar接口
8.@Import导入BeanDefinitionRegistryPostProcessor接口
bean的编程式加载控制
在程序中使用控制即可
public class MyImportSelector implements ImportSelector {
    public String[] selectImports(AnnotationMetadata annotationMetadata) {//AnnotationMetadata 注解的源数据
        //  做判定条件,是否有这个注解

        boolean flag = annotationMetadata.hasAnnotation("org.springframework.context.annotation.Configuration");
        if (flag){
            return new String[]{"com.service.Dog"};
        }

        return new String[]{"com.service.Cat"};
    }
}
bean的注解式加载控制
使用@ConditionalOnXXX注解为bean的加载设置条件

package com.beanLoad.config;

import com.beanLoad.service.Cat;
import com.beanLoad.service.Dog;
import com.beanLoad.service.Mouse;
import org.springframework.boot.autoconfigure.condition.ConditionalOnBean;
import org.springframework.boot.autoconfigure.condition.ConditionalOnMissingBean;
import org.springframework.boot.autoconfigure.condition.ConditionalOnNotWebApplication;
import org.springframework.context.annotation.Bean;
import org.springframework.context.annotation.ComponentScan;
import org.springframework.context.annotation.Import;

//@ComponentScan("com.beanLoad")
@Import({Mouse.class, Dog.class})
public class springConfig {

    @Bean
    @ConditionalOnBean(name="com.beanLoad.service.Mouse")//当有这个bean时加载
    @ConditionalOnMissingBean(name = "com.beanLoad.service.Dog")//当没有这个bean时就加载
    @ConditionalOnNotWebApplication//不是一个web项目时就加载
    //这些注解的条件同时满足才会加载
    public Cat tom(){
        return new Cat();
    }

}
主类下
package com.beanLoad.app;
import com.beanLoad.config.springConfig;
import org.springframework.context.ApplicationContext;
import org.springframework.context.annotation.AnnotationConfigApplicationContext;
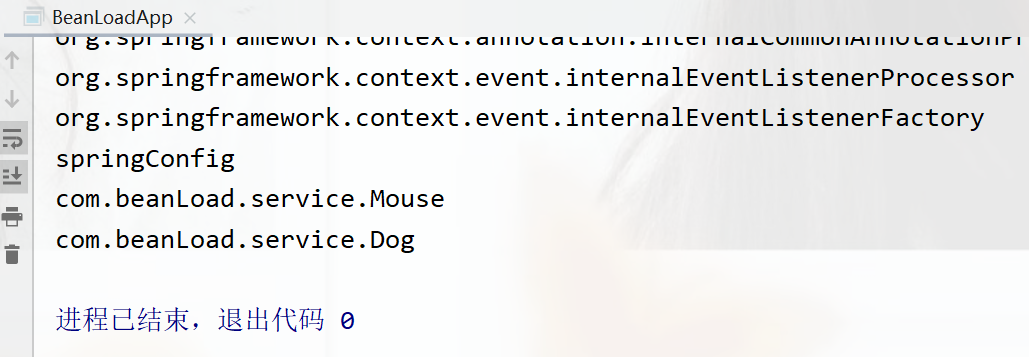
public class BeanLoadApp {
public static void main(String[] args) {
ApplicationContext app=new AnnotationConfigApplicationContext(springConfig.class);
String[] names = app.getBeanDefinitionNames();
for (String name : names) {
System.out.println(name);
}
}
}
运行结果
自动配置原理
1、收集Spring开发者的编程习惯,整理开发过程使用的常用的技术列表->(技术集A)
2、收集常用技术(技术集A)的使用参数,整理开发过程中每个技术的蝉蛹设置列表->(设置集B)
3、初始化SpringBoot基础环境,加载用户自定义的ena和到UR的其他坐标,形成初始化环境
4、将技术集A包含的所有技术都定义出来,在Spring/SpringBoot启动时默认全部加载
5、将技术集A中具有使用条件的技术约定出来,设置称按条件加载,有开发者决定是否使用该技术(与初始环境比对)
6、将设置集B作为默认加载(约定大于配置),减少开发者配置工作量
7、开放设置集B的配置覆盖接口,有开发者根据自身需要决定时候覆盖默认配置
自定义自动配置
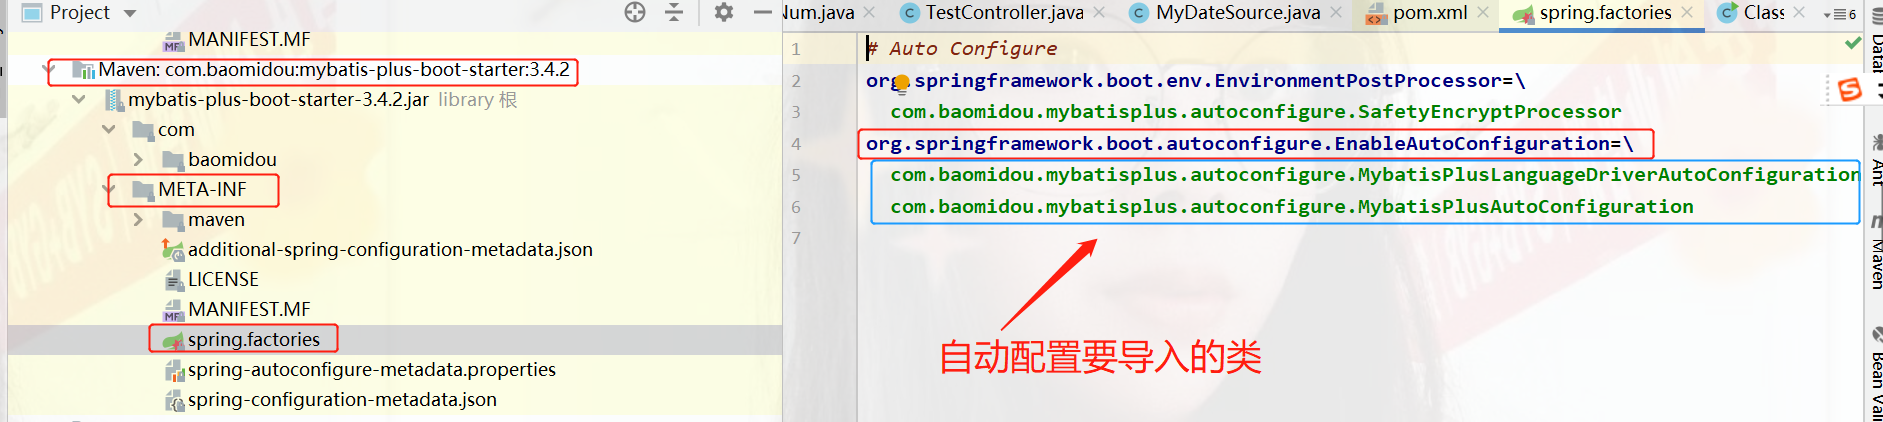
自定义自动配置的核心是,先在resource资源下新建一个META-INF,在下面的spring.factories

#要自动配置的类写在这
org.springframework.boot.autoconfigure.EnableAutoConfiguration=\
com.beanLoad.service.Cat
被自动配置的类有有特殊的标志

在一个配置类中
//当有这个类时,加载下面这个类
@ConditionalOnClass(name="com.beanLoad.service.Cat")
public class AutoSpringConfig {

}
测试的主类下
public class App1 {
    public static void main(String[] args) {
        ApplicationContext app=new AnnotationConfigApplicationContext(AutoSpringConfig.class);
        String[] names = app.getBeanDefinitionNames();
        for (String name : names) {
            System.out.println(name);
        }
}
}
运行结果

这说明自动配置成功
自定义starter
案例:统计独立IP访问次数
需求分析:
1、数据记录位置:Map/Redis
2|功能触发位置:每次web请求(拦截器)
- 步骤1:降低难度,主动调用,仅统计单一操作访问次数(例如查询)
- 步骤2:开发拦截器
3、业务参数(配置项)
- 输出频度:默认10秒
- 数据特征:累计数据/阶段数据,默认累计数据
- 输出格式:详细模式(显示ip和次数)/极简模式(只显示ip)
创建一个模块
pom.xml中
<?xml version="1.0" encoding="UTF-8"?>
<project xmlns="http://maven.apache.org/POM/4.0.0" xmlns:xsi="http://www.w3.org/2001/XMLSchema-instance"
    xsi:schemaLocation="http://maven.apache.org/POM/4.0.0 https://maven.apache.org/xsd/maven-4.0.0.xsd">
    <modelVersion>4.0.0</modelVersion>
    <groupId>com.kc</groupId>
    <artifactId>springboot_ipcount_starter</artifactId>
    <version>0.0.1-SNAPSHOT</version>

    <properties>
        <java.version>1.8</java.version>
        <project.build.sourceEncoding>UTF-8</project.build.sourceEncoding>
        <project.reporting.outputEncoding>UTF-8</project.reporting.outputEncoding>
        <spring-boot.version>2.4.1</spring-boot.version>
    </properties>

    <dependencies>

        <dependency>
            <groupId>org.springframework.boot</groupId>
            <artifactId>spring-boot-starter-web</artifactId>
        </dependency>

    </dependencies>

    <dependencyManagement>
        <dependencies>
            <dependency>
                <groupId>org.springframework.boot</groupId>
                <artifactId>spring-boot-dependencies</artifactId>
                <version>${spring-boot.version}</version>
                <type>pom</type>
                <scope>import</scope>
            </dependency>
        </dependencies>
    </dependencyManagement>

</project>
写入主要的类
package com.kc.service;

import com.kc.properties.IpProperties;
import org.springframework.beans.factory.annotation.Autowired;
import org.springframework.scheduling.annotation.Scheduled;

import javax.servlet.http.HttpServletRequest;
import java.util.HashMap;
import java.util.Map;

public class IpCountService {

    private HashMap<String,Integer> ipCountMap=new HashMap<>();

//当前的request对象的注入工作由使用当前starter的工程提供自动装配
@Autowired
private HttpServletRequest httpServletRequest;
    public void count(){

//每次调用当前操作,就记录当前访问的IP,然后累加访问次数
  //1、获取当前操作的ip地址
        String ip=httpServletRequest.getRemoteAddr();
  //2、根据ip地址从Map取值,并递增
        Integer value = ipCountMap.get(ip);
        //判断当前ip否存在
        if(value==null){
            ipCountMap.put(ip, 1);
        }else {
            ipCountMap.put(ip, value+1);
        }
    }

    //注入配置类
    @Autowired
    private IpProperties ipProperties;

    //打印
    @Scheduled(cron = "0/2 * * * * ?") //2秒执行一次
    public void show(){

        System.out.println("      IP访问监控 ");
        if (ipProperties.getModel().equals(IpProperties.LogModel.DETAIL.getValue())) {

            System.out.println("+-----ip-address-----+--num--+");
            //同时获取key和value
            for (Map.Entry<String, Integer> entry : ipCountMap.entrySet()) {
                String key = entry.getKey();
                Integer value = entry.getValue();
                //format格式输出,%18s是给字符串占18位和%5d是给数字占5位符
                System.out.println(String.format("|%18s  |%5d  |", key,value));
            }
            System.out.println("+--------------------+-------+");

        }else if (ipProperties.getModel().equals(IpProperties.LogModel.SIMPLE.getValue())){
            System.out.println("+-----ip-address-----+");
            //同时获取key和value
            for (String key : ipCountMap.keySet()) {

                System.out.println(String.format("|%18s |", key));
            }
            System.out.println("+--------------------+-------+");

        }

        //是否清除数据
        if (ipProperties.getCycleReset()){
            ipCountMap.clear();
        }

        }

    }
配置类下
package com.kc.properties;

        import org.springframework.boot.context.properties.ConfigurationProperties;
        import org.springframework.stereotype.Component;

@Component
@ConfigurationProperties(prefix = "ip")
public class IpProperties {

    /**
     * 日志显示周期
     */
    private long cycle=5L;

    /**
     * 是否重置周期数据
     */
    private boolean cycleReset=false;

    /**
     * 日志输出模式 detail :详细模式 simple 极简模式
     */

    private String model=LogModel.DETAIL.value;

    /**
     * 使用枚举来存储
     */

    public enum LogModel{
        DETAIL("detail"),
        SIMPLE("simple");
        private String value;
        LogModel(String value) {
            this.value=value;
        }

        public String getValue() {
            return value;
        }
    }

    public boolean getCycleReset() {
        return cycleReset;
    }

    public void setCycleReset(boolean cycleReset) {
        this.cycleReset = cycleReset;
    }

    public String getModel() {
        return model;
    }

    public void setModel(String model) {
        this.model = model;
    }

}
自动配置信息类
package com.kc.autoConfig;

import com.kc.service.IpCountService;
import org.springframework.context.annotation.Import;
import org.springframework.scheduling.annotation.EnableScheduling;

@EnableScheduling//开启定义任务调度
@Import(IpCountService.class)
public class IpAutoConfiguration {
}
在资源中新建
META-INF下的spring.factories
#要自动配置的类写在这
org.springframework.boot.autoconfigure.EnableAutoConfiguration=\
com.kc.autoConfig.IpAutoConfiguration
这个自定义starter就完成了
使用自定义starter

导入对应的坐标即可
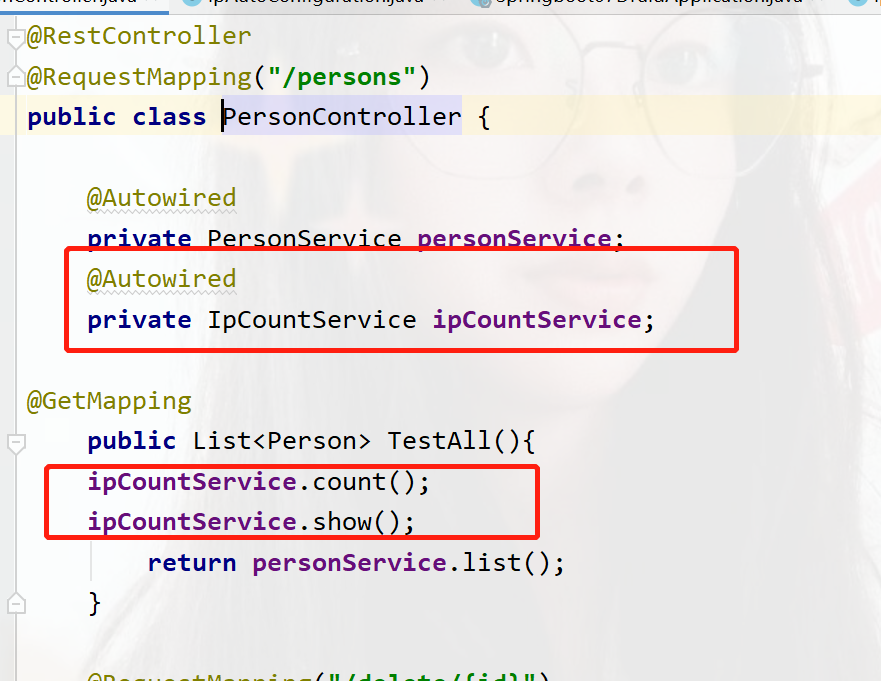
注入和使用对应的方法
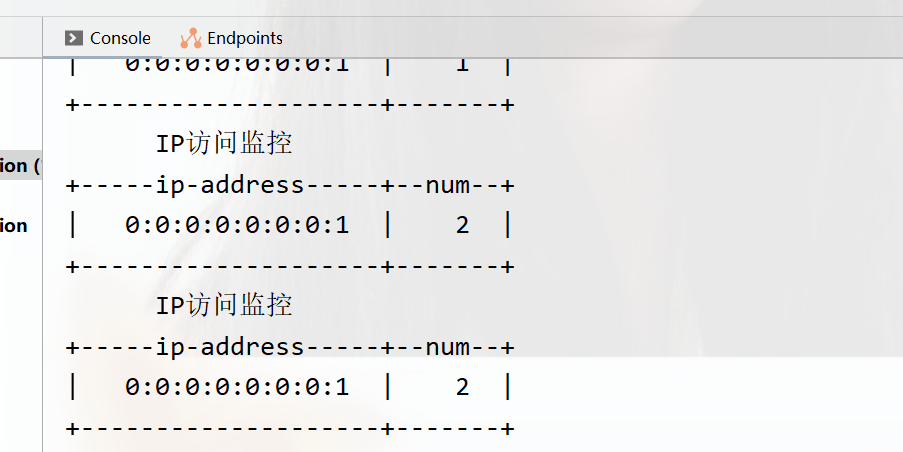
设置拦截器
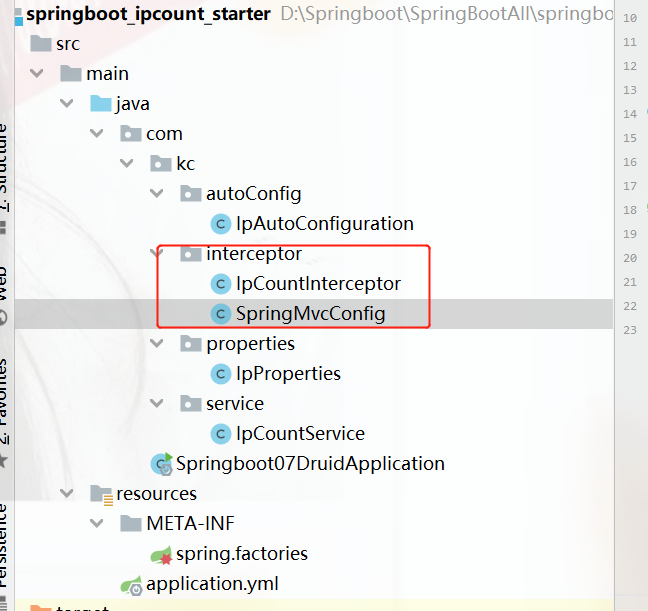
package com.kc.interceptor;

import com.kc.service.IpCountService;
import org.springframework.beans.factory.annotation.Autowired;
import org.springframework.web.servlet.HandlerInterceptor;

import javax.servlet.http.HttpServletRequest;
import javax.servlet.http.HttpServletResponse;

public class IpCountInterceptor implements HandlerInterceptor {
@Autowired
private IpCountService ipCountService;

    @Override
    public boolean preHandle(HttpServletRequest request, HttpServletResponse response, Object handler) throws Exception {
       ipCountService.count();
       ipCountService.show();
        return true;
    }
}
为了能被springmvc识别还得写个配置
package com.kc.interceptor;

import org.springframework.context.annotation.Bean;
import org.springframework.context.annotation.Configuration;
import org.springframework.web.servlet.config.annotation.InterceptorRegistry;
import org.springframework.web.servlet.config.annotation.WebMvcConfigurer;
@Configuration(proxyBeanMethods = true)//保证bean创建的对象唯一
//告诉springMVC拦截器的位置
public class SpringMvcConfig implements WebMvcConfigurer {

    @Override
    //添加一个拦截器
    public void addInterceptors(InterceptorRegistry registry) {
        registry.addInterceptor(ipCountInterceptor()).addPathPatterns("/**");//"/**表示所有请求"
    }

    @Bean
    public IpCountInterceptor ipCountInterceptor(){
        return  new IpCountInterceptor();
    }
}
运行之后 ,访问任意的功能都可以计数
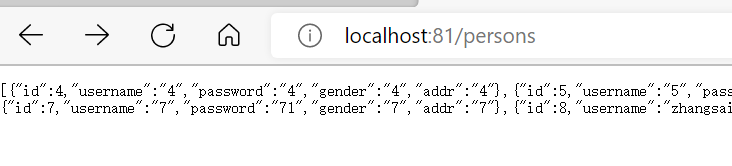
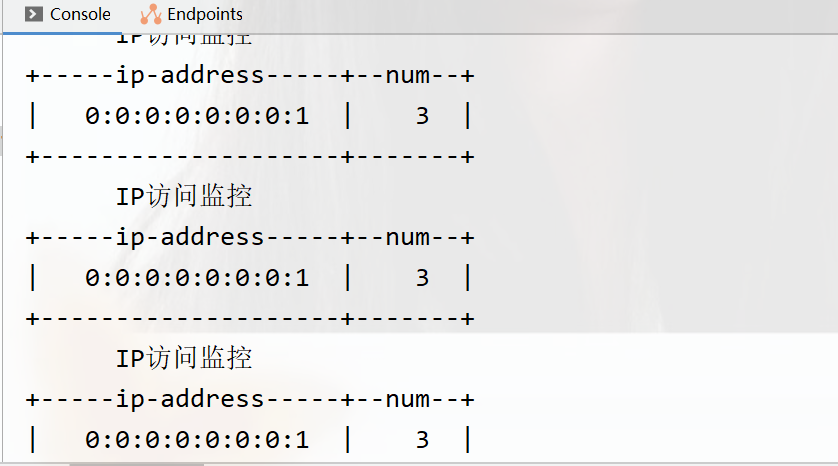
开启yml提示功能
在自定义starter中pom.xml中加入,mavenclean和install之后可以删除此坐标
<!--        开启yml提示-->
        <dependency>
            <groupId>org.springframework.boot</groupId>
            <artifactId>spring-boot-configuration-processor</artifactId>
        </dependency>
然后在maven中点击clean和install重新编译
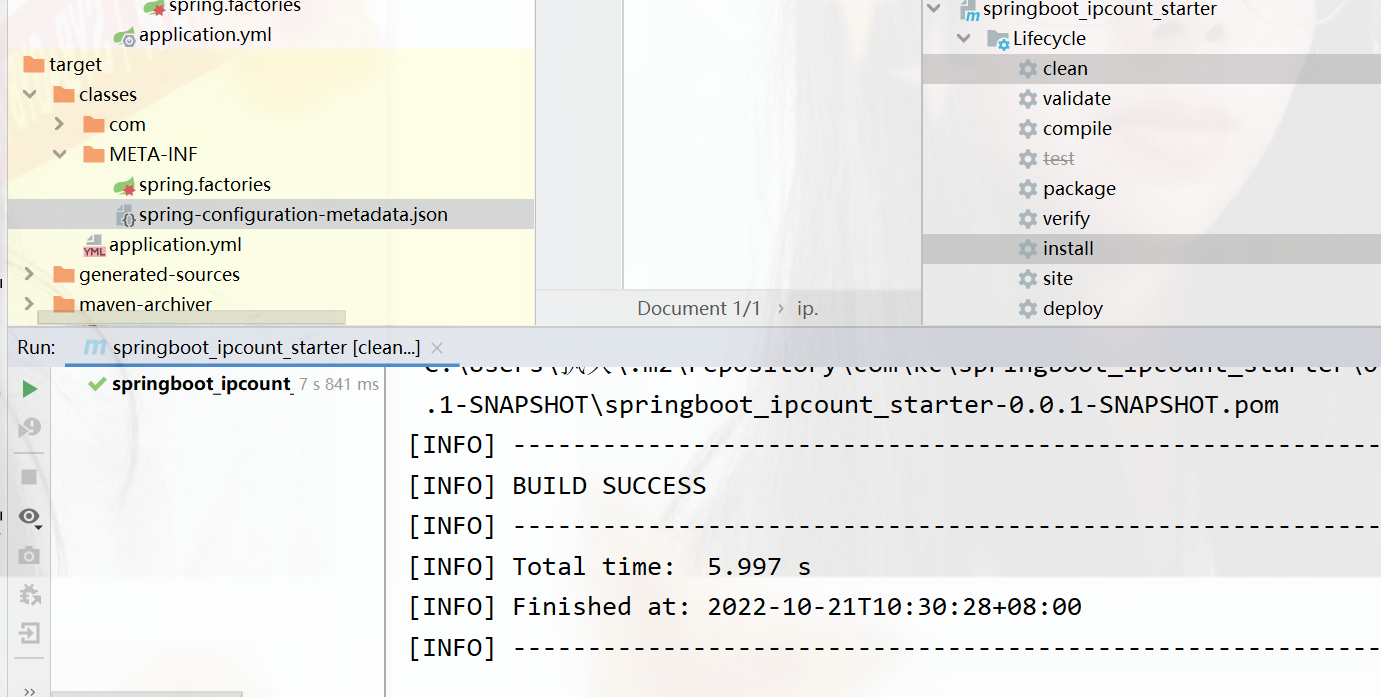
就会多出一个json文件
在使用这个starter的yaml配置文件中

就已经可以出现提示了,这些后面的中文都是之前写入的文档注释,所以得多写文档注释
输出之后,没有提示我们要写入的值
在前面生成的json文件中
 "hints": [
    {
      "name": "properties.ip.model",
      "values": [
        {
          "value": "detail",
          "description": "详细模式."
        },
        {
          "value": "simple",
          "description": "简略模式."
        }
      ]
    }
  ]
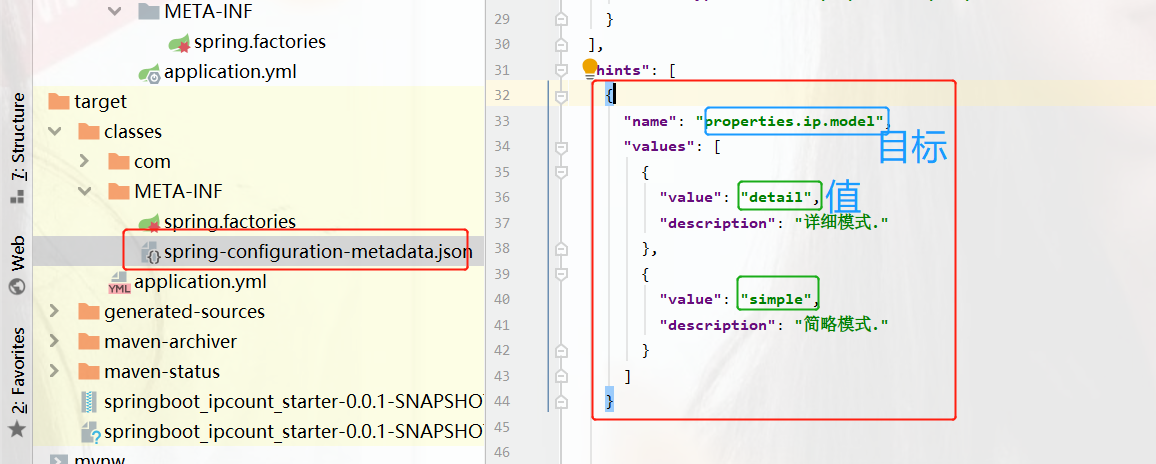
这样就可以得出提示了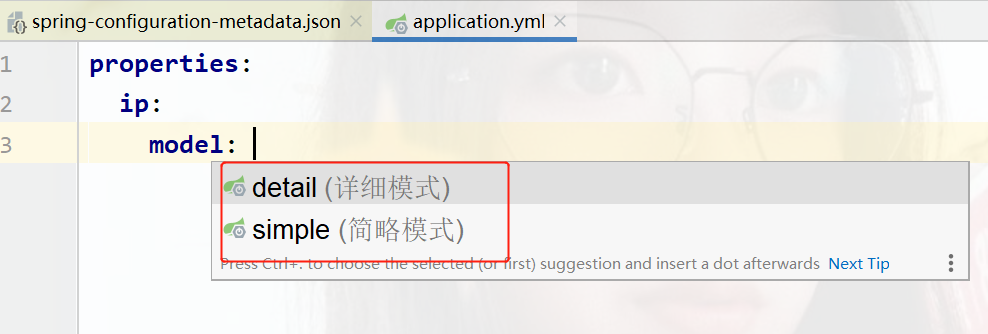
版权归原作者 执久呀 所有, 如有侵权,请联系我们删除。